1608: Hoverboard/All image links
- Below, you will find a table with link to all 3440 active individual images found on xkcd for the 1608: Hoverboard game.
Description of table
- There are several columns in the table which is sortable. This is very relevant for finding the interesting tiles.
- The columns are:
- The links
- They all have an (X, Y) coordinates ranging from X = 928 to 1107 (180 possible) and Y = 1069 to 1112 (44 possible).
- This grid has 7920 possible images, but "only" the 3440 active links are included!
- The other 4480 possible images would all have been empty white air. But several of the active images are also completely white.
- None of the images that would be completely black are inactive, although many of them can never be seen while playing the game.
- By defining the image where the hoverboard Cueball begins the game to (X, Y) = (0, 0) - ΔX and ΔY can be calculated going from -72 to 107 for ΔX from and -5 to 38 for ΔY.
- ΔX
- ΔY
- It is thus possible to sort the images both in columns and in rows. To begin with the table is sorted by ΔX then by ΔY. But it can also be sorted on all the other informations, which are based on this possibility.
- General location
- This tells approximately where in the game the image is located. Loosely based on the larger features as seen in the whole image, like Destroyer or Volcano.
- All images are listed with a location, also when it makes no difference for the "all black" or "all white" images.
- Content
- A very short description of what is in the image. Images with same larger structure can be found using this.
- Also it is here that all the "all black" and "all white" images (or almost so) can be easily sorted away.
- For instance the four lowest rows of active images are "all black", and there are many more of these higher up in the image, espcially under the left part with the volcano or in the right part inside the Destroyer.
- Also above ground and around the Destroyer (and other flying things) there are many "all white" images with empty air. Lots of these white tiles are not active (4480 possible white images are not linked from xkcd). But many of them are.
- Most images have already been listed like this, but so far not those around and inside the Destroyer.
- But this also takes up more than 1250 images. This is still a work in progress...
- People
- If there are people (or parts of people, if they are cut off at the images edges) this column has a Y for Yes.
- Else it is empty.
- Sorting this column is an easy way to find all images with people.
- Text
- If there are text (or parts of a text mainly belonging to another image but which have been cut off at the image edges) this column has a Y for Yes.
- Else it is empty.
- Sorting this column is an easy way to find all images with text.
- Animals
- If there are animals (or parts of animals, if they are cut off at the images edges) this column has a Y for Yes.
- Else it is empty.
- Sorting this column is an easy way to find all images with animals.
- Objects
- If there are objects (other than boulders and grass) this column has a Y for Yes.
- Else it is empty.
- Sorting this column is an easy way to find all images with objects.
- Not all objects listed here are as interesting as people.
- For instance trees and vapor/clouds are listed as object.
- But large boulders/stones grass and ground are not.
- Large structures are also not listed as object. Like part of a pyramid, the hull of a huge space ship of a mountain side. These are listed in General location.
- # Coins
- This column lists the number of coins to be found over any given image.
- If there are one or more coins then this column has the number of coins listed from 1-11.
- If there are no coins then it is empty.
- Sorting this column is an easy way to find all images with coins, even sorting them to find the images with most coins, or just finding those few images with more than one coin available.
- Description
- Here is a detailed description of what can be seen in the image.
- For some sections of images where there are more than one general interesting feature that cannot be put under general location of content, the first word of the description will point to this.
- So it can be useful to sort also on this column.
- Examples of relevant words could be Trees, Torpedoes or Lava lake or Slope left/Right etc.
- Since most text will be spread out over more than one image, it is NOT easy to make a transcript of individual images. So far the plan is to not include a transcription here. This plan could change...
- Alternatively there is a complete transcript written as if playing the game and discovering all visible parts of the game in a realistic order.
- All text can easily be found in this huge transcript, as it has been indented from the descriptive part of the transcript to stand out.
- Here is a detailed description of what can be seen in the image.
- The links
Hints
- This is a huge table.
- It takes time to load and time to sort before it can be viewed.
- If you wish to see more than one image and go back and forth the table will reload every time (although it will remember how it was sorted.
- So to improve your experience open the images up in a new window and close them when done.
- Click on the link with ctrl key pressed down for instance.
Table with links
| Link (X, Y) | ΔX | ΔY | General location | Content | P e o p l e |
T e x t |
A n i m a l s |
O b j e c t s |
# C o i n s |
Description |
|---|---|---|---|---|---|---|---|---|---|---|
| (928, 1069) | -72 | -5 | Mountain Slope left | Black | Black, never seen, below lowest visible terrain, bottom left corner image, with white line at the bottom only | |||||
| (928, 1070) | -72 | -4 | Mountain Slope left | Black | Black, never seen, below lowest visible terrain, left edge image, no white line | |||||
| (928, 1071) | -72 | -3 | Mountain Slope left | Black | Black, never seen, below lowest visible terrain, left edge image, no white line | |||||
| (928, 1072) | -72 | -2 | Mountain Slope left | Black | Black, never seen, below the mountain slope left, left edge image, no white line | |||||
| (928, 1073) | -72 | -1 | Mountain Slope left | Black | Black, never seen, below the mountain slope left, left edge image, no white line | |||||
| (928, 1074) | -72 | 0 | Mountain Slope left | Black | Black, never seen, below the mountain slope left, left edge image, no white line | |||||
| (928, 1075) | -72 | 1 | Mountain Slope left | Black | Black, never seen, below the mountain slope left, left edge image, no white line | |||||
| (928, 1076) | -72 | 2 | Mountain Slope left | Black | Black, never seen, below the mountain slope left, left edge image, no white line | |||||
| (928, 1077) | -72 | 3 | Mountain Slope left | Black | Black, never seen, below the mountain slope left, left edge image, no white line | |||||
| (928, 1078) | -72 | 4 | Mountain Slope left | Black | Black, never seen, below the mountain slope left, left edge image, no white line | |||||
| (928, 1079) | -72 | 5 | Mountain Slope left | Black | Black, never seen, below the mountain slope left, left edge image, no white line | |||||
| (928, 1080) | -72 | 6 | Mountain Slope left | Black | Black, never seen, below the mountain slope left, left edge image, no white line | |||||
| (928, 1081) | -72 | 7 | Mountain Slope left | Black | Black, can be seen, below the mountain slope left, left edge image, no white line | |||||
| (928, 1082) | -72 | 8 | Mountain Slope left | Slope left | Y | Y | 4 | A white haired girl with hair bun stands in front of four coins, left edge image, no white line in the lower black part | ||
| (928, 1083) | -72 | 9 | Mountain Slope left | White | Empty air above the girl with coins, left edge image | |||||
| (928, 1084) | -72 | 10 | Mountain Slope left | White | Empty air above the girl with coins, left edge image | |||||
| (929, 1069) | -71 | -5 | Mountain Slope left | Black | Black, never seen, below lowest visible terrain, bottom images, with white line at the bottom | |||||
| (929, 1070) | -71 | -4 | Mountain Slope left | Black | Black, never seen, below lowest visible terrain | |||||
| (929, 1071) | -71 | -3 | Mountain Slope left | Black | Black, never seen, below lowest visible terrain | |||||
| (929, 1072) | -71 | -2 | Mountain Slope left | Black | Black, never seen, below the mountain slope left | |||||
| (929, 1073) | -71 | -1 | Mountain Slope left | Black | Black, never seen, below the volcano | |||||
| (929, 1074) | -71 | 0 | Mountain Slope left | Black | Black, never seen, below the volcano | |||||
| (929, 1075) | -71 | 1 | Mountain Slope left | Black | Black, never seen, below the volcano | |||||
| (929, 1076) | -71 | 2 | Mountain Slope left | Black | Black, never seen, below the volcano | |||||
| (929, 1077) | -71 | 3 | Mountain Slope left | Black | Black, never seen, below the volcano | |||||
| (929, 1078) | -71 | 4 | Mountain Slope left | Black | Black, never seen, below the volcano | |||||
| (929, 1079) | -71 | 5 | Mountain Slope left | Black | Black, never seen, below the volcano | |||||
| (929, 1080) | -71 | 6 | Mountain Slope left | Black | Black, never seen, below the volcano | |||||
| (929, 1081) | -71 | 7 | Mountain Slope left | Black | Black, can be seen, below the mountain slope left | |||||
| (929, 1082) | -71 | 8 | Mountain Slope left | Slope left | Bare ground with three large rocks lying on the slope rising towards the right. The middle of the rocks lies on top of the one at the left edge of the image | |||||
| (929, 1083) | -71 | 9 | Mountain Slope left | White | Empty air above mountain slope left | |||||
| (929, 1084) | -71 | 10 | Mountain Slope left | White | Empty air above mountain slope left | |||||
| (930, 1069) | -70 | -5 | Mountain Slope left | Black | Black, never seen, below lowest visible terrain, bottom images, with white line at the bottom | |||||
| (930, 1070) | -70 | -4 | Mountain Slope left | Black | Black, never seen, below lowest visible terrain | |||||
| (930, 1071) | -70 | -3 | Mountain Slope left | Black | Black, never seen, below lowest visible terrain | |||||
| (930, 1072) | -70 | -2 | Mountain Slope left | Black | Black, never seen, below the mountain slope left | |||||
| (930, 1073) | -70 | -1 | Mountain Slope left | Black | Black, never seen, below the volcano | |||||
| (930, 1074) | -70 | 0 | Mountain Slope left | Black | Black, never seen, below the volcano | |||||
| (930, 1075) | -70 | 1 | Mountain Slope left | Black | Black, never seen, below the volcano | |||||
| (930, 1076) | -70 | 2 | Mountain Slope left | Black | Black, never seen, below the volcano | |||||
| (930, 1077) | -70 | 3 | Mountain Slope left | Black | Black, never seen, below the volcano | |||||
| (930, 1078) | -70 | 4 | Mountain Slope left | Black | Black, never seen, below the volcano | |||||
| (930, 1079) | -70 | 5 | Mountain Slope left | Black | Black, never seen, below the volcano | |||||
| (930, 1080) | -70 | 6 | Mountain Slope left | Black | Black, never seen, below the volcano | |||||
| (930, 1081) | -70 | 7 | Mountain Slope left | Black | Black, can be seen, below the mountain slope left | |||||
| (930, 1082) | -70 | 8 | Mountain Slope left | Slope left | Bare ground with three small rocks and a small stone lying on the slope rising towards the right. | |||||
| (930, 1083) | -70 | 9 | Mountain Slope left | White | Empty air above mountain slope left | |||||
| (930, 1084) | -70 | 10 | Mountain Slope left | White | Empty air above mountain slope left | |||||
| (931, 1069) | -69 | -5 | Mountain Slope left | Black | Black, never seen, below lowest visible terrain, bottom images, with white line at the bottom | |||||
| (931, 1070) | -69 | -4 | Mountain Slope left | Black | Black, never seen, below lowest visible terrain | |||||
| (931, 1071) | -69 | -3 | Mountain Slope left | Black | Black, never seen, below lowest visible terrain | |||||
| (931, 1072) | -69 | -2 | Mountain Slope left | Black | Black, never seen, below the mountain slope left | |||||
| (931, 1073) | -69 | -1 | Mountain Slope left | Black | Black, never seen, below the volcano | |||||
| (931, 1074) | -69 | 0 | Mountain Slope left | Black | Black, never seen, below the volcano | |||||
| (931, 1075) | -69 | 1 | Mountain Slope left | Black | Black, never seen, below the volcano | |||||
| (931, 1076) | -69 | 2 | Mountain Slope left | Black | Black, never seen, below the volcano | |||||
| (931, 1077) | -69 | 3 | Mountain Slope left | Black | Black, never seen, below the volcano | |||||
| (931, 1078) | -69 | 4 | Mountain Slope left | Black | Black, never seen, below the volcano | |||||
| (931, 1079) | -69 | 5 | Mountain Slope left | Black | Black, never seen, below the volcano | |||||
| (931, 1080) | -69 | 6 | Mountain Slope left | Black | Black, never seen, below the volcano | |||||
| (931, 1081) | -69 | 7 | Mountain Slope left | Black | Black, can be seen, below the mountain slope left | |||||
| (931, 1082) | -69 | 8 | Mountain Slope left | Slope left | Y | Trees; In the middle of the image there is a large but dead tree with no leaves. The tip of the top of the trees branches is cut off at the edge of this image. It stand on the bare ground with a small rocks lying on the slope rising towards the right | ||||
| (931, 1083) | -69 | 9 | Mountain Slope left | White - almost | Y | Trees; the very top of this large but dead tree is entering at the bottom of this almost white image | ||||
| (931, 1084) | -69 | 10 | Mountain Slope left | White | Empty air above mountain slope left | |||||
| (932, 1069) | -68 | -5 | Mountain Slope left | Black | Black, never seen, below lowest visible terrain, bottom images, with white line at the bottom | |||||
| (932, 1070) | -68 | -4 | Mountain Slope left | Black | Black, never seen, below lowest visible terrain | |||||
| (932, 1071) | -68 | -3 | Mountain Slope left | Black | Black, never seen, below lowest visible terrain | |||||
| (932, 1072) | -68 | -2 | Mountain Slope left | Black | Black, never seen, below the mountain slope left | |||||
| (932, 1073) | -68 | -1 | Mountain Slope left | Black | Black, never seen, below the volcano | |||||
| (932, 1074) | -68 | 0 | Mountain Slope left | Black | Black, never seen, below the volcano | |||||
| (932, 1075) | -68 | 1 | Mountain Slope left | Black | Black, never seen, below the volcano | |||||
| (932, 1076) | -68 | 2 | Mountain Slope left | Black | Black, never seen, below the volcano | |||||
| (932, 1077) | -68 | 3 | Mountain Slope left | Black | Black, never seen, below the volcano | |||||
| (932, 1078) | -68 | 4 | Mountain Slope left | Black | Black, never seen, below the volcano | |||||
| (932, 1079) | -68 | 5 | Mountain Slope left | Black | Black, never seen, below the volcano | |||||
| (932, 1080) | -68 | 6 | Mountain Slope left | Black | Black, never seen, below the volcano | |||||
| (932, 1081) | -68 | 7 | Mountain Slope left | Black | Black, can be seen, below the mountain slope left | |||||
| (932, 1082) | -68 | 8 | Mountain Slope left | Black - almost | Black below the mountain slope left except a tiny part at the top left which is white and shows a part of the slope rising towards the right | |||||
| (932, 1083) | -68 | 9 | Mountain Slope left | Slope left | Bare ground with the slope rising towards the right | |||||
| (932, 1084) | -68 | 10 | Mountain Slope left | White | Empty air above mountain slope left | |||||
| (933, 1069) | -67 | -5 | Mountain Slope left | Black | Black, never seen, below lowest visible terrain, bottom images, with white line at the bottom | |||||
| (933, 1070) | -67 | -4 | Mountain Slope left | Black | Black, never seen, below lowest visible terrain | |||||
| (933, 1071) | -67 | -3 | Mountain Slope left | Black | Black, never seen, below lowest visible terrain | |||||
| (933, 1072) | -67 | -2 | Mountain Slope left | Black | Black, never seen, below the mountain slope left | |||||
| (933, 1073) | -67 | -1 | Mountain Slope left | Black | Black, never seen, below the volcano | |||||
| (933, 1074) | -67 | 0 | Mountain Slope left | Black | Black, never seen, below the volcano | |||||
| (933, 1075) | -67 | 1 | Mountain Slope left | Black | Black, never seen, below the volcano | |||||
| (933, 1076) | -67 | 2 | Mountain Slope left | Black | Black, never seen, below the volcano | |||||
| (933, 1077) | -67 | 3 | Mountain Slope left | Black | Black, never seen, below the volcano | |||||
| (933, 1078) | -67 | 4 | Mountain Slope left | Black | Black, never seen, below the volcano | |||||
| (933, 1079) | -67 | 5 | Mountain Slope left | Black | Black, never seen, below the volcano | |||||
| (933, 1080) | -67 | 6 | Mountain Slope left | Black | Black, never seen, below the volcano | |||||
| (933, 1081) | -67 | 7 | Mountain Slope left | Black | Black, can be seen, below the mountain slope left | |||||
| (933, 1082) | -67 | 8 | Mountain Slope left | Black | Black, can be seen, below the mountain slope left | |||||
| (933, 1083) | -67 | 9 | Mountain Slope left | Slope left | 1 | Bare ground with a small rocks to the left and four stone lying around it as well as three other stones to the right, where after a flat plateau the slope again starts rising towards the right. Above the rock at the very top of this image there is a coin | ||||
| (933, 1084) | -67 | 10 | Mountain Slope left | White | Empty air above mountain slope left | |||||
| (934, 1069) | -66 | -5 | Mountain Slope left | Black | Black, never seen, below lowest visible terrain, bottom images, with white line at the bottom | |||||
| (934, 1070) | -66 | -4 | Mountain Slope left | Black | Black, never seen, below lowest visible terrain | |||||
| (934, 1071) | -66 | -3 | Mountain Slope left | Black | Black, never seen, below lowest visible terrain | |||||
| (934, 1072) | -66 | -2 | Mountain Slope left | Black | Black, never seen, below the mountain slope left | |||||
| (934, 1073) | -66 | -1 | Mountain Slope left | Black | Black, never seen, below the volcano | |||||
| (934, 1074) | -66 | 0 | Mountain Slope left | Black | Black, never seen, below the volcano | |||||
| (934, 1075) | -66 | 1 | Mountain Slope left | Black | Black, never seen, below the volcano | |||||
| (934, 1076) | -66 | 2 | Mountain Slope left | Black | Black, never seen, below the volcano | |||||
| (934, 1077) | -66 | 3 | Mountain Slope left | Black | Black, never seen, below the volcano | |||||
| (934, 1078) | -66 | 4 | Mountain Slope left | Black | Black, never seen, below the volcano | |||||
| (934, 1079) | -66 | 5 | Mountain Slope left | Black | Black, never seen, below the volcano | |||||
| (934, 1080) | -66 | 6 | Mountain Slope left | Black | Black, never seen, below the volcano | |||||
| (934, 1081) | -66 | 7 | Mountain Slope left | Black | Black, never seen, below mountain slope left | |||||
| (934, 1082) | -66 | 8 | Mountain Slope left | Black | Black, can be seen, below the mountain slope left | |||||
| (934, 1083) | -66 | 9 | Mountain Slope left | Slope left | Bare ground with the slope rising towards the right | |||||
| (934, 1084) | -66 | 10 | Mountain Slope left | White | Empty air above mountain slope left | |||||
| (935, 1069) | -65 | -5 | Mountain Slope left | Black | Black, never seen, below lowest visible terrain, bottom images, with white line at the bottom | |||||
| (935, 1070) | -65 | -4 | Mountain Slope left | Black | Black, never seen, below lowest visible terrain | |||||
| (935, 1071) | -65 | -3 | Mountain Slope left | Black | Black, never seen, below lowest visible terrain | |||||
| (935, 1072) | -65 | -2 | Mountain Slope left | Black | Black, never seen, below the mountain slope left | |||||
| (935, 1073) | -65 | -1 | Mountain Slope left | Black | Black, never seen, below the volcano | |||||
| (935, 1074) | -65 | 0 | Mountain Slope left | Black | Black, never seen, below the volcano | |||||
| (935, 1075) | -65 | 1 | Mountain Slope left | Black | Black, never seen, below the volcano | |||||
| (935, 1076) | -65 | 2 | Mountain Slope left | Black | Black, never seen, below the volcano | |||||
| (935, 1077) | -65 | 3 | Mountain Slope left | Black | Black, never seen, below the volcano | |||||
| (935, 1078) | -65 | 4 | Mountain Slope left | Black | Black, never seen, below the volcano | |||||
| (935, 1079) | -65 | 5 | Mountain Slope left | Black | Black, never seen, below the volcano | |||||
| (935, 1080) | -65 | 6 | Mountain Slope left | Black | Black, never seen, below the volcano | |||||
| (935, 1081) | -65 | 7 | Mountain Slope left | Black | Black, never seen, below mountain slope left | |||||
| (935, 1082) | -65 | 8 | Mountain Slope left | Black | Black, can be seen, below the mountain slope left | |||||
| (935, 1083) | -65 | 9 | Mountain Slope left | Black - almost | Black below the mountain slope left except in the top left corner where there is a large boulder, and a smaller next to it, with small pockets of air below it. Apart from these there is only a very small part of air above the rising slope that is not beneath the ground at the very top left corner | |||||
| (935, 1084) | -65 | 10 | Mountain Slope left | Slope left | Two rocks lying on top of each other, and the left one actually lying on top of an even larger rock, that is mainly visible in the image below | |||||
| (936, 1069) | -64 | -5 | Volcano | Black | Black, never seen, below lowest visible terrain, bottom images, with white line at the bottom | |||||
| (936, 1070) | -64 | -4 | Volcano | Black | Black, never seen, below lowest visible terrain | |||||
| (936, 1071) | -64 | -3 | Volcano | Black | Black, never seen, below lowest visible terrain | |||||
| (936, 1072) | -64 | -2 | Volcano | Black | Black, never seen, below the volcano | |||||
| (936, 1073) | -64 | -1 | Volcano | Black | Black, never seen, below the volcano | |||||
| (936, 1074) | -64 | 0 | Volcano | Black | Black, never seen, below the volcano | |||||
| (936, 1075) | -64 | 1 | Volcano | Black | Black, never seen, below the volcano | |||||
| (936, 1076) | -64 | 2 | Volcano | Black | Black, never seen, below the volcano | |||||
| (936, 1077) | -64 | 3 | Volcano | Black | Black, never seen, below the volcano | |||||
| (936, 1078) | -64 | 4 | Volcano | Black | Black, never seen, below the volcano | |||||
| (936, 1079) | -64 | 5 | Volcano | Black | Black, never seen, below the volcano | |||||
| (936, 1080) | -64 | 6 | Volcano | Black | Black, never seen, below the volcano | |||||
| (936, 1081) | -64 | 7 | Volcano | Black | Black, never seen, below the volcano | |||||
| (936, 1082) | -64 | 8 | Volcano | Black | Black, can be seen, below the volcano | |||||
| (936, 1083) | -64 | 9 | Volcano | Black | Black, can be seen, below the volcano | |||||
| (936, 1084) | -64 | 10 | Volcano | Slope left | Y | Y | Y | 1 | Ponytail, standing beneath a basketball hoop, pointing right, is talking to Megan, who stands to her right with the basketball, looking right towards the volcano. There is a coin above the hoop. The slope is particularly steep from left up to the girl’s small plateau, and then it continues up again to the right. It seems like they stand on the top edge of a loose rock that might not lie very steady on the slope .They are also standing on very uneven ground beneath their hoop | |
| (936, 1085) | -64 | 11 | Volcano | White | Empty air above volcano | |||||
| (936, 1086) | -64 | 12 | Volcano | White | Empty air above volcano | |||||
| (936, 1087) | -64 | 13 | Volcano | White | Empty air above volcano | |||||
| (936, 1088) | -64 | 14 | Volcano | White | Empty air over the volcano crater left | |||||
| (937, 1069) | -63 | -5 | Volcano | Black | Black, never seen, below lowest visible terrain, bottom images, with white line at the bottom | |||||
| (937, 1070) | -63 | -4 | Volcano | Black | Black, never seen, below lowest visible terrain | |||||
| (937, 1071) | -63 | -3 | Volcano | Black | Black, never seen, below lowest visible terrain | |||||
| (937, 1072) | -63 | -2 | Volcano | Black | Black, never seen, below the volcano | |||||
| (937, 1073) | -63 | -1 | Volcano | Black | Black, never seen, below the volcano | |||||
| (937, 1074) | -63 | 0 | Volcano | Black | Black, never seen, below the volcano | |||||
| (937, 1075) | -63 | 1 | Volcano | Black | Black, never seen, below the volcano | |||||
| (937, 1076) | -63 | 2 | Volcano | Black | Black, never seen, below the volcano | |||||
| (937, 1077) | -63 | 3 | Volcano | Black | Black, never seen, below the volcano | |||||
| (937, 1078) | -63 | 4 | Volcano | Black | Black, never seen, below the volcano | |||||
| (937, 1079) | -63 | 5 | Volcano | Black | Black, never seen, below the volcano | |||||
| (937, 1080) | -63 | 6 | Volcano | Black | Black, never seen, below the volcano | |||||
| (937, 1081) | -63 | 7 | Volcano | Black | Black, never seen, below the volcano | |||||
| (937, 1082) | -63 | 8 | Volcano | Black | Black, never seen, below the volcano | |||||
| (937, 1083) | -63 | 9 | Volcano | Black | Black, never seen, below the volcano | |||||
| (937, 1084) | -63 | 10 | Volcano | Black - almost | Black below the volcano except in the top left corner which is a part of the air above the rising slope that is not beneath the ground. Three small stones are laying one on top of the other | |||||
| (937, 1085) | -63 | 11 | Volcano | Slope left | Y | Cueball with a walking stick is walking up the volcanos steep left slope | ||||
| (937, 1086) | -63 | 12 | Volcano | White | Empty air above volcano | |||||
| (937, 1087) | -63 | 13 | Volcano | White | Empty air above volcano | |||||
| (937, 1088) | -63 | 14 | Volcano | White | Empty air over the volcano crater left | |||||
| (938, 1069) | -62 | -5 | Volcano | Black | Black, never seen, below lowest visible terrain, bottom images, with white line at the bottom | |||||
| (938, 1070) | -62 | -4 | Volcano | Black | Black, never seen, below lowest visible terrain | |||||
| (938, 1071) | -62 | -3 | Volcano | Black | Black, never seen, below lowest visible terrain | |||||
| (938, 1072) | -62 | -2 | Volcano | Black | Black, never seen, below the volcano | |||||
| (938, 1073) | -62 | -1 | Volcano | Black | Black, never seen, below the volcano | |||||
| (938, 1074) | -62 | 0 | Volcano | Black | Black, never seen, below the volcano | |||||
| (938, 1075) | -62 | 1 | Volcano | Black | Black, never seen, below the volcano | |||||
| (938, 1076) | -62 | 2 | Volcano | Black | Black, never seen, below the volcano | |||||
| (938, 1077) | -62 | 3 | Volcano | Black | Black, never seen, below the volcano | |||||
| (938, 1078) | -62 | 4 | Volcano | Black | Black, never seen, below the volcano | |||||
| (938, 1079) | -62 | 5 | Volcano | Black | Black, never seen, below the volcano | |||||
| (938, 1080) | -62 | 6 | Volcano | Black | Black, never seen, below the volcano | |||||
| (938, 1081) | -62 | 7 | Volcano | Black | Black, never seen, below the volcano | |||||
| (938, 1082) | -62 | 8 | Volcano | Black | Black, never seen, below the volcano | |||||
| (938, 1083) | -62 | 9 | Volcano | Black | Black, never seen, below the volcano | |||||
| (938, 1084) | -62 | 10 | Volcano | Black | Black, can be seen, below the volcano | |||||
| (938, 1085) | -62 | 11 | Volcano | Black - almost | Black below the volcano except in the top left corner which is a part of the air above the rapidly rising slope that is not beneath the ground | |||||
| (938, 1086) | -62 | 12 | Volcano | Slope left | The volcanos very steep left slope | |||||
| (938, 1087) | -62 | 13 | Volcano | Slope left | The volcanos very steep left slope just enters at the bottom right of this image | |||||
| (938, 1088) | -62 | 14 | Volcano | White | Empty air over the volcano crater left | |||||
| (939, 1069) | -61 | -5 | Volcano | Black | Black, never seen, below lowest visible terrain, bottom images, with white line at the bottom | |||||
| (939, 1070) | -61 | -4 | Volcano | Black | Black, never seen, below lowest visible terrain | |||||
| (939, 1071) | -61 | -3 | Volcano | Black | Black, never seen, below lowest visible terrain | |||||
| (939, 1072) | -61 | -2 | Volcano | Black | Black, never seen, below the volcano | |||||
| (939, 1073) | -61 | -1 | Volcano | Black | Black, never seen, below the volcano | |||||
| (939, 1074) | -61 | 0 | Volcano | Black | Black, never seen, below the volcano | |||||
| (939, 1075) | -61 | 1 | Volcano | Black | Black, never seen, below the volcano | |||||
| (939, 1076) | -61 | 2 | Volcano | Black | Black, never seen, below the volcano | |||||
| (939, 1077) | -61 | 3 | Volcano | Black | Black, never seen, below the volcano | |||||
| (939, 1078) | -61 | 4 | Volcano | Black | Black, never seen, below the volcano | |||||
| (939, 1079) | -61 | 5 | Volcano | Black | Black, never seen, below the volcano | |||||
| (939, 1080) | -61 | 6 | Volcano | Black | Black, never seen, below the volcano | |||||
| (939, 1081) | -61 | 7 | Volcano | Black | Black, never seen, below the volcano | |||||
| (939, 1082) | -61 | 8 | Volcano | Black | Black, never seen, below the volcano | |||||
| (939, 1083) | -61 | 9 | Volcano | Black | Black, never seen, below the volcano | |||||
| (939, 1084) | -61 | 10 | Volcano | Black | Black, can be seen, below the volcano | |||||
| (939, 1085) | -61 | 11 | Volcano | Black | Black, can be seen, below the volcano | |||||
| (939, 1086) | -61 | 12 | Volcano | Black | Black, can be seen, below the volcano | |||||
| (939, 1087) | -61 | 13 | Volcano | Crater top left | Trees; a little dead tree is standing here on the top plateau of the left side of the crater. The ground is very uneven with steps down, up, down and up again. The top of the crater is just reached at the left of this image | |||||
| (939, 1088) | -61 | 14 | Volcano | White | Empty air over the volcano crater left | |||||
| (940, 1069) | -60 | -5 | Volcano | Black | Black, never seen, below lowest visible terrain, bottom images, with white line at the bottom | |||||
| (940, 1070) | -60 | -4 | Volcano | Black | Black, never seen, below lowest visible terrain | |||||
| (940, 1071) | -60 | -3 | Volcano | Black | Black, never seen, below lowest visible terrain | |||||
| (940, 1072) | -60 | -2 | Volcano | Black | Black, never seen, below the volcano | |||||
| (940, 1073) | -60 | -1 | Volcano | Black | Black, never seen, below the volcano | |||||
| (940, 1074) | -60 | 0 | Volcano | Black | Black, never seen, below the volcano | |||||
| (940, 1075) | -60 | 1 | Volcano | Black | Black, never seen, below the volcano | |||||
| (940, 1076) | -60 | 2 | Volcano | Black | Black, never seen, below the volcano | |||||
| (940, 1077) | -60 | 3 | Volcano | Black | Black, never seen, below the volcano | |||||
| (940, 1078) | -60 | 4 | Volcano | Black | Black, never seen, below the volcano | |||||
| (940, 1079) | -60 | 5 | Volcano | Black | Black, never seen, below the volcano | |||||
| (940, 1080) | -60 | 6 | Volcano | Black | Black, never seen, below the volcano | |||||
| (940, 1081) | -60 | 7 | Volcano | Black | Black, never seen, below the volcano | |||||
| (940, 1082) | -60 | 8 | Volcano | Black | Black, can be seen, below the volcano | |||||
| (940, 1083) | -60 | 9 | Volcano | Black | Black, can be seen, below the volcano | |||||
| (940, 1084) | -60 | 10 | Volcano | Black | Black, can be seen, below the volcano | |||||
| (940, 1085) | -60 | 11 | Volcano | Black | Black, can be seen, below the volcano | |||||
| (940, 1086) | -60 | 12 | Volcano | Black | Black, can be seen, below the volcano | |||||
| (940, 1087) | -60 | 13 | Volcano | Crater top left | Y | Looking towards the right edge (in the next image right) sits a duck on top of a step at the very top of the left side of the crater. The ground is very uneven, with two steps up to a flat plateau with the duck, and then a step down again | ||||
| (940, 1088) | -60 | 14 | Volcano | White | Empty air over the volcano crater left | |||||
| (941, 1069) | -59 | -5 | Volcano | Black | Black, never seen, below lowest visible terrain, bottom images, with white line at the bottom | |||||
| (941, 1070) | -59 | -4 | Volcano | Black | Black, never seen, below lowest visible terrain | |||||
| (941, 1071) | -59 | -3 | Volcano | Black | Black, never seen, below lowest visible terrain | |||||
| (941, 1072) | -59 | -2 | Volcano | Black | Black, never seen, below the volcano | |||||
| (941, 1073) | -59 | -1 | Volcano | Black | Black, never seen, below the volcano | |||||
| (941, 1074) | -59 | 0 | Volcano | Black | Black, never seen, below the volcano | |||||
| (941, 1075) | -59 | 1 | Volcano | Black | Black, never seen, below the volcano | |||||
| (941, 1076) | -59 | 2 | Volcano | Black | Black, never seen, below the volcano | |||||
| (941, 1077) | -59 | 3 | Volcano | Black | Black, never seen, below the volcano | |||||
| (941, 1078) | -59 | 4 | Volcano | Black | Black, never seen, below the volcano | |||||
| (941, 1079) | -59 | 5 | Volcano | Black | Black, never seen, below the volcano | |||||
| (941, 1080) | -59 | 6 | Volcano | Black | Black, never seen, below the volcano | |||||
| (941, 1081) | -59 | 7 | Volcano | Black Lava Lake | Lava lake; completely beneath the surface with areas where it is possible to descend into. A small section in the top right comer connects this deepest and left most part of the volcano lake on the left side of the rock outcrop (not the deepest in the entire lake by far) | |||||
| (941, 1082) | -59 | 8 | Volcano | Black Lava Lake | Lava lake; completely beneath the surface with areas where it is possible to descend into. A small section along the very right edge in the bottom right part is connected to the right and bottom with the deepest and left most part of the volcano lake on the left side of the rock outcrop (not the deepest in the entire lake by far) | |||||
| (941, 1083) | -59 | 9 | Volcano | Cave in Volcano crater left | Y | Y | 1 | Cave in the left side of the volcano crater. The bottom of the cave is at the top of this image. On the floor of the cave is a tall pile of coins or other treasures (Megan sits on top of it in the image above this). There is a bag with a white dollar sign (counting as text) on to the right of the pile. Just right of this at the top of the image there is a coin. At the right side of this image is the steep slope of the left crater side going down towards the lava lake | ||
| (941, 1084) | -59 | 10 | Volcano | Cave in Volcano crater left | Y | Y | Y | 1 | Cave in the left side of the volcano crater. A hole goes into the very steep side of the crater and down where it extends into a small cave. In here, on a tall pile of coins or other treasures, sits Megan counting her hoard shouting about gold. There is a bag with a white dollar sign in front of her to the right on the pile. There is a coin behind her to the left. (The bottom of the cave is in the image below where the rest of the pile is and there is also a coin there) | |
| (941, 1085) | -59 | 11 | Volcano | Volcano crater left | A very steep slope down into the volcano on the left side of the crater | |||||
| (941, 1086) | -59 | 12 | Volcano | White | Empty air over lava lake in volcano crater | |||||
| (941, 1087) | -59 | 13 | Volcano | Crater top left | This ends the left crater top towards the right. A steep cliff goes down towards the lava lake below. A last outcrop beneath the first descends goes up again, but then the crater drops almost straight down | |||||
| (941, 1088) | -59 | 14 | Volcano | White | Empty air over the volcano crater left | |||||
| (942, 1069) | -58 | -5 | Volcano | Black | Black, never seen, below lowest visible terrain, bottom images, with white line at the bottom | |||||
| (942, 1070) | -58 | -4 | Volcano | Black | Black, never seen, below lowest visible terrain | |||||
| (942, 1071) | -58 | -3 | Volcano | Black | Black, never seen, below lowest visible terrain | |||||
| (942, 1072) | -58 | -2 | Volcano | Black | Black, never seen, below the volcano | |||||
| (942, 1073) | -58 | -1 | Volcano | Black | Black, never seen, below the volcano | |||||
| (942, 1074) | -58 | 0 | Volcano | Black | Black, never seen, below the volcano | |||||
| (942, 1075) | -58 | 1 | Volcano | Black | Black, never seen, below the volcano | |||||
| (942, 1076) | -58 | 2 | Volcano | Black | Black, never seen, below the volcano | |||||
| (942, 1077) | -58 | 3 | Volcano | Black | Black, never seen, below the volcano | |||||
| (942, 1078) | -58 | 4 | Volcano | Black | Black, never seen, below the volcano | |||||
| (942, 1079) | -58 | 5 | Volcano | Black | Black, never seen, below the volcano | |||||
| (942, 1080) | -58 | 6 | Volcano | Black | Black, never seen, below the volcano | |||||
| (942, 1081) | -58 | 7 | Volcano | Black Lava Lake | Lava lake; completely beneath the surface with areas where it is possible to descend into. A small section in the top left comer connects this with the very deepest and left most part of the volcano lake (the image to the left) on the left side of the rock outcrop (not the deepest in the entire lake by far) | |||||
| (942, 1082) | -58 | 8 | Volcano | Black Lava Lake | Lava lake; completely beneath the surface with areas where it is possible to descend into. This is below the left most part of the lava lakes surface. The bottom level of the lava lake it at the top right of this image. But there is a small slim shaft that connects this with a small but deep hole that even descends one more image down and also to the left, further left than at the surface. It is entirely possible to get stuck here if you do not know the game. But it is always possible to get out by pushing up while alternatingly pressing left and right arrows | |||||
| (942, 1083) | -58 | 9 | Volcano | Surface of Lava Lake left edge | Y | Lava lake; Partly above the lava lakes left edge, with the steep slope of the crater going in to the lava. There are fumes and bubbles. There is one large and three smaller bubbles on the surface. One plume of smoke, three large clouds and four small as well as 8 small bubbles hanging in the air above the surface. You can descend into the lava lake here. The crater descends rapidly into the lava already reaching below into the image below already in the middle of this image. From here to the rock the deepest part is not much into the two images below the two images between crater and rock. However, beneath the highest cloud to the right of the center of this image there is an extra deep hole in the lava lakes floor, where you can get stuck as you can also go even a hole image lover than the one below this, and also further back left to images that would be below the volcano craters side | ||||
| (942, 1084) | -58 | 10 | Volcano | White | Empty air over lava lake in volcano crater | |||||
| (942, 1085) | -58 | 11 | Volcano | White | Empty air over lava lake in volcano crater | |||||
| (942, 1086) | -58 | 12 | Volcano | White | Empty air over lava lake in volcano crater | |||||
| (942, 1087) | -58 | 13 | Volcano | White | Empty air over lava lake in volcano crater | |||||
| (942, 1088) | -58 | 14 | Volcano | White | Empty air over lava lake in volcano crater | |||||
| (943, 1069) | -57 | -5 | Volcano | Black | Black, never seen, below lowest visible terrain, bottom images, with white line at the bottom | |||||
| (943, 1070) | -57 | -4 | Volcano | Black | Black, never seen, below lowest visible terrain | |||||
| (943, 1071) | -57 | -3 | Volcano | Black | Black, never seen, below lowest visible terrain | |||||
| (943, 1072) | -57 | -2 | Volcano | Black | Black, never seen, below the volcano | |||||
| (943, 1073) | -57 | -1 | Volcano | Black | Black, never seen, below the volcano | |||||
| (943, 1074) | -57 | 0 | Volcano | Black | Black, never seen, below the volcano | |||||
| (943, 1075) | -57 | 1 | Volcano | Black | Black, never seen, below the volcano | |||||
| (943, 1076) | -57 | 2 | Volcano | Black | Black, never seen, below the volcano | |||||
| (943, 1077) | -57 | 3 | Volcano | Black | Black, never seen, below the volcano | |||||
| (943, 1078) | -57 | 4 | Volcano | Black | Black, never seen, below the volcano | |||||
| (943, 1079) | -57 | 5 | Volcano | Black | Black, never seen, below the volcano | |||||
| (943, 1080) | -57 | 6 | Volcano | Black | Black, never seen, below the volcano | |||||
| (943, 1081) | -57 | 7 | Volcano | Black | Black, never seen, below the volcano | |||||
| (943, 1082) | -57 | 8 | Volcano | Black Lava Lake | Lava lake; completely beneath the surface with areas where it is possible to descend into. This is at the bottom of the lava lake to the left and beneath the rock outcrop. The deepest part here is less than halfway down this image | |||||
| (943, 1083) | -57 | 9 | Volcano | Surface of Lava Lake | Y | Lava lake; Partly above where there are fumes and bubbles. The largest bubble of all is in the center of this image. There is one other small bubble on the surface. Three small plumes, eight large clouds and four small as well as 11 small bubbles and a spark hanging in the air above the surface. You can descend into the lava lake here. The crater descends rapidly into the lava to the left of the rock jutting out of the lava which is just to the right of this image. The bottom already reaches below into the image below before the middle of this image. From here to the rock the deepest part is not much into the two images below the two images between crater and rock. | ||||
| (943, 1084) | -57 | 10 | Volcano | White | Empty air over lava lake in volcano crater | |||||
| (943, 1085) | -57 | 11 | Volcano | White | Empty air over lava lake in volcano crater | |||||
| (943, 1086) | -57 | 12 | Volcano | White | Empty air over lava lake in volcano crater | |||||
| (943, 1087) | -57 | 13 | Volcano | White | Empty air over lava lake in volcano crater | |||||
| (943, 1088) | -57 | 14 | Volcano | White | Empty air over lava lake in volcano crater | |||||
| (944, 1069) | -56 | -5 | Volcano | Black | Black, never seen, below lowest visible terrain, bottom images, with white line at the bottom | |||||
| (944, 1070) | -56 | -4 | Volcano | Black | Black, never seen, below lowest visible terrain | |||||
| (944, 1071) | -56 | -3 | Volcano | Black | Black, never seen, below lowest visible terrain | |||||
| (944, 1072) | -56 | -2 | Volcano | Black | Black, never seen, below the volcano | |||||
| (944, 1073) | -56 | -1 | Volcano | Black - almost | Black below the volcanic lair except the two small white areas visible in top right corner that are part of the floor of the largest cave | |||||
| (944, 1074) | -56 | 0 | Volcano | Cave under Lava Lake | 1 | In the volcanic lair: Floor of the largest cave with a coin | ||||
| (944, 1075) | -56 | 1 | Volcano | Cave under Lava Lake | In the volcanic lair: Entrance through a shaft into the largest cave | |||||
| (944, 1076) | -56 | 2 | Volcano | Cave under Lava Lake | In the volcanic lair: Shaft down to the large cave | |||||
| (944, 1077) | -56 | 3 | Volcano | Cave under lava and part of Lava Lake | In the volcanic lair: Entrance into the first cave beneath the lava through the lava lake via a steep shaft connecting to this part of the lava lake in the two images to the right of this. In this image the part right of the top of the shaft going down right is filled with lava you can descend into. The lava does not go beneath this image | |||||
| (944, 1078) | -56 | 4 | Volcano | Cave under Lava Lake | In the volcanic lair: Parts of two caves | |||||
| (944, 1079) | -56 | 5 | Volcano | Cave under Lava Lake | Y | Y | 2 | In the volcanic lair: Upper cave Cueball is talking in front of two coins | ||
| (944, 1080) | -56 | 6 | Volcano | Black | Black, never seen, below the volcano | |||||
| (944, 1081) | -56 | 7 | Volcano | Black | Black, never seen, below the volcano | |||||
| (944, 1082) | -56 | 8 | Volcano | Black | Black, can be seen, below the volcano, below the rock in the lava pool | |||||
| (944, 1083) | -56 | 9 | Volcano | Surface of Lava Lake and rock | Y | Y | Y | Y | Lava lake; Partly above the lava lake to the left and right (where you can descend into the lava). In the center of the image there is a large rock which is jutting up out of the lava lake. To the left are Cueball and Megan walking left down the rock on their way to take a diving trip into the lava lake, she speaks. In the middle near the rocks highest point stands a wizard figure (Gandalf) with wizard hat, staff beard and cloak. He is looking left. To the right just on the last raised rock part before the lava stands another Cueball looking down on and calling to his horse that is swimming in the lava lake. To the left of the rock there are one large bubble and two other small bubbles on the surface. A small plume has risen just above the surface, there are three large clouds as well as 9 small bubbles hanging in the air above the surface and a splash of lava on the surface. To the left above the horse there are part of two large clouds and a small bubble in the air. The rock descends into the lava lake rapidly on both sides, more than half the way towards the bottom on both sides before the edges of this image | |
| (944, 1084) | -56 | 10 | Volcano | White | Empty air over lava lake in volcano crater | |||||
| (945, 1069) | -55 | -5 | Volcano | Black | Black, never seen, below lowest visible terrain, bottom images, with white line at the bottom | |||||
| (945, 1070) | -55 | -4 | Volcano | Black | Black, never seen, below lowest visible terrain | |||||
| (945, 1071) | -55 | -3 | Volcano | Black | Black, never seen, below lowest visible terrain | |||||
| (945, 1072) | -55 | -2 | Volcano | Black | Black, can be seen, below the lair beneath the lava | |||||
| (945, 1073) | -55 | -1 | Volcano | Black | Black, never seen, below the volcano | |||||
| (945, 1074) | -55 | 0 | Volcano | Cave under Lava Lake | Y | Y | Y | In the volcanic lair: Floor of the largest cave with three people and desks with chairs and laptops | ||
| (945, 1075) | -55 | 1 | Volcano | Cave under Lava Lake | In the volcanic lair: Ceiling of the largest cave | |||||
| (945, 1076) | -55 | 2 | Volcano | Black | Black, can be seen, inside the volcanic lair | |||||
| (945, 1077) | -55 | 3 | Volcano | Cave under lava and part of Lava Lake | In the volcanic lair: Entrance into the first cave beneath the lava through the lava lake via a steep shaft connecting to this part of the lava lake via the images above and to the right of this. In this image the part to the very left just after the highest point in the ceiling is filled with lava you can descend into. And then this lava bends to the right under that wall in the cave and begins to ascend upwards to the right. The lava does not go beneath this image | |||||
| (945, 1078) | -55 | 4 | Volcano | Cave under Lava Lake | In the volcanic lair: Shaft up to the upper cave | |||||
| (945, 1079) | -55 | 5 | Volcano | Cave under Lava Lake | Y | In the volcanic lair: Upper cave some of Cueballs text | ||||
| (945, 1080) | -55 | 6 | Volcano | Black | Black, never seen, below the volcano | |||||
| (945, 1081) | -55 | 7 | Volcano | Black | Black, never seen, below the volcano | |||||
| (945, 1082) | -55 | 8 | Volcano | Black Lava Lake | Lava lake; completely beneath the surface with areas where it is possible to descend into. A very tiny part of the lake in the top right corner, where the bottom of the lake just descends into from the image above to the right of the rock outcrop, but it is mainly in the next image right that the bottom really begins to fall down towards the shaft into the lair | |||||
| (945, 1083) | -55 | 9 | Volcano | Surface of Lava Lake | Y | Lava lake; Partly above where there are fumes and bubbles. The largest bubble is to the right of this image. There are two other small bubbles also on the surface and seven large clouds and one small as well as 15 small bubbles and a spark hanging in the air above the surface. You can descend into the lava lake here. After the first rapid descend after the rock island in the image to the left, the bottom descends more slowly through this image towards the right. First at the very right edge does the bottom descend below the edge into the image below. This happens beneath the largest bubble on the surface | ||||
| (945, 1084) | -55 | 10 | Volcano | White | Empty air over lava lake in volcano crater | |||||
| (946, 1069) | -54 | -5 | Volcano | Black | Black, never seen, below lowest visible terrain, bottom images, with white line at the bottom | |||||
| (946, 1070) | -54 | -4 | Volcano | Black | Black, never seen, below lowest visible terrain | |||||
| (946, 1071) | -54 | -3 | Volcano | Black | Black, never seen, below lowest visible terrain | |||||
| (946, 1072) | -54 | -2 | Volcano | Black | Black, can be seen, below the lair beneath the lava | |||||
| (946, 1073) | -54 | -1 | Volcano | Cave under Lava Lake | In the volcanic lair: Left part of the deepest cave | |||||
| (946, 1074) | -54 | 0 | Volcano | Cave under Lava Lake | Y | Y | In the volcanic lair: Right part of the largest cave with Elon Musk in a chain on a pedestal | |||
| (946, 1075) | -54 | 1 | Volcano | Cave under Lava Lake | In the volcanic lair: Celling of the right part of the largest cave and the ceiling entrance to the deeper cave | |||||
| (946, 1076) | -54 | 2 | Volcano | Black | Black, never seen, below the volcano | |||||
| (946, 1077) | -54 | 3 | Volcano | Black Lava Lake | Lava lake; completely beneath the surface with areas where it is possible to descend into. Shaft down to the lair beneath the lava. This is the lowest level with images of lava lake and the shaft. It cannot be reached by a straight fall from the top, six images above. Because higher up the shaft begins to take a turn to the left in under an outcrop in the shaft four images above. This can thus only be reached by going left once descends into the images above this image. Continuing with going left from here the shaft continues to go even lower in the next image to the left of this. Here the shaft reaches its lowest point. This part of the shaft is beginning to take a turn from going straight down to moving left. At the bottom left the lava is still about a third part above the bottom edge. In the next image to the left the lava almost reaches the bottom | |||||
| (946, 1078) | -54 | 4 | Volcano | Black Lava Lake | Lava lake; completely beneath the surface with areas where it is possible to descend into. Shaft down to the lair beneath the lava. This is the lowest part of the shaft that can be reached by a straight fall down from the two sparks between the clouds five images above. Higher up the shaft begins to take a turn to the left anything left of this point would be under an outcrop in the shaft three images above. It is thus only the very top right corner of this part of the shaft that can be reached directly. Going left from here the shaft continues to go even lower, and in the image below this the shaft reaches the lowest level with images, though the image to the left of this has lava almost to the bottom of the image below this, compared to only to the last third in the image just below this one. Going left from here leads to the lair beneath the lava lake. This part of the shaft sways gently from bottom left towards top right | |||||
| (946, 1079) | -54 | 5 | Volcano | Black Lava Lake | Lava lake; completely beneath the surface with areas where it is possible to descend into. Shaft down to the lair beneath the lava. This part of the shaft is four images below the surface image, and two above the bottom of the shaft. It goes almost completely straight up in almost the entire images width, without breaking the frames left or right | |||||
| (946, 1080) | -54 | 6 | Volcano | Black Lava Lake | Lava lake; completely beneath the surface with areas where it is possible to descend into. Shaft down to the lair beneath the lava. This part of the shaft is three images below the surface image, and three above the bottom of the shaft. It goes almost completely straight up in almost the entire images width, without breaking the frame to the left, but at the very top it break the frame to the right | |||||
| (946, 1081) | -54 | 7 | Volcano | Black Lava Lake | Lava lake; completely beneath the surface with areas where it is possible to descend into. Shaft down to the lair beneath the lava. This part of the shaft is two images below the surface image, and four above the bottom of the shaft. It is this image where the shaft takes a turn from going straight up in the middle of this level of images below, to going over the right edge in this image and in the one above. An outcrop is thus hanging out over the bottom part of the shaft, making it more difficult to enter into the shaft, and also making it possible to become stuck if you do not know the layout. It is always possible to get out, by clicking up repeatedly while alternatingly pushing left or right arrow. At the slimmest part, just below the top of the frame, there is only a slim part of this image where there are still lave to descend into | |||||
| (946, 1082) | -54 | 8 | Volcano | Black Lava Lake | Lava lake; completely beneath the surface with areas where it is possible to descend into. Shaft down to the lair beneath the lava. This is the entry to the shaft, one image below the surface image, and five above the bottom of the shaft. The bottom of the lava lake descends rapidly from just below the top of this image to the left to reaching out over the edge of the shaft going far down in the last part to the right of the image below the two bobbles above each other at the surface one image above | |||||
| (946, 1083) | -54 | 9 | Volcano | Surface of Lava Lake | Y | Lava lake; Partly above where there are fumes and bubbles. The largest bubble is in the center of this image. There are two other small bubbles also on the surface and six large clouds as well as 14 small bubbles hanging in the air above the surface. You can descend into the lava lake here. This is above the deepest shaft into the lava, the one that leads into the lair beneath the lava lake. Along the entire image the bottom is below the images edge. In the image below the bottom descends rapidly, but first at the very right edge does the shaft going into the image two images below this open up. First at the very right edge does the bottom disappear completely below. This happens beneath ´the bubble on the surface with another bubble in the air above this just left of the tip of the cloud that is cut off at the right side of the images edge. Descending from right there will make it possible to go as far down straight as possible, almost all the way to the bottom of the shaft. There is even lava straight down through this opening in the shaft under this image for four images below, and there is also an even deeper image five images below the surface where there is lava beneath this image. But the shaft then curves back left, and only by moving back left is it possible to get further down. From the bottom of the straight part of the shaft it is possible to walk left to get into the lair below | ||||
| (946, 1084) | -54 | 10 | Volcano | White | Empty air over lava lake in volcano crater | |||||
| (947, 1069) | -53 | -5 | Volcano | Black | Black, never seen, below lowest visible terrain, bottom images, with white line at the bottom | |||||
| (947, 1070) | -53 | -4 | Volcano | Black | Black, never seen, below lowest visible terrain | |||||
| (947, 1071) | -53 | -3 | Volcano | Black | Black, never seen, below lowest visible terrain | |||||
| (947, 1072) | -53 | -2 | Volcano | Black | Black, can be seen, below the lair beneath the lava | |||||
| (947, 1073) | -53 | -1 | Volcano | Cave under Lava Lake | Y | Y | Y | 1 | In the volcanic lair: Right part of the deepest cave with Ponytail and Hairbun in front of an antenna from the ceiling. A coin is on top of this. | |
| (947, 1074) | -53 | 0 | Volcano | Cave under Lava Lake | In the volcanic lair: Shaft going down to the deepest cave | |||||
| (947, 1075) | -53 | 1 | Volcano | Black - almost | Black below the volcanic lair, except the right part of the ceiling of the entrance to the deepest cave can be seen | |||||
| (947, 1076) | -53 | 2 | Volcano | Black | Black, never seen, below the volcano | |||||
| (947, 1077) | -53 | 3 | Volcano | Black | Black, never seen, below the volcano | |||||
| (947, 1078) | -53 | 4 | Volcano | Black | Black, never seen, below the volcano | |||||
| (947, 1079) | -53 | 5 | Volcano | Black | Black, never seen, below the volcano | |||||
| (947, 1080) | -53 | 6 | Volcano | Black Lava Lake | Lava lake; completely beneath the surface with areas where it is possible to descend into. Shaft down to the lair beneath the lava. Just the very top left corner is open lava | |||||
| (947, 1081) | -53 | 7 | Volcano | Black Lava Lake | Lava lake; completely beneath the surface with areas where it is possible to descend into. Shaft down to the lair beneath the lava. This part of the shaft is two images below the surface image, and four above the bottom of the shaft. It is in this image and the one to the left that the shaft has shifted from being only to the left (and below) this image going straight up, to moving over the border to the right into this image. To the left (in the image to the left) an outcrop thus hangs out over the bottom part of the shaft, making it more difficult to enter into the shaft, and also making it possible to become stuck if you do not know the layout. It is always possible to get out, by clicking up repeatedly while alternatingly pushing left or right arrow. Just at the left part of this image it is possible to descend one image down, as there is a small part of the upper right corner of the image below that is also open lava lake | |||||
| (947, 1082) | -53 | 8 | Volcano | Black Lava Lake | Lava lake; completely beneath the surface with areas where it is possible to descend into. Shaft down to the lair beneath the lava. At the very left side of this image (or even better just on the other side in the image to the left) is the entry to the shaft. This image is one image below the surface image, and five above the bottom of the shaft (which is left of this image). The bottom of the lava lake descends is half way down this image in the right part. But from the middle there is an edge where the shaft begins to going straight down. At this point there is not more than two images down (at most at the very left part), but just a little further left in to the left image and there are two more images down, and then one more by going left in to the lair beneath the lava | |||||
| (947, 1083) | -53 | 9 | Volcano | Surface of Lava Lake | Y | Lava lake; Partly above where there are fumes and bubbles. The largest bubble is at the right end of this image. There are five other small bubbles also on the surface and seven large clouds as well as 20 small bubbles hanging in the air above the surface. You can descend into the lava lake here. The left edge of this image is just right of where the deepest shaft goes into the lava, the one that leads into the lair beneath the lava lake. Along the entire image the bottom is below the images edge. In the image below the bottom is steady about half way down in the next image for half of the image to the right. But around the middle of the image, just left of the high cloud in the middle of this image is there a cliff below the lava so the bottom immediately descends below even the image two below this. At the very left most part of this image, there is even lava down in the image three images below this. Descending like this will make it possible to go far enough down to get from there by walking left into the lair below. But in the image to the left you can go even further down in one fall | ||||
| (947, 1084) | -53 | 10 | Volcano | White | Empty air over lava lake in volcano crater | |||||
| (948, 1069) | -52 | -5 | Volcano | Black | Black, never seen, below lowest visible terrain, bottom images, with white line at the bottom | |||||
| (948, 1070) | -52 | -4 | Volcano | Black | Black, never seen, below lowest visible terrain | |||||
| (948, 1071) | -52 | -3 | Volcano | Black | Black, never seen, below lowest visible terrain | |||||
| (948, 1072) | -52 | -2 | Volcano | Black | Black, can be seen, below the lair beneath the lava | |||||
| (948, 1073) | -52 | -1 | Volcano | Black | Black, never seen, below the volcano | |||||
| (948, 1074) | -52 | 0 | Volcano | Black | Black, never seen, below the volcano | |||||
| (948, 1075) | -52 | 1 | Volcano | Black | Black, never seen, below the volcano | |||||
| (948, 1076) | -52 | 2 | Volcano | Black | Black, never seen, below the volcano | |||||
| (948, 1077) | -52 | 3 | Volcano | Black | Black, never seen, below the volcano | |||||
| (948, 1078) | -52 | 4 | Volcano | Black | Black, never seen, below the volcano | |||||
| (948, 1079) | -52 | 5 | Volcano | Black | Black, never seen, below the volcano | |||||
| (948, 1080) | -52 | 6 | Volcano | Black | Black, never seen, below the volcano | |||||
| (948, 1081) | -52 | 7 | Volcano | Black Lava Lake | Lava lake; completely beneath the surface with areas where it is possible to descend into. Hole in the lava lake floor right. Below the higher of two rocks that are floating down inside the lava lake there is a deep hole in the right part of the lava lake. (Not compared to the shaft to the lair). In this image the deepest and left most part of this hole just enters the top of this image. The center of the shaft going into this hole, is between the two floating rocks. It is possible to get stuck in this hole, but it is always possible to get out, by clicking up repeatedly while alternatingly pushing left or right arrow | |||||
| (948, 1082) | -52 | 8 | Volcano | Black Lava Lake | Lava lake; completely beneath the surface with areas where it is possible to descend into. Hole in the lava lake floor right. The center of the shaft going into this hole, is between the two floating rocks. The shaft is split between this image which has the main part to the right of this image and the next image to the right, which has the rest of the shaft. The hole continues one more image down, but only under this image and only a short distance further. It is thus nowhere near as deep as the shaft going to the lair. It is possible to get stuck in this hole, but it is always possible to get out, by clicking up repeatedly while alternatingly pushing left or right arrow | |||||
| (948, 1083) | -52 | 9 | Volcano | Surface of Lava Lake | Y | Lava lake; Partly above where there are fumes and bubbles. The largest bubble is just left of the center of this image. There are five other small bubbles also on the surface and five large clouds as well as nine small bubbles hanging in the air above the surface. You can descend into the lava lake here. Just below the center of this image beneath the two bubbles there is a small rock outcrop that floats (or juts out from another wall in the crater). The exact same happens in the next image to the right. Although the bottom of the crater is below this image half way down in the image below, it is thus possible to stand high up in the lava here. It is also possible to walk under this floating solid rock in the lava. This rock floats higher up than the one in the next image. Just to the left of this floating rock beneath the left tip of the rightmost cloud there is a deeper hole in the bottom of the lake that goes two images below this one. The hole just barely extends into the image two below this | ||||
| (948, 1084) | -52 | 10 | Volcano | White | Empty air over lava lake in volcano crater | |||||
| (948, 1085) | -52 | 11 | Volcano | White | Empty air over lava lake in volcano crater | |||||
| (948, 1086) | -52 | 12 | Volcano | White | Empty air over lava lake in volcano crater | |||||
| (948, 1087) | -52 | 13 | Volcano | White | Empty air over lava lake in volcano crater | |||||
| (948, 1088) | -52 | 14 | Volcano | White | Empty air over lava lake in volcano crater | |||||
| (949, 1069) | -51 | -5 | Volcano | Black | Black, never seen, below lowest visible terrain, bottom images, with white line at the bottom | |||||
| (949, 1070) | -51 | -4 | Volcano | Black | Black, never seen, below lowest visible terrain | |||||
| (949, 1071) | -51 | -3 | Volcano | Black | Black, never seen, below lowest visible terrain | |||||
| (949, 1072) | -51 | -2 | Volcano | Black | Black, never seen, below volcano | |||||
| (949, 1073) | -51 | -1 | Volcano | Black | Black, never seen, below the volcano | |||||
| (949, 1074) | -51 | 0 | Volcano | Black | Black, never seen, below the volcano | |||||
| (949, 1075) | -51 | 1 | Volcano | Black | Black, never seen, below the volcano | |||||
| (949, 1076) | -51 | 2 | Volcano | Black | Black, never seen, below the volcano | |||||
| (949, 1077) | -51 | 3 | Volcano | Black | Black, never seen, below the volcano | |||||
| (949, 1078) | -51 | 4 | Volcano | Black | Black, never seen, below the volcano | |||||
| (949, 1079) | -51 | 5 | Volcano | Black | Black, never seen, below the volcano | |||||
| (949, 1080) | -51 | 6 | Volcano | Black | Black, never seen, below the volcano | |||||
| (949, 1081) | -51 | 7 | Volcano | Black | Black, never seen, below the volcano | |||||
| (949, 1082) | -51 | 8 | Volcano | Black Lava Lake | Lava lake; completely beneath the surface with areas where it is possible to descend into. Hole in the lava lake floor right. The center of the shaft going into this hole, is between the two floating rocks. The shaft is split between this image which has the smallest part to the left of this image and the next image to the left, which has the rest and main part of the shaft. The hole continues one more image down, but only under the image to the left and only a short distance further. It is thus nowhere near as deep as the shaft going to the lair. It is possible to get stuck in this hole because there is a small outcrop in the shaft in this image, going right in under the top of the shaft. And when trying to get out, it is easy to the end under one of the two floating rocks. But it is always possible to get out, by clicking up repeatedly while alternatingly pushing left or right arrow. The bottom of the lowest and biggest floating rock under the lava is at the top of this image. The bottom curves, so you can get up under the rock and again get a little stuck. Apart from the shaft to the left, the bottom of the lava lake ascends towards the right towards the end of the crater. At the far right the lava goes above the edge of this image before the edge, meaning that there is no more lava in the image to the right of this one, only in the right image above, which is be the last with lava going right | |||||
| (949, 1083) | -51 | 9 | Volcano | Surface of Lava Lake | Y | Lava lake; Partly above where there are fumes and bubbles. The largest bubble is at the right part of this image, and further right there is another rather large bubble. There are four other small bubbles also on the surface and eight large clouds, one of them to the right is the longest of all clouds, and the two clouds at the top of the frame is the highest clouds, and the small one on top of the other is the only one to break the top frame over the lava lake to be seen in the image row above. There is a small plume to the left and a spark on the surface shooting a bubble up in the air and here are also 6 other small bubbles hanging in the air above the surface. You can descend into the lava lake here. Just below the middle of the left part of this image between the edge of the zigzag cloud to the left and the jumping bubble to the right there is a small rock outcrop that floats (or juts out from another wall in the crater). The exact same happens in the next image to the left. Although the bottom of the crater is below the bottom edge of this image through the entire image (extending about a third down in this image), it is thus possible to stand higher up in the lava here on this outcrop. The outcrop is lower than the one in the image to the left, and part of this is extending beneath the edge of this image to the image below. In the image below It is also possible to walk under this floating solid rock in the lava. Just to the right of this floating rock beneath the small plume at the very left most part of the image there is a deeper hole in the bottom of the lake that here goes almost down to the bottom of the images below this one. In the image to the left of this hole even extends into the image two below this | ||||
| (949, 1084) | -51 | 10 | Volcano | White - almost | Empty air over lava lake in volcano crater except the tiniest wisp at the right bottom of this image, where the top of a cloud, that is mainly located in the image below, pops up | |||||
| (949, 1085) | -51 | 11 | Volcano | White | Empty air over lava lake in volcano crater | |||||
| (949, 1086) | -51 | 12 | Volcano | White | Empty air over lava lake in volcano crater | |||||
| (949, 1087) | -51 | 13 | Volcano | White | Empty air over lava lake in volcano crater | |||||
| (949, 1088) | -51 | 14 | Volcano | White | Empty air over lava lake in volcano crater | |||||
| (950, 1069) | -50 | -5 | Volcano | Black | Black, never seen, below lowest visible terrain, bottom images, with white line at the bottom | |||||
| (950, 1070) | -50 | -4 | Volcano | Black | Black, never seen, below lowest visible terrain | |||||
| (950, 1071) | -50 | -3 | Volcano | Black | Black, never seen, below lowest visible terrain | |||||
| (950, 1072) | -50 | -2 | Volcano | Black | Black, never seen, below volcano | |||||
| (950, 1073) | -50 | -1 | Volcano | Black | Black, never seen, below the volcano | |||||
| (950, 1074) | -50 | 0 | Volcano | Black | Black, never seen, below the volcano | |||||
| (950, 1075) | -50 | 1 | Volcano | Black | Black, never seen, below the volcano | |||||
| (950, 1076) | -50 | 2 | Volcano | Black | Black, never seen, below the volcano | |||||
| (950, 1077) | -50 | 3 | Volcano | Black | Black, never seen, below the volcano | |||||
| (950, 1078) | -50 | 4 | Volcano | Black | Black, never seen, below the volcano | |||||
| (950, 1079) | -50 | 5 | Volcano | Black | Black, never seen, below the volcano | |||||
| (950, 1080) | -50 | 6 | Volcano | Black | Black, never seen, below the volcano | |||||
| (950, 1081) | -50 | 7 | Volcano | Black | Black, never seen, below the volcano | |||||
| (950, 1082) | -50 | 8 | Volcano | Black | Black, can be seen, below the volcano | |||||
| (950, 1083) | -50 | 9 | Volcano | Surface of Lava Lake | Y | Lava lake; Partly above where there are fumes and bubbles. The largest bubble is in the right part of this image, it is the largest on this side of the rock outcrop in the lava lake. It is very close to the right edge of the lava lake, actually the lake stops right at the right edge of this image, without showing any of the right bank, but also without showing any of the lake in the next image to the right of this. There are six other small bubbles also on the surface and five large clouds (and the edge of the high cloud from the image to the left) as well as five small bubbles and a spark hanging in the air above the surface. You can descend into the lava lake here, which is not very deep here, and there is no lava in the image below this. (Above this image is the image with two drones and a coin) | ||||
| (950, 1084) | -50 | 10 | Volcano | Drones | Y | Y | 1 | Two drones are flying in the empty air above the right side of the lava lake. Each has four rotors and some device suspended beneath their main body. The drone to the right is talking to the other drone that is above it and a little further left. Just below this left drone (but still above the right drone) there is a coin. | ||
| (950, 1085) | -50 | 11 | Volcano | White | Empty air over lava lake in volcano crater | |||||
| (950, 1086) | -50 | 12 | Volcano | White | Empty air over lava lake in volcano crater | |||||
| (950, 1087) | -50 | 13 | Volcano | White | Empty air over lava lake in volcano crater | |||||
| (950, 1088) | -50 | 14 | Volcano | White | Empty air over lava lake in volcano crater | |||||
| (951, 1069) | -49 | -5 | Volcano | Black | Black, never seen, below lowest visible terrain, bottom images, with white line at the bottom | |||||
| (951, 1070) | -49 | -4 | Volcano | Black | Black, never seen, below lowest visible terrain | |||||
| (951, 1071) | -49 | -3 | Volcano | Black | Black, never seen, below lowest visible terrain | |||||
| (951, 1072) | -49 | -2 | Volcano | Black | Black, never seen, below volcano | |||||
| (951, 1073) | -49 | -1 | Volcano | Black | Black, never seen, below the volcano | |||||
| (951, 1074) | -49 | 0 | Volcano | Black | Black, never seen, below the volcano | |||||
| (951, 1075) | -49 | 1 | Volcano | Black | Black, never seen, below the volcano | |||||
| (951, 1076) | -49 | 2 | Volcano | Black | Black, never seen, below the volcano | |||||
| (951, 1077) | -49 | 3 | Volcano | Black | Black, never seen, below the volcano | |||||
| (951, 1078) | -49 | 4 | Volcano | Black | Black, never seen, below the volcano | |||||
| (951, 1079) | -49 | 5 | Volcano | Black | Black, never seen, below the volcano | |||||
| (951, 1080) | -49 | 6 | Volcano | Black | Black, never seen, below the volcano | |||||
| (951, 1081) | -49 | 7 | Volcano | Black | Black, never seen, below the volcano | |||||
| (951, 1082) | -49 | 8 | Volcano | Black | Black, can be seen, below the volcano | |||||
| (951, 1083) | -49 | 9 | Volcano | Surface of Lava Lake | Lava lake; right bank without any lava visible. Only the smallest part of the first small cloud enters the image to the left. Most of the image is black as the volcano crater rises steeply from here towards the right in the upper left quadrant | |||||
| (951, 1084) | -49 | 10 | Volcano | Volcano crater right | An almost vertical slope upwards and right at the right edge of the crater | |||||
| (951, 1085) | -49 | 11 | Volcano | Volcano crater right | Y | A very steep slope down into the volcano on the right side of the crater. On the middle of this slope there is a small plant | ||||
| (951, 1086) | -49 | 12 | Volcano | Volcano crater right | A very steep slope down into the volcano on the right side of the crater. | |||||
| (951, 1087) | -49 | 13 | Volcano | White | Empty air over lava lake in volcano crater | |||||
| (951, 1088) | -49 | 14 | Volcano | White | Empty air over lava lake in volcano crater | |||||
| (952, 1069) | -48 | -5 | Volcano | Black | Black, never seen, below lowest visible terrain, bottom images, with white line at the bottom | |||||
| (952, 1070) | -48 | -4 | Volcano | Black | Black, never seen, below lowest visible terrain | |||||
| (952, 1071) | -48 | -3 | Volcano | Black | Black, never seen, below lowest visible terrain | |||||
| (952, 1072) | -48 | -2 | Volcano | Black | Black, never seen, below volcano | |||||
| (952, 1073) | -48 | -1 | Volcano | Black | Black, never seen, below the volcano | |||||
| (952, 1074) | -48 | 0 | Volcano | Black | Black, never seen, below the volcano | |||||
| (952, 1075) | -48 | 1 | Volcano | Black | Black, never seen, below the volcano | |||||
| (952, 1076) | -48 | 2 | Volcano | Black | Black, never seen, below the volcano | |||||
| (952, 1077) | -48 | 3 | Volcano | Black | Black, never seen, below the volcano | |||||
| (952, 1078) | -48 | 4 | Volcano | Black | Black, never seen, below the volcano | |||||
| (952, 1079) | -48 | 5 | Volcano | Black | Black, never seen, below the volcano | |||||
| (952, 1080) | -48 | 6 | Volcano | Black | Black, never seen, below the volcano | |||||
| (952, 1081) | -48 | 7 | Volcano | Black | Black, never seen, below the volcano | |||||
| (952, 1082) | -48 | 8 | Volcano | Black | Black, can be seen, below the volcano | |||||
| (952, 1083) | -48 | 9 | Volcano | Black | Black, can be seen, below the volcano | |||||
| (952, 1084) | -48 | 10 | Volcano | Black | Black, can be seen, below the volcano | |||||
| (952, 1085) | -48 | 11 | Volcano | Black | Black, can be seen, below the volcano | |||||
| (952, 1086) | -48 | 12 | Volcano | Black | Black, can be seen, below the volcano | |||||
| (952, 1087) | -48 | 13 | Volcano | Crater top right | Y | Y | Y | At the left edge of the right top of the volcano crater Cueball stands behind Megan who again stands on the very edge of the crater and throws in 16 items (rings according to her text). The crater goes almost straight down from this cliff, and although she stands very near the left edge of the image, the cliff falls below the bottom edge of the image before crossing the left edge. Behind them to the right the ground is very uneven with a sharp and large rock jutting up from the ground and a large step up to the right | ||
| (952, 1088) | -48 | 14 | Volcano | White | Empty air over the volcano crater right | |||||
| (953, 1069) | -47 | -5 | Volcano | Black | Black, never seen, below lowest visible terrain, bottom images, with white line at the bottom | |||||
| (953, 1070) | -47 | -4 | Volcano | Black | Black, never seen, below lowest visible terrain | |||||
| (953, 1071) | -47 | -3 | Volcano | Black | Black, never seen, below lowest visible terrain | |||||
| (953, 1072) | -47 | -2 | Volcano | Black | Black, never seen, below volcano | |||||
| (953, 1073) | -47 | -1 | Volcano | Black | Black, never seen, below the volcano | |||||
| (953, 1074) | -47 | 0 | Volcano | Black | Black, never seen, below the volcano | |||||
| (953, 1075) | -47 | 1 | Volcano | Black | Black, never seen, below the volcano | |||||
| (953, 1076) | -47 | 2 | Volcano | Black | Black, never seen, below the volcano | |||||
| (953, 1077) | -47 | 3 | Volcano | Black | Black, never seen, below the volcano | |||||
| (953, 1078) | -47 | 4 | Volcano | Black | Black, never seen, below the volcano | |||||
| (953, 1079) | -47 | 5 | Volcano | Black | Black, never seen, below the volcano | |||||
| (953, 1080) | -47 | 6 | Volcano | Black | Black, never seen, below the volcano | |||||
| (953, 1081) | -47 | 7 | Volcano | Black | Black, never seen, below the volcano | |||||
| (953, 1082) | -47 | 8 | Volcano | Black | Black, never seen, below the volcano | |||||
| (953, 1083) | -47 | 9 | Volcano | Black | Black, never seen, below the volcano | |||||
| (953, 1084) | -47 | 10 | Volcano | Black | Black, never seen, below the volcano | |||||
| (953, 1085) | -47 | 11 | Volcano | Black | Black, never seen, below the volcano | |||||
| (953, 1086) | -47 | 12 | Volcano | Black | Black, can be seen, below the volcano | |||||
| (953, 1087) | -47 | 13 | Volcano | Crater top right | Y | Y | Y | A lava pool is located in the right part of this image, but just right of it there are a girl with a hair bun and a Megan like girl, both are only kids smaller than the adults in the comic. The lava lake has three smaller bubbles and also three plumes. The girl with hair bun talks but the text is cut off at the right edge of the image. To the left of the lake, there is some rubble and bare ground here on top of the right part of the crater | ||
| (953, 1088) | -47 | 14 | Volcano | White | Empty air over the volcano crater right | |||||
| (954, 1069) | -46 | -5 | Volcano | Black | Black, never seen, below lowest visible terrain, bottom images, with white line at the bottom | |||||
| (954, 1070) | -46 | -4 | Volcano | Black | Black, never seen, below lowest visible terrain | |||||
| (954, 1071) | -46 | -3 | Volcano | Black | Black, never seen, below lowest visible terrain | |||||
| (954, 1072) | -46 | -2 | Volcano | Black | Black, never seen, below volcano | |||||
| (954, 1073) | -46 | -1 | Volcano | Black | Black, never seen, below the volcano | |||||
| (954, 1074) | -46 | 0 | Volcano | Black | Black, never seen, below the volcano | |||||
| (954, 1075) | -46 | 1 | Volcano | Black | Black, never seen, below the volcano | |||||
| (954, 1076) | -46 | 2 | Volcano | Black | Black, never seen, below the volcano | |||||
| (954, 1077) | -46 | 3 | Volcano | Black | Black, never seen, below the volcano | |||||
| (954, 1078) | -46 | 4 | Volcano | Black | Black, never seen, below the volcano | |||||
| (954, 1079) | -46 | 5 | Volcano | Black | Black, never seen, below the volcano | |||||
| (954, 1080) | -46 | 6 | Volcano | Black | Black, never seen, below the volcano | |||||
| (954, 1081) | -46 | 7 | Volcano | Black | Black, never seen, below the volcano | |||||
| (954, 1082) | -46 | 8 | Volcano | Black | Black, never seen, below the volcano | |||||
| (954, 1083) | -46 | 9 | Volcano | Black | Black, never seen, below the volcano | |||||
| (954, 1084) | -46 | 10 | Volcano | Black | Black, can be seen, below the volcano | |||||
| (954, 1085) | -46 | 11 | Volcano | Black | Black, can be seen, below the volcano | |||||
| (954, 1086) | -46 | 12 | Volcano | Black | Black, can be seen, below the volcano | |||||
| (954, 1087) | -46 | 13 | Volcano | Crater top right | Y | Y | A lava pool is located in the left part of this image. The pool has two large bubbles sticking out. It also has a small black hammer like thing that juts out in the middle, and from that fumes comes off in four lines. There are also three vapor plumes and small dots of lava floating above it. To the right is a plateau with loose rocks, and then the top of the right part of the crater finishes and begins the downslope to the right. At the very left edge of the image there are two lines of text, part of the text from the girl in the image to the left | |||
| (954, 1088) | -46 | 14 | Volcano | White | Empty air over the volcano crater right | |||||
| (955, 1069) | -45 | -5 | Volcano | Black | Black, never seen, below lowest visible terrain, bottom images, with white line at the bottom | |||||
| (955, 1070) | -45 | -4 | Volcano | Black | Black, never seen, below lowest visible terrain | |||||
| (955, 1071) | -45 | -3 | Volcano | Black | Black, never seen, below lowest visible terrain | |||||
| (955, 1072) | -45 | -2 | Volcano | Black | Black, never seen, below volcano | |||||
| (955, 1073) | -45 | -1 | Volcano | Black | Black, never seen, below the volcano | |||||
| (955, 1074) | -45 | 0 | Volcano | Black | Black, never seen, below the volcano | |||||
| (955, 1075) | -45 | 1 | Volcano | Black | Black, never seen, below the volcano | |||||
| (955, 1076) | -45 | 2 | Volcano | Black | Black, never seen, below the volcano | |||||
| (955, 1077) | -45 | 3 | Volcano | Black | Black, never seen, below the volcano | |||||
| (955, 1078) | -45 | 4 | Volcano | Black | Black, never seen, below the volcano | |||||
| (955, 1079) | -45 | 5 | Volcano | Black | Black, never seen, below the volcano | |||||
| (955, 1080) | -45 | 6 | Volcano | Black | Black, never seen, below the volcano | |||||
| (955, 1081) | -45 | 7 | Volcano | Black | Black, never seen, below the volcano | |||||
| (955, 1082) | -45 | 8 | Volcano | Black | Black, never seen, below the volcano | |||||
| (955, 1083) | -45 | 9 | Volcano | Black | Black, never seen, below the volcano | |||||
| (955, 1084) | -45 | 10 | Volcano | Black | Black, can be seen, below the volcano | |||||
| (955, 1085) | -45 | 11 | Volcano | Black | Black, can be seen, below the volcano | |||||
| (955, 1086) | -45 | 12 | Volcano | Slope right | The steep slope down the right side takes a little rise up again in the middle of this mage, like a little ramp for a sleigh or a bike, but then proceeds down again | |||||
| (955, 1087) | -45 | 13 | Volcano | Slope right | The very steep slope down the right side | |||||
| (955, 1088) | -45 | 14 | Volcano | White | Empty air over the volcano crater right | |||||
| (956, 1069) | -44 | -5 | Volcano | Black | Black, never seen, below lowest visible terrain, bottom images, with white line at the bottom | |||||
| (956, 1070) | -44 | -4 | Volcano | Black | Black, never seen, below lowest visible terrain | |||||
| (956, 1071) | -44 | -3 | Volcano | Black | Black, never seen, below lowest visible terrain | |||||
| (956, 1072) | -44 | -2 | Volcano | Black | Black, never seen, below volcano | |||||
| (956, 1073) | -44 | -1 | Volcano | Black | Black, never seen, below the volcano | |||||
| (956, 1074) | -44 | 0 | Volcano | Black | Black, never seen, below the volcano | |||||
| (956, 1075) | -44 | 1 | Volcano | Black | Black, never seen, below the volcano | |||||
| (956, 1076) | -44 | 2 | Volcano | Black | Black, never seen, below the volcano | |||||
| (956, 1077) | -44 | 3 | Volcano | Black | Black, never seen, below the volcano | |||||
| (956, 1078) | -44 | 4 | Volcano | Black | Black, never seen, below the volcano | |||||
| (956, 1079) | -44 | 5 | Volcano | Black | Black, never seen, below the volcano | |||||
| (956, 1080) | -44 | 6 | Volcano | Black | Black, never seen, below the volcano | |||||
| (956, 1081) | -44 | 7 | Volcano | Black | Black, never seen, below the volcano | |||||
| (956, 1082) | -44 | 8 | Volcano | Black | Black, can be seen, below the volcano | |||||
| (956, 1083) | -44 | 9 | Volcano | Black | Black, can be seen, below the volcano | |||||
| (956, 1084) | -44 | 10 | Volcano | Black | Black, can be seen, below the volcano | |||||
| (956, 1085) | -44 | 11 | Volcano | Slope right | Y | Y | Megan is sliding down the very steep slope on an old fashioned snow sleigh. She is at the very top left of this image and is cut off at the top edge so only half of her (the head part) and the sleigh can be seen | |||
| (956, 1086) | -44 | 12 | Volcano | Slope right | Y | Y | Megan is sliding down the very steep slope (which only takes up the bottom left part of this image) on an old fashioned snow sleigh. She is at the very bottom and center of this image and is cut off at the bottom edge so only half of her (the body) and the sleigh can be seen. Dust stands up behind the sleigh indicating its speed | |||
| (956, 1087) | -44 | 13 | Volcano | White | Empty air above volcano | |||||
| (956, 1088) | -44 | 14 | Volcano | Eagles flying | Y | Y | Two eagles are flying in empty air talking about Frodo and Tolkien | |||
| (957, 1069) | -43 | -5 | Volcano | Black | Black, never seen, below lowest visible terrain, bottom images, with white line at the bottom | |||||
| (957, 1070) | -43 | -4 | Volcano | Black | Black, never seen, below lowest visible terrain | |||||
| (957, 1071) | -43 | -3 | Volcano | Black | Black, never seen, below lowest visible terrain | |||||
| (957, 1072) | -43 | -2 | Volcano | Black | Black, never seen, below volcano | |||||
| (957, 1073) | -43 | -1 | Volcano | Black | Black, never seen, below the volcano | |||||
| (957, 1074) | -43 | 0 | Volcano | Black | Black, never seen, below the volcano | |||||
| (957, 1075) | -43 | 1 | Volcano | Black | Black, never seen, below the volcano | |||||
| (957, 1076) | -43 | 2 | Volcano | Black | Black, never seen, below the volcano | |||||
| (957, 1077) | -43 | 3 | Volcano | Black | Black, never seen, below the volcano | |||||
| (957, 1078) | -43 | 4 | Volcano | Black | Black, never seen, below the volcano | |||||
| (957, 1079) | -43 | 5 | Volcano | Black | Black, never seen, below the volcano | |||||
| (957, 1080) | -43 | 6 | Volcano | Black | Black, never seen, below the volcano | |||||
| (957, 1081) | -43 | 7 | Volcano | Black | Black, can be seen, below the volcano | |||||
| (957, 1082) | -43 | 8 | Volcano | Black | Black, can be seen, below the volcano | |||||
| (957, 1083) | -43 | 9 | Volcano | Black - almost | Black below the volcano except for the tiniest white triangle at the very top right corner where a very small part of the steep slope of the volcano can be seen | |||||
| (957, 1084) | -43 | 10 | Volcano | Slope right | 1 | A very steep slope down the right side of the volcano. At the top left there is a small plateau or step where the ground rises before the slope continues down. Above this slope there is a coin | ||||
| (957, 1085) | -43 | 11 | Volcano | White | Only a tiny part of the slope enters this image at the bottom left part of this image | |||||
| (957, 1086) | -43 | 12 | Volcano | White | Empty air above volcano | |||||
| (957, 1087) | -43 | 13 | Volcano | White | Empty air above volcano | |||||
| (957, 1088) | -43 | 14 | Volcano | White | Empty air above volcano | |||||
| (958, 1069) | -42 | -5 | Volcano | Black | Black, never seen, below lowest visible terrain, bottom images, with white line at the bottom | |||||
| (958, 1070) | -42 | -4 | Volcano | Black | Black, never seen, below lowest visible terrain | |||||
| (958, 1071) | -42 | -3 | Volcano | Black | Black, never seen, below lowest visible terrain | |||||
| (958, 1072) | -42 | -2 | Volcano | Black | Black, never seen, below volcano | |||||
| (958, 1073) | -42 | -1 | Volcano | Black | Black, never seen, below the volcano | |||||
| (958, 1074) | -42 | 0 | Volcano | Black | Black, never seen, below the volcano | |||||
| (958, 1075) | -42 | 1 | Volcano | Black | Black, never seen, below the volcano | |||||
| (958, 1076) | -42 | 2 | Volcano | Black | Black, never seen, below the volcano | |||||
| (958, 1077) | -42 | 3 | Volcano | Black | Black, never seen, below the volcano | |||||
| (958, 1078) | -42 | 4 | Volcano | Black | Black, never seen, below the volcano | |||||
| (958, 1079) | -42 | 5 | Volcano | Black | Black, never seen, below the volcano | |||||
| (958, 1080) | -42 | 6 | Volcano | Black | Black, never seen, below the volcano | |||||
| (958, 1081) | -42 | 7 | Volcano | Black | Black, can be seen, below the volcano | |||||
| (958, 1082) | -42 | 8 | Volcano | Black - almost | Black below the volcano except for a little white at the top right corner where a small part of the steep slope of the volcano can be seen | |||||
| (958, 1083) | -42 | 9 | Volcano | Slope right | Y | Y | Y | Ponytail come racing down the steep slope on her bike with dust blowing up behind her. She is talking | ||
| (958, 1084) | -42 | 10 | Volcano | White | Empty air above volcano | |||||
| (958, 1085) | -42 | 11 | Volcano | White | Empty air above volcano | |||||
| (958, 1086) | -42 | 12 | Volcano | White | Empty air above volcano | |||||
| (958, 1087) | -42 | 13 | Volcano | White | Empty air above volcano | |||||
| (958, 1088) | -42 | 14 | Volcano | White | Empty air above volcano | |||||
| (959, 1069) | -41 | -5 | Volcano | Black | Black, never seen, below lowest visible terrain, bottom images, with white line at the bottom | |||||
| (959, 1070) | -41 | -4 | Volcano | Black | Black, never seen, below lowest visible terrain | |||||
| (959, 1071) | -41 | -3 | Volcano | Black | Black, never seen, below lowest visible terrain | |||||
| (959, 1072) | -41 | -2 | Volcano | Black | Black, never seen, below volcano | |||||
| (959, 1073) | -41 | -1 | Volcano | Black | Black, never seen, below the volcano | |||||
| (959, 1074) | -41 | 0 | Volcano | Black | Black, never seen, below the volcano | |||||
| (959, 1075) | -41 | 1 | Volcano | Black | Black, never seen, below the volcano | |||||
| (959, 1076) | -41 | 2 | Volcano | Black | Black, never seen, below the volcano | |||||
| (959, 1077) | -41 | 3 | Volcano | Black | Black, never seen, below the volcano | |||||
| (959, 1078) | -41 | 4 | Volcano | Black | Black, never seen, below the volcano | |||||
| (959, 1079) | -41 | 5 | Volcano | Black | Black, never seen, below the volcano | |||||
| (959, 1080) | -41 | 6 | Volcano | Black | Black, never seen, below the volcano | |||||
| (959, 1081) | -41 | 7 | Volcano | Black | Black, can be seen, below the volcano | |||||
| (959, 1082) | -41 | 8 | Volcano | Slope right | Steep part of the slope down the mountain towards right. A small rock outcrop stops the descend towards right for a brief spell | |||||
| (959, 1083) | -41 | 9 | Volcano | White | Empty air above volcano | |||||
| (959, 1084) | -41 | 10 | Volcano | White | Empty air above volcano | |||||
| (959, 1085) | -41 | 11 | Volcano | White | Empty air above volcano | |||||
| (959, 1086) | -41 | 12 | Volcano | White | Empty air above volcano | |||||
| (959, 1087) | -41 | 13 | Volcano | White | Empty air above volcano | |||||
| (959, 1088) | -41 | 14 | Volcano | White | Empty air above volcano | |||||
| (960, 1069) | -40 | -5 | Mountain Slope right | Black | Black, never seen, below lowest visible terrain, bottom images, with white line at the bottom | |||||
| (960, 1070) | -40 | -4 | Mountain Slope right | Black | Black, never seen, below lowest visible terrain | |||||
| (960, 1071) | -40 | -3 | Mountain Slope right | Black | Black, never seen, below lowest visible terrain | |||||
| (960, 1072) | -40 | -2 | Mountain Slope right | Black | Black, never seen, below mountain slope right | |||||
| (960, 1073) | -40 | -1 | Mountain Slope right | Black | Black, never seen, below the mountain slope right | |||||
| (960, 1074) | -40 | 0 | Mountain Slope right | Black | Black, never seen, below the mountain slope right | |||||
| (960, 1075) | -40 | 1 | Mountain Slope right | Black | Black, never seen, below the mountain slope right | |||||
| (960, 1076) | -40 | 2 | Mountain Slope right | Black | Black, never seen, below the mountain slope right | |||||
| (960, 1077) | -40 | 3 | Mountain Slope right | Black | Black, never seen, below the mountain slope right | |||||
| (960, 1078) | -40 | 4 | Mountain Slope right | Black | Black, never seen, below the mountain slope right | |||||
| (960, 1079) | -40 | 5 | Mountain Slope right | Black | Black, can be seen, below the mountain slope right | |||||
| (960, 1080) | -40 | 6 | Mountain Slope right | Black | Black, can be seen, below the mountain slope right | |||||
| (960, 1081) | -40 | 7 | Mountain Slope right | Slope right | Y | Y | Y | Two Cueballs who are climbing the steep slope. At the bottom right there is a large rock lying on the ground so that there is a hole beneath it. The rock is cut off at the right edge of this image. Just to the right and below the right Cueball there is a small vent with vapor coming out and drifting right. The Cueball to the left is up walking left away from the Cueball to the right, who is climbing up a small rise, with hands on the ground while he talks | ||
| (960, 1082) | -40 | 8 | Mountain Slope right | White - almost | Y | Empty air almost as the steep cliff on the slope towards right that takes the ground below the edge of this image except for a very small piece of the slope in the bottom left corner. Also half of the top line from the Cueball in the image below can be seen | ||||
| (960, 1083) | -40 | 9 | Mountain Slope right | White | Empty air above mountain slope right | |||||
| (960, 1084) | -40 | 10 | Mountain Slope right | White | Empty air above mountain slope right | |||||
| (961, 1069) | -39 | -5 | Mountain Slope right | Black | Black, never seen, below lowest visible terrain, bottom images, with white line at the bottom | |||||
| (961, 1070) | -39 | -4 | Mountain Slope right | Black | Black, never seen, below lowest visible terrain | |||||
| (961, 1071) | -39 | -3 | Mountain Slope right | Black | Black, never seen, below lowest visible terrain | |||||
| (961, 1072) | -39 | -2 | Mountain Slope right | Black | Black, never seen, below mountain slope right | |||||
| (961, 1073) | -39 | -1 | Mountain Slope right | Black | Black, never seen, below the mountain slope right | |||||
| (961, 1074) | -39 | 0 | Mountain Slope right | Black | Black, never seen, below the mountain slope right | |||||
| (961, 1075) | -39 | 1 | Mountain Slope right | Black | Black, never seen, below the mountain slope right | |||||
| (961, 1076) | -39 | 2 | Mountain Slope right | Black | Black, never seen, below the mountain slope right | |||||
| (961, 1077) | -39 | 3 | Mountain Slope right | Black | Black, never seen, below the mountain slope right | |||||
| (961, 1078) | -39 | 4 | Mountain Slope right | Black | Black, can be seen, below the mountain slope right | |||||
| (961, 1079) | -39 | 5 | Mountain Slope right | Black | Black, can be seen, below the mountain slope right | |||||
| (961, 1080) | -39 | 6 | Mountain Slope right | Slope right | Only a little white at the top of this image where rubles lies on a slope going down towards right in the right part of the image. In the center the ground is above the frame, but to the left there is a hole coming down with small rubbles at the bottom. To the very left the ground is again above the frame | |||||
| (961, 1081) | -39 | 7 | Mountain Slope right | Slope right | Y | To the very left of this image on top of a very large rock, which is lying so you can see a hole beneath it and the next part of the slope beneath it to the right, is Megan standing with Cueball to her right. She holds up some kind of device looking left while Cueball is looking almost straight up away from her to the right. (Cueball is actually looking up at a coin that is located in the empty air in the image above this one) | ||||
| (961, 1082) | -39 | 8 | Mountain Slope right | White | 1 | Empty air with a coin hanging above Megan and Cueball on the big rock below. This is the coin Cueball looks up at (and which can be seen in the game from his position) | ||||
| (961, 1083) | -39 | 9 | Mountain Slope right | White | Empty air above mountain slope right | |||||
| (961, 1084) | -39 | 10 | Mountain Slope right | White | Empty air above mountain slope right | |||||
| (962, 1069) | -38 | -5 | Mountain Slope right | Black | Black, never seen, below lowest visible terrain, bottom images, with white line at the bottom | |||||
| (962, 1070) | -38 | -4 | Mountain Slope right | Black | Black, never seen, below lowest visible terrain | |||||
| (962, 1071) | -38 | -3 | Mountain Slope right | Black | Black, never seen, below lowest visible terrain | |||||
| (962, 1072) | -38 | -2 | Mountain Slope right | Black | Black, never seen, below mountain slope right | |||||
| (962, 1073) | -38 | -1 | Mountain Slope right | Black | Black, never seen, below the mountain slope right | |||||
| (962, 1074) | -38 | 0 | Mountain Slope right | Black | Black, never seen, below the mountain slope right | |||||
| (962, 1075) | -38 | 1 | Mountain Slope right | Black | Black, never seen, below the mountain slope right | |||||
| (962, 1076) | -38 | 2 | Mountain Slope right | Black | Black, never seen, below the mountain slope right | |||||
| (962, 1077) | -38 | 3 | Mountain Slope right | Black | Black, can be seen, below the mountain slope right | |||||
| (962, 1078) | -38 | 4 | Mountain Slope right | Black | Black, can be seen, below the mountain slope right | |||||
| (962, 1079) | -38 | 5 | Mountain Slope right | Black - almost | Black below the mountain slope right except a little white at the top right corner where rubles lies on the steep slope going down towards right | |||||
| (962, 1080) | -38 | 6 | Mountain Slope right | Slope right | Y | Y | Y | Cueball is climbing up an almost vertical part of the steep rocky slope with Megan behind him. He looks down on her as she speaks. At the top left is a burning tree stomp, smoke from it is drifting right | ||
| (962, 1081) | -38 | 7 | Mountain Slope right | White | Empty air above mountain slope right | |||||
| (962, 1082) | -38 | 8 | Mountain Slope right | White | Empty air above mountain slope right | |||||
| (962, 1083) | -38 | 9 | Mountain Slope right | White | Empty air above mountain slope right | |||||
| (962, 1084) | -38 | 10 | Mountain Slope right | White | Empty air above mountain slope right | |||||
| (963, 1069) | -37 | -5 | Mountain Slope right | Black | Black, never seen, below lowest visible terrain, bottom images, with white line at the bottom | |||||
| (963, 1070) | -37 | -4 | Mountain Slope right | Black | Black, never seen, below lowest visible terrain | |||||
| (963, 1071) | -37 | -3 | Mountain Slope right | Black | Black, never seen, below lowest visible terrain | |||||
| (963, 1072) | -37 | -2 | Mountain Slope right | Black | Black, never seen, below mountain slope right | |||||
| (963, 1073) | -37 | -1 | Mountain Slope right | Black | Black, never seen, below the mountain slope right | |||||
| (963, 1074) | -37 | 0 | Mountain Slope right | Black | Black, never seen, below the mountain slope right | |||||
| (963, 1075) | -37 | 1 | Mountain Slope right | Black | Black, never seen, below the mountain slope right | |||||
| (963, 1076) | -37 | 2 | Mountain Slope right | Black | Black, never seen, below the mountain slope right | |||||
| (963, 1077) | -37 | 3 | Mountain Slope right | Black | Black, can be seen, below the mountain slope right | |||||
| (963, 1078) | -37 | 4 | Mountain Slope right | Black - almost | Black below the mountain slope right except in the top right corner where a small stone lies above the bare ground | |||||
| (963, 1079) | -37 | 5 | Mountain Slope right | Slope right | Y | Y | Ponytail is looking at a small plant to the left of her in the left part of this image. Cueball is standing further down this steep and bare rocky slope looking down and right exiting the image to the right where the top of a small boulder lying below the frame can be seen | |||
| (963, 1080) | -37 | 6 | Mountain Slope right | White | Empty air above mountain slope right | |||||
| (963, 1081) | -37 | 7 | Mountain Slope right | White | Empty air above mountain slope right | |||||
| (963, 1082) | -37 | 8 | Mountain Slope right | White | Empty air above mountain slope right | |||||
| (963, 1083) | -37 | 9 | Mountain Slope right | White | Empty air above mountain slope right | |||||
| (963, 1084) | -37 | 10 | Mountain Slope right | White | Empty air above mountain slope right | |||||
| (964, 1069) | -36 | -5 | Plateau before Volcano | Black | Black, never seen, below lowest visible terrain, bottom images, with white line at the bottom | |||||
| (964, 1070) | -36 | -4 | Plateau before Volcano | Black | Black, never seen, below lowest visible terrain | |||||
| (964, 1071) | -36 | -3 | Plateau before Volcano | Black | Black, never seen, below lowest visible terrain | |||||
| (964, 1072) | -36 | -2 | Plateau before Volcano | Black | Black, never seen, below plateau before volcano | |||||
| (964, 1073) | -36 | -1 | Plateau before Volcano | Black | Black, never seen, below the plateau before the Volcano | |||||
| (964, 1074) | -36 | 0 | Plateau before Volcano | Black | Black, never seen, below the plateau before the Volcano | |||||
| (964, 1075) | -36 | 1 | Plateau before Volcano | Black | Black, never seen, below the plateau before the Volcano | |||||
| (964, 1076) | -36 | 2 | Plateau before Volcano | Black | Black, never seen, below the plateau before the Volcano | |||||
| (964, 1077) | -36 | 3 | Plateau before Volcano | Black | Black, can be seen, below the plateau before the Volcano | |||||
| (964, 1078) | -36 | 4 | Plateau before Volcano | Terrain | Y | Y | Megan sits on a rock outcrop and reads for two children, a boy with hair standing out wild and a child with black wavy hair. The text is partly in the image above and right | |||
| (964, 1079) | -36 | 5 | Plateau before Volcano | White - almost | Y | Empty air but with the top part of the text from Megan in the image below at the very bottom right of this image | ||||
| (964, 1080) | -36 | 6 | Plateau before Volcano | White | Empty air above plateau before volcano | |||||
| (965, 1069) | -35 | -5 | Plateau before Volcano | Black | Black, never seen, below lowest visible terrain, bottom images, with white line at the bottom | |||||
| (965, 1070) | -35 | -4 | Plateau before Volcano | Black | Black, never seen, below lowest visible terrain | |||||
| (965, 1071) | -35 | -3 | Plateau before Volcano | Black | Black, never seen, below lowest visible terrain | |||||
| (965, 1072) | -35 | -2 | Plateau before Volcano | Black | Black, never seen, below plateau before volcano | |||||
| (965, 1073) | -35 | -1 | Plateau before Volcano | Black | Black, never seen, below the plateau before the Volcano | |||||
| (965, 1074) | -35 | 0 | Plateau before Volcano | Black | Black, never seen, below the plateau before the Volcano | |||||
| (965, 1075) | -35 | 1 | Plateau before Volcano | Black | Black, never seen, below the plateau before the Volcano | |||||
| (965, 1076) | -35 | 2 | Plateau before Volcano | Black | Black, can be seen, below the plateau before the Volcano | |||||
| (965, 1077) | -35 | 3 | Plateau before Volcano | Black | Black, can be seen, below the plateau before the Volcano | |||||
| (965, 1078) | -35 | 4 | Plateau before Volcano | Terrain | Y | A rocky slope is falling down towards right. A small part of the text from the image to the left can be seen at the very top left corner | ||||
| (965, 1079) | -35 | 5 | Plateau before Volcano | White - almost | Y | Empty air but with the top left part of the text from Megan in the image below to the left at the very bottom left of this image | ||||
| (965, 1080) | -35 | 6 | Plateau before Volcano | White | Empty air above plateau before volcano | |||||
| (966, 1069) | -34 | -5 | Plateau before Volcano | Black | Black, never seen, below lowest visible terrain, bottom images, with white line at the bottom | |||||
| (966, 1070) | -34 | -4 | Plateau before Volcano | Black | Black, never seen, below lowest visible terrain | |||||
| (966, 1071) | -34 | -3 | Plateau before Volcano | Black | Black, never seen, below lowest visible terrain | |||||
| (966, 1072) | -34 | -2 | Plateau before Volcano | Black | Black, never seen, below plateau before volcano | |||||
| (966, 1073) | -34 | -1 | Plateau before Volcano | Black | Black, never seen, below the plateau before the Volcano | |||||
| (966, 1074) | -34 | 0 | Plateau before Volcano | Black | Black, never seen, below the plateau before the Volcano | |||||
| (966, 1075) | -34 | 1 | Plateau before Volcano | Black | Black, never seen, below the plateau before the Volcano | |||||
| (966, 1076) | -34 | 2 | Plateau before Volcano | Black | Black, can be seen, below the plateau before the Volcano | |||||
| (966, 1077) | -34 | 3 | Plateau before Volcano | Vaping Earth | Y | Almost black image with just a little ground in the upper right corner, but still with a vent from the vaping ground | ||||
| (966, 1078) | -34 | 4 | Plateau before Volcano | Vaping Earth | Rocky ground descending towards right. At the very right in the image the ground disappears bellow the image and here the top of a vent comes up from the vaping ground below | |||||
| (966, 1079) | -34 | 5 | Plateau before Volcano | White | Empty air above plateau before volcano | |||||
| (966, 1080) | -34 | 6 | Plateau before Volcano | White | Empty air above plateau before volcano | |||||
| (967, 1069) | -33 | -5 | Plateau before Volcano | Black | Black, never seen, below lowest visible terrain, bottom images, with white line at the bottom | |||||
| (967, 1070) | -33 | -4 | Plateau before Volcano | Black | Black, never seen, below lowest visible terrain | |||||
| (967, 1071) | -33 | -3 | Plateau before Volcano | Black | Black, never seen, below lowest visible terrain | |||||
| (967, 1072) | -33 | -2 | Plateau before Volcano | Black | Black, never seen, below plateau before volcano | |||||
| (967, 1073) | -33 | -1 | Plateau before Volcano | Black | Black, never seen, below the plateau before the Volcano | |||||
| (967, 1074) | -33 | 0 | Plateau before Volcano | Black | Black, never seen, below the plateau before the Volcano | |||||
| (967, 1075) | -33 | 1 | Plateau before Volcano | Black | Black, never seen, below the plateau before the Volcano | |||||
| (967, 1076) | -33 | 2 | Plateau before Volcano | Black | Black, can be seen, below the plateau before the Volcano | |||||
| (967, 1077) | -33 | 3 | Plateau before Volcano | Vaping Earth | Y | A large vent with vapor drifting toward right and several clouds | ||||
| (967, 1078) | -33 | 4 | Plateau before Volcano | Vaping Earth | The top of the vapor of the large vent from the vaping ground below can be seen to the right, the vapor drifting toward right. There are also several clouds | |||||
| (967, 1079) | -33 | 5 | Plateau before Volcano | White | Empty air above plateau before volcano | |||||
| (967, 1080) | -33 | 6 | Plateau before Volcano | White | Empty air above plateau before volcano | |||||
| (968, 1069) | -32 | -5 | Plateau before Volcano | Black | Black, never seen, below lowest visible terrain, bottom images, with white line at the bottom | |||||
| (968, 1070) | -32 | -4 | Plateau before Volcano | Black | Black, never seen, below lowest visible terrain | |||||
| (968, 1071) | -32 | -3 | Plateau before Volcano | Black | Black, never seen, below lowest visible terrain | |||||
| (968, 1072) | -32 | -2 | Plateau before Volcano | Black | Black, never seen, below plateau before volcano | |||||
| (968, 1073) | -32 | -1 | Plateau before Volcano | Black | Black, never seen, below the plateau before the Volcano | |||||
| (968, 1074) | -32 | 0 | Plateau before Volcano | Black | Black, never seen, below the plateau before the Volcano | |||||
| (968, 1075) | -32 | 1 | Plateau before Volcano | Black | Black, never seen, below the plateau before the Volcano | |||||
| (968, 1076) | -32 | 2 | Plateau before Volcano | Black | Black, can be seen, below the plateau before the Volcano | |||||
| (968, 1077) | -32 | 3 | Plateau before Volcano | Vaping Earth | Y | Y | Two large vents the largest to the left has its vapor drifting toward right, there are also several clouds and then Megan walks towards left | |||
| (968, 1078) | -32 | 4 | Plateau before Volcano | Vaping Earth | The tip of the vapor of the two large vents from the vaping ground below can be seen at the bottom of this image. There are also two small clouds. Megan walks below in the image below | |||||
| (968, 1079) | -32 | 5 | Plateau before Volcano | White | Empty air above plateau before volcano | |||||
| (968, 1080) | -32 | 6 | Plateau before Volcano | White | Empty air above plateau before volcano | |||||
| (969, 1069) | -31 | -5 | Plateau before Volcano | Black | Black, never seen, below lowest visible terrain, bottom images, with white line at the bottom | |||||
| (969, 1070) | -31 | -4 | Plateau before Volcano | Black | Black, never seen, below lowest visible terrain | |||||
| (969, 1071) | -31 | -3 | Plateau before Volcano | Black | Black, never seen, below lowest visible terrain | |||||
| (969, 1072) | -31 | -2 | Plateau before Volcano | Black | Black, never seen, below plateau before volcano | |||||
| (969, 1073) | -31 | -1 | Plateau before Volcano | Black | Black, never seen, below the plateau before the Volcano | |||||
| (969, 1074) | -31 | 0 | Plateau before Volcano | Black | Black, never seen, below the plateau before the Volcano | |||||
| (969, 1075) | -31 | 1 | Plateau before Volcano | Black | Black, never seen, below the plateau before the Volcano | |||||
| (969, 1076) | -31 | 2 | Plateau before Volcano | Black | Black, can be seen, below the plateau before the Volcano | |||||
| (969, 1077) | -31 | 3 | Plateau before Volcano | Vaping Earth | Y | Y | Y | A large vent with vapor going up and several clouds close to the ground and Cueball looking at the large vent while speaking | ||
| (969, 1078) | -31 | 4 | Plateau before Volcano | Vaping Earth | The top of the vapor from the large vent from the vaping ground below can be seen at the bottom left. There are also four small clouds. Cueball stands below in the image below | |||||
| (969, 1079) | -31 | 5 | Plateau before Volcano | White | Empty air above plateau before volcano | |||||
| (969, 1080) | -31 | 6 | Plateau before Volcano | White | Empty air above plateau before volcano | |||||
| (970, 1069) | -30 | -5 | Plateau before Volcano | Black | Black, never seen, below lowest visible terrain, bottom images, with white line at the bottom | |||||
| (970, 1070) | -30 | -4 | Plateau before Volcano | Black | Black, never seen, below lowest visible terrain | |||||
| (970, 1071) | -30 | -3 | Plateau before Volcano | Black | Black, never seen, below lowest visible terrain | |||||
| (970, 1072) | -30 | -2 | Plateau before Volcano | Black | Black, never seen, below plateau before volcano | |||||
| (970, 1073) | -30 | -1 | Plateau before Volcano | Black | Black, never seen, below the plateau before the Volcano | |||||
| (970, 1074) | -30 | 0 | Plateau before Volcano | Black | Black, never seen, below the plateau before the Volcano | |||||
| (970, 1075) | -30 | 1 | Plateau before Volcano | Black | Black, never seen, below the plateau before the Volcano | |||||
| (970, 1076) | -30 | 2 | Plateau before Volcano | Black | Black, can be seen, below the plateau before the Volcano | |||||
| (970, 1077) | -30 | 3 | Plateau before Volcano | Kite | Y | Y | Megan with a kite string going up right is standing on bare ground | |||
| (970, 1078) | -30 | 4 | Plateau before Volcano | White | Empty air. (Megan is standing with her kite on the ground below). | |||||
| (970, 1079) | -30 | 5 | Plateau before Volcano | White | Empty air above plateau before volcano | |||||
| (970, 1080) | -30 | 6 | Plateau before Volcano | White | Empty air above plateau before volcano | |||||
| (971, 1069) | -29 | -5 | Plateau before Volcano | Black | Black, never seen, below lowest visible terrain, bottom images, with white line at the bottom | |||||
| (971, 1070) | -29 | -4 | Plateau before Volcano | Black | Black, never seen, below lowest visible terrain | |||||
| (971, 1071) | -29 | -3 | Plateau before Volcano | Black | Black, never seen, below lowest visible terrain | |||||
| (971, 1072) | -29 | -2 | Plateau before Volcano | Black | Black, never seen, below plateau before volcano | |||||
| (971, 1073) | -29 | -1 | Plateau before Volcano | Black | Black, never seen, below the plateau before the Volcano | |||||
| (971, 1074) | -29 | 0 | Plateau before Volcano | Black | Black, never seen, below the plateau before the Volcano | |||||
| (971, 1075) | -29 | 1 | Plateau before Volcano | Black | Black, never seen, below the plateau before the Volcano | |||||
| (971, 1076) | -29 | 2 | Plateau before Volcano | Black | Black, can be seen, below the plateau before the Volcano | |||||
| (971, 1077) | -29 | 3 | Plateau before Volcano | Kite | Y | The kite string going up right is seen at the top left corner of this image with bare ground. (In the image above with the kite there is a coin) | ||||
| (971, 1078) | -29 | 4 | Plateau before Volcano | Kite | Y | 1 | The kite to the right with its string going up from the bottom left. At the end of the kite’s tail there is a coin | |||
| (971, 1079) | -29 | 5 | Plateau before Volcano | White | Empty air above plateau before volcano | |||||
| (971, 1080) | -29 | 6 | Plateau before Volcano | White | Empty air above plateau before volcano | |||||
| (972, 1069) | -28 | -5 | Plateau before Volcano | Black | Black, never seen, below lowest visible terrain, bottom images, with white line at the bottom | |||||
| (972, 1070) | -28 | -4 | Plateau before Volcano | Black | Black, never seen, below lowest visible terrain | |||||
| (972, 1071) | -28 | -3 | Plateau before Volcano | Black | Black, never seen, below lowest visible terrain | |||||
| (972, 1072) | -28 | -2 | Plateau before Volcano | Black | Black, never seen, below plateau before volcano | |||||
| (972, 1073) | -28 | -1 | Plateau before Volcano | Black | Black, never seen, below the plateau before the Volcano | |||||
| (972, 1074) | -28 | 0 | Plateau before Volcano | Black | Black, never seen, below the plateau before the Volcano | |||||
| (972, 1075) | -28 | 1 | Plateau before Volcano | Black | Black, never seen, below the plateau before the Volcano | |||||
| (972, 1076) | -28 | 2 | Plateau before Volcano | Black | Black, can be seen, below the plateau before the Volcano | |||||
| (972, 1077) | -28 | 3 | Plateau before Volcano | Terrain | Y | Y | A woman with long blonde hair (maybe Mrs. Lenhart) is pointing on the ground towards left. A girl with black hair and a boy with standing hair are standing behind her to the right on the grassy ground | |||
| (972, 1078) | -28 | 4 | Plateau before Volcano | White | Empty air above plateau before volcano | |||||
| (972, 1079) | -28 | 5 | Plateau before Volcano | White | Empty air above plateau before volcano | |||||
| (972, 1080) | -28 | 6 | Plateau before Volcano | White | Empty air above plateau before volcano | |||||
| (973, 1069) | -27 | -5 | Plateau before Volcano | Black | Black, never seen, below lowest visible terrain, bottom images, with white line at the bottom | |||||
| (973, 1070) | -27 | -4 | Plateau before Volcano | Black | Black, never seen, below lowest visible terrain | |||||
| (973, 1071) | -27 | -3 | Plateau before Volcano | Black | Black, never seen, below lowest visible terrain | |||||
| (973, 1072) | -27 | -2 | Plateau before Volcano | Black | Black, never seen, below plateau before volcano | |||||
| (973, 1073) | -27 | -1 | Plateau before Volcano | Black | Black, never seen, below the plateau before the Volcano | |||||
| (973, 1074) | -27 | 0 | Plateau before Volcano | Black | Black, never seen, below the plateau before the Volcano | |||||
| (973, 1075) | -27 | 1 | Plateau before Volcano | Black | Black, never seen, below the plateau before the Volcano | |||||
| (973, 1076) | -27 | 2 | Plateau before Volcano | Black | Black, can be seen, below the plateau before the Volcano | |||||
| (973, 1077) | -27 | 3 | Plateau before Volcano | Pond | Y | Y | The left bank of a small pond with typical water plants of the species Typha in the shallow parts near the bank. You can sink into the pond. The right part of the text from the girl in image to the left can be seen to the left | |||
| (973, 1078) | -27 | 4 | Plateau before Volcano | White | Empty air above plateau before volcano | |||||
| (973, 1079) | -27 | 5 | Plateau before Volcano | White | Empty air above plateau before volcano | |||||
| (973, 1080) | -27 | 6 | Plateau before Volcano | White | Empty air above plateau before volcano | |||||
| (974, 1069) | -26 | -5 | Plateau before Volcano | Black | Black, never seen, below lowest visible terrain, bottom images, with white line at the bottom | |||||
| (974, 1070) | -26 | -4 | Plateau before Volcano | Black | Black, never seen, below lowest visible terrain | |||||
| (974, 1071) | -26 | -3 | Plateau before Volcano | Black | Black, never seen, below lowest visible terrain | |||||
| (974, 1072) | -26 | -2 | Plateau before Volcano | Black | Black, never seen, below plateau before volcano | |||||
| (974, 1073) | -26 | -1 | Plateau before Volcano | Black | Black, never seen, below the plateau before the Volcano | |||||
| (974, 1074) | -26 | 0 | Plateau before Volcano | Black | Black, never seen, below the plateau before the Volcano | |||||
| (974, 1075) | -26 | 1 | Plateau before Volcano | Black | Black, never seen, below the plateau before the Volcano | |||||
| (974, 1076) | -26 | 2 | Plateau before Volcano | Black | Black, can be seen, below the plateau before the Volcano | |||||
| (974, 1077) | -26 | 3 | Plateau before Volcano | Pond | Y | The right bank of a small pond with typical water plants of the species Typha in the shallow parts near the bank. You can sink into the pond. To the right the ground rises rapidly | ||||
| (974, 1078) | -26 | 4 | Plateau before Volcano | White | Empty air above plateau before volcano | |||||
| (974, 1079) | -26 | 5 | Plateau before Volcano | White | Empty air above plateau before volcano | |||||
| (974, 1080) | -26 | 6 | Plateau before Volcano | White | Empty air above plateau before volcano | |||||
| (975, 1069) | -25 | -5 | Plateau before Volcano | Black | Black, never seen, below lowest visible terrain, bottom images, with white line at the bottom | |||||
| (975, 1070) | -25 | -4 | Plateau before Volcano | Black | Black, never seen, below lowest visible terrain | |||||
| (975, 1071) | -25 | -3 | Plateau before Volcano | Black | Black, never seen, below lowest visible terrain | |||||
| (975, 1072) | -25 | -2 | Plateau before Volcano | Black | Black, never seen, below plateau before volcano | |||||
| (975, 1073) | -25 | -1 | Plateau before Volcano | Black | Black, never seen, below the plateau before the Volcano | |||||
| (975, 1074) | -25 | 0 | Plateau before Volcano | Black | Black, never seen, below the plateau before the Volcano | |||||
| (975, 1075) | -25 | 1 | Plateau before Volcano | Black | Black, never seen, below the plateau before the Volcano | |||||
| (975, 1076) | -25 | 2 | Plateau before Volcano | Black | Black, can be seen, below the plateau before the Volcano | |||||
| (975, 1077) | -25 | 3 | Plateau before Volcano | Terrain | Y | Trees; five very small, on grassy ground close to the top of this image. The trees are small enough to stay below the top frame | ||||
| (975, 1078) | -25 | 4 | Plateau before Volcano | White | Empty air above plateau before volcano | |||||
| (975, 1079) | -25 | 5 | Plateau before Volcano | White | Empty air above plateau before volcano | |||||
| (975, 1080) | -25 | 6 | Plateau before Volcano | White | Empty air above plateau before volcano | |||||
| (976, 1069) | -24 | -5 | Plateau before Volcano | Black | Black, never seen, below lowest visible terrain, bottom images, with white line at the bottom | |||||
| (976, 1070) | -24 | -4 | Plateau before Volcano | Black | Black, never seen, below lowest visible terrain | |||||
| (976, 1071) | -24 | -3 | Plateau before Volcano | Black | Black, never seen, below lowest visible terrain | |||||
| (976, 1072) | -24 | -2 | Plateau before Volcano | Black | Black, never seen, below plateau before volcano | |||||
| (976, 1073) | -24 | -1 | Plateau before Volcano | Black | Black, never seen, below the plateau before the Volcano | |||||
| (976, 1074) | -24 | 0 | Plateau before Volcano | Black | Black, never seen, below the plateau before the Volcano | |||||
| (976, 1075) | -24 | 1 | Plateau before Volcano | Black | Black, never seen, below the plateau before the Volcano | |||||
| (976, 1076) | -24 | 2 | Plateau before Volcano | Black | Black, can be seen, below the plateau before the Volcano | |||||
| (976, 1077) | -24 | 3 | Plateau before Volcano | Terrain | Y | Trees; seven small, on grassy ground that descends to towards right keeping the trees below the top frame. The last tree is cut off at the right edge | ||||
| (976, 1078) | -24 | 4 | Plateau before Volcano | White | Empty air above plateau before volcano | |||||
| (976, 1079) | -24 | 5 | Plateau before Volcano | Space capsule | Y | Y | Y | A triangular space capsule (with a tip pointing up) of the type that was used to get the astronauts from the Moon landings back to Earth. It is being lowered through the atmosphere by three large parachutes (in the image above) which are holding on to the capsule with a total of 17 lines, which goes from the top of the capsule and out of the top of this image. There is an open hatch in the left part of the capsule beneath which Cueball looks out of the capsule while holding his smart phone out to get a signal. He is talking to a guy inside the capsule who replies. There is also a closed hatch to the right | ||
| (976, 1080) | -24 | 6 | Plateau before Volcano | Space capsule | Y | Y | Y | Three large parachutes; the one to the left has five lines the other two have six lines going up to them from the space capsule (in the image below). The parachutes overlap, and are completely black, and it can be discussed which lines belong to which parachute. On top of the central of the three parachutes sits a bird (chicken like) looking right and it is thinking, as indicated with a wavy bobble above it | ||
| (977, 1069) | -23 | -5 | Plateau before Volcano | Black | Black, never seen, below lowest visible terrain, bottom images, with white line at the bottom | |||||
| (977, 1070) | -23 | -4 | Plateau before Volcano | Black | Black, never seen, below lowest visible terrain | |||||
| (977, 1071) | -23 | -3 | Plateau before Volcano | Black | Black, never seen, below lowest visible terrain | |||||
| (977, 1072) | -23 | -2 | Plateau before Volcano | Black | Black, never seen, below plateau before volcano | |||||
| (977, 1073) | -23 | -1 | Plateau before Volcano | Black | Black, never seen, below the plateau before the Volcano | |||||
| (977, 1074) | -23 | 0 | Plateau before Volcano | Black | Black, never seen, below the plateau before the Volcano | |||||
| (977, 1075) | -23 | 1 | Plateau before Volcano | Black | Black, never seen, below the plateau before the Volcano | |||||
| (977, 1076) | -23 | 2 | Plateau before Volcano | Black | Black, can be seen, below the plateau before the Volcano | |||||
| (977, 1077) | -23 | 3 | Plateau before Volcano | Terrain | Y | Trees; four small, and five very small on grassy ground that descends a little towards right. The first tree is cut off at the left edge. There is a small boulder sticking out of the grass | ||||
| (977, 1078) | -23 | 4 | Plateau before Volcano | White | Empty air above plateau before volcano | |||||
| (977, 1079) | -23 | 5 | Plateau before Volcano | White | Empty air above plateau before volcano | |||||
| (977, 1080) | -23 | 6 | Plateau before Volcano | White | Empty air above plateau before volcano | |||||
| (978, 1069) | -22 | -5 | Plateau before Volcano | Black | Black, never seen, below lowest visible terrain, bottom images, with white line at the bottom | |||||
| (978, 1070) | -22 | -4 | Plateau before Volcano | Black | Black, never seen, below lowest visible terrain | |||||
| (978, 1071) | -22 | -3 | Plateau before Volcano | Black | Black, never seen, below lowest visible terrain | |||||
| (978, 1072) | -22 | -2 | Plateau before Volcano | Black | Black, never seen, below plateau before volcano | |||||
| (978, 1073) | -22 | -1 | Plateau before Volcano | Black | Black, never seen, below the plateau before the Volcano | |||||
| (978, 1074) | -22 | 0 | Plateau before Volcano | Black | Black, never seen, below the plateau before the Volcano | |||||
| (978, 1075) | -22 | 1 | Plateau before Volcano | Black | Black, never seen, below the plateau before the Volcano | |||||
| (978, 1076) | -22 | 2 | Plateau before Volcano | Black | Black, can be seen, below the plateau before the Volcano | |||||
| (978, 1077) | -22 | 3 | Plateau before Volcano | Terrain | Y | A girl with ponytail runs to the left, jumping of a protruding stone towards a long haired girl with a bun, who holds out her arms towards the other girl. The bun girl stands on a slab of stone on the grassy ground. They are clearly children, much lower than the adults in the comic. There is a rather high mound to the left | ||||
| (978, 1078) | -22 | 4 | Plateau before Volcano | White | Empty air above plateau before volcano | |||||
| (978, 1079) | -22 | 5 | Plateau before Volcano | White | Empty air above plateau before volcano | |||||
| (978, 1080) | -22 | 6 | Plateau before Volcano | White | Empty air above plateau before volcano | |||||
| (979, 1069) | -21 | -5 | Plateau before Volcano | Black | Black, never seen, below lowest visible terrain, bottom images, with white line at the bottom | |||||
| (979, 1070) | -21 | -4 | Plateau before Volcano | Black | Black, never seen, below lowest visible terrain | |||||
| (979, 1071) | -21 | -3 | Plateau before Volcano | Black | Black, never seen, below lowest visible terrain | |||||
| (979, 1072) | -21 | -2 | Plateau before Volcano | Black | Black, can be seen, below the well | |||||
| (979, 1073) | -21 | -1 | Plateau before Volcano | Black | Black, can be seen, left of the well | |||||
| (979, 1074) | -21 | 0 | Plateau before Volcano | Black | Black, can be seen, left of the well | |||||
| (979, 1075) | -21 | 1 | Plateau before Volcano | Black | Black, can be seen, left of the well | |||||
| (979, 1076) | -21 | 2 | Plateau before Volcano | Black | Black, can be seen, below the plateau before the Volcano | |||||
| (979, 1077) | -21 | 3 | Plateau before Volcano | Terrain | Grassy ground, rather uneven | |||||
| (979, 1078) | -21 | 4 | Plateau before Volcano | White | Empty air above plateau before volcano | |||||
| (979, 1079) | -21 | 5 | Plateau before Volcano | White | Empty air above plateau before volcano | |||||
| (979, 1080) | -21 | 6 | Plateau before Volcano | White | Empty air above plateau before volcano | |||||
| (980, 1069) | -20 | -5 | Plateau before Volcano | Black | Black, never seen, below lowest visible terrain, bottom images, with white line at the bottom | |||||
| (980, 1070) | -20 | -4 | Plateau before Volcano | Black | Black, never seen, below lowest visible terrain | |||||
| (980, 1071) | -20 | -3 | Plateau before Volcano | Black | Black, never seen, below lowest visible terrain | |||||
| (980, 1072) | -20 | -2 | Plateau before Volcano | Black | Black, can be seen, below the well | |||||
| (980, 1073) | -20 | -1 | Plateau before Volcano | Well bottom | Y | Y | 1 | Well: Girl at the bottom of the well inside the water, which is shallow. She speaks, her text written in white in the dark to the right of her. In front of her to the left over the water is a coin | ||
| (980, 1074) | -20 | 0 | Plateau before Volcano | Well shaft | Well: Shaft of well, one image above the bottom, two below the top | |||||
| (980, 1075) | -20 | 1 | Plateau before Volcano | Well shaft | Well: Shaft of well, the middle with two images above and below | |||||
| (980, 1076) | -20 | 2 | Plateau before Volcano | Well shaft | Well: Shaft of well, the first image into the well, still two images down to the bottom | |||||
| (980, 1077) | -20 | 3 | Plateau before Volcano | Well top | Y | Y | Well: Cueball looking into a covered well, stones at each side and a small triangular roof is held up over the top of the well by to sticks. There are four images below down to the bottom | |||
| (980, 1078) | -20 | 4 | Plateau before Volcano | White | Empty air above plateau before volcano | |||||
| (980, 1079) | -20 | 5 | Plateau before Volcano | White | Empty air above plateau before volcano | |||||
| (980, 1080) | -20 | 6 | Plateau before Volcano | White | Empty air above plateau before volcano | |||||
| (981, 1069) | -19 | -5 | Plateau before Volcano | Black | Black, never seen, below lowest visible terrain, bottom images, with white line at the bottom | |||||
| (981, 1070) | -19 | -4 | Plateau before Volcano | Black | Black, never seen, below lowest visible terrain | |||||
| (981, 1071) | -19 | -3 | Plateau before Volcano | Black | Black, never seen, below lowest visible terrain | |||||
| (981, 1072) | -19 | -2 | Plateau before Volcano | Black | Black, can be seen, below the well | |||||
| (981, 1073) | -19 | -1 | Plateau before Volcano | Black | Black, can be seen, right of the well | |||||
| (981, 1074) | -19 | 0 | Plateau before Volcano | Black | Black, can be seen, right of the well | |||||
| (981, 1075) | -19 | 1 | Plateau before Volcano | Black | Black, can be seen, right of the well | |||||
| (981, 1076) | -19 | 2 | Plateau before Volcano | Black | Black, can be seen, below the plateau before the Volcano | |||||
| (981, 1077) | -19 | 3 | Plateau before Volcano | Gas station | Y | At the left edge of the gas station there is a stop sign, which can be seen in the right part of this image. The ground is uneven with little grass to the left of the sign | ||||
| (981, 1078) | -19 | 4 | Plateau before Volcano | White | Empty air above plateau before volcano | |||||
| (981, 1079) | -19 | 5 | Plateau before Volcano | White | Empty air above plateau before volcano | |||||
| (981, 1080) | -19 | 6 | Plateau before Volcano | White | Empty air above plateau before volcano | |||||
| (982, 1069) | -18 | -5 | Plateau before Volcano | Black | Black, never seen, below lowest visible terrain, bottom images, with white line at the bottom | |||||
| (982, 1070) | -18 | -4 | Plateau before Volcano | Black | Black, never seen, below lowest visible terrain | |||||
| (982, 1071) | -18 | -3 | Plateau before Volcano | Black | Black, never seen, below lowest visible terrain | |||||
| (982, 1072) | -18 | -2 | Plateau before Volcano | Black | Black, never seen, below plateau before volcano | |||||
| (982, 1073) | -18 | -1 | Plateau before Volcano | Black | Black, never seen, below the plateau before the Volcano | |||||
| (982, 1074) | -18 | 0 | Plateau before Volcano | Black | Black, never seen, below the plateau before the Volcano | |||||
| (982, 1075) | -18 | 1 | Plateau before Volcano | Black | Black, never seen, below the plateau before the Volcano | |||||
| (982, 1076) | -18 | 2 | Plateau before Volcano | Black | Black, can be seen, below the plateau before the Volcano | |||||
| (982, 1077) | -18 | 3 | Plateau before Volcano | Gas station | Y | Y | An X-wing Starfighter is parked to the left of the gas stations stand and Megan standing to the right of the spacecraft is attempting to pull the gas handle from the stand to her X-wing to refuel it. The stand is in the next image to the right where the right tip of the X-wing is also located. (Two images above the Megan flies two birds connected with a string. They carry a coin) | |||
| (982, 1078) | -18 | 4 | Plateau before Volcano | White | Empty air. (Below this image it the X-wing and above are two bids attached with a string and carrying a coin). | |||||
| (982, 1079) | -18 | 5 | Plateau before Volcano | White with Birds in the sky | Y | Y | 1 | Empty air except for two birds that are tied together with a string, and on that string there hangs a coin. The X-wing and Megan is two images below on the ground | ||
| (982, 1080) | -18 | 6 | Plateau before Volcano | White | Empty air above plateau before volcano | |||||
| (983, 1069) | -17 | -5 | Plateau before Volcano | Black | Black, never seen, below lowest visible terrain, bottom images, with white line at the bottom | |||||
| (983, 1070) | -17 | -4 | Plateau before Volcano | Black | Black, never seen, below lowest visible terrain | |||||
| (983, 1071) | -17 | -3 | Plateau before Volcano | Black | Black, never seen, below lowest visible terrain | |||||
| (983, 1072) | -17 | -2 | Plateau before Volcano | Black | Black, never seen, below plateau before volcano | |||||
| (983, 1073) | -17 | -1 | Plateau before Volcano | Black | Black, never seen, below the plateau before the Volcano | |||||
| (983, 1074) | -17 | 0 | Plateau before Volcano | Black | Black, never seen, below the plateau before the Volcano | |||||
| (983, 1075) | -17 | 1 | Plateau before Volcano | Black | Black, never seen, below the plateau before the Volcano | |||||
| (983, 1076) | -17 | 2 | Plateau before Volcano | Black | Black, can be seen, below the plateau before the Volcano | |||||
| (983, 1077) | -17 | 3 | Plateau before Volcano | Gas station | Y | Y | 1 | There is a small almost square building to the right; Cueball is sitting on top looking to the right. On the side pointing left of the building there is a room with a girl with ponytail and a black cap on behind a desk. It looks like a store with a large window panel with smaller square windows. There is a coin just inside the door to this room. This is the store for the gas station, and to the left is the T-shaped stand with two gas outlets. To the left the hose for the left standers gas handle is pulled out of the image to the left. Here is also the right tip of the X-wings right wing. | ||
| (983, 1078) | -17 | 4 | Plateau before Volcano | White | Empty air above plateau before volcano | |||||
| (983, 1079) | -17 | 5 | Plateau before Volcano | White | Empty air above plateau before volcano | |||||
| (983, 1080) | -17 | 6 | Plateau before Volcano | White | Empty air above plateau before volcano | |||||
| (984, 1069) | -16 | -5 | Plateau before Volcano | Black | Black, never seen, below lowest visible terrain, bottom images, with white line at the bottom | |||||
| (984, 1070) | -16 | -4 | Plateau before Volcano | Black | Black, never seen, below lowest visible terrain | |||||
| (984, 1071) | -16 | -3 | Plateau before Volcano | Black | Black, never seen, below lowest visible terrain | |||||
| (984, 1072) | -16 | -2 | Plateau before Volcano | Black | Black, never seen, below plateau before volcano | |||||
| (984, 1073) | -16 | -1 | Plateau before Volcano | Black | Black, never seen, below the plateau before the Volcano | |||||
| (984, 1074) | -16 | 0 | Plateau before Volcano | Black | Black, never seen, below the plateau before the Volcano | |||||
| (984, 1075) | -16 | 1 | Plateau before Volcano | Black | Black, can be seen, below the plateau before the Volcano | |||||
| (984, 1076) | -16 | 2 | Plateau before Volcano | Black | Black, can be seen, below the plateau before the Volcano | |||||
| (984, 1077) | -16 | 3 | Plateau before Volcano | Terrain | Y | Trees; One large tree on rocky ground with little grass | ||||
| (984, 1078) | -16 | 4 | Plateau before Volcano | White | Empty air above plateau before volcano | |||||
| (984, 1079) | -16 | 5 | Plateau before Volcano | White | Empty air above plateau before volcano | |||||
| (984, 1080) | -16 | 6 | Plateau before Volcano | White | Empty air above plateau before volcano | |||||
| (985, 1069) | -15 | -5 | Plateau before Volcano | Black | Black, never seen, below lowest visible terrain, bottom images, with white line at the bottom | |||||
| (985, 1070) | -15 | -4 | Plateau before Volcano | Black | Black, never seen, below lowest visible terrain | |||||
| (985, 1071) | -15 | -3 | Plateau before Volcano | Black | Black, never seen, below lowest visible terrain | |||||
| (985, 1072) | -15 | -2 | Plateau before Volcano | Black | Black, never seen, below plateau before volcano | |||||
| (985, 1073) | -15 | -1 | Plateau before Volcano | Black | Black, never seen, below the plateau before the Volcano | |||||
| (985, 1074) | -15 | 0 | Plateau before Volcano | Black | Black, can be seen, below the plateau before the Volcano | |||||
| (985, 1075) | -15 | 1 | Plateau before Volcano | Black | Black, can be seen, below the plateau before the Volcano | |||||
| (985, 1076) | -15 | 2 | Plateau before Volcano | Cliff | Y | A cliff to the left ends up in a plateau. To the right of this image Cueball is talking to a girl, but that is outside this image, but some of the text can be seen here | ||||
| (985, 1077) | -15 | 3 | Plateau before Volcano | Cliff | Y | Here begins the cliff that goes steep down towards right. At the bottom right comer is a little text from Cueball who are in the image below to the right | ||||
| (985, 1078) | -15 | 4 | Plateau before Volcano | White | Empty air above plateau before volcano | |||||
| (985, 1079) | -15 | 5 | Plateau before Volcano | White | Empty air above plateau before volcano | |||||
| (985, 1080) | -15 | 6 | Plateau before Volcano | White | Empty air above plateau before volcano | |||||
| (986, 1069) | -14 | -5 | Plateau before Volcano | Black | Black, never seen, below lowest visible terrain, bottom images, with white line at the bottom | |||||
| (986, 1070) | -14 | -4 | Plateau before Volcano | Black | Black, never seen, below lowest visible terrain | |||||
| (986, 1071) | -14 | -3 | Plateau before Volcano | Black | Black, never seen, below lowest visible terrain | |||||
| (986, 1072) | -14 | -2 | Plateau before Volcano | Black | Black, never seen, below plateau before volcano | |||||
| (986, 1073) | -14 | -1 | Plateau before Volcano | Black | Black, never seen, below the plateau before the Volcano | |||||
| (986, 1074) | -14 | 0 | Plateau before Volcano | Black | Black, can be seen, below the plateau before the Volcano | |||||
| (986, 1075) | -14 | 1 | Plateau before Volcano | Cliff | Y | Ponytail is crawling up a sheer cliff | ||||
| (986, 1076) | -14 | 2 | Plateau before Volcano | Cliff | Y | Y | Cueball is pointing while talking to a small girl with a ponytail. They are standing on an overhang at a plateau of a steep cliff. Not all their text can be seen in this image, but spills into both the above and that to the left | |||
| (986, 1077) | -14 | 3 | Plateau before Volcano | Cliff/White | Y | Empty air over the cliff, with part of the text spoken by Cueball and the little girl with ponytail in the image below | ||||
| (986, 1078) | -14 | 4 | Plateau before Volcano | White | Empty air above plateau before volcano | |||||
| (986, 1079) | -14 | 5 | Plateau before Volcano | White | Empty air above plateau before volcano | |||||
| (986, 1080) | -14 | 6 | Plateau before Volcano | White | Empty air above plateau before volcano | |||||
| (987, 1069) | -13 | -5 | Plateau before Volcano | Black | Black, never seen, below lowest visible terrain, bottom images, with white line at the bottom | |||||
| (987, 1070) | -13 | -4 | Plateau before Volcano | Black | Black, never seen, below lowest visible terrain | |||||
| (987, 1071) | -13 | -3 | Plateau before Volcano | Black | Black, never seen, below lowest visible terrain | |||||
| (987, 1072) | -13 | -2 | Plateau before Volcano | Black | Black, never seen, below plateau before volcano | |||||
| (987, 1073) | -13 | -1 | Plateau before Volcano | Black | Black, can be seen, below the plateau before the Volcano | |||||
| (987, 1074) | -13 | 0 | Plateau before Volcano | Terrain | Y | Bottom of hamster ball can be seen in this almost black image | ||||
| (987, 1075) | -13 | 1 | Plateau before Volcano | Terrain | Y | Y | Trees; A big tree entirely inside the image. A small girl with black hair comes bouncing towards the right inside a human sized hamster ball her hair flowing wild around her head - she rolls towards the bowling pins to the right | |||
| (987, 1076) | -13 | 2 | Plateau before Volcano | White | Empty air above plateau before volcano | |||||
| (987, 1077) | -13 | 3 | Plateau before Volcano | White | Empty air above plateau before volcano | |||||
| (987, 1078) | -13 | 4 | Plateau before Volcano | White | Empty air above plateau before volcano | |||||
| (987, 1079) | -13 | 5 | Plateau before Volcano | White | Empty air above plateau before volcano | |||||
| (987, 1080) | -13 | 6 | Plateau before Volcano | White | Empty air above plateau before volcano | |||||
| (988, 1069) | -12 | -5 | Ground level left | Black | Black, never seen, below lowest visible terrain, bottom images, with white line at the bottom | |||||
| (988, 1070) | -12 | -4 | Ground level left | Black | Black, never seen, below lowest visible terrain | |||||
| (988, 1071) | -12 | -3 | Ground level left | Black | Black, never seen, below lowest visible terrain | |||||
| (988, 1072) | -12 | -2 | Ground level left | Black | Black, never seen, below ground level left | |||||
| (988, 1073) | -12 | -1 | Ground level left | Black | Black, can be seen, below the ground level left | |||||
| (988, 1074) | -12 | 0 | Ground level left | Terrain | Trees; four very small and a bush | |||||
| (988, 1075) | -12 | 1 | Ground level left | White - almost | Trees; The tip of a very small tree is the only thing at the bottom of this almost white image | |||||
| (988, 1076) | -12 | 2 | Ground level left | White | Empty air above ground level left | |||||
| (988, 1109) | -12 | 35 | Floating Rock Island | White | Empty air above floating rock island | |||||
| (988, 1110) | -12 | 36 | Floating Rock Island | Rocks in air | Bottom of floating rock island, just one big rock in upper right corner | |||||
| (988, 1111) | -12 | 37 | Floating Rock Island | Top of Rock Island | The left edge of the top of the floating rock island | |||||
| (988, 1112) | -12 | 38 | Floating Rock Island | White | Empty air above floating rock island | |||||
| (989, 1069) | -11 | -5 | Ground level left | Black | Black, never seen, below lowest visible terrain, bottom images, with white line at the bottom | |||||
| (989, 1070) | -11 | -4 | Ground level left | Black | Black, never seen, below lowest visible terrain | |||||
| (989, 1071) | -11 | -3 | Ground level left | Black | Black, never seen, below lowest visible terrain | |||||
| (989, 1072) | -11 | -2 | Ground level left | Black | Black, never seen, below ground level left | |||||
| (989, 1073) | -11 | -1 | Ground level left | Black | Black, can be seen, below the ground level left | |||||
| (989, 1074) | -11 | 0 | Ground level left | Terrain | Y | Y | Bowling: A little girl with a hair bun standing behind a giant ten pin bowling pin setup. The front pin is towards the left, and she almost touches one of the four in the last row. She is only half as tall as the pins and their top is cut off by the frame | |||
| (989, 1075) | -11 | 1 | Ground level left | Terrain | Y | Bowling: The top of ten bowling pins are at the bottom of this image | ||||
| (989, 1076) | -11 | 2 | Ground level left | White | Empty air above ground level left | |||||
| (989, 1109) | -11 | 35 | Floating Rock Island | Rocks in air | Bottom of floating rock island, just one big rock in upper right corner | |||||
| (989, 1110) | -11 | 36 | Floating Rock Island | Rocks in air | Bottom of floating rock island, several loose big rocks | |||||
| (989, 1111) | -11 | 37 | Floating Rock Island | Rock on rock island | The left part of the top of the floating rock island with a big rock on top to the right | |||||
| (989, 1112) | -11 | 38 | Floating Rock Island | White - almost | Empty air except for a small part of the big rock on top of floating rock island can just be seen to the bottom right in this image | |||||
| (990, 1069) | -10 | -5 | Ground level left | Black | Black, never seen, below lowest visible terrain, bottom images, with white line at the bottom | |||||
| (990, 1070) | -10 | -4 | Ground level left | Black | Black, never seen, below lowest visible terrain | |||||
| (990, 1071) | -10 | -3 | Ground level left | Black | Black, never seen, below lowest visible terrain | |||||
| (990, 1072) | -10 | -2 | Ground level left | Black | Black, never seen, below ground level left | |||||
| (990, 1073) | -10 | -1 | Ground level left | Black | Black, can be seen, below the ground level left | |||||
| (990, 1074) | -10 | 0 | Ground level left | Terrain | Y | Cueball is talking to Ponytail, the text is in the two frames above and right | ||||
| (990, 1075) | -10 | 1 | Ground level left | White - almost | Y | Most of the text from Cueball who is below this image talking to Ponytail | ||||
| (990, 1076) | -10 | 2 | Ground level left | White | Empty air above ground level left | |||||
| (990, 1109) | -10 | 35 | Floating Rock Island | Rocks in air | Bottom of floating rock island, several loose big rocks | |||||
| (990, 1110) | -10 | 36 | Floating Rock Island | Black - almost | Black inside the floating rock island at the bottom, just above the largest and central rock almost completely inside the rock island, but there is a small white spark at the very bottom left of this image | |||||
| (990, 1111) | -10 | 37 | Floating Rock Island | Rock on rock island | The left part of the top of the floating rock island with a big rock on top to the left with a step. (Just above the left side of this image in the image above there is a coin above this step). | |||||
| (990, 1112) | -10 | 38 | Floating Rock Island | Rock on rock island | 1 | The highest point on the big rock on top of floating rock island. There is a coin at the bottom of this image next to the right side of this big rocks tip, | ||||
| (991, 1069) | -9 | -5 | Ground level left | Black | Black, never seen, below lowest visible terrain, bottom images, with white line at the bottom | |||||
| (991, 1070) | -9 | -4 | Ground level left | Black | Black, never seen, below lowest visible terrain | |||||
| (991, 1071) | -9 | -3 | Ground level left | Black | Black, never seen, below lowest visible terrain | |||||
| (991, 1072) | -9 | -2 | Ground level left | Black | Black, never seen, below ground level left | |||||
| (991, 1073) | -9 | -1 | Ground level left | Black | Black, can be seen, below the ground level left | |||||
| (991, 1074) | -9 | 0 | Ground level left | Terrain | Y | Y | Beret Guy is following a small flying insect | |||
| (991, 1075) | -9 | 1 | Ground level left | White - almost | Y | Y | The right part of the text from Cueball who is below and left of this image talking to Ponytail. The tip of Beret Guys beret can be seen in the middle of the image, him being below | |||
| (991, 1076) | -9 | 2 | Ground level left | White | Empty air above ground level left | |||||
| (991, 1109) | -9 | 35 | Floating Rock Island | Rocks in air | Bottom of floating rock island, largest and central rock | |||||
| (991, 1110) | -9 | 36 | Floating Rock Island | Black | Black, can be seen, inside floating rock island | |||||
| (991, 1111) | -9 | 37 | Floating Rock Island | Terrain on rock island | Central part of the top of the floating rock island | |||||
| (991, 1112) | -9 | 38 | Floating Rock Island | White | Empty air above floating rock island | |||||
| (992, 1069) | -8 | -5 | Washington Monument | Black | Black, never seen, below lowest visible terrain, bottom images, with white line at the bottom | |||||
| (992, 1070) | -8 | -4 | Washington Monument | Black | Black, never seen, below lowest visible terrain | |||||
| (992, 1071) | -8 | -3 | Washington Monument | Black | Black, never seen, below lowest visible terrain | |||||
| (992, 1072) | -8 | -2 | Washington Monument | Black | Black, never seen, below Washington Monument | |||||
| (992, 1073) | -8 | -1 | Washington Monument | Black | Black, can be seen, below the monument | |||||
| (992, 1074) | -8 | 0 | Washington Monument | Terrain | Just a grassy slope down towards right | |||||
| (992, 1075) | -8 | 1 | Washington Monument | White | Empty air above Washington monument | |||||
| (992, 1076) | -8 | 2 | Washington Monument | White | Empty air above Washington monument | |||||
| (992, 1077) | -8 | 3 | Washington Monument | White | Empty air above Washington monument | |||||
| (992, 1078) | -8 | 4 | Washington Monument | White | Empty air above Washington monument | |||||
| (992, 1079) | -8 | 5 | Washington Monument | White | Empty air above Washington monument | |||||
| (992, 1080) | -8 | 6 | Washington Monument | White | Empty air above Washington monument | |||||
| (992, 1081) | -8 | 7 | Washington Monument | White | Empty air above Washington monument | |||||
| (992, 1082) | -8 | 8 | Washington Monument | White | Empty air above Washington monument | |||||
| (992, 1083) | -8 | 9 | Washington Monument | White | Empty air above Washington monument | |||||
| (992, 1084) | -8 | 10 | Washington Monument | White | Empty air above Washington monument | |||||
| (992, 1109) | -8 | 35 | Floating Rock Island | Rocks in air | 1 | Bottom of floating rock island, several loose big rocks. There is a coin in the central part of this image | ||||
| (992, 1110) | -8 | 36 | Floating Rock Island | Black | Black, can be seen, inside floating rock island | |||||
| (992, 1111) | -8 | 37 | Floating Rock Island | Terrain on rock island | The right part of the top of the floating rock island | |||||
| (992, 1112) | -8 | 38 | Floating Rock Island | White | Empty air above floating rock island | |||||
| (993, 1069) | -7 | -5 | Washington Monument | Black | Black, never seen, below lowest visible terrain, bottom images, with white line at the bottom | |||||
| (993, 1070) | -7 | -4 | Washington Monument | Black | Black, never seen, below lowest visible terrain | |||||
| (993, 1071) | -7 | -3 | Washington Monument | Black | Black, never seen, below lowest visible terrain | |||||
| (993, 1072) | -7 | -2 | Washington Monument | Black | Black, never seen, below Washington Monument | |||||
| (993, 1073) | -7 | -1 | Washington Monument | Black | Black, can be seen, below the monument | |||||
| (993, 1074) | -7 | 0 | Washington Monument | Flagpole | Y | The base of a flagpole | ||||
| (993, 1075) | -7 | 1 | Washington Monument | Flagpole | The top of a flagpole with a uniform black flag at the top blowing left. On top of the truck there is a sitting duck | |||||
| (993, 1076) | -7 | 2 | Washington Monument | White | Empty air above Washington monument | |||||
| (993, 1077) | -7 | 3 | Washington Monument | White | Empty air above Washington monument | |||||
| (993, 1078) | -7 | 4 | Washington Monument | White | Empty air above Washington monument | |||||
| (993, 1079) | -7 | 5 | Washington Monument | White | Empty air above Washington monument | |||||
| (993, 1080) | -7 | 6 | Washington Monument | White | Empty air above Washington monument | |||||
| (993, 1081) | -7 | 7 | Washington Monument | White | Empty air above Washington monument | |||||
| (993, 1082) | -7 | 8 | Washington Monument | White | Empty air above Washington monument | |||||
| (993, 1083) | -7 | 9 | Washington Monument | White | Empty air above Washington monument | |||||
| (993, 1084) | -7 | 10 | Washington Monument | White | Empty air above Washington monument | |||||
| (993, 1109) | -7 | 35 | Floating Rock Island | Rocks in air | Bottom of floating rock island, just a few rocks in upper left corner | |||||
| (993, 1110) | -7 | 36 | Floating Rock Island | Rocks in air | Bottom of floating rock island, several loose big rocks | |||||
| (993, 1111) | -7 | 37 | Floating Rock Island | Terrain on rock island | The right part of the top of the floating rock island | |||||
| (993, 1112) | -7 | 38 | Floating Rock Island | White | Empty air above floating rock island | |||||
| (994, 1069) | -6 | -5 | Washington Monument | Black | Black, never seen, below lowest visible terrain, bottom images, with white line at the bottom | |||||
| (994, 1070) | -6 | -4 | Washington Monument | Black | Black, never seen, below lowest visible terrain | |||||
| (994, 1071) | -6 | -3 | Washington Monument | Black | Black, never seen, below lowest visible terrain | |||||
| (994, 1072) | -6 | -2 | Washington Monument | Black | Black, never seen, below Washington Monument | |||||
| (994, 1073) | -6 | -1 | Washington Monument | Black | Black, can be seen, below the monument | |||||
| (994, 1074) | -6 | 0 | Washington Monument | Washington Monument left base | Y | Y | Y | Cueball is talking to Megan while looking up at the monument | ||
| (994, 1075) | -6 | 1 | Washington Monument | Washington Monument left side | Washington Monument’s left side above the base | |||||
| (994, 1076) | -6 | 2 | Washington Monument | Washington Monument left side | Washington Monument’s left side | |||||
| (994, 1077) | -6 | 3 | Washington Monument | Washington Monument left side | Washington Monument’s left side - the fault line half way up is just visible | |||||
| (994, 1078) | -6 | 4 | Washington Monument | Washington Monument left side | Washington Monument’s left side | |||||
| (994, 1079) | -6 | 5 | Washington Monument | Washington Monument left side | Washington Monument’s left side almost white image | |||||
| (994, 1080) | -6 | 6 | Washington Monument | White | Empty air above Washington monument | |||||
| (994, 1081) | -6 | 7 | Washington Monument | White | Empty air above Washington monument | |||||
| (994, 1082) | -6 | 8 | Washington Monument | White | Empty air above Washington monument | |||||
| (994, 1083) | -6 | 9 | Washington Monument | White | Empty air above Washington monument | |||||
| (994, 1084) | -6 | 10 | Washington Monument | White | Empty air above Washington monument | |||||
| (994, 1109) | -6 | 35 | Floating Rock Island | White | Empty air above floating rock island | |||||
| (994, 1110) | -6 | 36 | Floating Rock Island | Rocks in air | Bottom of floating rock island, just a few rocks in upper left corner | |||||
| (994, 1111) | -6 | 37 | Floating Rock Island | Top of Rock Island | Y | The right edge of the top of the floating rock island. Ponytail has just jumped and Megan comes running behind her as they perform a "base jump" from this rock, with their parachutes on their bags | ||||
| (994, 1112) | -6 | 38 | Floating Rock Island | White | Empty air above floating rock island | |||||
| (995, 1069) | -5 | -5 | Washington Monument | Black | Black, never seen, below lowest visible terrain, bottom images, with white line at the bottom | |||||
| (995, 1070) | -5 | -4 | Washington Monument | Black | Black, never seen, below lowest visible terrain | |||||
| (995, 1071) | -5 | -3 | Washington Monument | Black | Black, never seen, below lowest visible terrain | |||||
| (995, 1072) | -5 | -2 | Washington Monument | Black | Black, never seen, below Washington Monument | |||||
| (995, 1073) | -5 | -1 | Washington Monument | Black | Black, can be seen, below the monument | |||||
| (995, 1074) | -5 | 0 | Washington Monument | Washington Monument right base | Y | An arrow is pointing towards the hidden entrance through the base of the monument | ||||
| (995, 1075) | -5 | 1 | Washington Monument | Washington Monument right side | Washington Monument’s right side above the base | |||||
| (995, 1076) | -5 | 2 | Washington Monument | Washington Monument right side | Washington Monument’s right side | |||||
| (995, 1077) | -5 | 3 | Washington Monument | Washington Monument right side | Washington Monument’s right side - the fault line half way up is visible | |||||
| (995, 1078) | -5 | 4 | Washington Monument | Washington Monument right side | Washington Monument’s right side | |||||
| (995, 1079) | -5 | 5 | Washington Monument | Washington Monument right side | Washington Monument’s right side, and just a bit of the left side at the top of the image | |||||
| (995, 1080) | -5 | 6 | Washington Monument | Washington Monument both sides | Washington Monument’s both sides in the left side of the image | |||||
| (995, 1081) | -5 | 7 | Washington Monument | Washington Monument both sides | Washington Monument’s both sides in the left side of the image | |||||
| (995, 1082) | -5 | 8 | Washington Monument | Washington Monument both sides | Washington Monument’s both sides in the left side of the image | |||||
| (995, 1083) | -5 | 9 | Washington Monument | Washington Monument tip | Y | Y | Y | Washington Monument’s tip. Two ropes are teetered to the very top, and on the right side hang White Hat with a bundle of rope behind him and on the left side hang Cueball with a similar bundle. Cueballs heads is just at the lower edge of the white tip. He is holding on to his rope with both hands. White Hat is a little below the white tip. He is only holding on to the rope with one hand, while his body is turned away from the tip to the right as he is both looking and pointing up and right. The very tip is cut off by the top of the frame | ||
| (995, 1084) | -5 | 10 | Washington Monument | Washington Monument tip | Y | Y | Washington Monument’s very tip only. Two ropes are teetered to the very top and the text spoken by Cueball and most of White Hats are in this image although they are in the image below | |||
| (995, 1109) | -5 | 35 | Floating Rock Island | White | Empty air above floating rock island | |||||
| (995, 1110) | -5 | 36 | Floating Rock Island | White | Empty air above floating rock island | |||||
| (995, 1111) | -5 | 37 | Floating Rock Island | White | Empty air above floating rock island | |||||
| (995, 1112) | -5 | 38 | Floating Rock Island | White | Empty air above floating rock island | |||||
| (996, 1069) | -4 | -5 | Left of Play Area | Black | Black, never seen, below lowest visible terrain, bottom images, with white line at the bottom | |||||
| (996, 1070) | -4 | -4 | Left of Play Area | Black | Black, never seen, below lowest visible terrain | |||||
| (996, 1071) | -4 | -3 | Left of Play Area | Black | Black, never seen, below lowest visible terrain | |||||
| (996, 1072) | -4 | -2 | Left of Play Area | Black | Black, never seen, below left of play area | |||||
| (996, 1073) | -4 | -1 | Left of Play Area | Black | Black, can be seen, below the plateau before the Volcano | |||||
| (996, 1074) | -4 | 0 | Left of Play Area | Stairs | Y | Stairs are leading down from the monument | ||||
| (996, 1075) | -4 | 1 | Left of Play Area | White | Empty air above left of Play Area | |||||
| (996, 1076) | -4 | 2 | Left of Play Area | White | Empty air above left of Play Area | |||||
| (997, 1069) | -3 | -5 | Left of Play Area | Black | Black, never seen, below lowest visible terrain, bottom images, with white line at the bottom | |||||
| (997, 1070) | -3 | -4 | Left of Play Area | Black | Black, never seen, below lowest visible terrain | |||||
| (997, 1071) | -3 | -3 | Left of Play Area | Black | Black, never seen, below lowest visible terrain | |||||
| (997, 1072) | -3 | -2 | Left of Play Area | Black | Black, never seen, below left of play area | |||||
| (997, 1073) | -3 | -1 | Left of Play Area | Black | Black, can be seen, below the plateau before the Volcano | |||||
| (997, 1074) | -3 | 0 | Left of Play Area | Terrain | The foundation for the left wall around the play area just begins in this image | |||||
| (997, 1075) | -3 | 1 | Left of Play Area | White | Empty air above left of Play Area | |||||
| (997, 1076) | -3 | 2 | Left of Play Area | White | Empty air above left of Play Area | |||||
| (998, 1069) | -2 | -5 | Left of Play Area | Black | Black, never seen, below lowest visible terrain, bottom images, with white line at the bottom | |||||
| (998, 1070) | -2 | -4 | Left of Play Area | Black | Black, never seen, below lowest visible terrain | |||||
| (998, 1071) | -2 | -3 | Left of Play Area | Black | Black, never seen, below lowest visible terrain | |||||
| (998, 1072) | -2 | -2 | Left of Play Area | Black | Black, never seen, below left of play area | |||||
| (998, 1073) | -2 | -1 | Left of Play Area | Black | Black, can be seen, below the plateau before the Volcano | |||||
| (998, 1074) | -2 | 0 | Left of Play Area | Foundation | The foundation for the left wall around the play area and half the wall in the right part of the image | |||||
| (998, 1075) | -2 | 1 | Left of Play Area | Wall around play area left | Half of the wall to the left of the play area is in the right part of this image | |||||
| (998, 1076) | -2 | 2 | Left of Play Area | Wall around play area left | Half of the very top of the wall to the left of the play area is in the right part of this image | |||||
| (999, 1069) | -1 | -5 | Play Area | Black | Black, never seen, below lowest visible terrain, bottom images, with white line at the bottom | |||||
| (999, 1070) | -1 | -4 | Play Area | Black | Black, never seen, below lowest visible terrain | |||||
| (999, 1071) | -1 | -3 | Play Area | Black | Black, never seen, below lowest visible terrain | |||||
| (999, 1072) | -1 | -2 | Play Area | Black | Black, never seen, below play area | |||||
| (999, 1073) | -1 | -1 | Play Area | Black | Black, can be seen, below the plateau before the Volcano | |||||
| (999, 1074) | -1 | 0 | Play Area | Play area; left of | Inside the left part of the play area with half the wall in the left part of the image. There is a stone lying on the ground. From the starting point you can see the right part of this stone | |||||
| (999, 1075) | -1 | 1 | Play Area | Wall around play area left | Half of the wall to the left of the play area is in the left part of this image | |||||
| (999, 1076) | -1 | 2 | Play Area | Wall around play area left | Half of the very top of the wall to the left of the play area is in the left part of this image | |||||
| (1000, 1069) | 0 | -5 | Play Area | Black | Black, never seen, below lowest visible terrain, bottom images, with white line at the bottom | |||||
| (1000, 1070) | 0 | -4 | Play Area | Black | Black, never seen, below lowest visible terrain | |||||
| (1000, 1071) | 0 | -3 | Play Area | Black | Black, never seen, below lowest visible terrain | |||||
| (1000, 1072) | 0 | -2 | Play Area | Black | Black, never seen, below play area | |||||
| (1000, 1073) | 0 | -1 | Play Area | Black | Black, can be seen, below the plateau before the Volcano | |||||
| (1000, 1074) | 0 | 0 | Starting point | Play area; starting point | Y | Y | Y | 11 | This is the starting point. As the hoverboard Cueball begin standing over the word "new" you are not centered in this image and can see half of the image to the left and a bit of those above and below. But you can see almost this entire image except the very right most part from your starting point. Around in this simple maze there are 12 coins visible, but only 11 of them are in this image (as the one at the top left just is in the image above). Cueball is standing on one of the platforms to the right. Right of the word "new" is a ramp, and behind the ramp is the terminal for handing in coins. | |
| (1000, 1075) | 0 | 1 | Play Area | Play area | 6 | This section is directly above the starting point, and the lowest part of the two inverted brackets ") (" can be seen to begin with. There are 6 coins more in this section (the lowest to the left, can be seen from the starting position) | ||||
| (1000, 1076) | 0 | 2 | Play Area | Play area | Empty air. This section is directly above the starting point. | |||||
| (1000, 1093) | 0 | 19 | Destroyer Front | White | Empty air in front of the Destroyer above play area | |||||
| (1000, 1094) | 0 | 20 | Destroyer Front | White | Empty air in front of the Destroyer above play area | |||||
| (1000, 1095) | 0 | 21 | Destroyer Front | White | Empty air in front of the Destroyer above play area | |||||
| (1000, 1096) | 0 | 22 | Destroyer Front | White | Empty air in front of the Destroyer above play area | |||||
| (1001, 1069) | 1 | -5 | Play Area | Black | Black, never seen, below lowest visible terrain, bottom images, with white line at the bottom | |||||
| (1001, 1070) | 1 | -4 | Play Area | Black | Black, never seen, below lowest visible terrain | |||||
| (1001, 1071) | 1 | -3 | Play Area | Black | Black, never seen, below lowest visible terrain | |||||
| (1001, 1072) | 1 | -2 | Play Area | Black | Black, never seen, below play area | |||||
| (1001, 1073) | 1 | -1 | Play Area | Black | Black, can be seen, below the plateau before the Volcano | |||||
| (1001, 1074) | 1 | 0 | Play Area | Play area; right of | There is nothing here except the left part of the right wall | |||||
| (1001, 1075) | 1 | 1 | Play Area | Wall around play area right | Half of the wall to the right of the play area is in the right part of this image | |||||
| (1001, 1076) | 1 | 2 | Play Area | Wall around play area right | Half of the very top of the wall to the right of the play area is in the right part of this image | |||||
| (1001, 1093) | 1 | 19 | Destroyer Front | White | Empty air in front of the Destroyer above play area | |||||
| (1001, 1094) | 1 | 20 | Destroyer Front | White | Empty air in front of the Destroyer above play area | |||||
| (1001, 1095) | 1 | 21 | Destroyer Front | White | Empty air in front of the Destroyer above play area | |||||
| (1001, 1096) | 1 | 22 | Destroyer Front | White | Empty air in front of the Destroyer above play area | |||||
| (1002, 1069) | 2 | -5 | Plateau right of Play Area | Black | Black, never seen, below lowest visible terrain, bottom images, with white line at the bottom | |||||
| (1002, 1070) | 2 | -4 | Plateau right of Play Area | Black | Black, never seen, below lowest visible terrain | |||||
| (1002, 1071) | 2 | -3 | Plateau right of Play Area | Black | Black, never seen, below lowest visible terrain | |||||
| (1002, 1072) | 2 | -2 | Plateau right of Play Area | Black | Black, never seen, below plateau right of play area | |||||
| (1002, 1073) | 2 | -1 | Plateau right of Play Area | Black | Black, can be seen, below the plateau before the Volcano | |||||
| (1002, 1074) | 2 | 0 | Plateau right of Play Area | Foundation | The foundation for the right wall around the play area and half the wall in the left part of the image | |||||
| (1002, 1075) | 2 | 1 | Plateau right of Play Area | Wall around play area right | Half of the wall to the right of the play area is in the left part of this image | |||||
| (1002, 1076) | 2 | 2 | Plateau right of Play Area | Wall around play area right | Half of the very top of the wall to the right of the play area is in the left part of this image | |||||
| (1002, 1093) | 2 | 19 | Destroyer Front | Front end - bottom hull of the Destroyer | Front end and below the hull of the Destroyer. At the top of this image the front end of the hull of the Destroyer can be seen to begin almost to the left and then the hull gently increases its size towards right | |||||
| (1002, 1094) | 2 | 20 | Destroyer Front | Front end of the Destroyer with corridor | Y | Front end of the Destroyer. On a ledge just above the bottom of the hull stands Cueball looking out left. Behind him a corridor begins going right into the ship. Above the ledge a little to the right the front end continues up | ||||
| (1002, 1095) | 2 | 21 | Destroyer Front | Front end - top hull of the Destroyer | Front end to just above the hull of the Destroyer. Most of this image is inside the front end of the hull of the Destroyer but at the top left the top hull can be seen gently increasing its size towards right. The front end protrudes a little over the entrance to the ship right below, where a corridor begins going right into the ship. (Just above the very tip, but in the image above is a coin) | |||||
| (1002, 1096) | 2 | 22 | Destroyer Front | Front end - top hull of the Destroyer | 1 | Front end and above the hull of the Destroyer. At the very bottom of this image the hull of the Destroyer can be seen gently increasing its size towards right. The very tip of the front end is in the image below, but right above where it would be is a coin | ||||
| (1003, 1069) | 3 | -5 | Plateau right of Play Area | Black | Black, never seen, below lowest visible terrain, bottom images, with white line at the bottom | |||||
| (1003, 1070) | 3 | -4 | Plateau right of Play Area | Black | Black, never seen, below lowest visible terrain | |||||
| (1003, 1071) | 3 | -3 | Plateau right of Play Area | Black | Black, never seen, below lowest visible terrain | |||||
| (1003, 1072) | 3 | -2 | Plateau right of Play Area | Black | Black, never seen, below plateau right of play area | |||||
| (1003, 1073) | 3 | -1 | Plateau right of Play Area | Black | Black, can be seen, below the plateau before the Volcano | |||||
| (1003, 1074) | 3 | 0 | Plateau right of Play Area | Terrain | As the foundation stops there is a drop down to grassy terrain | |||||
| (1003, 1075) | 3 | 1 | Plateau right of Play Area | White | Empty air above plateau right of Play Area | |||||
| (1003, 1076) | 3 | 2 | Plateau right of Play Area | White | Empty air above plateau right of Play Area | |||||
| (1003, 1093) | 3 | 19 | Destroyer Front | Bottom hull of the Destroyer | Below the hull of the Destroyer. At the top of this image the hull of the Destroyer can be seen, gently increasing its size towards right | |||||
| (1003, 1094) | 3 | 20 | Destroyer Front | Inside the Destroyer: Corridor and shaft | 1 | A corridor enters at the bottom left going right to the middle, and then a shaft goes up through the image. In this corner there is a coin. Just below the center another corridor goes out right out from the shaft | ||||
| (1003, 1095) | 3 | 21 | Destroyer Front | Inside the Destroyer: Corridor and shaft | A corridor enters left above the center going right across the image. In the middle a shaft goes down through the image forming a T | |||||
| (1003, 1096) | 3 | 22 | Destroyer Front | Top hull of the Destroyer | Above the hull of the Destroyer. At the very bottom of this image the hull of the Destroyer can be seen gently increasing its size towards right. | |||||
| (1004, 1069) | 4 | -5 | Plateau right of Play Area | Black | Black, never seen, below lowest visible terrain, bottom images, with white line at the bottom | |||||
| (1004, 1070) | 4 | -4 | Plateau right of Play Area | Black | Black, never seen, below lowest visible terrain | |||||
| (1004, 1071) | 4 | -3 | Plateau right of Play Area | Black | Black, never seen, below lowest visible terrain | |||||
| (1004, 1072) | 4 | -2 | Plateau right of Play Area | Black | Black, never seen, below plateau right of play area | |||||
| (1004, 1073) | 4 | -1 | Plateau right of Play Area | Black | Black, can be seen, below the plateau before the Volcano | |||||
| (1004, 1074) | 4 | 0 | Plateau right of Play Area | Terrain | Y | Cueball is standing in the grass | ||||
| (1004, 1075) | 4 | 1 | Plateau right of Play Area | White | Empty air above plateau right of Play Area | |||||
| (1004, 1076) | 4 | 2 | Plateau right of Play Area | White | Empty air above plateau right of Play Area | |||||
| (1004, 1093) | 4 | 19 | Destroyer Front | Bottom hull of the Destroyer | Below the hull of the Destroyer. At the top of this image the hull of the Destroyer can be seen, gently increasing its size towards right | |||||
| (1004, 1094) | 4 | 20 | Destroyer Front | Inside the Destroyer: Corridor | A corridor goes through the image below the center | |||||
| (1004, 1095) | 4 | 21 | Destroyer Front | Inside the Destroyer: Room and corridor | Y | Y | Y | Ball pit room: A room with a ball pit that is filled with playpen balls. To the left a corridor leaves the room around the center of the image. The room extends both above and to the right of this image. Cueball is throwing playpen balls into the air. Six balls are in the air, two of them with lines indicating their movement. Further right is the head of Megan and there is also a fish that jumps out of the pit to the right although its tail is cut off at the right edge of the image | ||
| (1004, 1096) | 4 | 22 | Destroyer Front | Top hull of the Destroyer with room | Ball pit room: Above the hull of the Destroyer. At the bottom of this image the hull of the Destroyer can be seen gently increasing its size towards right. At the very bottom from the middle towards right is the ceiling of the room inside the destroyer with a ball pit filled with playpen balls | |||||
| (1005, 1069) | 5 | -5 | Plateau right of Play Area | Black | Black, never seen, below lowest visible terrain, bottom images, with white line at the bottom | |||||
| (1005, 1070) | 5 | -4 | Plateau right of Play Area | Black | Black, never seen, below lowest visible terrain | |||||
| (1005, 1071) | 5 | -3 | Plateau right of Play Area | Black | Black, never seen, below lowest visible terrain | |||||
| (1005, 1072) | 5 | -2 | Plateau right of Play Area | Black | Black, never seen, below plateau right of play area | |||||
| (1005, 1073) | 5 | -1 | Plateau right of Play Area | Black | Black, can be seen, below the plateau before the Volcano | |||||
| (1005, 1074) | 5 | 0 | Plateau right of Play Area | Terrain | Y | Trees; one big that goes above the top and right of the frame and two very small | ||||
| (1005, 1075) | 5 | 1 | Plateau right of Play Area | Terrain | Y | Trees; left part of the crown of a big tree at the bottom of this image | ||||
| (1005, 1076) | 5 | 2 | Plateau right of Play Area | White | Empty air above plateau right of Play Area | |||||
| (1005, 1093) | 5 | 19 | Destroyer Front | Bottom hull of the Destroyer | Below the hull of the Destroyer. At the top of this image the hull of the Destroyer can be seen, gently increasing its size towards right | |||||
| (1005, 1094) | 5 | 20 | Destroyer Front | Inside the Destroyer: Corridor | A corridor goes through the image below the center | |||||
| (1005, 1095) | 5 | 21 | Destroyer Front | Inside the Destroyer: Room | Y | Ball pit room: A room with a ball pit that is filled with playpen balls. Most of the room extends to the left of this image as well as above. At the left edge is the tail of a fish that jumps out of the pit cut off at the left edge of the image | ||||
| (1005, 1096) | 5 | 22 | Destroyer Front | Top hull of the Destroyer with room | Ball pit room: Above the hull of the Destroyer. At the bottom of this image the hull of the Destroyer can be seen gently increasing its size towards right. At the very bottom from to the left is the ceiling of the room inside the destroyer with a ball pit filled with playpen balls | |||||
| (1006, 1069) | 6 | -5 | Plateau right of Play Area | Black | Black, never seen, below lowest visible terrain, bottom images, with white line at the bottom | |||||
| (1006, 1070) | 6 | -4 | Plateau right of Play Area | Black | Black, never seen, below lowest visible terrain | |||||
| (1006, 1071) | 6 | -3 | Plateau right of Play Area | Black | Black, never seen, below lowest visible terrain | |||||
| (1006, 1072) | 6 | -2 | Plateau right of Play Area | Black | Black, never seen, below plateau right of play area | |||||
| (1006, 1073) | 6 | -1 | Plateau right of Play Area | Black | Black, can be seen, below the plateau before the Volcano | |||||
| (1006, 1074) | 6 | 0 | Plateau right of Play Area | Terrain | Y | Trees; one big that goes above the top and left of the frame, one large tree and three very small | ||||
| (1006, 1075) | 6 | 1 | Plateau right of Play Area | Terrain | Y | Trees; right part of the crown of a big tree at the bottom of this image | ||||
| (1006, 1076) | 6 | 2 | Plateau right of Play Area | White | Empty air above plateau right of Play Area | |||||
| (1006, 1093) | 6 | 19 | Destroyer Front | Bottom hull of the Destroyer | Below the hull of the Destroyer. At the center of this image the hull of the Destroyer can be seen, gently increasing its size towards right, even taking a small step down in the middle | |||||
| (1006, 1094) | 6 | 20 | Destroyer Front | Inside the Destroyer: Corridor | A corridor goes through the image below the center | |||||
| (1006, 1095) | 6 | 21 | Destroyer Front | Inside the Destroyer: Room | Y | Y | Y | Piñata room: A room with two Cueballs, Megan and Hairy. The Cueball to the right is pointing at a Piñata shaped like a horse behind him is Megan and then Hairy who has his hand on Megan’s shoulder and he holds a stick to hit the Piñata with. On the left side of the Piñata is the other Cueball holding a lightsaber pointing a little down in front of him as he speaks. The room is only cut off at the right edge of the image, the floor being just below the center, the ceiling just below the top and the left wall halfway to the middle from the left | ||
| (1006, 1096) | 6 | 22 | Destroyer Front | Top hull of the Destroyer | Above the hull of the Destroyer. At the bottom of this image the hull of the Destroyer can be seen gently increasing its size towards right even taking a small step up to the right | |||||
| (1007, 1069) | 7 | -5 | Plateau right of Play Area | Black | Black, never seen, below lowest visible terrain, bottom images, with white line at the bottom | |||||
| (1007, 1070) | 7 | -4 | Plateau right of Play Area | Black | Black, never seen, below lowest visible terrain | |||||
| (1007, 1071) | 7 | -3 | Plateau right of Play Area | Black | Black, never seen, below lowest visible terrain | |||||
| (1007, 1072) | 7 | -2 | Plateau right of Play Area | Black | Black, can be seen, below ground level right | |||||
| (1007, 1073) | 7 | -1 | Plateau right of Play Area | Black | Black, can be seen, below the plateau before the Volcano | |||||
| (1007, 1074) | 7 | 0 | Plateau right of Play Area | Terrain | Y | Trees; three very small | ||||
| (1007, 1075) | 7 | 1 | Plateau right of Play Area | White | Empty air above plateau right of Play Area | |||||
| (1007, 1076) | 7 | 2 | Plateau right of Play Area | White | Empty air above plateau right of Play Area | |||||
| (1007, 1093) | 7 | 19 | Destroyer Front | Bottom hull of the Destroyer | Below the hull of the Destroyer. At the center of this image the hull of the Destroyer can be seen, gently increasing its size towards right | |||||
| (1007, 1094) | 7 | 20 | Destroyer Front | Inside the Destroyer: Corridor and shaft | A corridor enters left below the center going right across the image. In the middle a shaft goes up through the image forming an upside down T | |||||
| (1007, 1095) | 7 | 21 | Destroyer Front | Inside the Destroyer: Room, corridor and shaft | Piñata room: A room ends at the left (the one with a Piñata) and a corridor exits below the center going right across the image. In the middle a shaft goes down through the image forming a T | |||||
| (1007, 1096) | 7 | 22 | Destroyer Front | Top hull of the Destroyer | Above the hull of the Destroyer. At the bottom of this image the hull of the Destroyer can be seen gently increasing its size towards right although it takes a small step down to the left | |||||
| (1008, 1069) | 8 | -5 | Plateau right of Play Area | Black | Black, never seen, below lowest visible terrain, bottom images, with white line at the bottom | |||||
| (1008, 1070) | 8 | -4 | Plateau right of Play Area | Black | Black, never seen, below lowest visible terrain | |||||
| (1008, 1071) | 8 | -3 | Plateau right of Play Area | Black | Black, never seen, below lowest visible terrain | |||||
| (1008, 1072) | 8 | -2 | Plateau right of Play Area | Black | Black, can be seen, below ground level right | |||||
| (1008, 1073) | 8 | -1 | Plateau right of Play Area | Terrain | Cliff | |||||
| (1008, 1074) | 8 | 0 | Plateau right of Play Area | Terrain | Y | Y | Cueball is standing with Megan at the edge of a cliff they are looking upwards to the right and Megan points in the direction they are looking and makes an exclamation | |||
| (1008, 1075) | 8 | 1 | Plateau right of Play Area | White | Empty air above plateau right of Play Area | |||||
| (1008, 1076) | 8 | 2 | Plateau right of Play Area | White | Empty air above plateau right of Play Area | |||||
| (1008, 1093) | 8 | 19 | Destroyer Front | Bottom hull of the Destroyer | Below the hull of the Destroyer. At the center of this image the hull of the Destroyer can be seen, gently increasing its size towards right, but taking a small step up to the left | |||||
| (1008, 1094) | 8 | 20 | Destroyer Front | Inside the Destroyer: Corridor | A corridor goes through the image below the center | |||||
| (1008, 1095) | 8 | 21 | Destroyer Front | Inside the Destroyer: Corridor and shaft | 1 | A corridor enters left below the center going right across the image. To the very right a shaft goes up through the image forming an L lying down. At the bottom of this shaft there is a coin | ||||
| (1008, 1096) | 8 | 22 | Destroyer Front | Top hull of the Destroyer with shaft | Above the hull of the Destroyer. At the center of this image the hull of the Destroyer can be seen gently increasing its size towards right. At the very right a shaft is going down into the Destroyer | |||||
| (1009, 1069) | 9 | -5 | Ground level right | Black | Black, never seen, below lowest visible terrain, bottom images, with white line at the bottom | |||||
| (1009, 1070) | 9 | -4 | Ground level right | Black | Black, never seen, below lowest visible terrain | |||||
| (1009, 1071) | 9 | -3 | Ground level right | Black | Black, never seen, below lowest visible terrain | |||||
| (1009, 1072) | 9 | -2 | Ground level right | Black | Black, can be seen, below ground level right | |||||
| (1009, 1073) | 9 | -1 | Ground level right | Terrain | Y | Rocks | ||||
| (1009, 1074) | 9 | 0 | Ground level right | White | Empty air above ground level right | |||||
| (1009, 1075) | 9 | 1 | Ground level right | White | Empty air above ground level right | |||||
| (1009, 1076) | 9 | 2 | Ground level right | White | Empty air above ground level right | |||||
| (1009, 1093) | 9 | 19 | Destroyer Front | Bottom hull of the Destroyer with shaft | Below the hull of the Destroyer. A shaft is going up in the middle of this image. At the bottom of this image the hull of the Destroyer can be seen, gently increasing its size towards right | |||||
| (1009, 1094) | 9 | 20 | Destroyer Front | Inside the Destroyer: Corridor and shaft | A corridor enters left above the center going right across the image. In the middle a shaft goes down through the image forming a T | |||||
| (1009, 1095) | 9 | 21 | Destroyer Front | Inside the Destroyer: Corridor and shaft | A corridor enters right below the center going left across the image. To the very left a shaft goes up through the image forming an inverted L lying down | |||||
| (1009, 1096) | 9 | 22 | Destroyer Front | Top hull of the Destroyer with shaft | Above the hull of the Destroyer. At the center of this image the hull of the Destroyer can be seen gently increasing its size towards right. At the very left a shaft is going down into the Destroyer | |||||
| (1010, 1069) | 10 | -5 | Ground level right | Black | Black, never seen, below lowest visible terrain, bottom images, with white line at the bottom | |||||
| (1010, 1070) | 10 | -4 | Ground level right | Black | Black, never seen, below lowest visible terrain | |||||
| (1010, 1071) | 10 | -3 | Ground level right | Black | Black, never seen, below lowest visible terrain | |||||
| (1010, 1072) | 10 | -2 | Ground level right | Black | Black, can be seen, below ground level right | |||||
| (1010, 1073) | 10 | -1 | Ground level right | Terrain | Y | Large rock and cactus | ||||
| (1010, 1074) | 10 | 0 | Ground level right | White | Empty air above ground level right | |||||
| (1010, 1075) | 10 | 1 | Ground level right | White | Empty air above ground level right | |||||
| (1010, 1076) | 10 | 2 | Ground level right | White | Empty air above ground level right | |||||
| (1010, 1093) | 10 | 19 | Destroyer Front | Bottom hull of the Destroyer with room | Swimming pool room: below the hull of the Destroyer. At the center of this image the hull of the Destroyer can be seen, gently increasing its size towards right. The room is not visible as it is the black water of the swimming pool, but when inside the pool you can see below the hull. The poll ends to the left just before the middle, but continues in the image to the right | |||||
| (1010, 1094) | 10 | 20 | Destroyer Front | Inside the Destroyer: Room and corridor | Y | Swimming pool room: A corridor enters the image from the left below the center and enters a room with a swimming pool full of water just before the middle of the image. The rooms ceiling is at the same height as the corridors and the room goes down. The pool is deep and goes far into the image below, and the pool also extends in to the image to the right. The black water with waves are at the bottom. Ponytail is jumping into the water from the edge of the corridor, Cueball is threading water to the right and at the right edge is Megan (cut off) swimming with only her head showing | ||||
| (1010, 1095) | 10 | 21 | Destroyer Front | Inside the Destroyer: Corridor | A corridor goes through the image below the center | |||||
| (1010, 1096) | 10 | 22 | Destroyer Front | Top hull of the Destroyer | Above the hull of the Destroyer. At the center of this image the hull of the Destroyer can be seen gently increasing its size towards right | |||||
| (1011, 1069) | 11 | -5 | Ground level right | Black | Black, never seen, below lowest visible terrain, bottom images, with white line at the bottom | |||||
| (1011, 1070) | 11 | -4 | Ground level right | Black | Black, never seen, below lowest visible terrain | |||||
| (1011, 1071) | 11 | -3 | Ground level right | Black | Black, never seen, below lowest visible terrain | |||||
| (1011, 1072) | 11 | -2 | Ground level right | Black | Black, can be seen, below ground level right | |||||
| (1011, 1073) | 11 | -1 | Ground level right | Wires | Y | Y | Wires: Cueball and Megan holding on to a wire going up | |||
| (1011, 1074) | 11 | 0 | Ground level right | Wires | Y | Wires: Part of one wire going up | ||||
| (1011, 1075) | 11 | 1 | Ground level right | White | Empty air above ground level right | |||||
| (1011, 1076) | 11 | 2 | Ground level right | White | Empty air above ground level right | |||||
| (1011, 1093) | 11 | 19 | Destroyer Front | Bottom hull of the Destroyer with room | 1 | Swimming pool room: below the hull of the Destroyer. At the bottom of this image the hull of the Destroyer can be seen, gently increasing its size towards right, but there is a small indentation going a step up to the left and down again to the right. Up in this indentation there is a coin. The room is not visible as it is the black water of the swimming pool, but when inside the pool you can see the coin below the hull. The poll finishes to the right where the indentation ends to the right, but continues in the image to the left | ||||
| (1011, 1094) | 11 | 20 | Destroyer Front | Inside the Destroyer: Room | Y | 1 | Swimming pool room: A room with a swimming pool full of water. The pool is deep and goes far into the image below, and the pool also extends in to the image to the left, but ends just past the middle of the image to the right, and the ceiling is at the center of the image. The black water with waves are at the bottom. At the left edge is Megan (cut off) swimming with only her head showing. In the top right corner of the room is a coin | |||
| (1011, 1095) | 11 | 21 | Destroyer Front | Inside the Destroyer: Corridor | A corridor goes through the image below the center | |||||
| (1011, 1096) | 11 | 22 | Destroyer Front | Top hull of the Destroyer | 1 | Above the hull of the Destroyer. At the center of this image the hull of the Destroyer can be seen gently increasing its size towards right even taking a small step up to the right, and above this step there is a coin | ||||
| (1012, 1069) | 12 | -5 | Ground level right | Black | Black, never seen, below lowest visible terrain, bottom images, with white line at the bottom | |||||
| (1012, 1070) | 12 | -4 | Ground level right | Black | Black, never seen, below lowest visible terrain | |||||
| (1012, 1071) | 12 | -3 | Ground level right | Black | Black, never seen, below lowest visible terrain | |||||
| (1012, 1072) | 12 | -2 | Ground level right | Black | Black, can be seen, below ground level right | |||||
| (1012, 1073) | 12 | -1 | Ground level right | Terrain | Y | Dust ball | ||||
| (1012, 1074) | 12 | 0 | Ground level right | Wires | Y | Wires: Part of one wire going up | ||||
| (1012, 1075) | 12 | 1 | Ground level right | Wires | Y | Wires: Part of one wire going up | ||||
| (1012, 1076) | 12 | 2 | Ground level right | White | Empty air above ground level right | |||||
| (1012, 1077) | 12 | 3 | Rebel Blockade Runner | White | Empty air under the Rebel Blockade Runner | |||||
| (1012, 1078) | 12 | 4 | Rebel Blockade Runner | Front end - bottom hull of the Runner with room | Y | Y | Y | Bridge on the Runner: The rounded front end of the Rebel Blockade Runner with the command bridge. Only the very front part and the top of the room are cut off along with most of the text that goes above and to the right. At the control panel at the front of the bridge is a girl with long black hair. She is not quite looking as a typical Megan. Maybe it is Danish as she seems to deliberately try to annoy Hairbun standing behind her. Hairbun is lifting her hands in fists. Three small lines indicate that she is annoyed. Below is a thin white line to the right just indicating that there is a room below the bridge to the right | ||
| (1012, 1079) | 12 | 5 | Rebel Blockade Runner | Front end - top hull of the Runner with room | Y | Bridge on the Runner: The rounded front end of the Rebel Blockade Runner with the top left part of the bridge. The top left part of the text spoken by the woman at the control panel in the image below can be seen in the bottom right of this image | ||||
| (1012, 1080) | 12 | 6 | Rebel Blockade Runner | White | Empty air above the Rebel Blockade Runner | |||||
| (1012, 1089) | 12 | 15 | Destroyer Rotary section | White | Empty air below the Destroyer | |||||
| (1012, 1090) | 12 | 16 | Destroyer Rotary section | White | Empty air below the Destroyer | |||||
| (1012, 1091) | 12 | 17 | Destroyer Rotary section | White | Empty air below the Destroyer | |||||
| (1012, 1092) | 12 | 18 | Destroyer Rotary section | White | Empty air below the Destroyer | |||||
| (1012, 1093) | 12 | 19 | Destroyer Rotary section | Bottom hull of the Destroyer | Below the hull of the Destroyer. At the very bottom of this image the hull of the Destroyer can be seen, gently increasing its size towards right | |||||
| (1012, 1094) | 12 | 20 | Destroyer Rotary section | Black | Black, can be seen, inside the Destroyer | |||||
| (1012, 1095) | 12 | 21 | Destroyer Rotary section | Inside the Destroyer: Corridor | 1 | A corridor goes through the image below the center. At the very left there is a coin | ||||
| (1012, 1096) | 12 | 22 | Destroyer Rotary section | Top hull of the Destroyer | Above the hull of the Destroyer. At the top of this image the hull of the Destroyer can be seen gently increasing its size towards right | |||||
| (1013, 1069) | 13 | -5 | Ground level right | Black | Black, never seen, below lowest visible terrain, bottom images, with white line at the bottom | |||||
| (1013, 1070) | 13 | -4 | Ground level right | Black | Black, never seen, below lowest visible terrain | |||||
| (1013, 1071) | 13 | -3 | Ground level right | Black | Black, never seen, below lowest visible terrain | |||||
| (1013, 1072) | 13 | -2 | Ground level right | Black | Black, can be seen, below ground level right | |||||
| (1013, 1073) | 13 | -1 | Ground level right | Wires | Y | Y | Wires: Cueball and Hairy and a woman and another Cueball are holding on to two wires going up | |||
| (1013, 1074) | 13 | 0 | Ground level right | Wires | Y | Wires: Part of one wire going up | ||||
| (1013, 1075) | 13 | 1 | Ground level right | Wires | Y | Wires: Part of two wires going up | ||||
| (1013, 1076) | 13 | 2 | Ground level right | Wires | Y | Wires: Part of a wire going up | ||||
| (1013, 1077) | 13 | 3 | Rebel Blockade Runner | White | Empty air under the Rebel Blockade Runner | |||||
| (1013, 1078) | 13 | 4 | Rebel Blockade Runner | Bottom hull of the Runner with room, corridor and shaft | Y | Y | Y | 1 | Bridge on the Runner: A room below the bridge of the Rebel Blockade Runner (which can still be seen above, with parts of the text from the image to the left in the top left of this image). In this room Ponytail is holding a lightsaber above which floats a small sphere. Megan holds some kind of canon/gun and she stands in front of a black box with white text. There is a coin to the left of Ponytail. Above them to the right is a corridor going away from the bridge. At the very right end of this is a small robot on wheels | |
| (1013, 1079) | 13 | 5 | Rebel Blockade Runner | Top hull of the Runner with room and shaft | Y | Y | Y | Bridge on the Runner: The top of the Rebel Blockade Runners bridge. The top right part of the text spoken by the girl at the control panel in the image below and left can be seen in the bottom left of this image. Above the bridge there is a small shaft going up to the top of the ship’s hull through an open hatch door. Cueball is standing to the right of this looking down and right along the down curve of this round part of the front of the space ship | ||
| (1013, 1080) | 13 | 6 | Rebel Blockade Runner | White | Empty air above the Rebel Blockade Runner | |||||
| (1013, 1089) | 13 | 15 | Destroyer Rotary section | White | Empty air below the Destroyer | |||||
| (1013, 1090) | 13 | 16 | Destroyer Rotary section | White | Empty air below the Destroyer | |||||
| (1013, 1091) | 13 | 17 | Destroyer Rotary section | White | Empty air below the Destroyer | |||||
| (1013, 1092) | 13 | 18 | Destroyer Rotary section | White - almost | Empty air below the Destroyer, except at the very top right corner where the bottom hull of the Destroyer can just be seen | |||||
| (1013, 1093) | 13 | 19 | Destroyer Rotary section | Bottom hull of the Destroyer | Below the hull of the Destroyer. At the very bottom of this image the hull of the Destroyer can be seen, gently increasing its size towards right where it disappears beneath this image | |||||
| (1013, 1094) | 13 | 20 | Destroyer Rotary section | Black | Black, can be seen, inside the Destroyer | |||||
| (1013, 1095) | 13 | 21 | Destroyer Rotary section | Inside the Destroyer: Corridor and shaft | A corridor enters left below the center going right across the image. To the very right a shaft goes up through the image forming an L lying down | |||||
| (1013, 1096) | 13 | 22 | Destroyer Rotary section | Top hull of the Destroyer with shaft | 1 | Above the hull of the Destroyer. At the top of this image the hull of the Destroyer can be seen gently increasing its size towards right, although it takes a step down just to begin with. Right after this step there is a shaft is going down into the Destroyer. Just left of the hull there is a coin | ||||
| (1014, 1069) | 14 | -5 | Ground level right | Black | Black, never seen, below lowest visible terrain, bottom images, with white line at the bottom | |||||
| (1014, 1070) | 14 | -4 | Ground level right | Black | Black, never seen, below lowest visible terrain | |||||
| (1014, 1071) | 14 | -3 | Ground level right | Black | Black, never seen, below lowest visible terrain | |||||
| (1014, 1072) | 14 | -2 | Ground level right | Black | Black, can be seen, below ground level right | |||||
| (1014, 1073) | 14 | -1 | Ground level right | Dunes/Wire | Y | 1 | Wires: Part of a wire graces the top left corner, the dunes begins. There is a coin over the last dune peak | |||
| (1014, 1074) | 14 | 0 | Ground level right | Wires | Y | Wires: Part of one wire going up | ||||
| (1014, 1075) | 14 | 1 | Ground level right | Wires | Y | Wires: Part of two wires going up | ||||
| (1014, 1076) | 14 | 2 | Ground level right | Wires | Y | Wires: Part of a wire going up | ||||
| (1014, 1077) | 14 | 3 | Rebel Blockade Runner | Wires | Y | Y | Wires: Two wires going up just below the Rebel Blockade Runner. Two birds are circling above the end a fishing line with a hook attached to what looks like a small cracker | |||
| (1014, 1078) | 14 | 4 | Rebel Blockade Runner | Bottom hull of the Runner with room, corridor and shaft | Y | Y | At the top of this image is a corridor inside the Rebel Blockade Runner, with the tail of the robot in the image to the left with speed lines behind it showing that it drives out of this image to the left. Below the corridor is a ledge that can be accessed via a shaft to the right. On the ledge is Cueball with a fishing rod. He lowers the line down below the ship. Below the ledge to the right is a canon jutting out beneath the space ship. Two wires stretching down below are attached to this canon with “normal” ship anchors. Above the corridor to the right is another slimmer shaft going up | |||
| (1014, 1079) | 14 | 5 | Rebel Blockade Runner | Top hull of the Runner with room and shaft | Y | Y | Y | 1 | Bullets room. A shaft is going up towards the right of this image inside the Rebel Blockade Runner and ends in a small room to the right where Cueball is pouring several small objects from a bucket into a black box. Above the box is a canon outside on the ship’s hull. There is white label on the box. There is a coin at the tip of the canon | |
| (1014, 1080) | 14 | 6 | Rebel Blockade Runner | White | Empty air above the Rebel Blockade Runner | |||||
| (1014, 1089) | 14 | 15 | Destroyer Rotary section | White | Empty air below the Destroyer | |||||
| (1014, 1090) | 14 | 16 | Destroyer Rotary section | White | Empty air below the Destroyer | |||||
| (1014, 1091) | 14 | 17 | Destroyer Rotary section | White | Empty air below the Destroyer | |||||
| (1014, 1092) | 14 | 18 | Destroyer Rotary section | Bottom hull of the Destroyer | Below the hull of the Destroyer. At the top of this image the hull of the Destroyer can be seen, gently increasing its size towards right | |||||
| (1014, 1093) | 14 | 19 | Destroyer Rotary section | Black | Black, can be seen, inside the Destroyer | |||||
| (1014, 1094) | 14 | 20 | Destroyer Rotary section | Black | Black, can be seen, inside the Destroyer | |||||
| (1014, 1095) | 14 | 21 | Destroyer Rotary section | Inside the Destroyer: Corridor and shaft | A corridor enters right below the center going left across the image. To the very left a shaft goes up through the image forming an inverted L lying down | |||||
| (1014, 1096) | 14 | 22 | Destroyer Rotary section | Top hull of the Destroyer with shaft | Above the hull of the Destroyer. At the center of this image the hull of the Destroyer can be seen gently increasing its size towards right. At the very left a shaft is going down into the Destroyer | |||||
| (1015, 1069) | 15 | -5 | Ground level right | Black | Black, never seen, below lowest visible terrain, bottom images, with white line at the bottom | |||||
| (1015, 1070) | 15 | -4 | Ground level right | Black | Black, never seen, below lowest visible terrain | |||||
| (1015, 1071) | 15 | -3 | Ground level right | Black | Black, never seen, below lowest visible terrain | |||||
| (1015, 1072) | 15 | -2 | Ground level right | Black | Black, can be seen, below ground level right | |||||
| (1015, 1073) | 15 | -1 | Ground level right | Dunes | Y | Ponytail standing on a dune | ||||
| (1015, 1074) | 15 | 0 | Ground level right | White | Empty air above ground level right | |||||
| (1015, 1075) | 15 | 1 | Ground level right | Wires - almost white | Y | Wires: Part of one wire going up at the very top left edge of this white image in empty air | ||||
| (1015, 1076) | 15 | 2 | Ground level right | Wires | Y | Y | Wires: Part of a wire going up, with Megan climbing the wire | |||
| (1015, 1077) | 15 | 3 | Rebel Blockade Runner | Wires | Y | Wires: One wire going up just below the Rebel Blockade Runner. | ||||
| (1015, 1078) | 15 | 4 | Rebel Blockade Runner | Bottom hull of the Runner with room, corridor and shaft | Y | Y | Two corridors connected with a shaft in the middle inside the Rebel Blockade Runner . Ponytail is walking to the right in the top corridor while singing/whistling as indicated with two drawings of musical notes above and in front of her. An anchor with a wire going down is attached to the bottom of the hull outside. The corridor below stops to the left of this image, and beneath this to the left is the last part of the housing for the canon in the image to the left | |||
| (1015, 1079) | 15 | 5 | Rebel Blockade Runner | Top hull of the Runner | The top of the hull of the Rebel Blockade Runner with the end of the canon housing from the left image in the left part of this image. Else little features | |||||
| (1015, 1080) | 15 | 6 | Rebel Blockade Runner | White | Empty air above the Rebel Blockade Runner | |||||
| (1015, 1089) | 15 | 15 | Destroyer Rotary section | White | Empty air below the Destroyer | |||||
| (1015, 1090) | 15 | 16 | Destroyer Rotary section | White | Empty air below the Destroyer | |||||
| (1015, 1091) | 15 | 17 | Destroyer Rotary section | White | Empty air below the Destroyer | |||||
| (1015, 1092) | 15 | 18 | Destroyer Rotary section | Bottom hull of the Destroyer | Below the hull of the Destroyer. At the top of this image the hull of the Destroyer can be seen, gently increasing its size towards right, but taking a small step up to the right | |||||
| (1015, 1093) | 15 | 19 | Destroyer Rotary section | Inside the Destroyer: Corridor | Y | 1 | A dead end corridor (left) at the top of the image. At the left end is what looks like rubles at the end of a mine shaft that has caved in. There is a coin in front of the rubbles | |||
| (1015, 1094) | 15 | 20 | Destroyer Rotary section | Black | Black, can be seen, inside the Destroyer | |||||
| (1015, 1095) | 15 | 21 | Destroyer Rotary section | Inside the Destroyer: Corridor | A corridor goes through the image below the center | |||||
| (1015, 1096) | 15 | 22 | Destroyer Rotary section | Top hull of the Destroyer | Above the hull of the Destroyer. At the very top of this image the hull of the Destroyer can be seen gently increasing its size towards right | |||||
| (1016, 1069) | 16 | -5 | Ground level right | Black | Black, never seen, below lowest visible terrain, bottom images, with white line at the bottom | |||||
| (1016, 1070) | 16 | -4 | Ground level right | Black | Black, never seen, below lowest visible terrain | |||||
| (1016, 1071) | 16 | -3 | Ground level right | Black | Black, never seen, below lowest visible terrain | |||||
| (1016, 1072) | 16 | -2 | Ground level right | Black | Black, can be seen, below ground level right | |||||
| (1016, 1073) | 16 | -1 | Ground level right | Dunes | 1 | Higher dune with a coin at the right bottom | ||||
| (1016, 1074) | 16 | 0 | Ground level right | White | Empty air above ground level right | |||||
| (1016, 1075) | 16 | 1 | Ground level right | White | Empty air above ground level right | |||||
| (1016, 1076) | 16 | 2 | Ground level right | White | Empty air above ground level right | |||||
| (1016, 1077) | 16 | 3 | Rebel Blockade Runner | White | Empty air under the Rebel Blockade Runner | |||||
| (1016, 1078) | 16 | 4 | Rebel Blockade Runner | Bottom hull of the Runner with room and corridor | Y | Death Star plans room: Two corridors above each other come in from the left inside the Rebel Blockade Runner . The top one ends in a small room where you cannot see the ceiling, but something small is hanging down towards the right end of this room, near the wall. The corridor below continues under the room above and enters a large room that goes up on the other side of the wall of the room above. Someone is talking inside this room, as can be seen from two small pieces of text to the right in this image just inside this larger room. Beneath this corridor is the bottom of the hull outside with a few features down an up again | ||||
| (1016, 1079) | 16 | 5 | Rebel Blockade Runner | Top hull of the Runner with room, corridor and shaft | Y | Y | Death Star plans room: At the bottom of this image is the top of a small room inside the Rebel Blockade Runner. A hole has been torn in the upper hull of the space ship. It has ragged edges and goes up and right from inside to the top of the ship’s hull. There is a larger part hanging on to the inner left edge of the hole, the tip of which is cut off by the bottom frame. To the right two Cueballs are standing, the right most is cut down the middle. The first one is looking into the hole and they are speaking. The text of the left Cueball is cut off at the right edge of the image. The text of the left Cueball can almost not be seen, but there is a single line of his text (top left part of a "Y") also in this image. Below them is the upper left corner of a big room inside the space ship | |||
| (1016, 1080) | 16 | 6 | Rebel Blockade Runner | White | Empty air above the Rebel Blockade Runner | |||||
| (1016, 1081) | 16 | 7 | Torpedoes | White | Empty air left of torpedoes | |||||
| (1016, 1082) | 16 | 8 | Torpedoes | White | Empty air left of torpedoes | |||||
| (1016, 1083) | 16 | 9 | Torpedoes | White | Empty air left of torpedoes | |||||
| (1016, 1084) | 16 | 10 | Torpedoes | White | Empty air left of torpedoes | |||||
| (1016, 1089) | 16 | 15 | Destroyer Rotary section | White | Empty air below the Destroyer | |||||
| (1016, 1090) | 16 | 16 | Destroyer Rotary section | White | Empty air below the Destroyer | |||||
| (1016, 1091) | 16 | 17 | Destroyer Rotary section | White | Empty air below the Destroyer | |||||
| (1016, 1092) | 16 | 18 | Destroyer Rotary section | Bottom hull of the Destroyer with shaft | Below the hull of the Destroyer. The opening of a shaft is going up in the middle of this image. At the top of this image the hull of the Destroyer can be seen, gently increasing its size towards right | |||||
| (1016, 1093) | 16 | 19 | Destroyer Rotary section | Inside the Destroyer: Corridor and shaft | A corridor enters left at the top going right to a shaft that goes down through the image from top to bottom | |||||
| (1016, 1094) | 16 | 20 | Destroyer Rotary section | Inside the Destroyer: Shaft | A shaft enters in the middle of the image from above and goes down through the image | |||||
| (1016, 1095) | 16 | 21 | Destroyer Rotary section | Inside the Destroyer: Corridor and shaft | Y | A corridor enters left below the center going right across the image. In the middle a shaft goes down through the image forming a T. Hairy stands on the right side of the shaft looking down | ||||
| (1016, 1096) | 16 | 22 | Destroyer Rotary section | Black - almost | Black inside the Destroyer, except for a very small white triangle at the top left corner where the top of the hull is | |||||
| (1016, 1097) | 16 | 23 | Destroyer Rotary section | Top hull of the Destroyer | Above the hull of the Destroyer. At the very bottom of this image the hull of the Destroyer can be seen gently increasing its size towards right. At the very left the hull is below the bottom edge | |||||
| (1016, 1098) | 16 | 24 | Destroyer Rotary section | White | Empty air above the Destroyer | |||||
| (1016, 1099) | 16 | 25 | Destroyer Rotary section | White | Empty air above the Destroyer | |||||
| (1016, 1100) | 16 | 26 | Destroyer Rotary section | White | Empty air above the Destroyer | |||||
| (1017, 1069) | 17 | -5 | Ground level right | Black | Black, never seen, below lowest visible terrain, bottom images, with white line at the bottom | |||||
| (1017, 1070) | 17 | -4 | Ground level right | Black | Black, never seen, below lowest visible terrain | |||||
| (1017, 1071) | 17 | -3 | Ground level right | Black | Black, never seen, below lowest visible terrain | |||||
| (1017, 1072) | 17 | -2 | Ground level right | Black | Black, can be seen, below ground level right | |||||
| (1017, 1073) | 17 | -1 | Ground level right | Dunes | Highest dune | |||||
| (1017, 1074) | 17 | 0 | Ground level right | White | Empty air above ground level right | |||||
| (1017, 1075) | 17 | 1 | Ground level right | White | Empty air above ground level right | |||||
| (1017, 1076) | 17 | 2 | Ground level right | White | Empty air above ground level right | |||||
| (1017, 1077) | 17 | 3 | Rebel Blockade Runner | Bottom hull of the Runner | Y | There is a parabolic antenna at the top of the image. It is pointing left and sits at the bottom of the hull of the Rebel Blockade Runner | ||||
| (1017, 1078) | 17 | 4 | Rebel Blockade Runner | Bottom hull of the Runner with room | Y | Y | Death Star plans room: A big room inside the Rebel Blockade Runner where a Hairy is watching as two Cueballs are talking. The one to the right looks at the other two facing left. He does most of the talking. The text of the Cueball to the left is cut off at the left edge of this image. Below this room the ship’s hull bulge down to accommodate the parabolic disk that can be found in the image below | |||
| (1017, 1079) | 17 | 5 | Rebel Blockade Runner | Top hull of the Runner with room | Y | Y | Y | Death Star plans room: To the right is a huge parabolic antenna on top of the hull of the Rebel Blockade Runner. To the right of that there are two Cueballs looking up and speaking. Their text is partly cut off at the right edge of this image. To the very left in this image is a third Cueball that has been cut down just left of the middle. He speaks to another Cueball that is outside this frame in the image to the left. But part of his text is in this image. The Cueball present also speaks, a little piece of his text is also cut at the left edge of this image. Below this outer hull is the celling of a big room inside the space ship | ||
| (1017, 1080) | 17 | 6 | Rebel Blockade Runner | White | Empty air above the Rebel Blockade Runner | |||||
| (1017, 1081) | 17 | 7 | Torpedoes | White | Empty air left of torpedoes | |||||
| (1017, 1082) | 17 | 8 | Torpedoes | White | Empty air left of torpedoes | |||||
| (1017, 1083) | 17 | 9 | Torpedoes | White | Empty air left of torpedoes | |||||
| (1017, 1084) | 17 | 10 | Torpedoes | White | Empty air left of torpedoes | |||||
| (1017, 1089) | 17 | 15 | Destroyer Rotary section | White | Empty air below the Destroyer | |||||
| (1017, 1090) | 17 | 16 | Destroyer Rotary section | White | Empty air below the Destroyer | |||||
| (1017, 1091) | 17 | 17 | Destroyer Rotary section | White | Empty air below the Destroyer | |||||
| (1017, 1092) | 17 | 18 | Destroyer Rotary section | Bottom hull of the Destroyer | Below the hull of the Destroyer. At the top of this image the hull of the Destroyer can be seen, gently increasing its size towards right | |||||
| (1017, 1093) | 17 | 19 | Destroyer Rotary section | Inside the Destroyer: Shaft | A shaft enters in the middle of the image from above and goes down through the image | |||||
| (1017, 1094) | 17 | 20 | Destroyer Rotary section | Black | Black, can be seen, inside the Destroyer | |||||
| (1017, 1095) | 17 | 21 | Destroyer Rotary section | Inside the Destroyer: Corridor | A corridor goes through the image below the center | |||||
| (1017, 1096) | 17 | 22 | Destroyer Rotary section | Black | Black, can be seen, inside the Destroyer | |||||
| (1017, 1097) | 17 | 23 | Destroyer Rotary section | Top hull of the Destroyer | Above the hull of the Destroyer. At the very bottom of this image the hull of the Destroyer can be seen gently increasing its size towards right. | |||||
| (1017, 1098) | 17 | 24 | Destroyer Rotary section | White | Empty air above the Destroyer | |||||
| (1017, 1099) | 17 | 25 | Destroyer Rotary section | White | Empty air above the Destroyer | |||||
| (1017, 1100) | 17 | 26 | Destroyer Rotary section | White | Empty air above the Destroyer | |||||
| (1018, 1069) | 18 | -5 | Ground level right | Black | Black, never seen, below lowest visible terrain, bottom images, with white line at the bottom | |||||
| (1018, 1070) | 18 | -4 | Ground level right | Black | Black, never seen, below lowest visible terrain | |||||
| (1018, 1071) | 18 | -3 | Ground level right | Black | Black, never seen, below lowest visible terrain | |||||
| (1018, 1072) | 18 | -2 | Ground level right | Black | Black, can be seen, below ground level right | |||||
| (1018, 1073) | 18 | -1 | Ground level right | Dunes | 1 | Bottom of the highest dune with a coin and the last small dune. | ||||
| (1018, 1074) | 18 | 0 | Ground level right | White | Empty air above ground level right | |||||
| (1018, 1075) | 18 | 1 | Ground level right | White | Empty air above ground level right | |||||
| (1018, 1076) | 18 | 2 | Ground level right | White | Empty air above ground level right | |||||
| (1018, 1077) | 18 | 3 | Rebel Blockade Runner | Bottom hull of the Runner | Bottom of the hull of the Rebel Blockade Runner. Almost white but at the top right corner the hull enters this image | |||||
| (1018, 1078) | 18 | 4 | Rebel Blockade Runner | Bottom hull of the Runner with room | Death Star plans room: The right end of a big room inside the Rebel Blockade Runner with people left of this image. Below part of the bottom of the hull, but the image is mostly black except in the left part | |||||
| (1018, 1079) | 18 | 5 | Rebel Blockade Runner | Top hull of the Runner with room | Y | Y | Y | Death Star plans room: Torpedoes; one exploding on top of the hull of the Rebel Blockade Runner where the hull is inclining up to towards the right are Ponytail with an arrow on her bow and Cueball who has just shoot an arrow from his bow. They are aiming upwards, the aggression a response to a torpedo that has just exploded in a large cloud making a dent in the hull. Part of the explosion is in the image to the right. To the very left in this image is part of the text spoken by the two Cueballs at the antenna in the image to the left. Below this is the upper right corner of a big room inside the space ship | ||
| (1018, 1080) | 18 | 6 | Rebel Blockade Runner | White | Empty air above the Rebel Blockade Runner | |||||
| (1018, 1081) | 18 | 7 | Torpedoes | White | Empty air left of torpedoes | |||||
| (1018, 1082) | 18 | 8 | Torpedoes | White | Empty air left of torpedoes | |||||
| (1018, 1083) | 18 | 9 | Torpedoes | White | Empty air left of torpedoes | |||||
| (1018, 1084) | 18 | 10 | Torpedoes | White | Empty air left of torpedoes | |||||
| (1018, 1089) | 18 | 15 | Destroyer Rotary section | White | Empty air below the Destroyer | |||||
| (1018, 1090) | 18 | 16 | Destroyer Rotary section | White | Empty air below the Destroyer | |||||
| (1018, 1091) | 18 | 17 | Destroyer Rotary section | White | Empty air below the Destroyer | |||||
| (1018, 1092) | 18 | 18 | Destroyer Rotary section | Bottom hull of the Destroyer | Below the hull of the Destroyer. At the top of this image the hull of the Destroyer can be seen, gently increasing its size towards right | |||||
| (1018, 1093) | 18 | 19 | Destroyer Rotary section | Black | Black, can be seen, inside the Destroyer | |||||
| (1018, 1094) | 18 | 20 | Destroyer Rotary section | Black | Black, can be seen, inside the Destroyer | |||||
| (1018, 1095) | 18 | 21 | Destroyer Rotary section | Inside the Destroyer: Corridor | A corridor goes through the image below the center | |||||
| (1018, 1096) | 18 | 22 | Destroyer Rotary section | Black | Black, can be seen, inside the Destroyer | |||||
| (1018, 1097) | 18 | 23 | Destroyer Rotary section | Top hull of the Destroyer | Above the hull of the Destroyer. At the bottom of this image the hull of the Destroyer can be seen gently increasing its size towards right. | |||||
| (1018, 1098) | 18 | 24 | Destroyer Rotary section | White | Empty air above the Destroyer | |||||
| (1018, 1099) | 18 | 25 | Destroyer Rotary section | White | Empty air above the Destroyer | |||||
| (1018, 1100) | 18 | 26 | Destroyer Rotary section | White | Empty air above the Destroyer | |||||
| (1019, 1069) | 19 | -5 | Ground level right | Black | Black, never seen, below lowest visible terrain, bottom images, with white line at the bottom | |||||
| (1019, 1070) | 19 | -4 | Ground level right | Black | Black, never seen, below lowest visible terrain | |||||
| (1019, 1071) | 19 | -3 | Ground level right | Black | Black, never seen, below lowest visible terrain | |||||
| (1019, 1072) | 19 | -2 | Ground level right | Black | Black, can be seen, below ground level right | |||||
| (1019, 1073) | 19 | -1 | Ground level right | Ocean | Y | Y | Megan is rating the Ocean she is looking out across | |||
| (1019, 1074) | 19 | 0 | Ground level right | White | Empty air above ground level right | |||||
| (1019, 1075) | 19 | 1 | Ground level right | White | Empty air above ground level right | |||||
| (1019, 1076) | 19 | 2 | Ground level right | White | Empty air above ground level right | |||||
| (1019, 1077) | 19 | 3 | Rebel Blockade Runner | Bottom hull of the Runner | Bottom of the hull of the Rebel Blockade Runner with a small bulge down | |||||
| (1019, 1078) | 19 | 4 | Rebel Blockade Runner | Black | Black, can be seen, inside Rebel Blockade Runner | |||||
| (1019, 1079) | 19 | 5 | Rebel Blockade Runner | Top hull of the Runner | Y | Y | Torpedoes; one hitting the hull of the Rebel Blockade Runner. This image is almost entirely black and inside the space ship. But in the top part is the outside of the hull of the ship. To the left is the rest of the explosion of the torpedo hitting the ship in the image to the left. Another torpedo is just hitting the hull of the space ship (presumably exploding in the next instant), in the center of this image at the very top, where the hull bulges up and out. Standing just right of this still intact torpedo are two Cueballs, the left one is leaning left to look up at the torpedoes coming down above. But neither these nor the heads of the Cueballs can be seen as they are cut off by the top edge of the frame. | |||
| (1019, 1080) | 19 | 6 | Rebel Blockade Runner | Torpedoes | Y | Y | Y | Torpedoes; ten in the air and one hitting the hull (that are only visible in the image below). Just above the top part of the hull of the Rebel Blockade Runner we find the heads of two Cueballs. They are just to the right of the torpedo that is hitting the top most part of the hull where it bulges up and out, but this is still just below the frame of this image in the image below. The left Cueball is looking up and right towards the direction from where the torpedoes are coming. The other is looking at him. Apart from the torpedo that has already hit the hull there are now ten other torpedoes hanging in two showers of five above and mainly to the left of them. The three most right torpedoes are above the two Cueballs | ||
| (1019, 1081) | 19 | 7 | Torpedoes | Torpedoes | Y | 1 | Torpedoes; Six are falling down and right through this image mainly in the right part of the image. There is a coin between the two most central torpedoes | |||
| (1019, 1082) | 19 | 8 | Torpedoes | White | Empty air left of torpedoes | |||||
| (1019, 1083) | 19 | 9 | Torpedoes | White | Empty air left of torpedoes | |||||
| (1019, 1084) | 19 | 10 | Torpedoes | White | Empty air left of torpedoes | |||||
| (1019, 1089) | 19 | 15 | Destroyer Rotary section | White | Empty air below the Destroyer | |||||
| (1019, 1090) | 19 | 16 | Destroyer Rotary section | White | Empty air below the Destroyer | |||||
| (1019, 1091) | 19 | 17 | Destroyer Rotary section | White | Empty air below the Destroyer | |||||
| (1019, 1092) | 19 | 18 | Destroyer Rotary section | Bottom hull of the Destroyer | Below the hull of the Destroyer. At the top of this image the hull of the Destroyer can be seen, gently increasing its size towards right | |||||
| (1019, 1093) | 19 | 19 | Destroyer Rotary section | Black | Black, can be seen, inside the Destroyer | |||||
| (1019, 1094) | 19 | 20 | Destroyer Rotary section | Black | Black, can be seen, inside the Destroyer | |||||
| (1019, 1095) | 19 | 21 | Destroyer Rotary section | Inside the Destroyer: Corridor | A corridor goes through the image below the center | |||||
| (1019, 1096) | 19 | 22 | Destroyer Rotary section | Black | Black, can be seen, inside the Destroyer | |||||
| (1019, 1097) | 19 | 23 | Destroyer Rotary section | Top hull of the Destroyer | Above the hull of the Destroyer. At the bottom of this image the hull of the Destroyer can be seen gently increasing its size towards right. | |||||
| (1019, 1098) | 19 | 24 | Destroyer Rotary section | White | Empty air above the Destroyer | |||||
| (1019, 1099) | 19 | 25 | Destroyer Rotary section | White | Empty air above the Destroyer | |||||
| (1019, 1100) | 19 | 26 | Destroyer Rotary section | White | Empty air above the Destroyer | |||||
| (1020, 1069) | 20 | -5 | Ground level right | Black | Black, never seen, below lowest visible terrain, bottom images, with white line at the bottom | |||||
| (1020, 1070) | 20 | -4 | Ground level right | Black | Black, never seen, below lowest visible terrain | |||||
| (1020, 1071) | 20 | -3 | Ground level right | Black | Black, never seen, below lowest visible terrain | |||||
| (1020, 1072) | 20 | -2 | Ground level right | Black | Black, can be seen, below ground level right | |||||
| (1020, 1073) | 20 | -1 | Ground level right | Ocean | Waves | |||||
| (1020, 1074) | 20 | 0 | Ground level right | White | Empty air above ground level right | |||||
| (1020, 1075) | 20 | 1 | Ground level right | White | Empty air above ground level right | |||||
| (1020, 1076) | 20 | 2 | Ground level right | White | Empty air above ground level right | |||||
| (1020, 1077) | 20 | 3 | Rebel Blockade Runner | Bottom hull of the Runner | Y | Bottom of the hull of the Rebel Blockade Runner at the rear end. There is something looking like a rudder from a normal ship | ||||
| (1020, 1078) | 20 | 4 | Rebel Blockade Runner | Rear end of the Runner | 1 | The rear end of the Rebel Blockade Runner with what looks like exhaust from the engines. In front of this at the bottom left of this image there is a coin. Most of the left part of this image is black | ||||
| (1020, 1079) | 20 | 5 | Rebel Blockade Runner | Rear end - top hull of the Runner | Y | Y | The top rear end of the Rebel Blockade Runner with what looks like exhaust from the engines. Megan is holding on to Cueball who is leaning over the end of the ship. He is holding on to a long stick (with a huge marshmallow at the end as can be seen in the image to the right of this.) The stick bends down in front of the exhaust. Maybe they are trying to roast the marshmallow in the heat from the exhaust | |||
| (1020, 1080) | 20 | 6 | Rebel Blockade Runner | White | Empty air above the Rebel Blockade Runner | |||||
| (1020, 1081) | 20 | 7 | Torpedoes | Torpedoes | Y | Torpedoes; Three are falling down and right through this image mainly in the top left part of the image | ||||
| (1020, 1082) | 20 | 8 | Torpedoes | Torpedoes | Y | Torpedoes; two are falling down and right through the center of this image | ||||
| (1020, 1083) | 20 | 9 | Torpedoes | Torpedoes | Y | Y | Y | Torpedoes; three are falling down and right through the right part of this image. The top right torpedo is cut off by the edge of the image as are Beret Guy who rides this torpedo down while shouting a text which is also cut off at the right edge | ||
| (1020, 1084) | 20 | 10 | Torpedoes | White | Empty air left of torpedoes | |||||
| (1020, 1085) | 20 | 11 | Torpedoes | White | Empty air left of torpedoes | |||||
| (1020, 1086) | 20 | 12 | Torpedoes | White | Empty air left of torpedoes | |||||
| (1020, 1087) | 20 | 13 | Torpedoes | White | Empty air left of torpedoes | |||||
| (1020, 1088) | 20 | 14 | Torpedoes | White | Empty air left of torpedoes | |||||
| (1020, 1089) | 20 | 15 | Destroyer Rotary section | White | Empty air below the Destroyer | |||||
| (1020, 1090) | 20 | 16 | Destroyer Rotary section | White | Empty air below the Destroyer | |||||
| (1020, 1091) | 20 | 17 | Destroyer Rotary section | White | Empty air below the Destroyer | |||||
| (1020, 1092) | 20 | 18 | Destroyer Rotary section | Bottom hull of the Destroyer | Below the hull of the Destroyer. At the top of this image the hull of the Destroyer can be seen, gently increasing its size towards right | |||||
| (1020, 1093) | 20 | 19 | Destroyer Rotary section | Black | Black, can be seen, inside the Destroyer | |||||
| (1020, 1094) | 20 | 20 | Destroyer Rotary section | Black | Black, can be seen, inside the Destroyer | |||||
| (1020, 1095) | 20 | 21 | Destroyer Rotary section | Inside the Destroyer: Corridor | A corridor goes through the image below the center but rising towards right to the center | |||||
| (1020, 1096) | 20 | 22 | Destroyer Rotary section | Black | Black, can be seen, inside the Destroyer | |||||
| (1020, 1097) | 20 | 23 | Destroyer Rotary section | Top hull of the Destroyer | Above the hull of the Destroyer. At the bottom of this image the hull of the Destroyer can be seen gently increasing its size towards right. | |||||
| (1020, 1098) | 20 | 24 | Destroyer Rotary section | White | Empty air above the Destroyer | |||||
| (1020, 1099) | 20 | 25 | Destroyer Rotary section | White | Empty air above the Destroyer | |||||
| (1020, 1100) | 20 | 26 | Destroyer Rotary section | White | Empty air above the Destroyer | |||||
| (1021, 1069) | 21 | -5 | Ground level right | Black | Black, never seen, below lowest visible terrain, bottom images, with white line at the bottom | |||||
| (1021, 1070) | 21 | -4 | Ground level right | Black | Black, never seen, below lowest visible terrain | |||||
| (1021, 1071) | 21 | -3 | Ground level right | Black | Black, never seen, below lowest visible terrain | |||||
| (1021, 1072) | 21 | -2 | Ground level right | Black | Black, can be seen, below ground level right | |||||
| (1021, 1073) | 21 | -1 | Ground level right | Ocean | Waves | |||||
| (1021, 1074) | 21 | 0 | Ground level right | White | Empty air above ground level right | |||||
| (1021, 1075) | 21 | 1 | Ground level right | White | Empty air above ground level right | |||||
| (1021, 1076) | 21 | 2 | Ground level right | White | Empty air above ground level right | |||||
| (1021, 1077) | 21 | 3 | Rebel Blockade Runner | White | Empty air under and right of the Rebel Blockade Runner | |||||
| (1021, 1078) | 21 | 4 | Rebel Blockade Runner | White | Empty air right of the Rebel Blockade Runner | |||||
| (1021, 1079) | 21 | 5 | Rebel Blockade Runner | White - almost | Y | Empty air except for the long stick with a huge marshmallow that just enters the image from the left. In the image to the left of this we see Cueball holding this stick out in front of the exhaust of the Rebel Blockade Runner to presumably roast it in the heat | ||||
| (1021, 1080) | 21 | 6 | Rebel Blockade Runner | White | Empty air above the Rebel Blockade Runner | |||||
| (1021, 1081) | 21 | 7 | Torpedoes | White | Empty air right of torpedoes | |||||
| (1021, 1082) | 21 | 8 | Torpedoes | Torpedoes | Y | Torpedoes; one is falling down and right through the top left part of this image | ||||
| (1021, 1083) | 21 | 9 | Torpedoes | Torpedoes | Y | Y | Y | Torpedoes; two are falling down and right. One is at the top right corner. The other torpedo is cut off by the left edge of the image as are Beret Guy who rides this torpedo down while shouting a text which is also cut off at the left edge | ||
| (1021, 1084) | 21 | 10 | Torpedoes | White | Empty air left of torpedoes | |||||
| (1021, 1085) | 21 | 11 | Torpedoes | White | Empty air left of torpedoes | |||||
| (1021, 1086) | 21 | 12 | Torpedoes | White | Empty air left of torpedoes | |||||
| (1021, 1087) | 21 | 13 | Torpedoes | White | Empty air left of torpedoes | |||||
| (1021, 1088) | 21 | 14 | Torpedoes | White | Empty air left of torpedoes | |||||
| (1021, 1089) | 21 | 15 | Destroyer Rotary section | White | Empty air below the Destroyer | |||||
| (1021, 1090) | 21 | 16 | Destroyer Rotary section | White | Empty air below the Destroyer | |||||
| (1021, 1091) | 21 | 17 | Destroyer Rotary section | White | Empty air below the Destroyer | |||||
| (1021, 1092) | 21 | 18 | Destroyer Rotary section | Bottom hull of the Destroyer | Below the hull of the Destroyer. At the top of this image the hull of the Destroyer can be seen, gently increasing its size towards right | |||||
| (1021, 1093) | 21 | 19 | Destroyer Rotary section | Black | Black, can be seen, inside the Destroyer | |||||
| (1021, 1094) | 21 | 20 | Destroyer Rotary section | Black | Black, can be seen, inside the Destroyer | |||||
| (1021, 1095) | 21 | 21 | Destroyer Rotary section | Inside the Destroyer: Corridor | A corridor goes through the image at the center | |||||
| (1021, 1096) | 21 | 22 | Destroyer Rotary section | Black | Black, can be seen, inside the Destroyer | |||||
| (1021, 1097) | 21 | 23 | Destroyer Rotary section | Top hull of the Destroyer | Above the hull of the Destroyer. At the bottom of this image the hull of the Destroyer can be seen gently increasing its size towards right. | |||||
| (1021, 1098) | 21 | 24 | Destroyer Rotary section | White | Empty air above the Destroyer | |||||
| (1021, 1099) | 21 | 25 | Destroyer Rotary section | White | Empty air above the Destroyer | |||||
| (1021, 1100) | 21 | 26 | Destroyer Rotary section | White | Empty air above the Destroyer | |||||
| (1022, 1069) | 22 | -5 | Ground level right | Black | Black, never seen, below lowest visible terrain, bottom images, with white line at the bottom | |||||
| (1022, 1070) | 22 | -4 | Ground level right | Black | Black, never seen, below lowest visible terrain | |||||
| (1022, 1071) | 22 | -3 | Ground level right | Black | Black, never seen, below lowest visible terrain | |||||
| (1022, 1072) | 22 | -2 | Ground level right | Black | Black, can be seen, below ground level right | |||||
| (1022, 1073) | 22 | -1 | Ground level right | Ocean | Y | Y | Y | 1 | Waves. A rouge wave rises above the sea talking to Cueball in the water. There is a coin above the wave. | |
| (1022, 1074) | 22 | 0 | Ground level right | White | Empty air above ground level right | |||||
| (1022, 1075) | 22 | 1 | Ground level right | White | Empty air above ground level right | |||||
| (1022, 1076) | 22 | 2 | Ground level right | White | Empty air above ground level right | |||||
| (1022, 1077) | 22 | 3 | Rebel Blockade Runner | White | Empty air under and right of the Rebel Blockade Runner | |||||
| (1022, 1078) | 22 | 4 | Rebel Blockade Runner | White | Empty air right of the Rebel Blockade Runner | |||||
| (1022, 1079) | 22 | 5 | Rebel Blockade Runner | White | Empty air right of the Rebel Blockade Runner | |||||
| (1022, 1080) | 22 | 6 | Rebel Blockade Runner | White | Empty air above the Rebel Blockade Runner | |||||
| (1022, 1081) | 22 | 7 | Torpedoes | White | Empty air right of torpedoes | |||||
| (1022, 1082) | 22 | 8 | Torpedoes | White | Empty air right of torpedoes | |||||
| (1022, 1083) | 22 | 9 | Torpedoes | White | Empty air right of torpedoes | |||||
| (1022, 1084) | 22 | 10 | Torpedoes | Torpedoes | Y | Torpedoes; four are falling down and right through the diagonal going bottom left top right of this image | ||||
| (1022, 1085) | 22 | 11 | Torpedoes | Torpedoes | Y | Torpedoes; four are falling down and right two at the bottom and two at the top of this image | ||||
| (1022, 1086) | 22 | 12 | Torpedoes | White | Empty air left of torpedoes | |||||
| (1022, 1087) | 22 | 13 | Torpedoes | White | Empty air left of torpedoes | |||||
| (1022, 1088) | 22 | 14 | Torpedoes | White | Empty air left of torpedoes | |||||
| (1022, 1089) | 22 | 15 | Destroyer Rotary section | White | Empty air below the Destroyer | |||||
| (1022, 1090) | 22 | 16 | Destroyer Rotary section | White | Empty air below the Destroyer | |||||
| (1022, 1091) | 22 | 17 | Destroyer Rotary section | White | Empty air below the Destroyer | |||||
| (1022, 1092) | 22 | 18 | Destroyer Rotary section | Bottom hull of the Destroyer | Below the hull of the Destroyer. At the center of this image the hull of the Destroyer can be seen, gently increasing its size towards right, even taking a small step down to the left | |||||
| (1022, 1093) | 22 | 19 | Destroyer Rotary section | Inside the Destroyer: Corridor and shaft | A shaft enters in right of the middle of the image from above and goes down below the center of the image where it turns right into a corridor forming an L | |||||
| (1022, 1094) | 22 | 20 | Destroyer Rotary section | Inside the Destroyer: Shaft | A shaft enters in the middle of the image from above and goes down through the image | |||||
| (1022, 1095) | 22 | 21 | Destroyer Rotary section | Inside the Destroyer: Room, corridor and shaft | Three coin square room: A corridor enters left at the center going right across the image. In the middle a shaft goes down through the image forming a T. To the very right a room begins. It extends both above and to the right. (Inside the room there are three coins one in each of the three corners not in this image) | |||||
| (1022, 1096) | 22 | 22 | Destroyer Rotary section | Black - almost | Three coin square room: Black almost except for the very bottom right corner where the top left corner of the small square room with three coins in the corner can be seen. The coin in this corner is in the image right and below this image | |||||
| (1022, 1097) | 22 | 23 | Destroyer Rotary section | Top hull of the Destroyer | 1.5 | Above the hull of the Destroyer. At the bottom of this image the hull of the Destroyer can be seen gently increasing its size towards right. To the very right there are two coins, one of the coins are only half in this image. In total there are three coins in a row here, but 1.5 of them are in the next image to the right | ||||
| (1022, 1098) | 22 | 24 | Destroyer Rotary section | White | Empty air above the Destroyer | |||||
| (1022, 1099) | 22 | 25 | Destroyer Rotary section | White | Empty air above the Destroyer | |||||
| (1022, 1100) | 22 | 26 | Destroyer Rotary section | White | Empty air above the Destroyer | |||||
| (1023, 1069) | 23 | -5 | Ground level right | Black | Black, never seen, below lowest visible terrain, bottom images, with white line at the bottom | |||||
| (1023, 1070) | 23 | -4 | Ground level right | Black | Black, never seen, below lowest visible terrain | |||||
| (1023, 1071) | 23 | -3 | Ground level right | Black | Black, never seen, below lowest visible terrain | |||||
| (1023, 1072) | 23 | -2 | Ground level right | Black | Black, can be seen, below ground level right | |||||
| (1023, 1073) | 23 | -1 | Ground level right | Ocean | Y | Waves and part of Cueballs text | ||||
| (1023, 1074) | 23 | 0 | Ground level right | White | Empty air above ground level right | |||||
| (1023, 1075) | 23 | 1 | Ground level right | White | Empty air above ground level right | |||||
| (1023, 1076) | 23 | 2 | Ground level right | White | Empty air above ground level right | |||||
| (1023, 1077) | 23 | 3 | Rebel Blockade Runner | White | Empty air under and right of the Rebel Blockade Runner | |||||
| (1023, 1078) | 23 | 4 | Rebel Blockade Runner | White | Empty air right of the Rebel Blockade Runner | |||||
| (1023, 1079) | 23 | 5 | Rebel Blockade Runner | White | Empty air right of the Rebel Blockade Runner | |||||
| (1023, 1080) | 23 | 6 | Rebel Blockade Runner | White | Empty air above the Rebel Blockade Runner | |||||
| (1023, 1081) | 23 | 7 | Torpedoes | White | Empty air right of torpedoes | |||||
| (1023, 1082) | 23 | 8 | Torpedoes | White | Empty air right of torpedoes | |||||
| (1023, 1083) | 23 | 9 | Torpedoes | White | Empty air right of torpedoes | |||||
| (1023, 1084) | 23 | 10 | Torpedoes | White | Empty air right of torpedoes | |||||
| (1023, 1085) | 23 | 11 | Torpedoes | Torpedoes | Y | Torpedoes; two are falling down and right through the top left part of this image | ||||
| (1023, 1086) | 23 | 12 | Torpedoes | Torpedoes | Y | Torpedoes; four are falling down and right three just left of the center and one at the right side of this image | ||||
| (1023, 1087) | 23 | 13 | Torpedoes | White | Empty air left of torpedoes | |||||
| (1023, 1088) | 23 | 14 | Torpedoes | White | Empty air left of torpedoes | |||||
| (1023, 1089) | 23 | 15 | Destroyer Rotary section | White | Empty air below the Destroyer | |||||
| (1023, 1090) | 23 | 16 | Destroyer Rotary section | White | Empty air below the Destroyer | |||||
| (1023, 1091) | 23 | 17 | Destroyer Rotary section | White | Empty air below the Destroyer | |||||
| (1023, 1092) | 23 | 18 | Destroyer Rotary section | Bottom hull of the Destroyer | Below the hull of the Destroyer. At the center of this image the hull of the Destroyer can be seen, gently increasing its size towards right | |||||
| (1023, 1093) | 23 | 19 | Destroyer Rotary section | Inside the Destroyer: Corridor | A corridor goes through the image below the center | |||||
| (1023, 1094) | 23 | 20 | Destroyer Rotary section | Black | Black, can be seen, inside the Destroyer | |||||
| (1023, 1095) | 23 | 21 | Destroyer Rotary section | Inside the Destroyer: Room | 3 | Three coin square room: A small square room that ends past the middle to the left and with floor about the center of the image. It extends both above and to the left. There is a coin at the bottom right corner of the room and in both the left upper part at the edge and at the right upper part of the room. (The ceiling and left corner of this room are just outside this image, and thus the three coins visible in this image are located at each of the three corners formed by the room | ||||
| (1023, 1096) | 23 | 22 | Destroyer Rotary section | Inside the Destroyer: Room | Three coin square room: Black except for the very bottom where the ceiling and right top corner of the small square room with three coins in the corners can be seen. The coins in the top corners is in the image below this image | |||||
| (1023, 1097) | 23 | 23 | Destroyer Rotary section | Top hull of the Destroyer | 1.5 | Above the hull of the Destroyer. At the center of this image the hull of the Destroyer can be seen gently increasing its size towards right. To the very left there are two coins, one of the coins are only half in this image. In total there are three coins in a row here, but 1.5 of them are in the next image to the left | ||||
| (1023, 1098) | 23 | 24 | Destroyer Rotary section | White | Empty air above the Destroyer | |||||
| (1023, 1099) | 23 | 25 | Destroyer Rotary section | White | Empty air above the Destroyer | |||||
| (1023, 1100) | 23 | 26 | Destroyer Rotary section | White | Empty air above the Destroyer | |||||
| (1024, 1069) | 24 | -5 | Ground level right | Black | Black, never seen, below lowest visible terrain, bottom images, with white line at the bottom | |||||
| (1024, 1070) | 24 | -4 | Ground level right | Black | Black, never seen, below lowest visible terrain | |||||
| (1024, 1071) | 24 | -3 | Ground level right | Black | Black, never seen, below lowest visible terrain | |||||
| (1024, 1072) | 24 | -2 | Ground level right | Black | Black, can be seen, below ground level right | |||||
| (1024, 1073) | 24 | -1 | Ground level right | Ocean | Right bank of the ocean | |||||
| (1024, 1074) | 24 | 0 | Ground level right | White | Empty air above ground level right | |||||
| (1024, 1075) | 24 | 1 | Ground level right | White | Empty air above ground level right | |||||
| (1024, 1076) | 24 | 2 | Ground level right | White | Empty air above ground level right | |||||
| (1024, 1085) | 24 | 11 | Torpedoes | Torpedoes | Y | Torpedoes; one is falling down and right through the top center of this image | ||||
| (1024, 1086) | 24 | 12 | Torpedoes | Torpedoes | Y | Torpedoes; nine are falling down and right through most parts of this image below the very top. The top right torpedo, is just showing the very tip, the rest being cut off by the right edge of this image | ||||
| (1024, 1087) | 24 | 13 | Torpedoes | White | Empty air left of torpedoes | |||||
| (1024, 1088) | 24 | 14 | Torpedoes | White | Empty air left of torpedoes | |||||
| (1024, 1089) | 24 | 15 | Destroyer Rotary section | White | Empty air below the Destroyer | |||||
| (1024, 1090) | 24 | 16 | Destroyer Rotary section | White | Empty air below the Destroyer | |||||
| (1024, 1091) | 24 | 17 | Destroyer Rotary section | White | Empty air below the Destroyer | |||||
| (1024, 1092) | 24 | 18 | Destroyer Rotary section | Bottom hull of the Destroyer | Below the hull of the Destroyer. At the bottom of this image the hull of the Destroyer can be seen, gently increasing its size towards right | |||||
| (1024, 1093) | 24 | 19 | Destroyer Rotary section | Inside the Destroyer: Corridor | A corridor goes through the image below the center | |||||
| (1024, 1094) | 24 | 20 | Destroyer Rotary section | Black | Black, can be seen, inside the Destroyer | |||||
| (1024, 1095) | 24 | 21 | Destroyer Rotary section | Black | Black, can be seen, inside the Destroyer | |||||
| (1024, 1096) | 24 | 22 | Destroyer Rotary section | Black | Black, can be seen, inside the Destroyer | |||||
| (1024, 1097) | 24 | 23 | Destroyer Rotary section | Top hull of the Destroyer | Above the hull of the Destroyer. At the center of this image the hull of the Destroyer can be seen gently increasing its size towards right. | |||||
| (1024, 1098) | 24 | 24 | Destroyer Rotary section | White | Empty air above the Destroyer | |||||
| (1024, 1099) | 24 | 25 | Destroyer Rotary section | White | Empty air above the Destroyer | |||||
| (1024, 1100) | 24 | 26 | Destroyer Rotary section | White | Empty air above the Destroyer | |||||
| (1025, 1069) | 25 | -5 | Ground level right | Black | Black, never seen, below lowest visible terrain, bottom images, with white line at the bottom | |||||
| (1025, 1070) | 25 | -4 | Ground level right | Black | Black, never seen, below lowest visible terrain | |||||
| (1025, 1071) | 25 | -3 | Ground level right | Black | Black, never seen, below lowest visible terrain | |||||
| (1025, 1072) | 25 | -2 | Ground level right | Black | Black, can be seen, below ground level right | |||||
| (1025, 1073) | 25 | -1 | Ground level right | Terrain | Y | Ruin; left part | ||||
| (1025, 1074) | 25 | 0 | Ground level right | White | Empty air above ground level right | |||||
| (1025, 1075) | 25 | 1 | Ground level right | White | Empty air above ground level right | |||||
| (1025, 1076) | 25 | 2 | Ground level right | White | Empty air above ground level right | |||||
| (1025, 1085) | 25 | 11 | Torpedoes | White | Empty air right of torpedoes | |||||
| (1025, 1086) | 25 | 12 | Torpedoes | Torpedoes | Y | Y | Torpedoes; two are falling down and right through the top of this image. One is in the middle, but the left torpedoes tip is cut off at the left edge of this image. At the very top, right of the right torpedo, is part of the text from the explosion of two torpedoes hitting each other in the image above | |||
| (1025, 1087) | 25 | 13 | Torpedoes | Torpedoes | Y | Y | Torpedoes; six are falling down and right, four in a group to the right and in the middle of this image. At the very bottom in the middle two torpedoes are hitting each other and they are exploding in a cloud with text. Part of the text is cut off at the bottom edge of this image | |||
| (1025, 1088) | 25 | 14 | Torpedoes | White | Empty air left of torpedoes | |||||
| (1025, 1089) | 25 | 15 | Destroyer Rotary section | White | Empty air below the Destroyer | |||||
| (1025, 1090) | 25 | 16 | Destroyer Rotary section | White | Empty air below the Destroyer | |||||
| (1025, 1091) | 25 | 17 | Destroyer Rotary section | White | Empty air below the Destroyer | |||||
| (1025, 1092) | 25 | 18 | Destroyer Rotary section | Bottom hull of the Destroyer with shaft | Below the hull of the Destroyer. To the right a ledge is going out right beneath the opening of a shaft. The ledge stops just at the right edge of this image. The shaft is going up above the ledge. At the bottom of this image the hull of the Destroyer can be seen, gently increasing its size towards right, but where the ledge ends, the hull takes a step up to the top of the corridor. It stays here in the next few images to the right | |||||
| (1025, 1093) | 25 | 19 | Destroyer Rotary section | Inside the Destroyer: Corridor and shaft | A corridor enters left below the center going right across the image. Right of the middle a shaft goes down through the image and at the very rightmost part of the image a shaft goes up part of this is inside the next image | |||||
| (1025, 1094) | 25 | 20 | Destroyer Rotary section | Inside the Destroyer: Shaft | A shaft enters to the very right from above and goes down through the image | |||||
| (1025, 1095) | 25 | 21 | Destroyer Rotary section | Inside the Destroyer: Shaft | A shaft enters the image from above at the very right and goes down through the image, part of it in the next image | |||||
| (1025, 1096) | 25 | 22 | Destroyer Rotary section | Inside the Destroyer: Shaft | A shaft enters in the very right part of the image from above and goes down through the image. The right part of the shaft is in the next image to the right | |||||
| (1025, 1097) | 25 | 23 | Destroyer Rotary section | Top hull of the Destroyer with shaft | 0.25 | Above the hull of the Destroyer. At the center of this image the hull of the Destroyer can be seen gently increasing its size towards right until the middle. Here the hull is flat and at the very right there is a shaft going down into the Destroyer. Above the shaft there is a ledge going out over the shaft opening just to above the flat part of the hull. At the very top right corner above the ledge over the shaft there is a coin. Actually there is just about a quarter of a coin, since this coin is situated at a cross where four images joins. So it will be visible both in the image to the right and the two images above | ||||
| (1025, 1098) | 25 | 24 | Destroyer Rotary section | White | 0.25 | Empty air above the Destroyer. At the bottom right corner (above a ledge over a shaft in the image below) there is a coin. Actually there is just about a quarter of a coin, since this coin is situated at a cross where four images joins. So it will be visible both in the image to the right and the two images below | ||||
| (1025, 1099) | 25 | 25 | Destroyer Rotary section | White | Empty air above the Destroyer | |||||
| (1025, 1100) | 25 | 26 | Destroyer Rotary section | White | Empty air above the Destroyer | |||||
| (1026, 1069) | 26 | -5 | Ground level right | Black | Black, never seen, below lowest visible terrain, bottom images, with white line at the bottom | |||||
| (1026, 1070) | 26 | -4 | Ground level right | Black | Black, never seen, below lowest visible terrain | |||||
| (1026, 1071) | 26 | -3 | Ground level right | Black | Black, never seen, below lowest visible terrain | |||||
| (1026, 1072) | 26 | -2 | Ground level right | Black | Black, can be seen, below ground level right | |||||
| (1026, 1073) | 26 | -1 | Ground level right | Terrain | Y | Y | Y | 1 | Ruin; with Megan standing inside and Cueball sitting on the roof playing guitar while singing. A coin is beneath him inside the ruin | |
| (1026, 1074) | 26 | 0 | Ground level right | White - almost | Y | Ruin; above Cueball, only his singing notes and two lines of text can be seen | ||||
| (1026, 1075) | 26 | 1 | Ground level right | White | Empty air above ground level right | |||||
| (1026, 1076) | 26 | 2 | Ground level right | White | Empty air above ground level right | |||||
| (1026, 1085) | 26 | 11 | Torpedoes | White | Empty air right of torpedoes | |||||
| (1026, 1086) | 26 | 12 | Torpedoes | White | Empty air right of torpedoes | |||||
| (1026, 1087) | 26 | 13 | Torpedoes | Torpedoes | Y | Torpedoes; seven are falling down and right through the diagonal going bottom left top right of this image | ||||
| (1026, 1088) | 26 | 14 | Torpedoes | Torpedoes | Y | Torpedoes; four are falling down and right, at the bottom right of this image | ||||
| (1026, 1089) | 26 | 15 | Destroyer Rotary section | White | Empty air below the Destroyer | |||||
| (1026, 1090) | 26 | 16 | Destroyer Rotary section | White | Empty air below the Destroyer | |||||
| (1026, 1091) | 26 | 17 | Destroyer Rotary section | White | Empty air below the Destroyer | |||||
| (1026, 1092) | 26 | 18 | Destroyer Rotary section | Bottom hull of the Destroyer | Below the hull of the Destroyer. At the center of this image the hull of the Destroyer can be seen, gently increasing its size towards right, even taking a small step down to the left where the corridor from the previous image to the left ends | |||||
| (1026, 1093) | 26 | 19 | Destroyer Rotary section | Inside the Destroyer: Room, corridor and shaft | Y | Y | Shall not not pass room: To the right, past the middle is a room with floor below the center and ceiling halfway from center to top. The room extends to the right. A corridor coming from the left below the center and where it enters the room stands Cueball lifting his hand towards left and tells any one approaching: "You shall not not pass!" (There is a coin behind him in the room in the next image to the right). To the very left of the image a shaft goes up from the corridor to the top of the image. Part of the shaft is in the image to the left | |||
| (1026, 1094) | 26 | 20 | Destroyer Rotary section | Inside the Destroyer: Corridor and shaft | A corridor enters right below the center going left across the image. At the very left a shaft goes down through the image forming a lying T. The left part of the shaft is in the image to the left | |||||
| (1026, 1095) | 26 | 21 | Destroyer Rotary section | Inside the Destroyer: Room and shaft | 1 | Two coins on floor room: The very bottom left of this large rectangular room is in the upper right part of this image, and there is a coin. To the far left a shaft is going down through the image, most of it is in the image to the left. | ||||
| (1026, 1096) | 26 | 22 | Destroyer Rotary section | Inside the Destroyer: Room and shaft | Two coins on floor room: The top left of this large rectangular room is in the lower right quarter of this image. To the far left a shaft is going down through the image, most of it is in the image to the left | |||||
| (1026, 1097) | 26 | 23 | Destroyer Rotary section | Top hull of the Destroyer with shaft | 0.25 | Above the hull of the Destroyer. At the very top of this image the hull of the Destroyer can be seen gently increasing its size towards right at the very left part there is a shaft going down into the Destroyer. Since there is a ledge going out over the shaft opening, this is what can be seen at the left. At the very top left corner above the ledge over the shaft there is a coin. Actually there is just about a quarter of a coin, since this coin is situated at a cross where four images joins. So it will be visible both in the image to the left and the two images above | ||||
| (1026, 1098) | 26 | 24 | Destroyer Rotary section | White | 0.25 | Empty air above the Destroyer. At the bottom right corner (above a ledge over a shaft in the image below) there is a coin. Actually there is just about a quarter of a coin, since this coin is situated at a cross where four images joins. So it will be visible both in the image to the left and the two images below | ||||
| (1026, 1099) | 26 | 25 | Destroyer Rotary section | White | Empty air above the Destroyer | |||||
| (1026, 1100) | 26 | 26 | Destroyer Rotary section | White | Empty air above the Destroyer | |||||
| (1027, 1069) | 27 | -5 | Ground level right | Black | Black, never seen, below lowest visible terrain, bottom images, with white line at the bottom | |||||
| (1027, 1070) | 27 | -4 | Ground level right | Black | Black, never seen, below lowest visible terrain | |||||
| (1027, 1071) | 27 | -3 | Ground level right | Black | Black, never seen, below lowest visible terrain | |||||
| (1027, 1072) | 27 | -2 | Ground level right | Black | Black, can be seen, below ground level right | |||||
| (1027, 1073) | 27 | -1 | Ground level right | Terrain | Y | Ruin; left of image but part of Cueballs song text still visible | ||||
| (1027, 1074) | 27 | 0 | Ground level right | White | Empty air above ground level right | |||||
| (1027, 1075) | 27 | 1 | Ground level right | White | Empty air above ground level right | |||||
| (1027, 1076) | 27 | 2 | Ground level right | White | Empty air above ground level right | |||||
| (1027, 1085) | 27 | 11 | Torpedoes | White | Empty air right of torpedoes | |||||
| (1027, 1086) | 27 | 12 | Torpedoes | White | Empty air right of torpedoes | |||||
| (1027, 1087) | 27 | 13 | Torpedoes | White | Empty air right of torpedoes | |||||
| (1027, 1088) | 27 | 14 | Torpedoes | Torpedoes | Y | Torpedoes; three are falling down and right, at the top right of this image | ||||
| (1027, 1089) | 27 | 15 | Destroyer Rotary section | White | Empty air below the Destroyer | |||||
| (1027, 1090) | 27 | 16 | Destroyer Rotary section | White | Empty air below the Destroyer | |||||
| (1027, 1091) | 27 | 17 | Destroyer Rotary section | White | Empty air below the Destroyer | |||||
| (1027, 1092) | 27 | 18 | Destroyer Rotary section | Bottom hull of the Destroyer | Below the hull of the Destroyer. At the bottom of this image the hull of the Destroyer can be seen, gently increasing its size towards right | |||||
| (1027, 1093) | 27 | 19 | Destroyer Rotary section | Inside the Destroyer: Room | 1 | Shall not not pass room: A room with floor below the center, ceiling halfway from center to top and wall to the right halfway between edge and the middle. The room extends to the left (where Cueball tells : "You shall not not pass!") There is a coin in the bottom right corner of the room | ||||
| (1027, 1094) | 27 | 20 | Destroyer Rotary section | Inside the Destroyer: Corridor and shaft | A corridor enters right below the center going left across the image. To the very left, just staying inside the image a shaft goes up from the corridor through the image forming an L lying down | |||||
| (1027, 1095) | 27 | 21 | Destroyer Rotary section | Inside the Destroyer: Room and shaft | 1 | Two coins on floor room: The very bottom right of this large rectangular room is in the upper left part of this image, going past the middle. In the right corner of the room there is a coin. To the far left in the image a shaft is going down out of the room and through the image | ||||
| (1027, 1096) | 27 | 22 | Destroyer Rotary section | Inside the Destroyer: Room | Two coins on floor room: The top right of this large rectangular room is in the lower left quarter of this image | |||||
| (1027, 1097) | 27 | 23 | Destroyer Rotary section | Black - almost | Black inside the Destroyer, except for a small white triangle at the top left corner where the top of the hull is | |||||
| (1027, 1098) | 27 | 24 | Destroyer Rotary section | Top hull of the Destroyer | Above the hull of the Destroyer. At the bottom of this image the hull of the Destroyer can be seen entering the image a little from the left edge and then from there it gently increased its size towards right | |||||
| (1027, 1099) | 27 | 25 | Destroyer Rotary section | White | Empty air above the Destroyer | |||||
| (1027, 1100) | 27 | 26 | Destroyer Rotary section | White | Empty air above the Destroyer | |||||
| (1028, 1069) | 28 | -5 | Ground level right | Black | Black, never seen, below lowest visible terrain, bottom images, with white line at the bottom | |||||
| (1028, 1070) | 28 | -4 | Ground level right | Black | Black, never seen, below lowest visible terrain | |||||
| (1028, 1071) | 28 | -3 | Ground level right | Black | Black, never seen, below lowest visible terrain | |||||
| (1028, 1072) | 28 | -2 | Ground level right | Black | Black, can be seen, below ground level right | |||||
| (1028, 1073) | 28 | -1 | Ground level right | Terrain | Rising terrain | |||||
| (1028, 1074) | 28 | 0 | Ground level right | White | Empty air above ground level right | |||||
| (1028, 1075) | 28 | 1 | Ground level right | White | Empty air above ground level right | |||||
| (1028, 1076) | 28 | 2 | Ground level right | White | Empty air above ground level right | |||||
| (1028, 1089) | 28 | 15 | Torpedoes | Torpedoes | Y | Torpedoes; five are falling down and right, at the bottom of this image | ||||
| (1028, 1090) | 28 | 16 | Torpedoes | White | Empty air left of torpedoes | |||||
| (1028, 1091) | 28 | 17 | Destroyer Rotary section | White | Empty air below the Destroyer | |||||
| (1028, 1092) | 28 | 18 | Destroyer Rotary section | Bottom hull of the Destroyer with corridor | Y | Below the hull of the Destroyer. A corridor begins in the middle of this image. The bottom of the corridor is just a thin ledge above the hull. On this ledge Cueball is leaning over the ledge and a guy with flat black hair is standing behind him. Both are wearing backpacks. The part of the hull that is before and after this corridor is gently increasing its size towards right, but the size increases the full corridor height from the ledge | ||||
| (1028, 1093) | 28 | 19 | Destroyer Rotary section | Black | Black, can be seen, inside the Destroyer | |||||
| (1028, 1094) | 28 | 20 | Destroyer Rotary section | Inside the Destroyer: Corridor | A corridor goes through the image below the center | |||||
| (1028, 1095) | 28 | 21 | Destroyer Rotary section | Inside the Destroyer: Room | Y | Y | 1 | Ice cream room: This small rectangular room that extends to the right has its floor just above the bottom edge of this image, and the ceiling at the center. The left wall begins to the right of the center. At this wall there is a box with an inclined top. There is a white lid on top and on the box "Ice cream" is written in white text. A coin is situated on top of this box | ||
| (1028, 1096) | 28 | 22 | Destroyer Rotary section | Black | Black, can be seen, inside the Destroyer | |||||
| (1028, 1097) | 28 | 23 | Destroyer Rotary section | Black | Black, can be seen, inside the Destroyer | |||||
| (1028, 1098) | 28 | 24 | Destroyer Rotary section | Top hull of the Destroyer | Above the hull of the Destroyer. At the bottom of this image the hull of the Destroyer can be seen gently increasing its size towards right. | |||||
| (1028, 1099) | 28 | 25 | Destroyer Rotary section | White | Empty air above the Destroyer | |||||
| (1028, 1100) | 28 | 26 | Destroyer Rotary section | White | Empty air above the Destroyer | |||||
| (1029, 1069) | 29 | -5 | Ground level right | Black | Black, never seen, below lowest visible terrain, bottom images, with white line at the bottom | |||||
| (1029, 1070) | 29 | -4 | Ground level right | Black | Black, never seen, below lowest visible terrain | |||||
| (1029, 1071) | 29 | -3 | Ground level right | Black | Black, never seen, below lowest visible terrain | |||||
| (1029, 1072) | 29 | -2 | Ground level right | Black | Black, can be seen, below ground level right | |||||
| (1029, 1073) | 29 | -1 | Ground level right | Terrain | Y | Y | 1 | Ponytail is flying a few meters above the ground by flapping her arms. A coin is beneath her | ||
| (1029, 1074) | 29 | 0 | Ground level right | White | Empty air above ground level right | |||||
| (1029, 1075) | 29 | 1 | Ground level right | White | Empty air above ground level right | |||||
| (1029, 1076) | 29 | 2 | Ground level right | White | Empty air above ground level right | |||||
| (1029, 1089) | 29 | 15 | Torpedoes | Torpedoes | Y | 1 | Torpedoes; four are falling down and right, three in the middle and one at the top right of this image. There is a coin between the two torpedoes to the right | |||
| (1029, 1090) | 29 | 16 | Torpedoes | White | Empty air left of torpedoes | |||||
| (1029, 1091) | 29 | 17 | Destroyer Rotary section | Bottom hull of the Destroyer | Below the hull of the Destroyer. At the very top of this image the hull of the Destroyer can be seen, gently increasing its size towards right | |||||
| (1029, 1092) | 29 | 18 | Destroyer Rotary section | Bottom hull of the Destroyer with corridor and shaft | Below the hull of the Destroyer. A corridor comes in from the left. Below it is a small part of the bottom hull visible. In the center of the image the corridor end in a shaft going up into the ship | |||||
| (1029, 1093) | 29 | 19 | Destroyer Rotary section | Inside the Destroyer: Shaft | 1 | A shaft enters in the left part of the image from above and goes down through the image. At the very bottom there is a coin | ||||
| (1029, 1094) | 29 | 20 | Destroyer Rotary section | Inside the Destroyer: Corridor and shaft | 1 | A corridor enters left below the center going right across the image. Left of the middle a shaft goes down through the image forming a crocked T. Just past the shaft to the right there is a coin | ||||
| (1029, 1095) | 29 | 21 | Destroyer Rotary section | Inside the Destroyer: Room and corridor | Y | Y | Ice cream room: This small rectangular room that extends to the left has its floor just above the bottom edge of this image, and the ceiling at the center. To the right past the middle the room ends and a corridor exits the room and goes out the image to the right. Megan talks to Cueball while they walk towards left (where in the next image to the left a coin is situated on top of an ice cream box). The text is almost inside this image, but the first letter is cut off at the left edge | |||
| (1029, 1096) | 29 | 22 | Destroyer Rotary section | Black | Black, can be seen, inside the Destroyer | |||||
| (1029, 1097) | 29 | 23 | Destroyer Rotary section | Inside the Destroyer: Room | Big empty room: The left part of this rectangular room begins just left of the middle, the floor and the ceiling about halfway between the center and the edges. The room continues in the image to the right | |||||
| (1029, 1098) | 29 | 24 | Destroyer Rotary section | Top hull of the Destroyer | Above the hull of the Destroyer. At the bottom of this image the hull of the Destroyer can be seen gently increasing its size towards right. | |||||
| (1029, 1099) | 29 | 25 | Destroyer Rotary section | White | Empty air above the Destroyer | |||||
| (1029, 1100) | 29 | 26 | Destroyer Rotary section | White | Empty air above the Destroyer | |||||
| (1030, 1069) | 30 | -5 | Ground level right | Black | Black, never seen, below lowest visible terrain, bottom images, with white line at the bottom | |||||
| (1030, 1070) | 30 | -4 | Ground level right | Black | Black, never seen, below lowest visible terrain | |||||
| (1030, 1071) | 30 | -3 | Ground level right | Black | Black, never seen, below lowest visible terrain | |||||
| (1030, 1072) | 30 | -2 | Ground level right | Black | Black, can be seen, below ground level right | |||||
| (1030, 1073) | 30 | -1 | Ground level right | Forrest | Y | Trees; three very small | ||||
| (1030, 1074) | 30 | 0 | Ground level right | White | Empty air above ground level right | |||||
| (1030, 1075) | 30 | 1 | Ground level right | White | Empty air above ground level right | |||||
| (1030, 1076) | 30 | 2 | Ground level right | White | Empty air above ground level right | |||||
| (1030, 1089) | 30 | 15 | Torpedoes | Torpedoes | Y | Torpedoes; three are falling down and right, at the top of this image, two to the left one to the right. The middle torpedoes tail is cut off by the upper edge of this image | ||||
| (1030, 1090) | 30 | 16 | Torpedoes | Torpedoes | Y | Torpedoes; three are falling down and right, at the bottom of this image, two to the left one to the right. The left most torpedoes tip has been cut off by the bottom edge of this image as is also the case with the very tip of the tail of the torpedo to the right, but by the right edge of the image | ||||
| (1030, 1091) | 30 | 17 | Destroyer Rotary section | Bottom hull of the Destroyer | Below the hull of the Destroyer. At the top of this image the hull of the Destroyer can be seen, gently increasing its size towards right | |||||
| (1030, 1092) | 30 | 18 | Destroyer Rotary section | Black | Black, can be seen, inside the Destroyer | |||||
| (1030, 1093) | 30 | 19 | Destroyer Rotary section | Black | Black, can be seen, inside the Destroyer | |||||
| (1030, 1094) | 30 | 20 | Destroyer Rotary section | Inside the Destroyer: Corridor | A corridor goes through the image below the center | |||||
| (1030, 1095) | 30 | 21 | Destroyer Rotary section | Inside the Destroyer: Corridor and shaft | A corridor enters left at the very bottom going right across the image. In the middle a shaft goes up through the image forming an upside down T | |||||
| (1030, 1096) | 30 | 22 | Destroyer Rotary section | Inside the Destroyer: Corridor and shaft | A corridor enters right at the center going left to just before the middle where it enters a shaft that goes down through the image from top to bottom | |||||
| (1030, 1097) | 30 | 23 | Destroyer Rotary section | Inside the Destroyer: Room and shaft | Big empty room: The right part of this rectangular room begins at the middle, the floor and the ceiling about halfway between the center and the edges. The room continues in the image to the left. At the bottom right of the room a shaft exits and goes out the bottom edge | |||||
| (1030, 1098) | 30 | 24 | Destroyer Rotary section | Top hull of the Destroyer | Above the hull of the Destroyer. At the bottom of this image the hull of the Destroyer can be seen gently increasing its size towards right. | |||||
| (1030, 1099) | 30 | 25 | Destroyer Rotary section | White | Empty air above the Destroyer | |||||
| (1030, 1100) | 30 | 26 | Destroyer Rotary section | White | Empty air above the Destroyer | |||||
| (1031, 1069) | 31 | -5 | Ground level right | Black | Black, never seen, below lowest visible terrain, bottom images, with white line at the bottom | |||||
| (1031, 1070) | 31 | -4 | Ground level right | Black | Black, never seen, below lowest visible terrain | |||||
| (1031, 1071) | 31 | -3 | Ground level right | Black | Black, never seen, below lowest visible terrain | |||||
| (1031, 1072) | 31 | -2 | Ground level right | Black | Black, can be seen, below ground level right | |||||
| (1031, 1073) | 31 | -1 | Ground level right | Forrest | Y | Trees; one large going above the frame and six small | ||||
| (1031, 1074) | 31 | 0 | Ground level right | Forrest | Y | 1 | Trees; the top of a large tree is at the bottom of this image. At the center above the tree there is a coin | |||
| (1031, 1075) | 31 | 1 | Ground level right | White | Empty air above ground level right | |||||
| (1031, 1076) | 31 | 2 | Ground level right | White | Empty air above ground level right | |||||
| (1031, 1089) | 31 | 15 | Torpedoes | White | Empty air right of torpedoes | |||||
| (1031, 1090) | 31 | 16 | Torpedoes | Torpedoes | Y | Torpedoes; six are falling down and right, almost left to right through the central part of this image. The one to the left is almost outside the image as it has been cut off by the left edge of this image so just the tip of the tail is inside this image | ||||
| (1031, 1091) | 31 | 17 | Destroyer Rotary section | Bottom hull of the Destroyer | Below the hull of the Destroyer. At the top of this image the hull of the Destroyer can be seen, gently increasing its size towards right | |||||
| (1031, 1092) | 31 | 18 | Destroyer Rotary section | Black | Black, can be seen, inside the Destroyer | |||||
| (1031, 1093) | 31 | 19 | Destroyer Rotary section | Black | Black, can be seen, inside the Destroyer | |||||
| (1031, 1094) | 31 | 20 | Destroyer Rotary section | Inside the Destroyer: Corridor | A corridor goes through the image below the center | |||||
| (1031, 1095) | 31 | 21 | Destroyer Rotary section | Inside the Destroyer: Room and corridor | Y | 1 | Steven Universe room: From the left a corridor enters the image at the very bottom and before the middle of the image it enters the bottom of a small square room (ceiling just above the center and right wall halfway past the middle to the right). The room has a raised plateau in the center. On top of this stand a family of four. First there is a short kid with lots of black hair. Then a woman with a hairdo not typically seen in xkcd, blonde but short hair, with a little wisp sticking out front. She seems to wear a miniskirt. Then a taller woman with a square black afro-like hair-do and big glasses. Behind her is a small woman with very long and big blond hair. This can be recognizes as the family from Steven Universe. The boy being Steven. The first woman with least hair is Pearl. The high afro woman in the middle Garnet and. The woman with big blond hair is Amethyst. (See also Steven Universe Wiki. The three women are what is called crystal gems and are aliens. Steven is half alien. The afro haired woman, Garnet, holds up her left hand and above it floats a coin or is it a crystal gem? (There is an image at the bridge where Darth Vader himself references Steven Universe) | |||
| (1031, 1096) | 31 | 22 | Destroyer Rotary section | Inside the Destroyer: Corridor and shaft | 1 | A corridor enters left at the center going right across the image. Left of the middle a shaft goes up through the image forming an upside down T. Inside the shaft there is a coin | ||||
| (1031, 1097) | 31 | 23 | Destroyer Rotary section | Inside the Destroyer: Shaft | A shaft enters left of the middle in this image from above and goes down through the image | |||||
| (1031, 1098) | 31 | 24 | Destroyer Rotary section | Top hull of the Destroyer with shaft | Above the hull of the Destroyer. At the bottom of this image the hull of the Destroyer can be seen gently increasing its size towards right. Left of the middle there is shaft going down into the Destroyer | |||||
| (1031, 1099) | 31 | 25 | Destroyer Rotary section | White | Empty air above the Destroyer | |||||
| (1031, 1100) | 31 | 26 | Destroyer Rotary section | White | Empty air above the Destroyer | |||||
| (1032, 1069) | 32 | -5 | Ground level right | Black | Black, never seen, below lowest visible terrain, bottom images, with white line at the bottom | |||||
| (1032, 1070) | 32 | -4 | Ground level right | Black | Black, never seen, below lowest visible terrain | |||||
| (1032, 1071) | 32 | -3 | Ground level right | Black | Black, never seen, below lowest visible terrain | |||||
| (1032, 1072) | 32 | -2 | Ground level right | Black | Black, can be seen, below ground level right | |||||
| (1032, 1073) | 32 | -1 | Ground level right | Forrest | Y | Trees; one big with only stem in this frame and four small | ||||
| (1032, 1074) | 32 | 0 | Ground level right | Forrest | Y | 1 | Trees; the entire crown of one big tree, and the left part of another big trees crown. At the fork above the main stem in the central tree there is a coin | |||
| (1032, 1075) | 32 | 1 | Ground level right | White | Empty air above ground level right | |||||
| (1032, 1076) | 32 | 2 | Ground level right | White | Empty air above ground level right | |||||
| (1032, 1089) | 32 | 15 | Torpedoes | White | Empty air right of torpedoes | |||||
| (1032, 1090) | 32 | 16 | Torpedoes | Torpedoes | Y | Torpedoes; one is falling down and right, at the top left of this image | ||||
| (1032, 1091) | 32 | 17 | Destroyer Rotary section | Bottom hull of the Destroyer with torpedoes | Y | Torpedoes; six are falling down and right, at the bottom of this image, two at the very bottom to the left and four a little higher to the right. At the top of this image the hull of the Destroyer can be seen, gently increasing its size towards right | ||||
| (1032, 1092) | 32 | 18 | Destroyer Rotary section | Black | Black, can be seen, inside the Destroyer | |||||
| (1032, 1093) | 32 | 19 | Destroyer Rotary section | Black | Black, can be seen, inside the Destroyer | |||||
| (1032, 1094) | 32 | 20 | Destroyer Rotary section | Inside the Destroyer: Corridor and shaft | 1 | Rotary: A corridor goes through the image below the center from the left, but past the middle the corridor takes a turn upwards and continues sloping almost 45 degree upwards reaching the right edge of the image above the center. Where the turn occurs there is a coin | ||||
| (1032, 1095) | 32 | 21 | Destroyer Rotary section | Black - almost | Rotary: In this almost black image there is a small part of the rotary roundabout in the very rightmost part. A part of the circular corridor just enters around the center of the right edge | |||||
| (1032, 1096) | 32 | 22 | Destroyer Rotary section | Inside the Destroyer: Corridor and shaft | Y | Y | Rotary: A corridor goes through the image above the center from the left, but past the middle the corridor takes a turn downwards and continues sloping almost 45 degree downwards reaching the right edge of the image just above the bottom edge. Just past the turn on the top of the downslope is Cueball standing trying to keep his balance while complaining "Ugh, rotaries" | |||
| (1032, 1097) | 32 | 23 | Destroyer Rotary section | Black | Black, can be seen, inside the Destroyer | |||||
| (1032, 1098) | 32 | 24 | Destroyer Rotary section | Top hull of the Destroyer | Above the hull of the Destroyer. At the center of this image the hull of the Destroyer can be seen gently increasing its size towards right. | |||||
| (1032, 1099) | 32 | 25 | Destroyer Rotary section | White | Empty air above the Destroyer | |||||
| (1032, 1100) | 32 | 26 | Destroyer Rotary section | White | Empty air above the Destroyer | |||||
| (1033, 1069) | 33 | -5 | Ground level right | Black | Black, never seen, below lowest visible terrain, bottom images, with white line at the bottom | |||||
| (1033, 1070) | 33 | -4 | Ground level right | Black | Black, never seen, below lowest visible terrain | |||||
| (1033, 1071) | 33 | -3 | Ground level right | Black | Black, never seen, below lowest visible terrain | |||||
| (1033, 1072) | 33 | -2 | Ground level right | Black | Black, can be seen, below ground level right | |||||
| (1033, 1073) | 33 | -1 | Ground level right | Forrest | Y | Trees; two big with only stem in this frame, seven small one of them dead and two bushes | ||||
| (1033, 1074) | 33 | 0 | Ground level right | Forrest | Y | Trees; the right part of the crown of a big tree and most of the crown of another big tree to the right | ||||
| (1033, 1075) | 33 | 1 | Ground level right | White | Empty air above ground level right | |||||
| (1033, 1076) | 33 | 2 | Ground level right | White | Empty air above ground level right | |||||
| (1033, 1089) | 33 | 15 | Destroyer Rotary section | White | Empty air below the Destroyer | |||||
| (1033, 1090) | 33 | 16 | Destroyer Rotary section | White | Empty air below the Destroyer | |||||
| (1033, 1091) | 33 | 17 | Destroyer Rotary section | Bottom hull of the Destroyer with torpedoes | Y | Torpedoes; five are falling down and right, almost through the central part of this image. Three to the left and two at the right. At the top of this image the hull of the Destroyer can be seen, gently increasing its size towards right | ||||
| (1033, 1092) | 33 | 18 | Destroyer Rotary section | Inside the Destroyer: Shaft | A shaft enters the image from above in the far right and goes down to the center of the image and stops (here it merges with a corridor that goes in to the image to the right). Part of the shaft is also in the image to the right | |||||
| (1033, 1093) | 33 | 19 | Destroyer Rotary section | Inside the Destroyer: Shaft | Y | A shaft enters in the very right part of the image from above and goes down through the image; the main part of the shaft is in the next image to the right. At the bottom of the shaft is the very left part of a T shaped Tetris piece, cut off before anything but three small black rectangles can be seen | ||||
| (1033, 1094) | 33 | 20 | Destroyer Rotary section | Inside the Destroyer: Corridor and shaft | Rotary: A corridor/shaft sloping almost 45 degree upwards comes in from the center left, reaching the bottom left part of the rotary which is a corridor that goes around a small room in the center, with four exits like a big roundabout. I this image the bottom part of the rotary goes between the upper part of this image, the left most part in this image disappearing at the top edge of the image just above where the corridor from the left enters into it. To the very right where the rotary exits at the right edge just below the top, there is a shaft going almost straight down, a little to the right to begin with, and then straight down and out at the bottom. The shafts right part extends into the image to the right | |||||
| (1033, 1095) | 33 | 21 | Destroyer Rotary section | Inside the Destroyer: Room, corridor and shaft | Y | Y | 1 | Rotary: This is the center of the roundabout like rotary. To the left the circular corridor that encircles the room to the right can be seen. At the very top and left a corridor/shaft can be seen entering the rotary from above in a 45 degree angle. Just below the center from the circle there is a corridor going right into a small room that is centered around the center of the image, and extends a little into the image to the right. In the room there is a kid with flat black hair, a potted plant growing higher than him and behind these there is a coin | ||
| (1033, 1096) | 33 | 22 | Destroyer Rotary section | Inside the Destroyer: Room, corridor and shaft | Rotary: This is the top, above the center, of the roundabout like rotary. At the left below the center a corridor/shaft can be seen entering the rotary from above in a 45 degree angle. From there the corridor that circles around the room in the center (in the image below) can be seen taking a circle curve above the bottom of this image, entering from below to the left where the shaft comes down, and exiting to the right just above the bottom | |||||
| (1033, 1097) | 33 | 23 | Destroyer Rotary section | Black | Black, can be seen, inside the Destroyer | |||||
| (1033, 1098) | 33 | 24 | Destroyer Rotary section | Top hull of the Destroyer | Above the hull of the Destroyer. At the center of this image the hull of the Destroyer can be seen gently increasing its size towards right. | |||||
| (1033, 1099) | 33 | 25 | Destroyer Rotary section | White | Empty air above the Destroyer | |||||
| (1033, 1100) | 33 | 26 | Destroyer Rotary section | White | Empty air above the Destroyer | |||||
| (1034, 1069) | 34 | -5 | Ground level right | Black | Black, never seen, below lowest visible terrain, bottom images, with white line at the bottom | |||||
| (1034, 1070) | 34 | -4 | Ground level right | Black | Black, never seen, below lowest visible terrain | |||||
| (1034, 1071) | 34 | -3 | Ground level right | Black | Black, never seen, below lowest visible terrain | |||||
| (1034, 1072) | 34 | -2 | Ground level right | Black | Black, can be seen, below ground level right | |||||
| (1034, 1073) | 34 | -1 | Ground level right | Forrest | Y | Trees; one big with only stem in this frame, one large going above the frame, four small and a shrubbery | ||||
| (1034, 1074) | 34 | 0 | Ground level right | Forrest | Y | Trees; a smaller right part of the crown of one big tree, the tip of a large tree and most of the crown of another big tree to the right | ||||
| (1034, 1075) | 34 | 1 | Ground level right | White | Empty air above ground level right | |||||
| (1034, 1076) | 34 | 2 | Ground level right | White | Empty air above ground level right | |||||
| (1034, 1089) | 34 | 15 | Destroyer Rotary section | White | Empty air below the Destroyer | |||||
| (1034, 1090) | 34 | 16 | Destroyer Rotary section | White | Empty air below the Destroyer | |||||
| (1034, 1091) | 34 | 17 | Destroyer Rotary section | Bottom hull of the Destroyer with room | Y | Y | Y | 1 | Torpedo canon room: No torpedoes visible outside the hull, but here is the canon that fired them all. It is below a small room inside the Star Destroyer, just above the bottom of the hull with the canon that fired all the torpedoes protruding out below the ship’s hull. The room is located in the top left of this image. In the middle of the image in the top left of the room there is a shaft going up. Behind the inner part of the canon is Megan who has turned away from it and speaks to Cueball. Behind them to the right is a coin. After the part with the canon the hull of the Destroyer can be seen to continue its gentle increasing of its size towards right | |
| (1034, 1092) | 34 | 18 | Destroyer Rotary section | Inside the Destroyer: Corridor and shaft | Y | A corridor enters from the left above the center going right across the image. In the middle a shaft goes down through the image. At the very left edge of this image a shaft is coming down to the corridor from the top, part of it being in the image to the left. At the right part of the corridor, a small robot on wheels moves to the left towards the shaft, speeding lines behind it indicate the way it moves. It looks like it is made of two identical small robots (both with wheels) on top of each other | ||||
| (1034, 1093) | 34 | 19 | Destroyer Rotary section | Inside the Destroyer: Shaft | Y | A shaft enters in the very left part of the image from above and goes down through the image; a minor part of the shaft is in the next image to the left. At the bottom of the shaft is most of a T shaped Tetris piece with the short part pointing right. It is shown that it is falling with three move lines above it. It is cut off at the left edge so some part of the piece is in the image to the left | ||||
| (1034, 1094) | 34 | 20 | Destroyer Rotary section | Inside the Destroyer: Corridor and shaft | Rotary: A shaft is at the very left of this image coming up from below the bottom to reach the rightmost and bottom part of the rotary which is a corridor that goes around a small room in the center, with four exits like a big roundabout. This image is mainly black, having only corridors/shaft in the left most part. This bottom right part of the rotary goes between the upper left part of this image, to the top left part in a small circle around the top left corner. The shafts left side is in the image to the left | |||||
| (1034, 1095) | 34 | 21 | Destroyer Rotary section | Inside the Destroyer: Room, corridor and shaft | Rotary: This is just right of the center of the roundabout like rotary. In the middle the circular corridor that encircles the room to the left can be seen. At the very left a small part of the room’s right side can be seen. The room is centered around the center of this image. Right of the circle corridor above the center a corridor can be seen exiting the rotary going up in a gentle slope. Close to the top of this image the corridor flattens out and goes straight right to the edge | |||||
| (1034, 1096) | 34 | 22 | Destroyer Rotary section | Inside the Destroyer: Room, corridor and shaft | Rotary: This image is mainly black, having only the top right part of the rotary circle corridor going through the bottom left part of this image | |||||
| (1034, 1097) | 34 | 23 | Destroyer Rotary section | Black | Black, can be seen, inside the Destroyer | |||||
| (1034, 1098) | 34 | 24 | Destroyer Rotary section | Top hull of the Destroyer | Above the hull of the Destroyer. At the center of this image the hull of the Destroyer can be seen gently increasing its size towards right. | |||||
| (1034, 1099) | 34 | 25 | Destroyer Rotary section | White | Empty air above the Destroyer | |||||
| (1034, 1100) | 34 | 26 | Destroyer Rotary section | White | Empty air above the Destroyer | |||||
| (1035, 1069) | 35 | -5 | Ground level right | Black | Black, never seen, below lowest visible terrain, bottom images, with white line at the bottom | |||||
| (1035, 1070) | 35 | -4 | Ground level right | Black | Black, never seen, below lowest visible terrain | |||||
| (1035, 1071) | 35 | -3 | Ground level right | Black | Black, never seen, below lowest visible terrain | |||||
| (1035, 1072) | 35 | -2 | Ground level right | Black | Black, can be seen, below ground level right | |||||
| (1035, 1073) | 35 | -1 | Ground level right | Forrest | Y | Trees; seven small to very small | ||||
| (1035, 1074) | 35 | 0 | Ground level right | Forrest | Y | Trees; a very smaller right part of the crown of one big tree | ||||
| (1035, 1075) | 35 | 1 | Ground level right | White | Empty air above ground level right | |||||
| (1035, 1076) | 35 | 2 | Ground level right | White | Empty air above ground level right | |||||
| (1035, 1089) | 35 | 15 | Destroyer Rotary section | White | Empty air below the Destroyer | |||||
| (1035, 1090) | 35 | 16 | Destroyer Rotary section | White | Empty air below the Destroyer | |||||
| (1035, 1091) | 35 | 17 | Destroyer Rotary section | Bottom hull of the Destroyer | Below the hull of the Destroyer. At the center of this image the hull of the Destroyer can be seen, gently increasing its size towards right | |||||
| (1035, 1092) | 35 | 18 | Destroyer Rotary section | Inside the Destroyer: Corridor | A corridor goes through the image below the center | |||||
| (1035, 1093) | 35 | 19 | Destroyer Rotary section | Black | Black, can be seen, inside the Destroyer | |||||
| (1035, 1094) | 35 | 20 | Destroyer Rotary section | Black | Black, can be seen, inside the Destroyer | |||||
| (1035, 1095) | 35 | 21 | Destroyer Rotary section | Inside the Destroyer: Corridor | Y | Y | A corridor goes through the top of the image. At the very left Cueball is racing right along the corridor on a bike with speed lines behind him to indicate his speed | |||
| (1035, 1096) | 35 | 22 | Destroyer Rotary section | Black | Black, can be seen, inside the Destroyer | |||||
| (1035, 1097) | 35 | 23 | Destroyer Rotary section | Black | Black, can be seen, inside the Destroyer | |||||
| (1035, 1098) | 35 | 24 | Destroyer Rotary section | Top hull of the Destroyer | Above the hull of the Destroyer. At the center of this image the hull of the Destroyer can be seen gently increasing its size towards right. | |||||
| (1035, 1099) | 35 | 25 | Destroyer Rotary section | White | Empty air above the Destroyer | |||||
| (1035, 1100) | 35 | 26 | Destroyer Rotary section | White | Empty air above the Destroyer | |||||
| (1036, 1069) | 36 | -5 | Ground level right | Black | Black, never seen, below lowest visible terrain, bottom images, with white line at the bottom | |||||
| (1036, 1070) | 36 | -4 | Ground level right | Black | Black, never seen, below lowest visible terrain | |||||
| (1036, 1071) | 36 | -3 | Ground level right | Black | Black, never seen, below lowest visible terrain | |||||
| (1036, 1072) | 36 | -2 | Ground level right | Black | Black, can be seen, below ground level right | |||||
| (1036, 1073) | 36 | -1 | Ground level right | Terrain | Y | Trees; four small to very small and one larger rock | ||||
| (1036, 1074) | 36 | 0 | Ground level right | White | Empty air above ground level right | |||||
| (1036, 1075) | 36 | 1 | Ground level right | White | Empty air above ground level right | |||||
| (1036, 1076) | 36 | 2 | Ground level right | White | Empty air above ground level right | |||||
| (1036, 1089) | 36 | 15 | Destroyer Rotary section | White | Empty air below the Destroyer | |||||
| (1036, 1090) | 36 | 16 | Destroyer Rotary section | White | Empty air below the Destroyer | |||||
| (1036, 1091) | 36 | 17 | Destroyer Rotary section | Bottom hull of the Destroyer with corridor | Below the hull of the Destroyer. At the center of this image the hull of the Destroyer can be seen, gently increasing its size towards right. In the top right corner the lower half of a corridor ending there can be seen going right | |||||
| (1036, 1092) | 36 | 18 | Destroyer Rotary section | Inside the Destroyer: Corridor and shaft | 1 | A corridor enters left at the center going right and just before it reaches a shaft at the very right part of the image, there is a coin. The shaft goes down through the image from top to bottom. At the bottom of the image a new corridor exits the shaft to the right. The shaft ends here, but its end and the floor of the corridor is cut off and is in the image below | ||||
| (1036, 1093) | 36 | 19 | Destroyer Rotary section | Inside the Destroyer: Corridor and shaft | A shaft enters in the very right part of the image from above and goes down through the image. At the top of the shaft a corridor exits to the right | |||||
| (1036, 1094) | 36 | 20 | Destroyer Rotary section | Inside the Destroyer: Shaft | A shaft enters in the right part of the image from above and goes down through the image | |||||
| (1036, 1095) | 36 | 21 | Destroyer Rotary section | Inside the Destroyer: Corridor and shaft | A corridor enters left at the top going right across the image. In the right part of the image a shaft goes down through the image | |||||
| (1036, 1096) | 36 | 22 | Destroyer Rotary section | Black | Black, can be seen, inside the Destroyer | |||||
| (1036, 1097) | 36 | 23 | Destroyer Rotary section | Black | Black, can be seen, inside the Destroyer | |||||
| (1036, 1098) | 36 | 24 | Destroyer Rotary section | Top hull of the Destroyer | Above the hull of the Destroyer. At the center of this image the hull of the Destroyer can be seen gently increasing its size towards right. | |||||
| (1036, 1099) | 36 | 25 | Destroyer Rotary section | White | Empty air above the Destroyer | |||||
| (1036, 1100) | 36 | 26 | Destroyer Rotary section | White | Empty air above the Destroyer | |||||
| (1037, 1069) | 37 | -5 | Ground level right | Black | Black, never seen, below lowest visible terrain, bottom images, with white line at the bottom | |||||
| (1037, 1070) | 37 | -4 | Ground level right | Black | Black, never seen, below lowest visible terrain | |||||
| (1037, 1071) | 37 | -3 | Ground level right | Black | Black, never seen, below lowest visible terrain | |||||
| (1037, 1072) | 37 | -2 | Ground level right | Black | Black, can be seen, below ground level right | |||||
| (1037, 1073) | 37 | -1 | Ground level right | Wedding | Y | Y | Trees; one big with only stem in this frame and five small, plus the first person, Hairy, sitting in a chair at the wedding | |||
| (1037, 1074) | 37 | 0 | Ground level right | Wedding | Y | Y | Trees; the entire crown of one big tree, and to the right a bit of the text from the wedding ceremony. A person is sitting in attention to the wedding below this images frame. | |||
| (1037, 1075) | 37 | 1 | Ground level right | White | Empty air above ground level right | |||||
| (1037, 1076) | 37 | 2 | Ground level right | White | Empty air above ground level right | |||||
| (1037, 1089) | 37 | 15 | Destroyer Rotary section | White | Empty air below the Destroyer | |||||
| (1037, 1090) | 37 | 16 | Destroyer Rotary section | White | Empty air below the Destroyer | |||||
| (1037, 1091) | 37 | 17 | Destroyer Rotary section | Bottom hull of the Destroyer with room and corridor | One coin at bottom room: below the hull of the Destroyer. At the center of this image the hull of the Destroyer can be seen, gently increasing its size towards right. At the top the lower half of a corridor can be seen going through the image, most of it is the image above. In the right part of the image the corridor turns into a small room, that extends above and left, but there is no change in this image where only the floor of room and corridor can be seen | |||||
| (1037, 1092) | 37 | 18 | Destroyer Rotary section | Inside the Destroyer: Room and corridor | One coin at bottom room: A corridor enters left at the very bottom, part of it being in the image below, going right across the image until about half way past the middle towards right it enters a room, whose ceiling goes halfway up to the center. The room continues in the next image to the right | |||||
| (1037, 1093) | 37 | 19 | Destroyer Rotary section | Inside the Destroyer: Room and corridor | Y | Octopus room. A corridor goes through the top of the image from the left, and after passing the middle of the image the ceiling rises towards a dome (in the image above and right) as it enters the octopus room. The most left tip of the octopus tentacles can be seen in the bottom right of the room | ||||
| (1037, 1094) | 37 | 20 | Destroyer Rotary section | Inside the Destroyer: Room | Octopus room. The ceiling of this room rises right towards the top of a dome (in the image above to the right). The ceiling comes in from below in the middle of the image (where it is so steep it looks like a wall) and then it rises and turns right exiting just above the center of the image to the right | |||||
| (1037, 1095) | 37 | 21 | Destroyer Rotary section | Inside the Destroyer: Room and corridor | Hamster ball and stilts room: A corridor goes through the image at the top. To the very right the bottom of a very high and long room begins. It extends almost a full image above, and almost two more images to the right | |||||
| (1037, 1096) | 37 | 22 | Destroyer Rotary section | Inside the Destroyer: Room | Hamster ball and stilts room: In this, mainly black, image the only white is at the very right. This is the top left part of a very high and long room, with its ceiling just below the top. It extends into the image below, and almost two more images to the right | |||||
| (1037, 1097) | 37 | 23 | Destroyer Rotary section | Black | Black, can be seen, inside the Destroyer | |||||
| (1037, 1098) | 37 | 24 | Destroyer Rotary section | Top hull of the Destroyer | Above the hull of the Destroyer. At the top of this image the hull of the Destroyer can be seen gently increasing its size towards right. | |||||
| (1037, 1099) | 37 | 25 | Destroyer Rotary section | White | Empty air above the Destroyer | |||||
| (1037, 1100) | 37 | 26 | Destroyer Rotary section | White | Empty air above the Destroyer | |||||
| (1038, 1069) | 38 | -5 | Ground level right | Black | Black, never seen, below lowest visible terrain, bottom images, with white line at the bottom | |||||
| (1038, 1070) | 38 | -4 | Ground level right | Black | Black, never seen, below lowest visible terrain | |||||
| (1038, 1071) | 38 | -3 | Ground level right | Black | Black, never seen, below lowest visible terrain | |||||
| (1038, 1072) | 38 | -2 | Ground level right | Black | Black, can be seen, below ground level right | |||||
| (1038, 1073) | 38 | -1 | Ground level right | Wedding | Y | Y | Cueball with a tie and Megan in a wedding dressed (although she is a black bride), are standing at a small stage with a pole behind them. There is also a priest. Their heads are cut off partly or completely for Cueball, by the top of the frame. Four people attending the wedding can be seen sitting in chairs to the left of the stage. The first has a cap on backwards, then another Cueball, Ponytail and a person with black hair. | |||
| (1038, 1074) | 38 | 0 | Ground level right | Wedding | Y | Y | Y | The heads of Cueball and Megan at the wedding as well as of the female priest who speaks. To the right is a pole with a stick at the top. The pole is decorated with a plant going from the ground and up | ||
| (1038, 1075) | 38 | 1 | Ground level right | White | Empty air above ground level right | |||||
| (1038, 1076) | 38 | 2 | Ground level right | White | Empty air above ground level right | |||||
| (1038, 1089) | 38 | 15 | Destroyer Rotary section | White | Empty air below the Destroyer | |||||
| (1038, 1090) | 38 | 16 | Destroyer Rotary section | White | Empty air below the Destroyer | |||||
| (1038, 1091) | 38 | 17 | Destroyer Rotary section | Bottom hull of the Destroyer with room and corridor | One coin at bottom room: below the hull of the Destroyer. At the center of this image the hull of the Destroyer can be seen, gently increasing its size towards right. At the top the floor of a small room can be seen (in the part of the room in the image above there is a coin). To the left the room ends a corridor that goes over in a ledge above the hull. There are two small steps down from above and one large and one small step up from the hull below. The hull is much higher up from here to the right, and next image right is in empty air | |||||
| (1038, 1092) | 38 | 18 | Destroyer Rotary section | Bottom hull of the Destroyer with room and corridor | 1 | One coin at bottom room: below the hull of the Destroyer. At the bottom right of this image the hull of the Destroyer can be seen, gently increasing its size towards right. To the left the hull enters over the top part of a short corridor, and then the ceiling goes up as a small room begins to the left just past the middle. The ceiling comes halfway up to the center of the image. At the top of this room to the left there is a coin | ||||
| (1038, 1093) | 38 | 19 | Destroyer Rotary section | Inside the Destroyer: Room | Y | 2 | Octopus room. The floor is half way between the center and the top and the ceiling of this high room is above in a dome (in the image above). The room also continues to the left and right. In the middle of the room there is a large octopus with a large head (that is cut off at the top edge of the image) and it is possible to see the ending of four tentacles on each side (the longest tentacle is cut off at the left). The arms twist together. There are two coins one on each side of the monster, on top of the arms that reaches farthest out | |||
| (1038, 1094) | 38 | 20 | Destroyer Rotary section | Inside the Destroyer: Room | Y | Octopus room. The top part and the domed ceiling of this room. The room continues both left and right and below. In the middle of the image is the dome shaped top of a large octopus head (this is cut off half way down the bottom edge of the image, and down there are two coins) | ||||
| (1038, 1095) | 38 | 21 | Destroyer Rotary section | Inside the Destroyer: Room | Y | Y | Y | Hamster ball and stilts room: This is the bottom left of a very high and long room, the floor being just above the center of the image. It extends almost a full image above, and goes through most of the image to the right, as well as extending into the left image. Megan on a skate board is inside a hamster ball. She is driving up the left side while the ball is obviously rolling towards left as indicated by speed lines. She is yelling | ||
| (1038, 1096) | 38 | 22 | Destroyer Rotary section | Inside the Destroyer: Room | Hamster ball and stilts room: This is the top left of a very high and long room, the ceiling being just below the top. It extends into the image below, and goes through most of the image to the right, as well as extending into the left image. (In the image below is Megan in hamster ball) | |||||
| (1038, 1097) | 38 | 23 | Destroyer Rotary section | Black | Black, can be seen, inside the Destroyer | |||||
| (1038, 1098) | 38 | 24 | Destroyer Rotary section | Top hull of the Destroyer | Above the hull of the Destroyer. At the top of this image the hull of the Destroyer can be seen gently increasing its size towards right. | |||||
| (1038, 1099) | 38 | 25 | Destroyer Rotary section | White | Empty air above the Destroyer | |||||
| (1038, 1100) | 38 | 26 | Destroyer Rotary section | White | Empty air above the Destroyer | |||||
| (1039, 1069) | 39 | -5 | Ground level right | Black | Black, never seen, below lowest visible terrain, bottom images, with white line at the bottom | |||||
| (1039, 1070) | 39 | -4 | Ground level right | Black | Black, never seen, below lowest visible terrain | |||||
| (1039, 1071) | 39 | -3 | Ground level right | Black | Black, never seen, below lowest visible terrain | |||||
| (1039, 1072) | 39 | -2 | Ground level right | Black | Black, can be seen, below ground level right | |||||
| (1039, 1073) | 39 | -1 | Ground level right | Wedding | Two rocks, one flat slab and a larger rock after the wedding. | |||||
| (1039, 1074) | 39 | 0 | Ground level right | Wedding | Y | Megan is sitting on top of a large rock looking towards the weeding to the left (or away from the picnic to the right) | ||||
| (1039, 1075) | 39 | 1 | Ground level right | White | Empty air above ground level right | |||||
| (1039, 1076) | 39 | 2 | Ground level right | White | Empty air above ground level right | |||||
| (1039, 1089) | 39 | 15 | Destroyer Rotary section | White | Empty air below the Destroyer | |||||
| (1039, 1090) | 39 | 16 | Destroyer Rotary section | White | Empty air below the Destroyer | |||||
| (1039, 1091) | 39 | 17 | Destroyer Rotary section | White | Empty air below the Destroyer | |||||
| (1039, 1092) | 39 | 18 | Destroyer Rotary section | Bottom hull of the Destroyer | Below the hull of the Destroyer. At the bottom of this image the hull of the Destroyer can be seen, gently increasing its size towards right | |||||
| (1039, 1093) | 39 | 19 | Destroyer Rotary section | Inside the Destroyer: Room and corridor | Octopus room. A corridor goes through the top of the image from the right and after passing the middle of the image the ceiling rises towards a dome (in the image above and left)as it enters the octopus room | |||||
| (1039, 1094) | 39 | 20 | Destroyer Rotary section | Inside the Destroyer: Room | Octopus room. In the very left bottom of this image the ceiling of this room rises left towards the top of a dome (in the image above to the left) | |||||
| (1039, 1095) | 39 | 21 | Destroyer Rotary section | Inside the Destroyer: Room | Y | Hamster ball and stilts room: This is the bottom right of a very very high and long room, the floor being just above the center of the image, the right wall being just inside the image to the right. It extends almost a full image above, and more than one image more to the left. Two long lines going are up from the floor and are cut off at the top edge. (In the image above it is revealed that the lines are two very tall stilts and on top of these stands a Cueball like guy, and there is a coin) | ||||
| (1039, 1096) | 39 | 22 | Destroyer Rotary section | Inside the Destroyer: Room | Y | Y | Y | 1 | Hamster ball and stilts room: This is the top right of a very high and long room, the ceiling being just below the top, the right wall being just inside the image to the right. It extends into the image below, and more than one image more to the left. At the top of two very tall stilts (that are cut off at the bottom edge) stands a Cueball like guy (although maybe he has a little black hair). The stilts almost reach the ceiling, and the guy’s head is just a little below the top of the stilts. He speaks. Between the stilts in the center of the image there is a coin | |
| (1039, 1097) | 39 | 23 | Destroyer Rotary section | Black | Black, can be seen, inside the Destroyer | |||||
| (1039, 1098) | 39 | 24 | Destroyer Rotary section | Top hull of the Destroyer | Above the hull of the Destroyer. At the top of this image the hull of the Destroyer can be seen gently increasing its size towards right. | |||||
| (1039, 1099) | 39 | 25 | Destroyer Rotary section | White | Empty air above the Destroyer | |||||
| (1039, 1100) | 39 | 26 | Destroyer Rotary section | White | Empty air above the Destroyer | |||||
| (1040, 1069) | 40 | -5 | Ground level right | Black | Black, never seen, below lowest visible terrain, bottom images, with white line at the bottom | |||||
| (1040, 1070) | 40 | -4 | Ground level right | Black | Black, never seen, below lowest visible terrain | |||||
| (1040, 1071) | 40 | -3 | Ground level right | Black | Black, never seen, below lowest visible terrain | |||||
| (1040, 1072) | 40 | -2 | Ground level right | Black | Black, can be seen, below ground level right | |||||
| (1040, 1073) | 40 | -1 | Ground level right | Terrain | Y | Y | Two people are sitting on a stone and on the ground having a picnic, with basket on the ground. Their heads are cut off, by the frame, but it is Ponytail and Cueball. | |||
| (1040, 1074) | 40 | 0 | Ground level right | Terrain | Y | Y | The torso and heads of Ponytail and Cueball sitting at a picnic | |||
| (1040, 1075) | 40 | 1 | Ground level right | White | Empty air above ground level right | |||||
| (1040, 1076) | 40 | 2 | Ground level right | White | Empty air above ground level right | |||||
| (1040, 1089) | 40 | 15 | Destroyer Rotary section | White | Empty air below the Destroyer | |||||
| (1040, 1090) | 40 | 16 | Destroyer Rotary section | White | Empty air below the Destroyer | |||||
| (1040, 1091) | 40 | 17 | Destroyer Rotary section | White - almost | Empty air below the Destroyer, but at the very top right of this image the hull of the Destroyer can be seen entering, gently increasing its size towards right | |||||
| (1040, 1092) | 40 | 18 | Destroyer Rotary section | Black - almost | Black inside the Destroyer except for a small piece of white in the bottom left corner which is below the hull of the Destroyer. The hull can be seen, gently increasing its size towards right before disappearing below at the middle of the image | |||||
| (1040, 1093) | 40 | 19 | Destroyer Rotary section | Inside the Destroyer: Corridor | A corridor goes through the very top of this image; it is very uneven and goes a little up and down | |||||
| (1040, 1094) | 40 | 20 | Destroyer Rotary section | Black | Black, can be seen, inside the Destroyer | |||||
| (1040, 1095) | 40 | 21 | Destroyer Rotary section | Black | Black, can be seen, inside the Destroyer | |||||
| (1040, 1096) | 40 | 22 | Destroyer Rotary section | Black | Black, can be seen, inside the Destroyer | |||||
| (1040, 1097) | 40 | 23 | Destroyer Rotary section | Black | Black, can be seen, inside the Destroyer | |||||
| (1040, 1098) | 40 | 24 | Destroyer Rotary section | Black - almost | Black inside the Destroyer, except for a small white rectangle at the top left corner where the top of the hull just takes a step up out of the image | |||||
| (1040, 1099) | 40 | 25 | Destroyer Rotary section | Top hull of the Destroyer | Above the hull of the Destroyer. At the bottom of this image the hull of the Destroyer can be seen gently increasing its size towards right. At the very left the hull enters from below as there is a higher step up from the image below | |||||
| (1040, 1100) | 40 | 26 | Destroyer Rotary section | White | Empty air above the Destroyer | |||||
| (1041, 1069) | 41 | -5 | Ground level right | Black | Black, never seen, below lowest visible terrain, bottom images, with white line at the bottom | |||||
| (1041, 1070) | 41 | -4 | Ground level right | Black | Black, never seen, below lowest visible terrain | |||||
| (1041, 1071) | 41 | -3 | Ground level right | Black | Black, never seen, below lowest visible terrain | |||||
| (1041, 1072) | 41 | -2 | Ground level right | Black | Black, can be seen, below ground level right | |||||
| (1041, 1073) | 41 | -1 | Ground level right | Black - almost | Black below the ground level right except at the top of the rising terrain that only leaves a little white in the top left corner | |||||
| (1041, 1074) | 41 | 0 | Ground level right | Terrain | Bare ground sloping upwards to the right | |||||
| (1041, 1075) | 41 | 1 | Ground level right | White | Empty air above ground level right | |||||
| (1041, 1076) | 41 | 2 | Ground level right | White | Empty air above ground level right | |||||
| (1041, 1089) | 41 | 15 | Destroyer Rotary section | White | Empty air below the Destroyer | |||||
| (1041, 1090) | 41 | 16 | Destroyer Rotary section | White | Empty air below the Destroyer | |||||
| (1041, 1091) | 41 | 17 | Destroyer Rotary section | Bottom hull of the Destroyer | Below the hull of the Destroyer. At the very top of this image the hull of the Destroyer can be seen, gently increasing its size towards right | |||||
| (1041, 1092) | 41 | 18 | Destroyer Rotary section | Black | Black, can be seen, inside the Destroyer | |||||
| (1041, 1093) | 41 | 19 | Destroyer Rotary section | Inside the Destroyer: Corridor and shaft | A corridor goes through the very top of this image; it is very uneven and goes a little up and down. To the left a shaft goes up from the corridor | |||||
| (1041, 1094) | 41 | 20 | Destroyer Rotary section | Inside the Destroyer: Shaft | A shaft enters in the left part of the image from above and goes down through the image | |||||
| (1041, 1095) | 41 | 21 | Destroyer Rotary section | Inside the Destroyer: Shaft | A shaft enters in the left part of the image from above and goes down through the image | |||||
| (1041, 1096) | 41 | 22 | Destroyer Rotary section | Inside the Destroyer: Shaft | A shaft enters in the left part of the image from above and goes down through the image | |||||
| (1041, 1097) | 41 | 23 | Destroyer Rotary section | Inside the Destroyer: Corridor and shaft | A corridor enters right below the center going left to just past the middle where it enters a shaft that goes down through the image from top to bottom | |||||
| (1041, 1098) | 41 | 24 | Destroyer Rotary section | Inside the Destroyer: Shaft | A shaft enters left of the middle in this image from above and goes down through the image | |||||
| (1041, 1099) | 41 | 25 | Destroyer Rotary section | Top hull of the Destroyer | Above the hull of the Destroyer. At the bottom of this image the hull of the Destroyer can be seen gently increasing its size towards right. Left of the middle there is shaft going down into the Destroyer | |||||
| (1041, 1100) | 41 | 26 | Destroyer Rotary section | White | Empty air above the Destroyer | |||||
| (1042, 1069) | 42 | -5 | Ground level right | Black | Black, never seen, below lowest visible terrain, bottom images, with white line at the bottom | |||||
| (1042, 1070) | 42 | -4 | Ground level right | Black | Black, never seen, below lowest visible terrain | |||||
| (1042, 1071) | 42 | -3 | Ground level right | Black | Black, never seen, below lowest visible terrain | |||||
| (1042, 1072) | 42 | -2 | Ground level right | Black | Black, can be seen, below ground level right | |||||
| (1042, 1073) | 42 | -1 | Ground level right | Black | Black, can be seen, below ground level right | |||||
| (1042, 1074) | 42 | 0 | Ground level right | Cemetery | Y | Y | Y | Cemetery: The beginning of a cemetery where a blonde girl with long hair and Megan, who points to the right, are standing past the first head stone | ||
| (1042, 1075) | 42 | 1 | Ground level right | White | Empty air above ground level right | |||||
| (1042, 1076) | 42 | 2 | Ground level right | White | Empty air above ground level right | |||||
| (1042, 1089) | 42 | 15 | Destroyer Rotary section | White | Empty air below the Destroyer | |||||
| (1042, 1090) | 42 | 16 | Destroyer Rotary section | White | Empty air below the Destroyer | |||||
| (1042, 1091) | 42 | 17 | Destroyer Rotary section | Bottom hull of the Destroyer | Below the hull of the Destroyer. At the top of this image the hull of the Destroyer can be seen, gently increasing its size towards right | |||||
| (1042, 1092) | 42 | 18 | Destroyer Rotary section | Black | Black, can be seen, inside the Destroyer | |||||
| (1042, 1093) | 42 | 19 | Destroyer Rotary section | Inside the Destroyer: Room and corridor | Horn room: A corridor enters from the left and goes through the very top of this image past the middle before it enters a room that extends both above and right of this image | |||||
| (1042, 1094) | 42 | 20 | Destroyer Rotary section | Inside the Destroyer: Room | Horn room: In the bottom right corner of this image is part of the top and the ceiling of a rectangular room where the ceiling (also in the image to the right) are bulging somewhat down. In this image the ceiling is just seen to become a little lower towards the right edge | |||||
| (1042, 1095) | 42 | 21 | Destroyer Rotary section | Black | Black, can be seen, inside the Destroyer | |||||
| (1042, 1096) | 42 | 22 | Destroyer Rotary section | Black | Black, can be seen, inside the Destroyer | |||||
| (1042, 1097) | 42 | 23 | Destroyer Rotary section | Inside the Destroyer: Corridor | A corridor goes through the image below the center; it is uneven and goes a little up and down | |||||
| (1042, 1098) | 42 | 24 | Destroyer Rotary section | Black | Black, can be seen, inside the Destroyer | |||||
| (1042, 1099) | 42 | 25 | Destroyer Rotary section | Top hull of the Destroyer | Above the hull of the Destroyer. At the bottom of this image the hull of the Destroyer can be seen gently increasing its size towards right. | |||||
| (1042, 1100) | 42 | 26 | Destroyer Rotary section | White | Empty air above the Destroyer | |||||
| (1043, 1069) | 43 | -5 | Ground level right | Black | Black, never seen, below lowest visible terrain, bottom images, with white line at the bottom | |||||
| (1043, 1070) | 43 | -4 | Ground level right | Black | Black, never seen, below lowest visible terrain | |||||
| (1043, 1071) | 43 | -3 | Ground level right | Black | Black, never seen, below lowest visible terrain | |||||
| (1043, 1072) | 43 | -2 | Ground level right | Black | Black, never seen, below ground level right | |||||
| (1043, 1073) | 43 | -1 | Ground level right | Black | Black, can be seen, below ground level right | |||||
| (1043, 1074) | 43 | 0 | Ground level right | Cemetery | Y | Y | Cemetery: The rest of the cemetery. It consists of 7 gravestones (6 in this image) that are fenced in behind two robes/chains that are held up by ten poles (8 in this image). There is a stone between each of the seven “rooms” made by the eight poles that are not at either end | |||
| (1043, 1075) | 43 | 1 | Ground level right | White | Empty air above ground level right | |||||
| (1043, 1076) | 43 | 2 | Ground level right | White | Empty air above ground level right | |||||
| (1043, 1089) | 43 | 15 | Destroyer Rotary section | White | Empty air below the Destroyer | |||||
| (1043, 1090) | 43 | 16 | Destroyer Rotary section | White | Empty air below the Destroyer | |||||
| (1043, 1091) | 43 | 17 | Destroyer Rotary section | Bottom hull of the Destroyer | Below the hull of the Destroyer. At the top of this image the hull of the Destroyer can be seen, gently increasing its size towards right | |||||
| (1043, 1092) | 43 | 18 | Destroyer Rotary section | Black | Black, can be seen, inside the Destroyer | |||||
| (1043, 1093) | 43 | 19 | Destroyer Rotary section | Inside the Destroyer: Room | Y | 0.5 | Horn room: This is a rectangular room with a ceiling (in the image above) that is bulging somewhat down. In the middle of the room (left of the middle of this image as the room extends to the left image, is a black box with two horns poking up from each side pointing towards each other. Between the horns there is a coin, cut off at the top edge, so only half a coin is in this image | |||
| (1043, 1094) | 43 | 20 | Destroyer Rotary section | Inside the Destroyer: Room | 0.5 | Horn room: In the bottom part of this image is part of the top and the ceiling of a rectangular room where the ceiling (also in the image to the left) are bulging somewhat down in the middle. In the image below is a black box with two horns poking up from each side pointing towards each other. Between the horns there is a coin, cut off at the top edge, so half a coin is visible at the bottom of this image left of the middle | ||||
| (1043, 1095) | 43 | 21 | Destroyer Rotary section | Black | Black, can be seen, inside the Destroyer | |||||
| (1043, 1096) | 43 | 22 | Destroyer Rotary section | Black | Black, can be seen, inside the Destroyer | |||||
| (1043, 1097) | 43 | 23 | Destroyer Rotary section | Inside the Destroyer: Corridor | A corridor goes through the image below the center; it is uneven and goes a little up and down | |||||
| (1043, 1098) | 43 | 24 | Destroyer Rotary section | Black | Black, can be seen, inside the Destroyer | |||||
| (1043, 1099) | 43 | 25 | Destroyer Rotary section | Top hull of the Destroyer | Above the hull of the Destroyer. At the bottom of this image the hull of the Destroyer can be seen gently increasing its size towards right. | |||||
| (1043, 1100) | 43 | 26 | Destroyer Rotary section | White | Empty air above the Destroyer | |||||
| (1044, 1069) | 44 | -5 | Ground level right | Black | Black, never seen, below lowest visible terrain, bottom images, with white line at the bottom | |||||
| (1044, 1070) | 44 | -4 | Ground level right | Black | Black, never seen, below lowest visible terrain | |||||
| (1044, 1071) | 44 | -3 | Ground level right | Black | Black, never seen, below lowest visible terrain | |||||
| (1044, 1072) | 44 | -2 | Ground level right | Black | Black, never seen, below ground level right | |||||
| (1044, 1073) | 44 | -1 | Ground level right | Black | Black, can be seen, below ground level right | |||||
| (1044, 1074) | 44 | 0 | Ground level right | Terrain | Grassy ground | |||||
| (1044, 1075) | 44 | 1 | Ground level right | White | Empty air above ground level right | |||||
| (1044, 1076) | 44 | 2 | Ground level right | White | Empty air above ground level right | |||||
| (1044, 1089) | 44 | 15 | Destroyer Rotary section | White | Empty air below the Destroyer | |||||
| (1044, 1090) | 44 | 16 | Destroyer Rotary section | White | Empty air below the Destroyer | |||||
| (1044, 1091) | 44 | 17 | Destroyer Rotary section | Bottom hull of the Destroyer | Below the hull of the Destroyer. At the top of this image the hull of the Destroyer can be seen, gently increasing its size towards right | |||||
| (1044, 1092) | 44 | 18 | Destroyer Rotary section | Black | Black, can be seen, inside the Destroyer | |||||
| (1044, 1093) | 44 | 19 | Destroyer Rotary section | Black | Black, can be seen, inside the Destroyer | |||||
| (1044, 1094) | 44 | 20 | Destroyer Rotary section | Black | Black, can be seen, inside the Destroyer | |||||
| (1044, 1095) | 44 | 21 | Destroyer Rotary section | Inside the Destroyer: Room | Medium empty room: The left part of this rectangular room begins just left of the middle, the floor just above the bottom and the ceiling is just above the center. The room continues in the image to the right | |||||
| (1044, 1096) | 44 | 22 | Destroyer Rotary section | Black | Black, can be seen, inside the Destroyer | |||||
| (1044, 1097) | 44 | 23 | Destroyer Rotary section | Inside the Destroyer: Corridor | A corridor goes through the image below the center; it is uneven and goes a little up and down | |||||
| (1044, 1098) | 44 | 24 | Destroyer Rotary section | Black | Black, can be seen, inside the Destroyer | |||||
| (1044, 1099) | 44 | 25 | Destroyer Rotary section | Top hull of the Destroyer | Above the hull of the Destroyer. At the center of this image the hull of the Destroyer can be seen gently increasing its size towards right. | |||||
| (1044, 1100) | 44 | 26 | Destroyer Rotary section | White | Empty air above the Destroyer | |||||
| (1045, 1069) | 45 | -5 | Ground level right | Black | Black, never seen, below lowest visible terrain, bottom images, with white line at the bottom | |||||
| (1045, 1070) | 45 | -4 | Ground level right | Black | Black, never seen, below lowest visible terrain | |||||
| (1045, 1071) | 45 | -3 | Ground level right | Black | Black, never seen, below lowest visible terrain | |||||
| (1045, 1072) | 45 | -2 | Ground level right | Black | Black, never seen, below ground level right | |||||
| (1045, 1073) | 45 | -1 | Ground level right | Black | Black, can be seen, below ground level right | |||||
| (1045, 1074) | 45 | 0 | Ground level right | Terrain | Bare ground | |||||
| (1045, 1075) | 45 | 1 | Ground level right | White | Empty air above ground level right | |||||
| (1045, 1076) | 45 | 2 | Ground level right | White | Empty air above ground level right | |||||
| (1045, 1089) | 45 | 15 | Destroyer Rotary section | White | Empty air below the Destroyer | |||||
| (1045, 1090) | 45 | 16 | Destroyer Rotary section | White | Empty air below the Destroyer | |||||
| (1045, 1091) | 45 | 17 | Destroyer Rotary section | Bottom hull of the Destroyer | Below the hull of the Destroyer. At the top of this image the hull of the Destroyer can be seen, gently increasing its size towards right | |||||
| (1045, 1092) | 45 | 18 | Destroyer Rotary section | Black | Black, can be seen, inside the Destroyer | |||||
| (1045, 1093) | 45 | 19 | Destroyer Rotary section | Inside the Destroyer: Room | Large empty room: To the right is the left part of a big room that extends two images to the right. Its floor and ceiling are just inside this image. The left wall is to the right past the middle | |||||
| (1045, 1094) | 45 | 20 | Destroyer Rotary section | Black | Black, can be seen, inside the Destroyer | |||||
| (1045, 1095) | 45 | 21 | Destroyer Rotary section | Inside the Destroyer: Room and corridor | Medium empty room: The right part of this rectangular room begins just left of the middle, the floor just above the bottom and the ceiling is just above the center. The room continues in the image to the left. At the bottom right of the room a corridor exits and goes out the right edge | |||||
| (1045, 1096) | 45 | 22 | Destroyer Rotary section | Black | Black, can be seen, inside the Destroyer | |||||
| (1045, 1097) | 45 | 23 | Destroyer Rotary section | Inside the Destroyer: Corridor | A corridor goes through the image below the center; it is uneven and goes a little up and down | |||||
| (1045, 1098) | 45 | 24 | Destroyer Rotary section | Black | Black, can be seen, inside the Destroyer | |||||
| (1045, 1099) | 45 | 25 | Destroyer Rotary section | Top hull of the Destroyer | Above the hull of the Destroyer. At the center of this image the hull of the Destroyer can be seen gently increasing its size towards right. | |||||
| (1045, 1100) | 45 | 26 | Destroyer Rotary section | White | Empty air above the Destroyer | |||||
| (1046, 1069) | 46 | -5 | Ground level right | Black | Black, never seen, below lowest visible terrain, bottom images, with white line at the bottom | |||||
| (1046, 1070) | 46 | -4 | Ground level right | Black | Black, never seen, below lowest visible terrain | |||||
| (1046, 1071) | 46 | -3 | Ground level right | Black | Black, never seen, below lowest visible terrain | |||||
| (1046, 1072) | 46 | -2 | Ground level right | Black | Black, never seen, below ground level right | |||||
| (1046, 1073) | 46 | -1 | Ground level right | Black | Black, can be seen, below ground level right | |||||
| (1046, 1074) | 46 | 0 | Ground level right | Terrain | Y | Y | Y | Huge foot: Two Cueballs are looking at an inscription on a plaque at the front of the pedestal on which stands a huge foot (cut off at the ankle, toes pointing left) | ||
| (1046, 1075) | 46 | 1 | Ground level right | White | Empty air above ground level right | |||||
| (1046, 1076) | 46 | 2 | Ground level right | White | Empty air above ground level right | |||||
| (1046, 1089) | 46 | 15 | Destroyer Rotary section | White | Empty air below the Destroyer | |||||
| (1046, 1090) | 46 | 16 | Destroyer Rotary section | White | Empty air below the Destroyer | |||||
| (1046, 1091) | 46 | 17 | Destroyer Rotary section | Bottom hull of the Destroyer | Below the hull of the Destroyer. At the center of this image the hull of the Destroyer can be seen, gently increasing its size towards right, then in the middle of the image it takes a step down | |||||
| (1046, 1092) | 46 | 18 | Destroyer Rotary section | Black | Black, can be seen, inside the Destroyer | |||||
| (1046, 1093) | 46 | 19 | Destroyer Rotary section | Inside the Destroyer: Room and shaft | Large empty room: A big room that extends to the images left and right. Its floor and ceiling are just inside this image. At the center of the ceiling is a shaft going up | |||||
| (1046, 1094) | 46 | 20 | Destroyer Rotary section | Inside the Destroyer: Corridor and shaft | A corridor enters right above the center going left to a shaft, before the middle of the image that goes down through the image | |||||
| (1046, 1095) | 46 | 21 | Destroyer Rotary section | Inside the Destroyer: Corridor and shaft | A corridor enters left at the bottom going right across the image. In the middle a shaft goes down from the corridor to the bottom of the image | |||||
| (1046, 1096) | 46 | 22 | Destroyer Rotary section | Black | Black, can be seen, inside the Destroyer | |||||
| (1046, 1097) | 46 | 23 | Destroyer Rotary section | Inside the Destroyer: Corridor | 1 | A corridor goes through the image below the center; it is uneven and goes a little up and down. At the very left of the corridor there is a coin | ||||
| (1046, 1098) | 46 | 24 | Destroyer Rotary section | Black | Black, can be seen, inside the Destroyer | |||||
| (1046, 1099) | 46 | 25 | Destroyer Rotary section | Top hull of the Destroyer | 1 | Above the hull of the Destroyer. At the center of this image the hull of the Destroyer can be seen gently increasing its size towards right. Right of the middle the hull takes a huge step up out of the top of the image. At the corner between hull and step there is a coin | ||||
| (1046, 1100) | 46 | 26 | Destroyer Rotary section | Top hull of the Destroyer | 1 | Above the hull of the Destroyer. To the left empty air, right of the middle a huge step in the hull enters from below going above the center of this image. At the top of the step the hull is flat towards right. A small and thick ledge stretches out over the step to the left. On top of this ledge there is a coin | ||||
| (1047, 1069) | 47 | -5 | Ground level right | Black | Black, never seen, below lowest visible terrain, bottom images, with white line at the bottom | |||||
| (1047, 1070) | 47 | -4 | Ground level right | Black | Black, never seen, below lowest visible terrain | |||||
| (1047, 1071) | 47 | -3 | Ground level right | Black | Black, never seen, below lowest visible terrain | |||||
| (1047, 1072) | 47 | -2 | Ground level right | Black | Black, never seen, below ground level right | |||||
| (1047, 1073) | 47 | -1 | Ground level right | Black | Black, can be seen, below ground level right | |||||
| (1047, 1074) | 47 | 0 | Ground level right | Terrain | Y | Huge foot: The heel of the huge foot | ||||
| (1047, 1075) | 47 | 1 | Ground level right | White | Empty air above ground level right | |||||
| (1047, 1076) | 47 | 2 | Ground level right | White | Empty air above ground level right | |||||
| (1047, 1089) | 47 | 15 | Destroyer Rotary section | White | Empty air below the Destroyer | |||||
| (1047, 1090) | 47 | 16 | Destroyer Rotary section | White | Empty air below the Destroyer | |||||
| (1047, 1091) | 47 | 17 | Destroyer Rotary section | Bottom hull of the Destroyer | Below the hull of the Destroyer. At the center of this image the hull of the Destroyer can be seen, gently increasing its size towards right, then to the right it takes a small step up | |||||
| (1047, 1092) | 47 | 18 | Destroyer Rotary section | Black | Black, can be seen, inside the Destroyer | |||||
| (1047, 1093) | 47 | 19 | Destroyer Rotary section | Inside the Destroyer: Room | Large empty room: To the left is the right part of a big room that extends two images to the left. Its floor and ceiling are just inside this image. The right wall is to the right past the middle | |||||
| (1047, 1094) | 47 | 20 | Destroyer Rotary section | Inside the Destroyer: Corridor | A corridor goes through the image above the center | |||||
| (1047, 1095) | 47 | 21 | Destroyer Rotary section | Inside the Destroyer: Room and corridor | Small empty room: A corridor enters this small rectangular room at the bottom left of this image. The ceiling is at the center and the right wall close to the right edge | |||||
| (1047, 1096) | 47 | 22 | Destroyer Rotary section | Black | Black, can be seen, inside the Destroyer | |||||
| (1047, 1097) | 47 | 23 | Destroyer Rotary section | Inside the Destroyer: Corridor | A corridor goes through the image below the center; it is uneven and goes a little up and down | |||||
| (1047, 1098) | 47 | 24 | Destroyer Rotary section | Black | Black, can be seen, inside the Destroyer | |||||
| (1047, 1099) | 47 | 25 | Destroyer Rotary section | Black | Black, can be seen, inside the Destroyer | |||||
| (1047, 1100) | 47 | 26 | Destroyer Rotary section | Top hull of the Destroyer | Above the hull of the Destroyer. At the top of this image the hull of the Destroyer can be seen gently increasing its size towards right. | |||||
| (1048, 1069) | 48 | -5 | Pyramid | Black | Black, never seen, below lowest visible terrain, bottom images, with white line at the bottom | |||||
| (1048, 1070) | 48 | -4 | Pyramid | Black | Black, never seen, below lowest visible terrain | |||||
| (1048, 1071) | 48 | -3 | Pyramid | Black | Black, never seen, below lowest visible terrain | |||||
| (1048, 1072) | 48 | -2 | Pyramid | Black | Black, never seen, below pyramid | |||||
| (1048, 1073) | 48 | -1 | Pyramid | Black | Black, can be seen, below ground level right | |||||
| (1048, 1074) | 48 | 0 | Pyramid | Pyramid left bottom | Y | Y | Ponytail is standing on the left side of the pyramid facing left. She is pointing up the pyramid while giving a protip | |||
| (1048, 1075) | 48 | 1 | Pyramid | White | Empty air above the pyramid | |||||
| (1048, 1076) | 48 | 2 | Pyramid | White | Empty air above the pyramid | |||||
| (1048, 1089) | 48 | 15 | Destroyer Rotary section | White | Empty air below the Destroyer | |||||
| (1048, 1090) | 48 | 16 | Destroyer Rotary section | White | Empty air below the Destroyer | |||||
| (1048, 1091) | 48 | 17 | Destroyer Rotary section | Bottom hull of the Destroyer | Below the hull of the Destroyer. At the center of this image the hull of the Destroyer can be seen, gently increasing its size towards right | |||||
| (1048, 1092) | 48 | 18 | Destroyer Rotary section | Black | Black, can be seen, inside the Destroyer | |||||
| (1048, 1093) | 48 | 19 | Destroyer Rotary section | Black | Black, can be seen, inside the Destroyer | |||||
| (1048, 1094) | 48 | 20 | Destroyer Rotary section | Inside the Destroyer: Room and corridor | Y | Y | Hoverboards room: A corridor enters the image above the center from the left and enters a big room that extends higher up and as much right of this image in the images above and right. Megan flying on a hoverboard, can be seen just under the top right of the image (her hair is cut off at the top edge). She is doing acrobatics, and although she is presently standing almost erect, she lifts the board so it is in a 45 degree angle to the floor, and she has just taken a counter clockwise swing as shown by two speed lines. (In the image above Cueball is also flying on hoverboard to the left, and just above her head there is a coin) | |||
| (1048, 1095) | 48 | 21 | Destroyer Rotary section | Inside the Destroyer: Room | Y | Y | 1 | Hoverboards room: This big room extends down and as much right of this image in the images below and right. Cueball is flying on a hoverboard in the middle of the image. He is doing acrobatics and the bottom of his board is pointing directly to the left with him standing parallel to the floor, as he is in the process of doing some kind of loop, as shown by the two speed lines. Megan is doing similar tricks in the image below and her hair can just be seen at the bottom right edge (as the rest of her is cut off at the bottom edge). Above her head in the height of Cueballs head there is a coin | ||
| (1048, 1096) | 48 | 22 | Destroyer Rotary section | Black | Black, can be seen, inside the Destroyer | |||||
| (1048, 1097) | 48 | 23 | Destroyer Rotary section | Inside the Destroyer: Corridor | A corridor goes through the image below the center; it is uneven and goes a little up and down | |||||
| (1048, 1098) | 48 | 24 | Destroyer Rotary section | Black | Black, can be seen, inside the Destroyer | |||||
| (1048, 1099) | 48 | 25 | Destroyer Rotary section | Inside the Destroyer: Room | Y | Y | Car room: The lower left part of a high rectangular room begins in the middle of this image below the center. It extends both above and right of this image. To the right is a small car and on its hood lays a relaxed Cueball | |||
| (1048, 1100) | 48 | 26 | Destroyer Rotary section | Top hull of the Destroyer with room | Car room: Above the hull of the Destroyer. At the bottom of this image the hull of the Destroyer can be seen gently increasing its size towards right. At the very bottom from the middle towards right is the very top of a ceiling of the room inside the destroyer with a car with Cueball on the hood | |||||
| (1049, 1069) | 49 | -5 | Pyramid | Black | Black, never seen, below lowest visible terrain, bottom images, with white line at the bottom | |||||
| (1049, 1070) | 49 | -4 | Pyramid | Black | Black, never seen, below lowest visible terrain | |||||
| (1049, 1071) | 49 | -3 | Pyramid | Black | Black, never seen, below lowest visible terrain | |||||
| (1049, 1072) | 49 | -2 | Pyramid | Black | Black, never seen, below pyramid | |||||
| (1049, 1073) | 49 | -1 | Pyramid | Black | Black, can be seen, below ground level right | |||||
| (1049, 1074) | 49 | 0 | Pyramid | Pyramid left bottom | Almost inside the pyramid, only not black at the top left corner | |||||
| (1049, 1075) | 49 | 1 | Pyramid | Pyramid left slope | The rising slope of the pyramid takes almost half of the image | |||||
| (1049, 1076) | 49 | 2 | Pyramid | White | Empty air above the pyramid | |||||
| (1049, 1089) | 49 | 15 | Destroyer Rotary section | White | Empty air below the Destroyer | |||||
| (1049, 1090) | 49 | 16 | Destroyer Rotary section | Bottom hull of the Destroyer with room | Y | Y | Car and atmosphere room: below the hull of the Destroyer. To the left empty air, but then the hull of the Destroyer can be seen, gently increasing its size towards right. It is though only a thin ledge, and on the left edge Megan is standing looking down while talking to a blonde girl with hair bun behind her to the right | |||
| (1049, 1091) | 49 | 17 | Destroyer Rotary section | Bottom hull of the Destroyer with room | Car and atmosphere room: below the hull of the Destroyer, but only at the very left part of the image. When the hull takes a small step up, it becomes the ceiling of room where the floor (in the image below) is a thin ledge ending to the left in the image below | |||||
| (1049, 1092) | 49 | 18 | Destroyer Rotary section | Black | Black, can be seen, inside the Destroyer | |||||
| (1049, 1093) | 49 | 19 | Destroyer Rotary section | Black | Black, can be seen, inside the Destroyer | |||||
| (1049, 1094) | 49 | 20 | Destroyer Rotary section | Inside the Destroyer: Room and corridor | Hoverboards room: A corridor enters the image above the center from the right and enters a big room that extends higher up and as much left of this image in the images above and left. This image is empty, but Cueball and Megan are flying on hoverboards in the images to the left | |||||
| (1049, 1095) | 49 | 21 | Destroyer Rotary section | Inside the Destroyer: Room | Hoverboards room: This big room extends down and as much left of this image in the images below and left. This image is empty, but Cueball and Megan are flying on hoverboards in the images to the left | |||||
| (1049, 1096) | 49 | 22 | Destroyer Rotary section | Black | Black, can be seen, inside the Destroyer | |||||
| (1049, 1097) | 49 | 23 | Destroyer Rotary section | Inside the Destroyer: Corridor | A corridor goes through the image below the center; it is uneven and goes a little up and down | |||||
| (1049, 1098) | 49 | 24 | Destroyer Rotary section | Black | Black, can be seen, inside the Destroyer | |||||
| (1049, 1099) | 49 | 25 | Destroyer Rotary section | Inside the Destroyer: Room and corridor | Car room: The lower right part of a high rectangular room begins just right of the middle of this image below the center. It extends both above and left of this image, although the ceilings height decreases so it is only in the very left part that it is fully above the top edge. (In the left image is Cueball on a small car). To the right a corridor exits going out the right edge | |||||
| (1049, 1100) | 49 | 26 | Destroyer Rotary section | Top hull of the Destroyer with room | Car room: Above the hull of the Destroyer. At the bottom of this image the hull of the Destroyer can be seen gently increasing its size towards right. At the very bottom from to the left is the very top of a ceiling of the room inside the destroyer with a car with Cueball on the hood | |||||
| (1050, 1069) | 50 | -5 | Pyramid | Black | Black, never seen, below lowest visible terrain, bottom images, with white line at the bottom | |||||
| (1050, 1070) | 50 | -4 | Pyramid | Black | Black, never seen, below lowest visible terrain | |||||
| (1050, 1071) | 50 | -3 | Pyramid | Black | Black, never seen, below lowest visible terrain | |||||
| (1050, 1072) | 50 | -2 | Pyramid | Black | Black, never seen, below pyramid | |||||
| (1050, 1073) | 50 | -1 | Pyramid | Black | Black, can be seen, below ground level right | |||||
| (1050, 1074) | 50 | 0 | Pyramid | Black | Black, can be seen, inside Pyramid | |||||
| (1050, 1075) | 50 | 1 | Pyramid | Pyramid left slope | The rising slope of the pyramid can be seen in top left corner | |||||
| (1050, 1076) | 50 | 2 | Pyramid | Pyramid left slope | The rising slope of the pyramid takes almost half of the image - almost at the tip, but that is in the next image to the right | |||||
| (1050, 1089) | 50 | 15 | Destroyer Rotary section | White | Empty air below the Destroyer | |||||
| (1050, 1090) | 50 | 16 | Destroyer Rotary section | Bottom hull of the Destroyer with room | Y | 1 | Car and atmosphere room: below the hull of the Destroyer. At the center of this image the hull of the Destroyer can be seen, gently increasing its size towards right. It is though very thin here as there is a room above. In the room there is a car and a coin is hanging over the car. Above the car to the right a corridor exits the room | |||
| (1050, 1091) | 50 | 17 | Destroyer Rotary section | Inside the Destroyer: Room and corridor | Car and atmosphere room: At the right a corridor enters this large room that goes both above and below the corridors entrance. The corridors bottom is already below this image. But the room goes even deeper down, as the entrance is in the middle of this right wall of the room. The ceiling is thus at the center of the room. (Below this there is a car with a coin on top) | |||||
| (1050, 1092) | 50 | 18 | Destroyer Rotary section | Black | Black, can be seen, inside the Destroyer | |||||
| (1050, 1093) | 50 | 19 | Destroyer Rotary section | Black | Black, can be seen, inside the Destroyer | |||||
| (1050, 1094) | 50 | 20 | Destroyer Rotary section | Inside the Destroyer: Corridor | A corridor goes through the image above the center | |||||
| (1050, 1095) | 50 | 21 | Destroyer Rotary section | Black | Black, can be seen, inside the Destroyer | |||||
| (1050, 1096) | 50 | 22 | Destroyer Rotary section | Black | Black, can be seen, inside the Destroyer | |||||
| (1050, 1097) | 50 | 23 | Destroyer Rotary section | Inside the Destroyer: Corridor and shaft | A corridor enters left below the center going right across the image. To the very right a shaft goes up through the image forming an L lying down. The very right part of the shaft is in the next image to the right | |||||
| (1050, 1098) | 50 | 24 | Destroyer Rotary section | Inside the Destroyer: Shaft | A shaft enters to the very right in this image from above and goes down through the image. The right part of the shaft is in the image to the right | |||||
| (1050, 1099) | 50 | 25 | Destroyer Rotary section | Inside the Destroyer: Corridor and shaft | A corridor enters left below the center going right across the image. To the very right a shaft goes down from the corridor to the bottom edge of the image forming an inverted L lying down. The right part of the shaft is in the image to the right | |||||
| (1050, 1100) | 50 | 26 | Destroyer Rotary section | Top hull of the Destroyer | Above the hull of the Destroyer. At the top of this image the hull of the Destroyer can be seen gently increasing its size towards right. | |||||
| (1051, 1069) | 51 | -5 | Pyramid | Black | Black, never seen, below lowest visible terrain, bottom images, with white line at the bottom | |||||
| (1051, 1070) | 51 | -4 | Pyramid | Black | Black, never seen, below lowest visible terrain | |||||
| (1051, 1071) | 51 | -3 | Pyramid | Black | Black, never seen, below lowest visible terrain | |||||
| (1051, 1072) | 51 | -2 | Pyramid | Black | Black, never seen, below pyramid | |||||
| (1051, 1073) | 51 | -1 | Pyramid | Black | Black, can be seen, below ground level right | |||||
| (1051, 1074) | 51 | 0 | Pyramid | Black | Black, can be seen, inside Pyramid | |||||
| (1051, 1075) | 51 | 1 | Pyramid | Pyramid right slope | Almost inside the pyramid, only not black at the top right corner | |||||
| (1051, 1076) | 51 | 2 | Pyramid | Pyramid tip | 1 | The very tip of the pyramid is at the left side of this image. Just above the tip just inside this image there is a coin | ||||
| (1051, 1089) | 51 | 15 | Destroyer Rotary section | White | Empty air below the Destroyer | |||||
| (1051, 1090) | 51 | 16 | Destroyer Rotary section | Bottom hull of the Destroyer with corridor | Below the hull of the Destroyer. At the center of this image the hull of the Destroyer can be seen, gently increasing its size towards right. At the top the lower half of a corridor can be seen sloping gently down towards the right | |||||
| (1051, 1091) | 51 | 17 | Destroyer Rotary section | Inside the Destroyer: Corridor | A corridor goes through the image at the very bottom, part of it thus being in the image below. The ceiling of the corridor rises towards the left | |||||
| (1051, 1092) | 51 | 18 | Destroyer Rotary section | Black | Black, can be seen, inside the Destroyer | |||||
| (1051, 1093) | 51 | 19 | Destroyer Rotary section | Black | Black, can be seen, inside the Destroyer | |||||
| (1051, 1094) | 51 | 20 | Destroyer Rotary section | Inside the Destroyer: Corridor | A corridor goes through the image above the center | |||||
| (1051, 1095) | 51 | 21 | Destroyer Rotary section | Black | Black, can be seen, inside the Destroyer | |||||
| (1051, 1096) | 51 | 22 | Destroyer Rotary section | Black | Black, can be seen, inside the Destroyer | |||||
| (1051, 1097) | 51 | 23 | Destroyer Rotary section | Inside the Destroyer: Corridor and shaft | A shaft enters in very left part of the image from above and goes down below the center of the image where it turns right into a corridor forming an L. The corridor stops in a rounded dead end just past the middle. Most of the shaft is in the image to the left | |||||
| (1051, 1098) | 51 | 24 | Destroyer Rotary section | Black - almost | Black inside the Destroyer almost, but at the very left part of this image is the right edge of shaft that enters from above and goes down through the image | |||||
| (1051, 1099) | 51 | 25 | Destroyer Rotary section | Inside the Destroyer: Corridor and shaft | A corridor enters right below the center going left across the image. To the very left a shaft goes down from the corridor to the bottom edge of the image forming an L lying down. Most of the shaft is in the image to the left | |||||
| (1051, 1100) | 51 | 26 | Destroyer Rotary section | Top hull of the Destroyer | Above the hull of the Destroyer. At the top of this image the hull of the Destroyer can be seen gently increasing its size towards right. | |||||
| (1052, 1069) | 52 | -5 | Pyramid | Black | Black, never seen, below lowest visible terrain, bottom images, with white line at the bottom | |||||
| (1052, 1070) | 52 | -4 | Pyramid | Black | Black, never seen, below lowest visible terrain | |||||
| (1052, 1071) | 52 | -3 | Pyramid | Black | Black, never seen, below lowest visible terrain | |||||
| (1052, 1072) | 52 | -2 | Pyramid | Black | Black, never seen, below pyramid | |||||
| (1052, 1073) | 52 | -1 | Pyramid | Black | Black, can be seen, below ground level right | |||||
| (1052, 1074) | 52 | 0 | Pyramid | Black - almost | Black inside the pyramid, except at the top right corner where a part of the right slope can be seen | |||||
| (1052, 1075) | 52 | 1 | Pyramid | Pyramid right slope | The descending slope of the pyramid takes almost half of the image | |||||
| (1052, 1076) | 52 | 2 | Pyramid | White | Empty air above the pyramid | |||||
| (1052, 1089) | 52 | 15 | Destroyer Cave section | White | Empty air below the Destroyer | |||||
| (1052, 1090) | 52 | 16 | Destroyer Cave section | Bottom hull of the Destroyer with corridor | Below the hull of the Destroyer. At the center of this image the hull of the Destroyer can be seen, gently increasing its size towards right. At the top the lower half of a corridor can be seen | |||||
| (1052, 1091) | 52 | 17 | Destroyer Cave section | Inside the Destroyer: Corridor | A corridor goes through the image at the very bottom, part of it thus being in the image below | |||||
| (1052, 1092) | 52 | 18 | Destroyer Cave section | Black | Black, can be seen, inside the Destroyer | |||||
| (1052, 1093) | 52 | 19 | Destroyer Cave section | Black | Black, can be seen, inside the Destroyer | |||||
| (1052, 1094) | 52 | 20 | Destroyer Cave section | Inside the Destroyer: Corridor | A corridor goes through the image at the center | |||||
| (1052, 1095) | 52 | 21 | Destroyer Cave section | Black | Black, can be seen, inside the Destroyer | |||||
| (1052, 1096) | 52 | 22 | Destroyer Cave section | Black | Black, can be seen, inside the Destroyer | |||||
| (1052, 1097) | 52 | 23 | Destroyer Cave section | Black | Black, can be seen, inside the Destroyer | |||||
| (1052, 1098) | 52 | 24 | Destroyer Cave section | Black | Black, can be seen, inside the Destroyer | |||||
| (1052, 1099) | 52 | 25 | Destroyer Cave section | Inside the Destroyer: Corridor | A corridor enters left below the center going right across the image. To the very right a shaft goes down from the corridor forming an inverted L lying down. The rightmost part of the shaft is in the next image to the right | |||||
| (1052, 1100) | 52 | 26 | Destroyer Cave section | Top hull of the Destroyer | Above the hull of the Destroyer. At the top of this image the hull of the Destroyer can be seen gently increasing its size towards right. | |||||
| (1052, 1101) | 52 | 27 | Destroyer Cave section | White | Empty air above the Destroyer | |||||
| (1052, 1102) | 52 | 28 | Destroyer Cave section | White | Empty air above the Destroyer | |||||
| (1052, 1103) | 52 | 29 | Destroyer Cave section | White | Empty air above the Destroyer | |||||
| (1052, 1104) | 52 | 30 | Destroyer Cave section | White | Empty air above the Destroyer | |||||
| (1053, 1069) | 53 | -5 | Pyramid | Black | Black, never seen, below lowest visible terrain, bottom images, with white line at the bottom | |||||
| (1053, 1070) | 53 | -4 | Pyramid | Black | Black, never seen, below lowest visible terrain | |||||
| (1053, 1071) | 53 | -3 | Pyramid | Black | Black, never seen, below lowest visible terrain | |||||
| (1053, 1072) | 53 | -2 | Pyramid | Black | Black, never seen, below pyramid | |||||
| (1053, 1073) | 53 | -1 | Pyramid | Black | Black, can be seen, below ground level right | |||||
| (1053, 1074) | 53 | 0 | Pyramid | Pyramid right bottom | Pyramids bottom to the right | |||||
| (1053, 1075) | 53 | 1 | Pyramid | White | Empty air above the pyramid | |||||
| (1053, 1076) | 53 | 2 | Pyramid | White | Empty air above the pyramid | |||||
| (1053, 1089) | 53 | 15 | Destroyer Cave section | White | Empty air below the Destroyer | |||||
| (1053, 1090) | 53 | 16 | Destroyer Cave section | Bottom hull of the Destroyer with corridor | Below the hull of the Destroyer. At the center of this image the hull of the Destroyer can be seen, gently increasing its size towards right, with a small indentation to the right, where what looks like half a crater in the hull can be seen (in the next image to the right it turns out this is only part of the first of three such craters). At the top the lower half of a corridor can be seen sloping gently down towards the right. (Above the right part of this image a shaft is going up) | |||||
| (1053, 1091) | 53 | 17 | Destroyer Cave section | Inside the Destroyer: Corridor and shaft | Y | A corridor goes through the image at the very bottom, part of it thus being in the image below. At the very right part of the image, a shaft goes up through the image; the very rightmost part of the shaft is in the image to the right. Ponytail is inside the bottom part of the shaft flying up through the shaft with her arms stretched out in front of her. A line below her indicates that she is rising | ||||
| (1053, 1092) | 53 | 18 | Destroyer Cave section | Inside the Destroyer: Shaft | 1 | A shaft enters in the very right part of the image from above and goes down through the image. Some places the shafts edge is cut off at the right edge of this image. At the center of the shaft there is a coin | ||||
| (1053, 1093) | 53 | 19 | Destroyer Cave section | Inside the Destroyer: Shaft | A shaft enters in the very right part of the image from above and goes down through the image. The shafts edge is cut off at the right edge of this image | |||||
| (1053, 1094) | 53 | 20 | Destroyer Cave section | Inside the Destroyer: Corridor and shaft | 1 | A corridor enters left at the center going right across the image entering a shaft that goes down through the image forming a lying T. The shaft extends in to the image to the right. Just inside the corridor left of the shaft there is a coin | ||||
| (1053, 1095) | 53 | 21 | Destroyer Cave section | Inside the Destroyer: Corridor and shaft | A corridor enters left at the center going right across the image entering a shaft that goes down through the image forming a lying T. The shaft extends in to the image to the right | |||||
| (1053, 1096) | 53 | 22 | Destroyer Cave section | Inside the Destroyer: Corridor and shaft | A corridor enters left at the center going right across the image entering a shaft that goes down through the image forming a lying T. The shaft extends in to the image to the right | |||||
| (1053, 1097) | 53 | 23 | Destroyer Cave section | Inside the Destroyer: Corridor and shaft | A corridor enters left at the center going right across the image entering a shaft that goes down through the image forming a lying T. The shaft extends in to the image to the right | |||||
| (1053, 1098) | 53 | 24 | Destroyer Cave section | Inside the Destroyer: Corridor and shaft | A corridor enters left at the center going right across the image entering a shaft that goes down through the image forming a lying T. The shaft extends in to the image to the right | |||||
| (1053, 1099) | 53 | 25 | Destroyer Cave section | Inside the Destroyer: Corridor and shaft | A corridor enters right below the center going left across the image. To the very left a shaft goes up through the image forming an inverted L lying down | |||||
| (1053, 1100) | 53 | 26 | Destroyer Cave section | Top hull of the Destroyer with room | 1 | Two rooms across: Above the hull of the Destroyer. At the very top of this image the hull of the Destroyer can be seen gently increasing its size towards right exiting at the top edge past the middle. To the very right a shaft starting above this image can be seen going into the Destroyer. Below the hull to the left there is a small room. The whole room is completely depicted in this image. A corridor connects it to the shaft in the right part. The small room is rectangular, higher than it is wide. In the central top part of the room above the height of the corridors entrance there is a coin. (Going out across the corridor leads to another similar room, larger but also with a coin) | ||||
| (1053, 1101) | 53 | 27 | Destroyer Cave section | White - almost | Empty air above the Destroyer except at the very bottom right where the hull just enters, and then disappears again as a shaft is going down into the Destroyer here | |||||
| (1053, 1102) | 53 | 28 | Destroyer Cave section | White | Empty air above the Destroyer | |||||
| (1053, 1103) | 53 | 29 | Destroyer Cave section | White | Empty air above the Destroyer | |||||
| (1053, 1104) | 53 | 30 | Destroyer Cave section | White | Empty air above the Destroyer | |||||
| (1054, 1069) | 54 | -5 | Ground level right of pyramid | Black | Black, never seen, below lowest visible terrain, bottom images, with white line at the bottom | |||||
| (1054, 1070) | 54 | -4 | Ground level right of pyramid | Black | Black, never seen, below lowest visible terrain | |||||
| (1054, 1071) | 54 | -3 | Ground level right of pyramid | Black | Black, never seen, below lowest visible terrain | |||||
| (1054, 1072) | 54 | -2 | Ground level right of pyramid | Black | Black, never seen, below ground level right of pyramid | |||||
| (1054, 1073) | 54 | -1 | Ground level right of pyramid | Black | Black, can be seen, below ground level right | |||||
| (1054, 1074) | 54 | 0 | Ground level right of pyramid | Terrain | Bare ground | |||||
| (1054, 1075) | 54 | 1 | Ground level right of pyramid | White | Empty air above ground level right of the pyramid | |||||
| (1054, 1076) | 54 | 2 | Ground level right of pyramid | White | Empty air above ground level right of the pyramid | |||||
| (1054, 1089) | 54 | 15 | Destroyer Cave section | White | Empty air below the Destroyer | |||||
| (1054, 1090) | 54 | 16 | Destroyer Cave section | Bottom hull of the Destroyer with corridor | Below the hull of the Destroyer. At the center of this image the hull of the Destroyer can be seen, gently increasing its size towards right. There are three craters in the hull, the first to the left cut off at the edge. The one in the middle is the deepest and has three pieces hanging down below it. At the top the lower half of a corridor can be seen sloping gently down towards the right | |||||
| (1054, 1091) | 54 | 17 | Destroyer Cave section | Inside the Destroyer: Corridor and shaft | A corridor goes through the image at the very bottom, part of it thus being in the image below. At the very left part of the image, a shaft goes up through the image, but most of the shaft is in the image to the left | |||||
| (1054, 1092) | 54 | 18 | Destroyer Cave section | Black - almost | Black inside the Destroyer except at the very left where a thin sliver of the shaft that goes down through the image to the left can be seen most of the way, but not even all the time | |||||
| (1054, 1093) | 54 | 19 | Destroyer Cave section | Black - almost | Black inside the Destroyer except at the very left where a small part of the shaft that goes down through the image to the left can be seen, but most of this shaft is in the image to the left | |||||
| (1054, 1094) | 54 | 20 | Destroyer Cave section | Black - almost | Black inside the Destroyer except at the very left where a small part of the shaft that goes down through the image to the left can be seen, but most of this shaft is in the image to the left | |||||
| (1054, 1095) | 54 | 21 | Destroyer Cave section | Inside the Destroyer: Corridor and shaft | A corridor enters right at the center going left across the image entering a shaft that goes down through the image forming a lying T. The shaft extends in to the image to the left | |||||
| (1054, 1096) | 54 | 22 | Destroyer Cave section | Black - almost | Black inside the Destroyer except at the very left where a small part of the shaft that goes down through the image to the left can be seen, but most of this shaft is in the image to the left | |||||
| (1054, 1097) | 54 | 23 | Destroyer Cave section | Black - almost | Black inside the Destroyer except at the very left where a small part of the shaft that goes down through the image to the left can be seen, but most of this shaft is in the image to the left | |||||
| (1054, 1098) | 54 | 24 | Destroyer Cave section | Black - almost | Black inside the Destroyer except at the very left where a small part of the shaft that goes down through the image to the left can be seen, but most of this shaft is in the image to the left | |||||
| (1054, 1099) | 54 | 25 | Destroyer Cave section | Inside the Destroyer: Corridor and shaft | Y | Y | 1 | Corridor peristalsis: A corridor enters left, where the right part of a shaft goes down from the corridor. Most of the shaft being in the left image. The corridor continues across the image. In the middle a shaft goes up from the corridor. In the right part of the tunnel just before the edge the ceiling and floor moves towards each other (up and down respectively) and then back up. In total this occurs three times in a row, counting the two similar indentations in the image to the right. Already at the first truncation the space is too small for hoverboard Cueball to pass through. Hairbun and Cueball are standing with a coin in front of Cueballs head before the first indentation. They are looking at this section of the corridor and Hairbun is talking: "Ah, yes. Corridor peristalsis." Like the movements that moves food along inside the human digestive tract. (There is also a coin on the other side of these three truncations which cannot be reached this way because of the peristalsis) | ||
| (1054, 1100) | 54 | 26 | Destroyer Cave section | Inside the Destroyer: Room, corridor and shaft | Two rooms across: To the left is a shaft coming down (from the top of the hull in the image above). Part of the shaft is in the image to the left. The shaft ends just below the center in a corridor that goes from left to right. In the middle a shaft is going down from the corridor, and to the right the corridor enters a room, that is just visible at the right edge. The rooms ceiling and floor are both less than halfway from the center to the top/bottom. There is also a similar room to the left across the corridor (both rooms have a coin) | |||||
| (1054, 1101) | 54 | 27 | Destroyer Cave section | Top hull of the Destroyer with shaft | Above the hull of the Destroyer. At the very bottom of this image the hull of the Destroyer can be seen gently increasing its size towards right. At the very left there is an opening where there is no hull; this is part of an opening to a shaft going inside the Destroyer | |||||
| (1054, 1102) | 54 | 28 | Destroyer Cave section | White | Empty air above the Destroyer | |||||
| (1054, 1103) | 54 | 29 | Destroyer Cave section | White | Empty air above the Destroyer | |||||
| (1054, 1104) | 54 | 30 | Destroyer Cave section | White | Empty air above the Destroyer | |||||
| (1055, 1069) | 55 | -5 | Ground level right of pyramid | Black | Black, never seen, below lowest visible terrain, bottom images, with white line at the bottom | |||||
| (1055, 1070) | 55 | -4 | Ground level right of pyramid | Black | Black, never seen, below lowest visible terrain | |||||
| (1055, 1071) | 55 | -3 | Ground level right of pyramid | Black | Black, never seen, below lowest visible terrain | |||||
| (1055, 1072) | 55 | -2 | Ground level right of pyramid | Black | Black, never seen, below ground level right of pyramid | |||||
| (1055, 1073) | 55 | -1 | Ground level right of pyramid | Black | Black, can be seen, below ground level right | |||||
| (1055, 1074) | 55 | 0 | Ground level right of pyramid | Terrain | Bare ground | |||||
| (1055, 1075) | 55 | 1 | Ground level right of pyramid | White | Empty air above ground level right of the pyramid | |||||
| (1055, 1076) | 55 | 2 | Ground level right of pyramid | White | Empty air above ground level right of the pyramid | |||||
| (1055, 1089) | 55 | 15 | Destroyer Cave section | White | Empty air below the Destroyer | |||||
| (1055, 1090) | 55 | 16 | Destroyer Cave section | Bottom hull of the Destroyer with corridor | Y | Y | Y | Below the hull of the Destroyer. At the bottom of this image the hull of the Destroyer can be seen, gently increasing its size towards right. At the top the lower half of a corridor can be seen. In the middle of this corridor there is a hole in the floor with sharp spikes at the bottom. The hole is covered with sticks and Cueball throws some small things on top of the cover while telling something to a boy with black hair standing behind him to the right. Text can be seen to be written in the image above, but it is almost completely cut out of this image | ||
| (1055, 1091) | 55 | 17 | Destroyer Cave section | Inside the Destroyer: Corridor | Y | A corridor goes through the image at the very bottom, part of it thus being in the image below, and here is also Cueball talking to a kid, but only the text he says can be seen in this image (almost all of it) | ||||
| (1055, 1092) | 55 | 18 | Destroyer Cave section | Black | Black, can be seen, inside the Destroyer | |||||
| (1055, 1093) | 55 | 19 | Destroyer Cave section | Black | Black, can be seen, inside the Destroyer | |||||
| (1055, 1094) | 55 | 20 | Destroyer Cave section | Black | Black, can be seen, inside the Destroyer | |||||
| (1055, 1095) | 55 | 21 | Destroyer Cave section | Inside the Destroyer: Corridor | 1 | A corridor goes through the image at the center. Left of the middle there is a coin | ||||
| (1055, 1096) | 55 | 22 | Destroyer Cave section | Black | Black, can be seen, inside the Destroyer | |||||
| (1055, 1097) | 55 | 23 | Destroyer Cave section | Black | Black, can be seen, inside the Destroyer | |||||
| (1055, 1098) | 55 | 24 | Destroyer Cave section | Black | Black, can be seen, inside the Destroyer | |||||
| (1055, 1099) | 55 | 25 | Destroyer Cave section | Inside the Destroyer: Corridor | 1 | Corridor peristalsis: A corridor enters right going across the image. In the left part of the tunnel from just past the middle the ceiling and floor moves towards each other (up and down respectively) and then back up twice, ending apart again at the left. In total this occurs three times in a row, counting the similar indentation in the image to the left. Already at the first truncation the space is too small for hoverboard Cueball to pass through. There is a coin just before the first truncation. (There is also a coin on the other side of these three truncations which cannot be reached this way because of the peristalsis. Here Hairbun calls these indentation for Corridor peristalsis) | ||||
| (1055, 1100) | 55 | 26 | Destroyer Cave section | Inside the Destroyer: Room | 1 | Two rooms across: Here is a medium-sized room. The room’s right wall ends just right of the middle of this image. The room is rectangular extending into the image to the left. The ceiling and floor are both less than halfway from the center to the top/bottom. In the central top part of the there is a coin. (Going out of the room via the image to the left and across the corridor there leads to another similar room, smaller but also with a coin) | ||||
| (1055, 1101) | 55 | 27 | Destroyer Cave section | Top hull of the Destroyer | Above the hull of the Destroyer. At the very bottom left of this image the hull of the Destroyer can be seen gently increasing its size towards right. Then before the middle it takes a big step up and this repeats at close to the right edge. At the very top right the hull is almost flat when it exits at the right edge | |||||
| (1055, 1102) | 55 | 28 | Destroyer Cave section | White | Empty air above the Destroyer | |||||
| (1055, 1103) | 55 | 29 | Destroyer Cave section | White | Empty air above the Destroyer | |||||
| (1055, 1104) | 55 | 30 | Destroyer Cave section | White | Empty air above the Destroyer | |||||
| (1056, 1069) | 56 | -5 | Ground level right of pyramid | Black | Black, never seen, below lowest visible terrain, bottom images, with white line at the bottom | |||||
| (1056, 1070) | 56 | -4 | Ground level right of pyramid | Black | Black, never seen, below lowest visible terrain | |||||
| (1056, 1071) | 56 | -3 | Ground level right of pyramid | Black | Black, never seen, below lowest visible terrain | |||||
| (1056, 1072) | 56 | -2 | Ground level right of pyramid | Black | Black, never seen, below ground level right of pyramid | |||||
| (1056, 1073) | 56 | -1 | Ground level right of pyramid | Black | Black, can be seen, below ground level right | |||||
| (1056, 1074) | 56 | 0 | Ground level right of pyramid | Terrain | Bare ground | |||||
| (1056, 1075) | 56 | 1 | Ground level right of pyramid | White | Empty air above ground level right of the pyramid | |||||
| (1056, 1076) | 56 | 2 | Ground level right of pyramid | White | Empty air above ground level right of the pyramid | |||||
| (1056, 1089) | 56 | 15 | Destroyer Cave section | White | Empty air below the Destroyer | |||||
| (1056, 1090) | 56 | 16 | Destroyer Cave section | Bottom hull of the Destroyer with corridor | Below the hull of the Destroyer. At the bottom of this image the hull of the Destroyer can be seen, gently increasing its size towards right. At the top the lower half of a corridor can be seen sloping gently up towards the right | |||||
| (1056, 1091) | 56 | 17 | Destroyer Cave section | Inside the Destroyer: Corridor | A corridor goes through the image at the very bottom, part of it thus being in the image below | |||||
| (1056, 1092) | 56 | 18 | Destroyer Cave section | Black | Black, can be seen, inside the Destroyer | |||||
| (1056, 1093) | 56 | 19 | Destroyer Cave section | Black | Black, can be seen, inside the Destroyer | |||||
| (1056, 1094) | 56 | 20 | Destroyer Cave section | Black | Black, can be seen, inside the Destroyer | |||||
| (1056, 1095) | 56 | 21 | Destroyer Cave section | Inside the Destroyer: Corridor | A corridor goes through the image at the center. At the far right the floor begins to drop just before entering a room | |||||
| (1056, 1096) | 56 | 22 | Destroyer Cave section | Black | Black, can be seen, inside the Destroyer | |||||
| (1056, 1097) | 56 | 23 | Destroyer Cave section | Black | Black, never seen, inside the Destroyer | |||||
| (1056, 1098) | 56 | 24 | Destroyer Cave section | Black | Black, can be seen, inside the Destroyer | |||||
| (1056, 1099) | 56 | 25 | Destroyer Cave section | Inside the Destroyer: Corridor | A corridor goes through the image below the center | |||||
| (1056, 1100) | 56 | 26 | Destroyer Cave section | Black | Black, can be seen, inside the Destroyer | |||||
| (1056, 1101) | 56 | 27 | Destroyer Cave section | Top hull of the Destroyer with room and corridor | Three rooms in a row: Above the hull of the Destroyer. At the very top eft of this image the hull of the Destroyer can be seen gently increasing its size towards right. Then from the middle the hull turns into the bottom part of a corridor going inside the Destroyer with an almost flat floor and at the far right the corridor expands up (in the image above) into a small room, the first of three in a row). In the image above a very large step up in the hull can be seen, as well as the top part of the corridor | |||||
| (1056, 1102) | 56 | 28 | Destroyer Cave section | Top hull of the Destroyer with room | Three rooms in a row: Above the hull of the Destroyer. To the left and past the middle there is just empty air, then the hull of the Destroyer enters from below as it takes a giant step from below to above this image. At the bottom of this step is the top part of a corridor that enters a room that is just about two corridor heights high. (There is a coin in this room, but it is just on the other side of the edge in the next image to the right). | |||||
| (1056, 1103) | 56 | 29 | Destroyer Cave section | Top hull of the Destroyer | Above the hull of the Destroyer. To the left and past the middle there is just empty air, and then the hull of the Destroyer enters from below as it has taken a giant step from below through the entire image below. At the top of this step there is a broad ledge jutting out over the abys to the right. To the right of this the hull continues almost flat towards right | |||||
| (1056, 1104) | 56 | 30 | Destroyer Cave section | White | Empty air above the Destroyer | |||||
| (1057, 1069) | 57 | -5 | Ground level right of pyramid | Black | Black, never seen, below lowest visible terrain, bottom images, with white line at the bottom | |||||
| (1057, 1070) | 57 | -4 | Ground level right of pyramid | Black | Black, never seen, below lowest visible terrain | |||||
| (1057, 1071) | 57 | -3 | Ground level right of pyramid | Black | Black, never seen, below lowest visible terrain | |||||
| (1057, 1072) | 57 | -2 | Ground level right of pyramid | Black | Black, never seen, below ground level right of pyramid | |||||
| (1057, 1073) | 57 | -1 | Ground level right of pyramid | Black | Black, can be seen, below ground level right | |||||
| (1057, 1074) | 57 | 0 | Ground level right of pyramid | Terrain | Grassy ground | |||||
| (1057, 1075) | 57 | 1 | Ground level right of pyramid | White | Empty air above ground level right of the pyramid | |||||
| (1057, 1076) | 57 | 2 | Ground level right of pyramid | White | Empty air above ground level right of the pyramid | |||||
| (1057, 1089) | 57 | 15 | Destroyer Cave section | White | Empty air below the Destroyer | |||||
| (1057, 1090) | 57 | 16 | Destroyer Cave section | Bottom hull of the Destroyer with room | Spark gap room: below the hull of the Destroyer. At the bottom of this image the hull of the Destroyer can be seen, gently increasing its size towards right. At the top left a corridor enters a room by a step down to the floor. The floor of the room gently slopes up towards right | |||||
| (1057, 1091) | 57 | 17 | Destroyer Cave section | Inside the Destroyer: Room and corridor | Y | Spark gap room: A huge room going both above and below this image and to the right. To the left is a wall about halfway from left to the middle. At the bottom of this wall a corridor enters from the left, the bottom part of the corridor is in the image below. At the top of the wall is Cueball hanging on to the wall, his head is cut off at the top edge of the image | ||||
| (1057, 1092) | 57 | 18 | Destroyer Cave section | Inside the Destroyer: Room and shaft | Y | Y | Spark gap room: The top part of a huge room going two images below this image and to the right. To the left is a wall about halfway from left to the middle and the ceiling is halfway up toward the center. At the bottom left of the image is Cueball hanging on to the wall, his torso is cut off at the bottom edge of the image. He says something. To the very right a shaft going up can just be seen, most of it is in the image to the right. The shaft ends just before the top of the image | |||
| (1057, 1093) | 57 | 19 | Destroyer Cave section | Black | Black, can be seen, inside the Destroyer | |||||
| (1057, 1094) | 57 | 20 | Destroyer Cave section | Black - almost | Cotton trap: This almost black image only has a small piece of white at the top right corner. This is part of the steep downward slope down towards the cotton trap to the right and below/right | |||||
| (1057, 1095) | 57 | 21 | Destroyer Cave section | Inside the Destroyer: Room | Y | Y | Cotton trap: At the left part of this image a corridor has just ended (in the left image) as it now expands mainly in a steep downward slope. The ceiling only rises moderately towards the right, starting just above the center of the image. The floor though began at just below the center and this slopes down so it falls below the image before reaching the right edge of the image. At the top of the slope, at the very left, stands Ponytail looking left towards you, and she warns you about a cotton trap | |||
| (1057, 1096) | 57 | 22 | Destroyer Cave section | Black | Black, can be seen, inside the Destroyer | |||||
| (1057, 1097) | 57 | 23 | Destroyer Cave section | Black | Black, never seen, inside the Destroyer | |||||
| (1057, 1098) | 57 | 24 | Destroyer Cave section | Black | Black, can be seen, inside the Destroyer | |||||
| (1057, 1099) | 57 | 25 | Destroyer Cave section | Inside the Destroyer: Corridor and shaft | Small intestine shaft: A corridor goes through the image below the center. At the very top right corner of this image a lope from the small intestine shaft/corridor can be seen. It enters just enough that a very small bit of the corner itself is on the other side of this circle shaft around the corner. The shaft extend into the images both above and to the right | |||||
| (1057, 1100) | 57 | 26 | Destroyer Cave section | Inside the Destroyer: Corridor and shaft | Y | Y | Small intestine shaft: This is deep within the small intestine shaft, which extends both above and below and to the right. To the right above the center the shaft enters like a corridor and begins to climb up to the left, only to turn down again (the top of the shaft is cut off at the top edge on the way to the middle). On this downwards part of the shaft Cueball is flying down while yelling, with lines showing his movement. Then the shaft turn right and then straight down exiting at the bottom close to the right edge. With the other images this shaft creates a structure that looks a lot like the small intestines of a human digestive tract. Since this is just right of the corridor peristalsis in the corridor below, it makes it quite clear that this should look like the ships digestion system, with coins going through | |||
| (1057, 1101) | 57 | 27 | Destroyer Cave section | Inside the Destroyer: Room, corridor and shaft | Small intestine shaft: At the very top of this image is the floor of two small rooms connected with a corridor in the middle.(The rooms can be seen in the image above).Down in the bottom right corner two lopes of the small intestine shaft/corridor can be seen. One enters at the very right between the center and exits right half way down from there to the bottom edge. The other does similarly at the bottom, just going a little further into this image. The rest of this shaft can be seen in the images below and to the right | |||||
| (1057, 1102) | 57 | 28 | Destroyer Cave section | Inside the Destroyer: Room and corridor | 2 | Three rooms in a row: In this image two small rooms can be seen. One in the left part extending to the left image and similar to the right. The ceiling is just below the center, and the floor is just below the bottom edge in the image below. Between these two small square rooms there is a short corridor, the walls thus go down to just above the bottom of the image. The room to the left has a corridor that leads out on to the top of the hull. The room to the right has another corridor that leads to yet a third room in a row like these two. There are two coins, one at the top in each of the two rooms, close to the image edges | ||||
| (1057, 1103) | 57 | 29 | Destroyer Cave section | Top hull of the Destroyer | Above the hull of the Destroyer. At the bottom of this image the hull of the Destroyer can be seen gently increasing its size towards right. | |||||
| (1057, 1104) | 57 | 30 | Destroyer Cave section | White | Empty air above the Destroyer | |||||
| (1058, 1069) | 58 | -5 | Ground level right of pyramid | Black | Black, never seen, below lowest visible terrain, bottom images, with white line at the bottom | |||||
| (1058, 1070) | 58 | -4 | Ground level right of pyramid | Black | Black, never seen, below lowest visible terrain | |||||
| (1058, 1071) | 58 | -3 | Ground level right of pyramid | Black | Black, never seen, below lowest visible terrain | |||||
| (1058, 1072) | 58 | -2 | Ground level right of pyramid | Black | Black, never seen, below ground level right of pyramid | |||||
| (1058, 1073) | 58 | -1 | Ground level right of pyramid | Black | Black, can be seen, below ground level right | |||||
| (1058, 1074) | 58 | 0 | Ground level right of pyramid | Terrain | Grassy ground | |||||
| (1058, 1075) | 58 | 1 | Ground level right of pyramid | White | Empty air above ground level right of the pyramid | |||||
| (1058, 1076) | 58 | 2 | Ground level right of pyramid | White | Empty air above ground level right of the pyramid | |||||
| (1058, 1089) | 58 | 15 | Destroyer Cave section | White - almost | Empty air below the Destroyer, but at the very top right of this image the hull of the Destroyer can be seen entering, gently increasing its size towards right | |||||
| (1058, 1090) | 58 | 16 | Destroyer Cave section | Bottom hull of the Destroyer with room | Y | Y | Y | 2 | Spark gap room: below the hull of the Destroyer. At the bottom of this image the hull of the Destroyer can be seen, gently increasing its size towards right even taking a step down, so the hull disappears below the edge to the right. There is a coin before the step down. At the top of the image is the floor of a room where Cueball is standing looking at a big machine to the right, with the letters JS written on it. There is a coin behind it. (It may be a huge spark gap, the spark and the top electrode being in the image above) | |
| (1058, 1091) | 58 | 17 | Destroyer Cave section | Inside the Destroyer: Room | Y | Y | Spark gap room: A huge room going both above and below this image and to the left. To the right is a wall about halfway from right to the middle. Below the center in the middle of the image can be seen the top part of a big machine, it looks like a huge spark gap consisting of two “simple-house” shaped electrodes labeled JS, the bottom electrode is in the image below. The two tips point directly at each other (the bottom tip is just visible at the bottom) and they are connected with an electrical current streaming from one to the other. White text has been written on the electrode. The electrode is held in place by a large arm jutting out from the wall. It is thicker on top of the electrode and from here several wires connected down to the arm and another wire goes from the arm into the wall to the right above where the arm itself is connected to the wall. (There is a coin in the image below close to the wall) | |||
| (1058, 1092) | 58 | 18 | Destroyer Cave section | Inside the Destroyer: Room, corridor and shaft | 1 | Spark gap room and Cotton trap: The top of a huge room going two images below this image and to the right. To the right is a wall about halfway from right to the middle and the ceiling is about half way up to the center. The very right and extending slightly into the left image is a shaft going up. It seems like the shaft ends blindly at the very top, where there is a coin, but inside this image. But to the right a corridor filled with black Cotton leads our right into the bottom of the Cotton trap. Just past the middle of the image the bottom of the trap goes down in a half circular bottom, the bottom is just inside the image, the floor beginning to rise again to the very right, before it is cut off at the right edge. | ||||
| (1058, 1093) | 58 | 19 | Destroyer Cave section | Black Cotton | Cotton trap: Black inside the Destroyer, but the left part of the is part of the black cotton trap and it goes from top to bottom and extends further right as well as above and below this image | |||||
| (1058, 1094) | 58 | 20 | Destroyer Cave section | Inside the Destroyer: Room | Cotton trap: To the left the steep slope of this large room enters the surface of the black cotton that fills the deep hole beneath (two images more down). The slope continues, though even steeper below the surface | |||||
| (1058, 1095) | 58 | 21 | Destroyer Cave section | Inside the Destroyer: Room | Cotton trap: The ceiling of this large room. It is almost straight, but goes up a little from the left and then falls a little again towards the right. Below in the image below is a deep hole (3 images deep) most of it covered with black cotton | |||||
| (1058, 1096) | 58 | 22 | Destroyer Cave section | Black | Black, can be seen, inside the Destroyer | |||||
| (1058, 1097) | 58 | 23 | Destroyer Cave section | Black | Black, never seen, inside the Destroyer | |||||
| (1058, 1098) | 58 | 24 | Destroyer Cave section | Black | Black, can be seen, inside the Destroyer | |||||
| (1058, 1099) | 58 | 25 | Destroyer Cave section | Inside the Destroyer: Corridor and shaft | Small intestine shaft: A corridor goes through the image below the center. At the very top left corner the exit lope from the small intestine shaft/corridor enters just below the top, going almost straight right, but then it swings down, and ends up going almost straight down into the corridor halfway between the left edge and the middle. Above and left this shaft twists and turns left, right and even down again. All in all it creates a structure that looks a lot like the small intestines of a human digestive tract. Since this is just right of the corridor peristalsis, it makes it quite clear that this should look like the ships digestion system, with coins going through | |||||
| (1058, 1100) | 58 | 26 | Destroyer Cave section | Inside the Destroyer: Corridor and shaft | Y | 1 | Small intestine shaft: This is deep within the small intestine shaft, which extends both above and below and to the left. The shaft enters in left of the middle going a little right then turning into a twisted shaft, that while turning going down at first then goes left. Ponytail is sliding down the right side of the shaft near the bottom with her head first and facing down, with lines indicating her movement. There is a coin at the bottom of this section of the shaft, that never reaches down to the center. After the coin the shaft begins to climb up to the left where it exits the image. With the other images this shaft creates a structure that looks a lot like the small intestines of a human digestive tract. Since this is just right of the corridor peristalsis in the corridor below, it makes it quite clear that this should look like the ships digestion system, with coins going through | |||
| (1058, 1101) | 58 | 27 | Destroyer Cave section | Inside the Destroyer: Room, corridor and shaft | Y | Small intestine shaft: Above this image there is a room both at the left edge and to the right of the shaft. The shaft though, goes down from a small corridor between these two rooms. Just to the left of the shaft is the legs and an arm of Cueball who is cut off at the top edge, but his head is clearly looking down the shaft. There are three rooms in a row here (the last is to the left, each with a coin in them). But the main item in this image is the beginning of the shaft that goes down to a corridor two images below, but it does so while twisting and turning left, right and even up again. All in all it creates a structure that looks a lot like the small intestines of a human digestive tract. Since this is just right of the corridor peristalsis in the corridor below, it makes it quite clear that this should look like the ships digestion system, with coins going through. | ||||
| (1058, 1102) | 58 | 28 | Destroyer Cave section | Inside the Destroyer: Room and corridor | Y | 1 | Three rooms in a row: In this image two small rooms can be seen. The right part of a room to the left is just entering this image to the left, the rest of the room extending to the left image. Then a corridor leads right from this room to a similar room to the right which is just contained to the right within this image. The ceiling is just below the center, and the floor is just below the bottom edge in the image below. the walls go down to just above the bottom of the image where they exit to the corridor between the two rooms. To the left of the left room there is a third room in a row like these two. There is a coin in the top center of the right room. In the tunnel is Cueball looking right and down. He is cut off at the bottom edge above his legs. (In the image below is a shaft down from the corridor that twist and turns so it looks like small intestines) | |||
| (1058, 1103) | 58 | 29 | Destroyer Cave section | Top hull of the Destroyer | Above the hull of the Destroyer. At the bottom of this image the hull of the Destroyer can be seen gently increasing its size towards right. | |||||
| (1058, 1104) | 58 | 30 | Destroyer Cave section | White | Empty air above the Destroyer | |||||
| (1059, 1069) | 59 | -5 | Ground level right of pyramid | Black | Black, never seen, below lowest visible terrain, bottom images, with white line at the bottom | |||||
| (1059, 1070) | 59 | -4 | Ground level right of pyramid | Black | Black, never seen, below lowest visible terrain | |||||
| (1059, 1071) | 59 | -3 | Ground level right of pyramid | Black | Black, never seen, below lowest visible terrain | |||||
| (1059, 1072) | 59 | -2 | Ground level right of pyramid | Black | Black, never seen, below ground level right of pyramid | |||||
| (1059, 1073) | 59 | -1 | Ground level right of pyramid | Black | Black, can be seen, below ground level right | |||||
| (1059, 1074) | 59 | 0 | Ground level right of pyramid | Terrain | Grassy ground | |||||
| (1059, 1075) | 59 | 1 | Ground level right of pyramid | White | Empty air above ground level right of the pyramid | |||||
| (1059, 1076) | 59 | 2 | Ground level right of pyramid | White | Empty air above ground level right of the pyramid | |||||
| (1059, 1089) | 59 | 15 | Destroyer Cave section | Bottom hull of the Destroyer | 1 | Below the hull of the Destroyer. At the top of this image the hull of the Destroyer can be seen, gently increasing its size towards right, but taking a small step up to the right. After this there is a coin | ||||
| (1059, 1090) | 59 | 16 | Destroyer Cave section | Black | Black, can be seen, inside the Destroyer | |||||
| (1059, 1091) | 59 | 17 | Destroyer Cave section | Black | Black, can be seen, inside the Destroyer | |||||
| (1059, 1092) | 59 | 18 | Destroyer Cave section | Black Cotton | Cotton trap: Black inside the Destroyer, but the left part from the center and up is part of the bottom of the cotton trap that extends to the left and above this image | |||||
| (1059, 1093) | 59 | 19 | Destroyer Cave section | Black - almost | Cotton trap: Almost black inside the Destroyer, but the top right part of the image is white, a small piece of the corridor leaving the cotton trap to the right. Going left from there the corridor continues in the black cotton with a small slope down towards left. Past the middle the cotton trap begins and goes down below the bottom of this image as well as further left and above this image | |||||
| (1059, 1094) | 59 | 20 | Destroyer Cave section | Inside the Destroyer: Room and corridor | 2 | Cotton trap: Right of the middle of this image is the right wall of this large room, and just above the center it enters the surface of the black cotton that fills the deep hole beneath (two images more down). Above this corner there is a coin. Beneath the cotton the wall begins to slope out left. At the very bottom right is a small white rectangle, which is a corridor that goes out right. In the very corner of this image in the corridor there is a coin. Most of this corridor is to the left but covered in the black cotton. The sloping wall from above stops just under the middle of the image and here the corridor enters the room. The bottom of the corridor is in the image below (both the for the white and the black part) | ||||
| (1059, 1095) | 59 | 21 | Destroyer Cave section | Inside the Destroyer: Room | Cotton trap: Around the left bottom corner of this image is the right part of the ceiling of this large room, where it bends down in a circle so it goes below the bottom edge just past the middle. The ceiling begins to the left just above the center. Below, in the image below is a deep hole (3 images deep) most of it covered with black cotton | |||||
| (1059, 1096) | 59 | 22 | Destroyer Cave section | Black | Black, can be seen, inside the Destroyer | |||||
| (1059, 1097) | 59 | 23 | Destroyer Cave section | Black | Black, never seen, inside the Destroyer | |||||
| (1059, 1098) | 59 | 24 | Destroyer Cave section | Black | Black, can be seen, inside the Destroyer | |||||
| (1059, 1099) | 59 | 25 | Destroyer Cave section | Inside the Destroyer: Room, corridor and shaft | Y | 2 | Buffer stop room: A corridor goes through the image below the center. Halfway to the middle from the left a thin shaft goes up from the corridor to a room that extends just above this image. The left wall is a little to the left of the shaft, just inside this image, the right wall is halfway from the middle to the right edge. At the right end of the room are two protrusions from the wall one close to the floor, the other above it is halfway to the top edge from the bottom protrusion. This looks like the buffer stops that are at the end of a train track to stop a train (but here turned 90 degrees so one is above the other). There are two coins on in front of each of these stops | |||
| (1059, 1100) | 59 | 26 | Destroyer Cave section | Inside the Destroyer: Room | Buffer stop room: The bottom part of a room that extends down into the image below. The left wall is just inside this image, the right wall is halfway from the middle to the right edge. (There are two coins in the image below) | |||||
| (1059, 1101) | 59 | 27 | Destroyer Cave section | Black | Black, can be seen, inside the Destroyer | |||||
| (1059, 1102) | 59 | 28 | Destroyer Cave section | Black | Black, can be seen, inside the Destroyer | |||||
| (1059, 1103) | 59 | 29 | Destroyer Cave section | Top hull of the Destroyer | Above the hull of the Destroyer. At the bottom of this image the hull of the Destroyer can be seen gently increasing its size towards right. | |||||
| (1059, 1104) | 59 | 30 | Destroyer Cave section | White | Empty air above the Destroyer | |||||
| (1060, 1069) | 60 | -5 | Ground level right of pyramid | Black | Black, never seen, below lowest visible terrain, bottom images, with white line at the bottom | |||||
| (1060, 1070) | 60 | -4 | Ground level right of pyramid | Black | Black, never seen, below lowest visible terrain | |||||
| (1060, 1071) | 60 | -3 | Ground level right of pyramid | Black | Black, never seen, below lowest visible terrain | |||||
| (1060, 1072) | 60 | -2 | Ground level right of pyramid | Black | Black, never seen, below ground level right of pyramid | |||||
| (1060, 1073) | 60 | -1 | Ground level right of pyramid | Black | Black, can be seen, below ground level right | |||||
| (1060, 1074) | 60 | 0 | Ground level right of pyramid | Terrain | Grassy ground | |||||
| (1060, 1075) | 60 | 1 | Ground level right of pyramid | White | Empty air above ground level right of the pyramid | |||||
| (1060, 1076) | 60 | 2 | Ground level right of pyramid | White | Empty air above ground level right of the pyramid | |||||
| (1060, 1089) | 60 | 15 | Destroyer Cave section | Bottom hull of the Destroyer | Below the hull of the Destroyer. At the top of this image the hull of the Destroyer can be seen, gently increasing its size towards right | |||||
| (1060, 1090) | 60 | 16 | Destroyer Cave section | Inside the Destroyer: Corridor and shaft | Spiral corridor: At the top right corner is the bottom left outer part of the corridor that continues around in an inwards spiral taking two turns before ending up in the middle of the spiral | |||||
| (1060, 1091) | 60 | 17 | Destroyer Cave section | Inside the Destroyer: Corridor and shaft | Spiral corridor: The left part of the corridor that continues around in an inwards spiral taking two turns before ending up in the middle of the spiral. In the middle of this image the outer left part of the spiral goes up from the bottom to the top turning right. Right of the inner left part of the spiral forms a half circle to the right of the outer part, exiting the picture right above and below the center of the image | |||||
| (1060, 1092) | 60 | 18 | Destroyer Cave section | Inside the Destroyer: Corridor and shaft | Spiral corridor: The top left of that part of the outer corridor that continues around in an inwards spiral taking two turns before ending up in a little larger round part of the corridor in the middle of the spiral. This part of the spiral is at the bottom right of this image forming a section of a circle around this corner | |||||
| (1060, 1093) | 60 | 19 | Destroyer Cave section | Inside the Destroyer: Corridor | Y | Y | Hammer trap: A corridor runs through the very top of this image from left to right. Most of the corridor is in the image above | |||
| (1060, 1094) | 60 | 20 | Destroyer Cave section | Inside the Destroyer: Corridor | Y | Y | Hammer trap: A corridor runs through the very bottom of this image from left to right. The bottom part of the corridor is in the image below. In the middle of the image there are four evil looking hammers smashing together from floor and ceiling with fitting jaws in between them. The first is open, the second has just smashed together, the third is fully open and the fourth has also just smashed together just opening again. Every time they hit together there is a loud sound. The bottom part of the hammers (mainly the pistons but also part of one low hammer) is cut off at the bottom edge of the image along with part of the sound effect of one chomp | |||
| (1060, 1095) | 60 | 21 | Destroyer Cave section | Black | Black, can be seen, inside the Destroyer | |||||
| (1060, 1096) | 60 | 22 | Destroyer Cave section | Black | Black, can be seen, inside the Destroyer | |||||
| (1060, 1097) | 60 | 23 | Destroyer Cave section | Black | Black, never seen, inside the Destroyer | |||||
| (1060, 1098) | 60 | 24 | Destroyer Cave section | Black | Black, can be seen, inside the Destroyer | |||||
| (1060, 1099) | 60 | 25 | Destroyer Cave section | Inside the Destroyer: Corridor | 1 | A corridor goes through the image below the center- In the middle there is a coin | ||||
| (1060, 1100) | 60 | 26 | Destroyer Cave section | Black | Black, can be seen, inside the Destroyer | |||||
| (1060, 1101) | 60 | 27 | Destroyer Cave section | Black | Black, can be seen, inside the Destroyer | |||||
| (1060, 1102) | 60 | 28 | Destroyer Cave section | Black | Black, can be seen, inside the Destroyer | |||||
| (1060, 1103) | 60 | 29 | Destroyer Cave section | Top hull of the Destroyer | Y | 1 | Above the hull of the Destroyer. At the center of this image to the left the hull of the Destroyer can be seen gently increasing its size towards right, then there is a canon pointing left with a coin over its tip. Behind the canon the hull slopes steeply up to the right, and then continues the normal increase in size. A small ledge juts out over the top of the slope to the left | |||
| (1060, 1104) | 60 | 30 | Destroyer Cave section | White | Empty air above the Destroyer | |||||
| (1061, 1069) | 61 | -5 | Ground level right of pyramid | Black | Black, never seen, below lowest visible terrain, bottom images, with white line at the bottom | |||||
| (1061, 1070) | 61 | -4 | Ground level right of pyramid | Black | Black, never seen, below lowest visible terrain | |||||
| (1061, 1071) | 61 | -3 | Ground level right of pyramid | Black | Black, never seen, below lowest visible terrain | |||||
| (1061, 1072) | 61 | -2 | Ground level right of pyramid | Black | Black, never seen, below ground level right of pyramid | |||||
| (1061, 1073) | 61 | -1 | Ground level right of pyramid | Black | Black, can be seen, below ground level right | |||||
| (1061, 1074) | 61 | 0 | Ground level right of pyramid | Terrain | Grassy hills | |||||
| (1061, 1075) | 61 | 1 | Ground level right of pyramid | White | Empty air above ground level right of the pyramid | |||||
| (1061, 1076) | 61 | 2 | Ground level right of pyramid | White | Empty air above ground level right of the pyramid | |||||
| (1061, 1089) | 61 | 15 | Destroyer Cave section | Bottom hull of the Destroyer | Below the hull of the Destroyer. A shaft is going up in the middle of this image. At the bottom of this image the hull of the Destroyer can be seen, gently increasing its size towards right | |||||
| (1061, 1090) | 61 | 16 | Destroyer Cave section | Inside the Destroyer: Corridor and shaft | Spiral corridor: At the top left corner is the bottom right outer part of the corridor that continues around in an inwards spiral taking two turns before ending up in the middle of the spiral | |||||
| (1061, 1091) | 61 | 17 | Destroyer Cave section | Inside the Destroyer: Corridor and shaft | Spiral corridor: The main part of the corridor that continues around in an inwards spiral taking two turns before ending up in a little larger round part of the corridor in the middle of the spiral. In the middle of this image the outer right part of the spiral goes up and turns over left to exit the image at the left edge at the top, only to enter below the center and then finish in the center taking yet a turn to get there. At the bottom the outer bottom spiral exits at the bottom edge close in a broad section from the middle to almost the left edge | |||||
| (1061, 1092) | 61 | 18 | Destroyer Cave section | Inside the Destroyer: Corridor and shaft | Spiral corridor: The top right of that part of the outer corridor that continues around in an inwards spiral taking two turns before ending up in a little larger round part of the corridor in the middle of the spiral. This part of the spiral is at the bottom of this image bending slightly down towards the left | |||||
| (1061, 1093) | 61 | 19 | Destroyer Cave section | Inside the Destroyer: Room and corridor | Y | Fire room: A corridor enters at the very top from the right. In the image above the top of the corridor and the ceiling of this room can be seen. The ceiling only goes a little up in this broad corridor like room. The room also extends into the image to the left. In the middle of the image there is a pit going down to the center of the image, and there are flames at the bottom of the pit | ||||
| (1061, 1094) | 61 | 20 | Destroyer Cave section | Inside the Destroyer: Room and corridor | Fire room: A corridor enters at the very bottom from the left as the ceiling goes a little up in this broad corridor like room. The room and corridor extends into the image below (where there is a pit with flames at the bottom) and right | |||||
| (1061, 1095) | 61 | 21 | Destroyer Cave section | Black | Black, can be seen, inside the Destroyer | |||||
| (1061, 1096) | 61 | 22 | Destroyer Cave section | Black | Black, never seen, inside the Destroyer | |||||
| (1061, 1097) | 61 | 23 | Destroyer Cave section | Black | Black, never seen, inside the Destroyer | |||||
| (1061, 1098) | 61 | 24 | Destroyer Cave section | Black | Black, can be seen, inside the Destroyer | |||||
| (1061, 1099) | 61 | 25 | Destroyer Cave section | Inside the Destroyer: Corridor and shaft | A corridor enters left below the center going right across the image. To the very right a shaft goes up through the image forming an L lying down. The shaft extends into the image to the right | |||||
| (1061, 1100) | 61 | 26 | Destroyer Cave section | Inside the Destroyer: Shaft | A shaft enters in the very left part of the image from above and goes down through the image, half of the shaft being in the image to the left | |||||
| (1061, 1101) | 61 | 27 | Destroyer Cave section | Black - almost | Black inside the Destroyer, except at the very bottom right where a shaft goes up from below and stop before the center. (Here it turns into a corridor in the next image to the right.) Half of the shaft extends into the image to the right | |||||
| (1061, 1102) | 61 | 28 | Destroyer Cave section | Black | Black, can be seen, inside the Destroyer | |||||
| (1061, 1103) | 61 | 29 | Destroyer Cave section | Top hull of the Destroyer | Above the hull of the Destroyer. At the center of this image the hull of the Destroyer can be seen gently increasing its size towards right. | |||||
| (1061, 1104) | 61 | 30 | Destroyer Cave section | White | Empty air above the Destroyer | |||||
| (1062, 1069) | 62 | -5 | Ground level right of pyramid | Black | Black, never seen, below lowest visible terrain, bottom images, with white line at the bottom | |||||
| (1062, 1070) | 62 | -4 | Ground level right of pyramid | Black | Black, never seen, below lowest visible terrain | |||||
| (1062, 1071) | 62 | -3 | Ground level right of pyramid | Black | Black, never seen, below lowest visible terrain | |||||
| (1062, 1072) | 62 | -2 | Ground level right of pyramid | Black | Black, never seen, below ground level right of pyramid | |||||
| (1062, 1073) | 62 | -1 | Ground level right of pyramid | Black | Black, can be seen, below ground level right | |||||
| (1062, 1074) | 62 | 0 | Ground level right of pyramid | Terrain | Grassy hills | |||||
| (1062, 1075) | 62 | 1 | Ground level right of pyramid | White | Empty air above ground level right of the pyramid | |||||
| (1062, 1076) | 62 | 2 | Ground level right of pyramid | White | Empty air above ground level right of the pyramid | |||||
| (1062, 1089) | 62 | 15 | Destroyer Cave section | Bottom hull of the Destroyer with shaft | Below the hull of the Destroyer. A shaft is going up to the left in this image. At the top of this image the hull of the Destroyer can be seen, gently increasing its size towards right | |||||
| (1062, 1090) | 62 | 16 | Destroyer Cave section | Inside the Destroyer: Shaft | A shaft enters in the left part of the image from above and goes down through the image | |||||
| (1062, 1091) | 62 | 17 | Destroyer Cave section | Inside the Destroyer: Corridor and shaft | A corridor enters the image at the right above the center; it is very uneven and goes a little up and down, to the left it ends in a shaft that goes through the picture from top to bottom | |||||
| (1062, 1092) | 62 | 18 | Destroyer Cave section | Inside the Destroyer: Room, corridor and shaft | Spiral room: A rectangular room is at the very right of this image, going up and down about halfway to each side of the center. The room extends into the right image. At the bottom of the room a corridor exits to the left and goes through the image below the center. Close to the left edge a shaft goes down from the corridor. (Beyond the shaft in the image to the left the corridor turns into the spiral corridor) | |||||
| (1062, 1093) | 62 | 19 | Destroyer Cave section | Inside the Destroyer: Room and corridor | Fire room: A corridor enters at the very top from the left. In the image above the top of the corridor and the ceiling of this room can be seen. The ceiling only goes a little up in this broad corridor like room. The room also extends into the image to the right /where there is a pit with flames at the bottom) | |||||
| (1062, 1094) | 62 | 20 | Destroyer Cave section | Inside the Destroyer: Room and corridor | Fire room: A corridor enters at the very bottom from the right. To the left the ceiling goes a little up in this broad corridor like room. The room and corridor extends into the image below and left (and below there as well and here there is a pit with flames at the bottom) | |||||
| (1062, 1095) | 62 | 21 | Destroyer Cave section | Black | Black, can be seen, inside the Destroyer | |||||
| (1062, 1096) | 62 | 22 | Destroyer Cave section | Black | Black, never seen, inside the Destroyer | |||||
| (1062, 1097) | 62 | 23 | Destroyer Cave section | Black | Black, never seen, inside the Destroyer | |||||
| (1062, 1098) | 62 | 24 | Destroyer Cave section | Black | Black, can be seen, inside the Destroyer | |||||
| (1062, 1099) | 62 | 25 | Destroyer Cave section | Inside the Destroyer: Corridor and shaft | A corridor enters right below the center going left across the image. To the very left a shaft goes up through the image forming an inverted L lying down- The shaft extends into the image to the left | |||||
| (1062, 1100) | 62 | 26 | Destroyer Cave section | Inside the Destroyer: Shaft | A shaft enters in the very right part of the image from above and goes down through the image, half of the shaft being in the image to the right | |||||
| (1062, 1101) | 62 | 27 | Destroyer Cave section | Inside the Destroyer: Corridor and shaft | 1 | A corridor enters right below the center going left across the image. To the very left a shaft goes down through the image forming an L lying down. Just before the shaft there is a coin in the corridor. The shaft extends into the image to the left | ||||
| (1062, 1102) | 62 | 28 | Destroyer Cave section | Inside the Destroyer: Corridor and shaft | A shaft enters in the left part of the image from above (and the top hull) and goes down below the center, where it turns into a corridor going right out of the image | |||||
| (1062, 1103) | 62 | 29 | Destroyer Cave section | Top hull of the Destroyer with shaft | Above the hull of the Destroyer. At the top of this image the hull of the Destroyer can be seen gently increasing its size towards right. At the left a shaft is going down into the Destroyer | |||||
| (1062, 1104) | 62 | 30 | Destroyer Cave section | White | Empty air above the Destroyer | |||||
| (1063, 1069) | 63 | -5 | Ground level right of pyramid | Black | Black, never seen, below lowest visible terrain, bottom images, with white line at the bottom | |||||
| (1063, 1070) | 63 | -4 | Ground level right of pyramid | Black | Black, never seen, below lowest visible terrain | |||||
| (1063, 1071) | 63 | -3 | Ground level right of pyramid | Black | Black, never seen, below lowest visible terrain | |||||
| (1063, 1072) | 63 | -2 | Ground level right of pyramid | Black | Black, never seen, below ground level right of pyramid | |||||
| (1063, 1073) | 63 | -1 | Ground level right of pyramid | Black | Black, can be seen, below ground level right | |||||
| (1063, 1074) | 63 | 0 | Ground level right of pyramid | Black - almost | Black below ground level right except that a cliff rises up and a small sliver of white can be seen at the top left | |||||
| (1063, 1075) | 63 | 1 | Ground level right of pyramid | Terrain | Grassy ground on top of a plateau on a cliff | |||||
| (1063, 1076) | 63 | 2 | Ground level right of pyramid | White | Empty air above ground level right of the pyramid | |||||
| (1063, 1089) | 63 | 15 | Destroyer Cave section | Bottom hull of the Destroyer | Below the hull of the Destroyer. A shaft is going up in the middle of this image. At the bottom of this image the hull of the Destroyer can be seen, gently increasing its size towards right | |||||
| (1063, 1090) | 63 | 16 | Destroyer Cave section | Black | Black, can be seen, inside the Destroyer | |||||
| (1063, 1091) | 63 | 17 | Destroyer Cave section | Inside the Destroyer: Corridor | A corridor goes through the image above the center; it is very uneven and goes a little up and down | |||||
| (1063, 1092) | 63 | 18 | Destroyer Cave section | Inside the Destroyer: Room | Spiral room: A rectangular room is centered with a thin black wall around the right and the top and bottom of this image. The room extends a little further into the left image. (From there a corridor leads directly into the spiral corridor) | |||||
| (1063, 1093) | 63 | 19 | Destroyer Cave section | Inside the Destroyer: Corridor | A corridor enters at the very top from the left; the top of the corridor is in the image above | |||||
| (1063, 1094) | 63 | 20 | Destroyer Cave section | Inside the Destroyer: Corridor | A corridor enters at the very bottom from the left; the bottom of the corridor is in the image below | |||||
| (1063, 1095) | 63 | 21 | Destroyer Cave section | Black | Black, can be seen, inside the Destroyer | |||||
| (1063, 1096) | 63 | 22 | Destroyer Cave section | Black | Black, can be seen, inside the Destroyer | |||||
| (1063, 1097) | 63 | 23 | Destroyer Cave section | Black | Black, never seen, inside the Destroyer | |||||
| (1063, 1098) | 63 | 24 | Destroyer Cave section | Black | Black, can be seen, inside the Destroyer | |||||
| (1063, 1099) | 63 | 25 | Destroyer Cave section | Inside the Destroyer: Corridor | A corridor goes through the image below the center | |||||
| (1063, 1100) | 63 | 26 | Destroyer Cave section | Black | Black, can be seen, inside the Destroyer | |||||
| (1063, 1101) | 63 | 27 | Destroyer Cave section | Inside the Destroyer: Corridor and shaft | A corridor enters left below the center going right across the image. Just inside from the left a thin shaft goes up through the image | |||||
| (1063, 1102) | 63 | 28 | Destroyer Cave section | Inside the Destroyer: Corridor and shaft | Y | Y | 1 | A corridor enters left below the center going right to a shaft just inside the image that goes down from there. The corridor continues almost to the right part of the image, but it is a dead end. This end is, however, in the progress of being expanded by a mining party of two Cueballs. One is hacking away at the end of the tunnel with a pickaxe. The other is moving a cart away towards left with the ruble they gets loose. They are thus in the process of building a new corridor. Above the Cueball with the pickaxe the corridor is somewhat higher than normal. Here is a coin | ||
| (1063, 1103) | 63 | 29 | Destroyer Cave section | Top hull of the Destroyer | 1 | Above the hull of the Destroyer. At the top of this image the hull of the Destroyer can be seen gently increasing its size towards right. At the center above the hull just below the upper edge there is a coin | ||||
| (1063, 1104) | 63 | 30 | Destroyer Cave section | White | Empty air above the Destroyer (there is a coin just below the middle of this image) | |||||
| (1064, 1069) | 64 | -5 | Ground level right of pyramid | Black | Black, never seen, below lowest visible terrain, bottom images, with white line at the bottom | |||||
| (1064, 1070) | 64 | -4 | Ground level right of pyramid | Black | Black, never seen, below lowest visible terrain | |||||
| (1064, 1071) | 64 | -3 | Ground level right of pyramid | Black | Black, never seen, below lowest visible terrain | |||||
| (1064, 1072) | 64 | -2 | Ground level right of pyramid | Black | Black, never seen, below ground level right of pyramid | |||||
| (1064, 1073) | 64 | -1 | Ground level right of pyramid | Black | Black, can be seen, below ground level right | |||||
| (1064, 1074) | 64 | 0 | Ground level right of pyramid | Terrain | Grassy ground at the very top of this image. The rest is under this hill | |||||
| (1064, 1075) | 64 | 1 | Ground level right of pyramid | White - almost | The edge of the grassy ground before it falls out of the image, so just grass at the very left of this almost white image | |||||
| (1064, 1076) | 64 | 2 | Ground level right of pyramid | White | Empty air above ground level right of the pyramid | |||||
| (1064, 1089) | 64 | 15 | Destroyer Cave section | Bottom hull of the Destroyer | Below the hull of the Destroyer. A shaft is going up in the middle of this image. At the bottom of this image the hull of the Destroyer can be seen, gently increasing its size towards right | |||||
| (1064, 1090) | 64 | 16 | Destroyer Cave section | Black | Black, can be seen, inside the Destroyer | |||||
| (1064, 1091) | 64 | 17 | Destroyer Cave section | Inside the Destroyer: Corridor | A corridor goes through the image above the center; it is very uneven and goes a little up and down | |||||
| (1064, 1092) | 64 | 18 | Destroyer Cave section | Black | Black, can be seen, inside the Destroyer | |||||
| (1064, 1093) | 64 | 19 | Destroyer Cave section | Inside the Destroyer: Room and corridor | Y | Cave: The left entrance to the cave. The image begins just where the ceiling of the corridor begins to go up as it enters the cave (going already two images up at the right edge). In this image only the floor of the corridor is visible, the ceiling is in the image above. At the very top to the left is a flat piece of the entry corridors floor. Then a very small step down indicates the start of the cave, and the ground becomes grassy. There is a small mound almost going up to the top edge, but then the terrain slopes down unevenly towards the right. There are three stones lying in the grass, the last is rather big (and either is very uneven or two stones) and goes almost to the right edge, where the ground is past halfway down to the center. Just before the last stone to the right is the stem of a large tree, which quickly splits into five small branches, two of which split again, so seven branches exits the image in the top right corner, where only a few leaves can be seen. The crown thus being in three other images (above, right and above-right) | ||||
| (1064, 1094) | 64 | 20 | Destroyer Cave section | Inside the Destroyer: Room and corridor | Y | Cave: The left entrance to the cave. The image begins just where the ceiling of the corridor begins to go up as it enters the cave. In this image the floor of the corridor is not visible, as it is in the image below. The very first part of the ceiling to the left is an extension of the flat part of the corridor in the image to the left. Then it begins to take a few small steps up but the first really large step up indicates the start of the cave, and from here the ceiling recedes up very fast, more becoming a cave ceiling than that of a normal room. There are even some overhangs, where the "wall" goes back left, and then right, which happens above the first large step, and at the very top of the image. The wall, which it is here, exits at the top before the middle of the image (where the cave extends one more image up). In the image below the floor is now terrain with grass and a large tree grows up into this image where three branches enter from below at the very bottom right corner. The crown has many leaves, and although there were almost none of these in the image below, the crown extends into both the image to the right and that below the right image | ||||
| (1064, 1095) | 64 | 21 | Destroyer Cave section | Inside the Destroyer: Room | Cave: This is the ceiling of the cave just above the left entrance, already here at the right edge this almost reaches two full images above the floor, but at the right edge the ceiling exits the image to the right just below the top edge. At the bottom middle of the image the ceiling has become a cave wall instead and is almost vertical going straight up until the center, from where it begins to turn right in a slow smooth turn. Only at the top right does it become more uneven | |||||
| (1064, 1096) | 64 | 22 | Destroyer Cave section | Black | Black, can be seen, inside the Destroyer | |||||
| (1064, 1097) | 64 | 23 | Destroyer Cave section | Black | Black, never seen, inside the Destroyer | |||||
| (1064, 1098) | 64 | 24 | Destroyer Cave section | Inside the Destroyer: Corridor | 1 | A corridor enters the image to the right above the center. It stops just before the middle in a dead end. There is a coin there | ||||
| (1064, 1099) | 64 | 25 | Destroyer Cave section | Inside the Destroyer: Corridor | A corridor goes through the image below the center | |||||
| (1064, 1100) | 64 | 26 | Destroyer Cave section | Black | Black, can be seen, inside the Destroyer | |||||
| (1064, 1101) | 64 | 27 | Destroyer Cave section | Inside the Destroyer: Corridor | A corridor goes through the image below the center | |||||
| (1064, 1102) | 64 | 28 | Destroyer Cave section | Black | Black, can be seen, inside the Destroyer | |||||
| (1064, 1103) | 64 | 29 | Destroyer Cave section | Black - almost | Black inside the Destroyer, except for a small white triangle at the top left corner where the top hull of the Destroyer can be seen gently increasing its size towards right. | |||||
| (1064, 1104) | 64 | 30 | Destroyer Cave section | Top hull of the Destroyer | Above the hull of the Destroyer. At the very bottom of this image, just before the middle, the hull of the Destroyer can be seen entering from below and then it gently increases its size towards right | |||||
| (1065, 1069) | 65 | -5 | Ground level right of pyramid | Black | Black, never seen, below lowest visible terrain, bottom images, with white line at the bottom | |||||
| (1065, 1070) | 65 | -4 | Ground level right of pyramid | Black | Black, never seen, below lowest visible terrain | |||||
| (1065, 1071) | 65 | -3 | Ground level right of pyramid | Black | Black, never seen, below lowest visible terrain | |||||
| (1065, 1072) | 65 | -2 | Ground level right of pyramid | Black | Black, never seen, below ground level right of pyramid | |||||
| (1065, 1073) | 65 | -1 | Ground level right of pyramid | Black | Black, can be seen, below ground level right | |||||
| (1065, 1074) | 65 | 0 | Ground level right of pyramid | T-like structures and terrain | Y | The base and most of the top of a T-shaped platform | ||||
| (1065, 1075) | 65 | 1 | Ground level right of pyramid | T-like structures top | Y | The left part of the top of the first T-like structure | ||||
| (1065, 1076) | 65 | 2 | Ground level right of pyramid | White | Empty air above ground level right of the pyramid | |||||
| (1065, 1089) | 65 | 15 | Destroyer Cave section | Bottom hull of the Destroyer | Below the hull of the Destroyer. A shaft is going up in the middle of this image. At the bottom of this image the hull of the Destroyer can be seen, gently increasing its size towards right | |||||
| (1065, 1090) | 65 | 16 | Destroyer Cave section | Black | Black, can be seen, inside the Destroyer | |||||
| (1065, 1091) | 65 | 17 | Destroyer Cave section | Inside the Destroyer: Corridor | A corridor goes through the image above the center; it is very uneven and goes a little up and down | |||||
| (1065, 1092) | 65 | 18 | Destroyer Cave section | Black | Black, can be seen, inside the Destroyer | |||||
| (1065, 1093) | 65 | 19 | Destroyer Cave section | Inside the Destroyer: Room | Y | Cave: The floor of this cave (three images high here) is now terrain with grass, and as it enters the image to the left, above the center; it is on the downslope of a small hill with, that goes down into a small pond with the water surface just above the center of this image. There are typical lake plants both on this left bank and out into the water past the middle of the image. The water is shallow, but in the middle of the lake at the right edge of this image, where the water is deepest the hoverboard Cueball's head will only just be visible. The pond continues in the next image to the right. At the top left of this image a large tree grows into this image from the image to the left, and four branches enters from there. The crown has many leaves, and although there were almost none of these in the image to the left, the crown extends into both the image above and the one above and left of this image. The crown extends more than halfway to the middle, but only at the very top of this image | ||||
| (1065, 1094) | 65 | 20 | Destroyer Cave section | Inside the Destroyer: Room | Y | Cave: This image is mainly white empty air, but in the image below the floor is now terrain with grass and a large tree grows up into the bottom left corner of this image where the crown with many leaves can be seen. The crown also extends into both the image to the left and that below this image. The cave extends two more images above | ||||
| (1065, 1095) | 65 | 21 | Destroyer Cave section | Inside the Destroyer: Room | Y | Cave: In this image with almost nothing but empty air inside the cave, there is just a small part of the rising ceiling in the top left corner, but already in this second image inside the cave from the left, the cave is three images above the floor, and this image is only the second of these. However, there are also three birds in the lower right part of the image | ||||
| (1065, 1096) | 65 | 22 | Destroyer Cave section | Inside the Destroyer: Room | Cave: This is the ceiling of the cave, and here just one image inside the cave from the left it is already almost three full images above the floor. But at the right edge the ceiling still exits the image to the right about halfway between the center and the top edge. At the bottom left of the image the ceiling enters the image and curves around and right in a slow smooth turn | |||||
| (1065, 1097) | 65 | 23 | Destroyer Cave section | Black | Black, never seen, inside the Destroyer | |||||
| (1065, 1098) | 65 | 24 | Destroyer Cave section | Inside the Destroyer: Corridor and shaft | A corridor enters right above the center going left across the image. At the very left edge a shaft goes up from the corridor to the top | |||||
| (1065, 1099) | 65 | 25 | Destroyer Cave section | Inside the Destroyer: Corridor and shaft | 1 | A corridor enters the image to the left below the center. It stops just at the middle in a dead end. There is a coin there. At the very left a shaft goes down from the corridor | ||||
| (1065, 1100) | 65 | 26 | Destroyer Cave section | Black | Black, can be seen, inside the Destroyer | |||||
| (1065, 1101) | 65 | 27 | Destroyer Cave section | Inside the Destroyer: Corridor | A corridor goes through the image below the center | |||||
| (1065, 1102) | 65 | 28 | Destroyer Cave section | Black | Black, can be seen, inside the Destroyer | |||||
| (1065, 1103) | 65 | 29 | Destroyer Cave section | Black | Black, can be seen, inside the Destroyer | |||||
| (1065, 1104) | 65 | 30 | Destroyer Cave section | Top hull of the Destroyer | Y | Above the hull of the Destroyer. At the bottom of this image the hull of the Destroyer can be seen gently increasing its size towards right, with a more curved feature than usual. At the center a basketball can be seen jumping down towards the left | ||||
| (1066, 1069) | 66 | -5 | Ground level right of pyramid | Black | Black, never seen, below lowest visible terrain, bottom images, with white line at the bottom | |||||
| (1066, 1070) | 66 | -4 | Ground level right of pyramid | Black | Black, never seen, below lowest visible terrain | |||||
| (1066, 1071) | 66 | -3 | Ground level right of pyramid | Black | Black, never seen, below lowest visible terrain | |||||
| (1066, 1072) | 66 | -2 | Ground level right of pyramid | Black | Black, never seen, below ground level right of pyramid | |||||
| (1066, 1073) | 66 | -1 | Ground level right of pyramid | Black | Black, can be seen, below ground level right | |||||
| (1066, 1074) | 66 | 0 | Ground level right of pyramid | T-like structures and terrain | Y | To the left the top right part of the T-shape standing to the left of this image and then the base and most of the top of another T-shaped platform | ||||
| (1066, 1075) | 66 | 1 | Ground level right of pyramid | T-like structures top | Y | Y | The right part of the first and the left part of the second top the T-like structure. Megan is standing on the left T looking right | |||
| (1066, 1076) | 66 | 2 | Ground level right of pyramid | White | Empty air above ground level right of the pyramid | |||||
| (1066, 1089) | 66 | 15 | Destroyer Cave section | Bottom hull of the Destroyer | Below the hull of the Destroyer. At the center of this image the hull of the Destroyer can be seen, gently increasing its size towards right | |||||
| (1066, 1090) | 66 | 16 | Destroyer Cave section | Black | Black, can be seen, inside the Destroyer | |||||
| (1066, 1091) | 66 | 17 | Destroyer Cave section | Inside the Destroyer: Corridor | A corridor goes through the image above the center; it is very uneven and goes a little up and down | |||||
| (1066, 1092) | 66 | 18 | Destroyer Cave section | Black | Black, can be seen, inside the Destroyer | |||||
| (1066, 1093) | 66 | 19 | Destroyer Cave section | Inside the Destroyer: Room | Y | Cave: The floor of this cave (three images high here) is now a small pond with the water surface just above the center of this image. There are typical lake plants both on this right bank and out into the water past the middle of the image. The water is shallow, but in the middle of the lake (just past the left edge of this image), where the water is deepest the hoverboard Cueball's head will only just be visible. The pond continues in the next image to the left. At the right bank where the grassy ground slopes slightly up there lies a large rock. Only the very left part of the rock is visible as it is cut off at the right edge. It reaches from just above the center and almost to the top edge of this image | ||||
| (1066, 1094) | 66 | 20 | Destroyer Cave section | White | Cave: Empty air inside the Destroyer | |||||
| (1066, 1095) | 66 | 21 | Destroyer Cave section | White | Cave: Empty air inside the Destroyer | |||||
| (1066, 1096) | 66 | 22 | Destroyer Cave section | Inside the Destroyer: Room | Cave: This is the ceiling of the cave two images inside the cave from the left it is now almost three full images above the floor. At the left edge the ceiling comes in about halfway up from the middle to the top edge, and then it becomes even higher towards the right, taken one larger step just before the middle. At the right edge it is just inside this image when it exits at the right edge | |||||
| (1066, 1097) | 66 | 23 | Destroyer Cave section | Black | Black, can be seen, inside the Destroyer | |||||
| (1066, 1098) | 66 | 24 | Destroyer Cave section | Inside the Destroyer: Corridor and shaft | A corridor enters left above the center going right. In the middle it turns into a shaft that goes up, thus forming an L lying down | |||||
| (1066, 1099) | 66 | 25 | Destroyer Cave section | Inside the Destroyer: Room, corridor and shaft | Four coin room: A shaft goes up through the middle of the image from below. Below the center it turns right and becomes a corridor that exits to the right. In the very top right corner of the image is the very bottom left corner of a room that extends in the image above and in those to the left of these (where there are four coins) | |||||
| (1066, 1100) | 66 | 26 | Destroyer Cave section | Inside the Destroyer: Room | Four coin room: In the bottom right corner of the image is the very left part of a room that extends in the image to the right and in those below. The ceiling is just below the center. In the upper part of the room there is a thin ledge coming out, it is cut off at the right edge before it ends. In the image to the right there are four coins, the two of them are above and below the ledge of this image, and they are so close to this room’s right edge that they will probably extend a tiny bit into this image. But as this is less than a tenth of the coins, they will only be counted as being in the next room | |||||
| (1066, 1101) | 66 | 27 | Destroyer Cave section | Inside the Destroyer: Corridor | A corridor goes through the image below the center | |||||
| (1066, 1102) | 66 | 28 | Destroyer Cave section | Black | Black, can be seen, inside the Destroyer | |||||
| (1066, 1103) | 66 | 29 | Destroyer Cave section | Black | Black, can be seen, inside the Destroyer | |||||
| (1066, 1104) | 66 | 30 | Destroyer Cave section | Top hull of the Destroyer | Y | Above the hull of the Destroyer. At the bottom of this image the hull of the Destroyer can be seen gently increasing its size towards right. To the left a Cueball like child comes running arms outstretched (after the basketball jumping down left in the image to the left) | ||||
| (1067, 1069) | 67 | -5 | Ground level right of pyramid | Black | Black, never seen, below lowest visible terrain, bottom images, with white line at the bottom | |||||
| (1067, 1070) | 67 | -4 | Ground level right of pyramid | Black | Black, never seen, below lowest visible terrain | |||||
| (1067, 1071) | 67 | -3 | Ground level right of pyramid | Black | Black, never seen, below lowest visible terrain | |||||
| (1067, 1072) | 67 | -2 | Ground level right of pyramid | Black | Black, never seen, below ground level right of pyramid | |||||
| (1067, 1073) | 67 | -1 | Ground level right of pyramid | Black | Black, can be seen, below ground level right | |||||
| (1067, 1074) | 67 | 0 | Ground level right of pyramid | T-like structures and terrain | Y | To the left the top right part of the T-shape standing to the left of this image and then the base of another taller T-shaped platform with the platform entirely above this image | ||||
| (1067, 1075) | 67 | 1 | Ground level right of pyramid | T-like structures top | Y | The right part of the second and the entire part of the top third higher the T-like structures | ||||
| (1067, 1076) | 67 | 2 | Ground level right of pyramid | White | Empty air above ground level right of the pyramid | |||||
| (1067, 1089) | 67 | 15 | Destroyer Cave section | Bottom hull of the Destroyer with room | Glitch floor room: below the hull of the Destroyer. At the center left of this image the hull of the Destroyer can be seen, gently increasing its size towards right. But from the middle it begins to go down right in a circle, and turns into the floor of the Glitch floor room, where this bulges out beneath the Destroyers hull | |||||
| (1067, 1090) | 67 | 16 | Destroyer Cave section | Inside the Destroyer: Room | Glitch floor room: The floor of this room is part of semi-circle shaped bowl, and it is almost a vertical wall going down almost at the left in this image, but it clearly extends further to the right at the bottom, so the circle shape can easily be seen | |||||
| (1067, 1091) | 67 | 17 | Destroyer Cave section | Inside the Destroyer: Room and corridor | Glitch floor room: A corridor enters the image at the very left at the top, only to enter into the top of the Glitch floor room, whose ceiling is at the same level as the corridor, but the floor is part of semi-circle shaped bowl, and at the entrance the floor is almost a vertical wall going down almost at the left in this image. Just where the corridor enters the floor in the corridor goes a little down and the ceiling above just inside the room also extends higher up | |||||
| (1067, 1092) | 67 | 18 | Destroyer Cave section | Black | Black, can be seen, inside the Destroyer | |||||
| (1067, 1093) | 67 | 19 | Destroyer Cave section | Inside the Destroyer: Room | Y | Y | 1 | Cave: The floor of this cave (four images high here in the center) is terrain and to the left lies a large rock. It extends into both the image to the left (where it just began) and halfway to the middle it also extends into the image above. The rock ends close to the middle where is goes almost straight down to the ground half way above the center, after having been rounded from the left edge until here. (In the image above lies a puma like cat on the very top). Cueball is lying on the right part of the rock facing right. The top part of his head has been cut off at the top edge. After the rock the grassy ground slopes up towards a small gazebo with four columns visible. (It is likely that they cover the four other since such a gazebo typically have eight). The roof of this has been cut off along with the top of the columns at the top edge of the image. A coin is inside the gazebo above the railing. The gazebo ends just before the right edge, where the ground level is halfway between the top and the middle of the image | ||
| (1067, 1094) | 67 | 20 | Destroyer Cave section | Inside the Destroyer: Room | Y | Y | Y | Cave: Most of this image is empty air but at the bottom of this image two structures emerges from the floor of the cave below (which is now terrain). To the left of this image (in the image below) lies a large rock and halfway to the middle it extends into this image. At the very top lies a puma like cat looking right, with Cueball lying right in front of it. Only his head is visible as he is cut off at the bottom edge, but he also lies on the rock in the image below. To the right the roof of a small gazebo with four columns can be seen. Most of the columns are in the image below (together with a coin). The gazebo ends just before the right edge. The cave extends three more images above here at the center of the cave | ||
| (1067, 1095) | 67 | 21 | Destroyer Cave section | White | Cave: Empty air inside the Destroyer | |||||
| (1067, 1096) | 67 | 22 | Destroyer Cave section | Inside the Destroyer: Room | Cave: This is the ceiling of the cave at the center of the cave. To the left and right the ceiling is visible inside the image, but just inside from the left, the ceiling goes even higher up exiting this image into the image above, until just past the middle. (The highest point of the cave is just in the image above here, where a shaft comes into the cave from above) | |||||
| (1067, 1097) | 67 | 23 | Destroyer Cave section | Inside the Destroyer: Room and shaft | Cave: This is the very top part of the ceiling at the center of the cave. In the left part of the image the broadest shaft in the Destroyer comes down from above, and at the bottom it enters into the cave. The cave only begins at the very bottom of this image, but both left and right of the shaft, are jagged parts of the ceiling extending just a little to the left, but past the middle of the image to the right. So these parts are the top of the caves ceiling, and thus this image contains the very top part of the cave, although it mainly contains the entry shaft. There are four images below that are also inside the cave, which is here more than three full images high | |||||
| (1067, 1098) | 67 | 24 | Destroyer Cave section | Inside the Destroyer: Shaft | A shaft enters in the middle of the image from above and goes down through the image. This is the broadest shaft in the Destroyer and it goes into the top of the cave in the image below | |||||
| (1067, 1099) | 67 | 25 | Destroyer Cave section | Inside the Destroyer: Room, corridor and shaft | Four coin room: A shaft goes up through the middle of the image from below. This is the broadest shaft in the Destroyer and it goes into the top of the cave two images below. Just below the center a corridor exits from the corridor to the left. At the very top of the image the shaft enters the bottom of a room that extends in the image above (with four coins). The room also extends into the image to the left. To the right the wall is halfway from the middle towards the right edge | |||||
| (1067, 1100) | 67 | 26 | Destroyer Cave section | Inside the Destroyer: Room | 4 | Four coin room: This rooms ceiling is below the middle and the right wall is halfway from the middle towards the right edge. The room just extends into the image below and only a little more into the image to the left. From the right wall a thin ledge comes out more than halfway up in this part of the room. A similar a ledge comes out from the left wall, and then it enters into this image and ends a little way into this image. The tips of the two ledges ends just above the floor below, before it turns into the broadest shaft in the Destroyer, the one that goes into the cave three images below. There are four coins in this image, one above and below each of the two ledges. The two coins at the left ledge are so close to the left edge that they will probably extend a tiny bit into the left image. But as this is less than a tenth of the coins, they will only be counted as being in this room | ||||
| (1067, 1101) | 67 | 27 | Destroyer Cave section | Inside the Destroyer: Corridor | A corridor goes through the image below the center | |||||
| (1067, 1102) | 67 | 28 | Destroyer Cave section | Black | Black, can be seen, inside the Destroyer | |||||
| (1067, 1103) | 67 | 29 | Destroyer Cave section | Black | Black, can be seen, inside the Destroyer | |||||
| (1067, 1104) | 67 | 30 | Destroyer Cave section | Top hull of the Destroyer | Y | Y | Above the hull of the Destroyer. At the bottom of this image the hull of the Destroyer can be seen gently increasing its size towards right. To the left are three children (looking like Megan, Ponytail and Cueball) looking after the Cueball child running after a basketball in the two images to the left. Behind them is a basketball board with hoop | |||
| (1068, 1069) | 68 | -5 | Ground level right of pyramid | Black | Black, never seen, below lowest visible terrain, bottom images, with white line at the bottom | |||||
| (1068, 1070) | 68 | -4 | Ground level right of pyramid | Black | Black, never seen, below lowest visible terrain | |||||
| (1068, 1071) | 68 | -3 | Ground level right of pyramid | Black | Black, never seen, below lowest visible terrain | |||||
| (1068, 1072) | 68 | -2 | Ground level right of pyramid | Black | Black, never seen, below ground level right of pyramid | |||||
| (1068, 1073) | 68 | -1 | Ground level right of pyramid | Black | Black, can be seen, below ground level right | |||||
| (1068, 1074) | 68 | 0 | Ground level right of pyramid | Terrain | Grassy hills | |||||
| (1068, 1075) | 68 | 1 | Ground level right of pyramid | White | Empty air above ground level right of the pyramid | |||||
| (1068, 1076) | 68 | 2 | Ground level right of pyramid | White | Empty air above ground level right of the pyramid | |||||
| (1068, 1085) | 68 | 11 | Destroyer Cave section | White | Empty air beneath the Destroyer cave section | |||||
| (1068, 1086) | 68 | 12 | Destroyer Cave section | White | Empty air beneath the Destroyer cave section | |||||
| (1068, 1087) | 68 | 13 | Destroyer Cave section | White | Empty air beneath the Destroyer cave section | |||||
| (1068, 1088) | 68 | 14 | Destroyer Cave section | Bottom hull of the Destroyer with room | Glitch floor room: below the hull of the Destroyer. The hull of the Destroyer is here the floor of the dome room with the glitch floor falling down towards right | |||||
| (1068, 1089) | 68 | 15 | Destroyer Cave section | Bottom hull of the Destroyer with room | Glitch floor room: below the hull of the Destroyer, or at least a speck of light at the very bottom left corner is outside the hull. The rest of the bottom left is part of the circle, which is the floor of the Glitch floor room, where this bulges out beneath the Destroyers hull | |||||
| (1068, 1090) | 68 | 16 | Destroyer Cave section | White | Glitch floor room: Empty air inside the Destroyer | |||||
| (1068, 1091) | 68 | 17 | Destroyer Cave section | Inside the Destroyer: Room | Glitch floor room: Ceiling of the room, going completely straight from left to right in the top part of the image | |||||
| (1068, 1092) | 68 | 18 | Destroyer Cave section | Black | Black, can be seen, inside the Destroyer | |||||
| (1068, 1093) | 68 | 19 | Destroyer Cave section | Inside the Destroyer: Room | Y | Y | Cave: The grassy ground of the cave (three images high here) is here at the top of the image and extends from left to right, with a small mound in the middle rising close to the top edge, so the small tree that grows here extends into the image above. At the very left edge stands Cueball who looks to the right at Ponytail and tells her something, but the text is fully in the image above. Right of the mound is another Cueball with bow and arrows walking left | |||
| (1068, 1094) | 68 | 20 | Destroyer Cave section | Inside the Destroyer: Room | Y | Y | Cave: Most of this image is empty air but in the bottom left quarter is the text spoken by the Cueball in the image below to Ponytail. In the middle at the very bottom is the top of a small tree growing on a small mound just below the bottom edge of this image. The cave extends two more images above | |||
| (1068, 1095) | 68 | 21 | Destroyer Cave section | White | Cave: Empty air inside the Destroyer | |||||
| (1068, 1096) | 68 | 22 | Destroyer Cave section | Inside the Destroyer: Room | Cave: This is the ceiling of the cave three images inside the cave from the right it is now almost three full images above the floor at the left edge. Towards the right the ceiling begins to drop down so at the right edge it is more than halfway down to the center of the image | |||||
| (1068, 1097) | 68 | 23 | Destroyer Cave section | Black | Black, can be seen, inside the Destroyer | |||||
| (1068, 1098) | 68 | 24 | Destroyer Cave section | Black | Black, can be seen, inside the Destroyer | |||||
| (1068, 1099) | 68 | 25 | Destroyer Cave section | Black | Black, can be seen, inside the Destroyer | |||||
| (1068, 1100) | 68 | 26 | Destroyer Cave section | Black | Black, can be seen, inside the Destroyer | |||||
| (1068, 1101) | 68 | 27 | Destroyer Cave section | Inside the Destroyer: Room and corridor | Piano dance hall: A corridor enters from the left and goes through the image until it reaches a long room half way past the middle to the right. The ceiling is just inside the top of this image but it extends into the next two images to the right | |||||
| (1068, 1102) | 68 | 28 | Destroyer Cave section | Black | Black, can be seen, inside the Destroyer | |||||
| (1068, 1103) | 68 | 29 | Destroyer Cave section | Black | Black, can be seen, inside the Destroyer | |||||
| (1068, 1104) | 68 | 30 | Destroyer Cave section | Top hull of the Destroyer | Above the hull of the Destroyer. At the very bottom of this image to the left the hull of the Destroyer can be seen gently increasing its size towards right, only to take a big step (inside the image) where a small thin ledge juts out to the left at the top. Then the hull continues its gentle increase towards right | |||||
| (1069, 1069) | 69 | -5 | Ground level right of pyramid | Black | Black, never seen, below lowest visible terrain, bottom images, with white line at the bottom | |||||
| (1069, 1070) | 69 | -4 | Ground level right of pyramid | Black | Black, never seen, below lowest visible terrain | |||||
| (1069, 1071) | 69 | -3 | Ground level right of pyramid | Black | Black, never seen, below lowest visible terrain | |||||
| (1069, 1072) | 69 | -2 | Ground level right of pyramid | Black | Black, never seen, below ground level right of pyramid | |||||
| (1069, 1073) | 69 | -1 | Ground level right of pyramid | Black | Black, can be seen, below ground level right | |||||
| (1069, 1074) | 69 | 0 | Ground level right of pyramid | Terrain | Grassy hills | |||||
| (1069, 1075) | 69 | 1 | Ground level right of pyramid | White | Empty air above ground level right of the pyramid | |||||
| (1069, 1076) | 69 | 2 | Ground level right of pyramid | White | Empty air above ground level right of the pyramid | |||||
| (1069, 1085) | 69 | 11 | Destroyer Cave section | White | Empty air beneath the Destroyer cave section | |||||
| (1069, 1086) | 69 | 12 | Destroyer Cave section | White | Empty air beneath the Destroyer cave section | |||||
| (1069, 1087) | 69 | 13 | Destroyer Cave section | White | Empty air beneath the Destroyer cave section | |||||
| (1069, 1088) | 69 | 14 | Destroyer Cave section | Bottom hull of the Destroyer with room | Y | Y | Y | Glitch floor room: below the hull of the Destroyer. The hull of the Destroyer is here the floor of the dome room with the glitch floor. Cueball is standing on the right side of this image looking left. Right of him there is a typical "wet floor" sign pointing towards left. There is an exclamation mark on the sign (counts as text). Just right of this the image ends, but the very last part of the floor in the room, towards the out hull is part of the glitch that makes it possible to go through this part of the floor in our out of the space ship | ||
| (1069, 1089) | 69 | 15 | Destroyer Cave section | White | Glitch floor room: Empty air inside the Destroyer | |||||
| (1069, 1090) | 69 | 16 | Destroyer Cave section | White | Glitch floor room: Empty air inside the Destroyer | |||||
| (1069, 1091) | 69 | 17 | Destroyer Cave section | Inside the Destroyer: Room | Glitch floor room: Ceiling of the room, going completely straight from left to right in the top part of the image | |||||
| (1069, 1092) | 69 | 18 | Destroyer Cave section | Black | Black, can be seen, inside the Destroyer | |||||
| (1069, 1093) | 69 | 19 | Destroyer Cave section | Inside the Destroyer: Room | Y | Y | Cave: The grassy ground of the cave (three images high here) begins at the left close to the top of the image, but then it slopes down until halfway to the middle, and stays here about halfway down to the center to the right side of the image. In the middle of the image stands a large deer with antlers. Both left and right of this, there are small plants that extends from the grass | |||
| (1069, 1094) | 69 | 20 | Destroyer Cave section | White | Cave: Empty air inside the Destroyer | |||||
| (1069, 1095) | 69 | 21 | Destroyer Cave section | Inside the Destroyer: Room | Cave: In this image with almost nothing but empty air inside the cave, there is just a small part of the rising ceiling in the top right corner, but already in this third image inside the cave from the right, the cave is three images above the floor, and this image is only the second of these | |||||
| (1069, 1096) | 69 | 22 | Destroyer Cave section | Inside the Destroyer: Room | Cave: This is the ceiling of the cave, and here just two images inside the cave from the right it is already almost three full images above the floor. But at the left edge the ceiling still exits the image to the left about halfway between the center and the top edge. At the bottom right of the image the ceiling enters the image almost vertical as a wall, and then curves around and left in a slow smooth turn, although there are several small and three larger indentations into the wall/ceiling | |||||
| (1069, 1097) | 69 | 23 | Destroyer Cave section | Black | Black, can be seen, inside the Destroyer | |||||
| (1069, 1098) | 69 | 24 | Destroyer Cave section | Black | Black, can be seen, inside the Destroyer | |||||
| (1069, 1099) | 69 | 25 | Destroyer Cave section | Black | Black, can be seen, inside the Destroyer | |||||
| (1069, 1100) | 69 | 26 | Destroyer Cave section | Black | Black, can be seen, inside the Destroyer | |||||
| (1069, 1101) | 69 | 27 | Destroyer Cave section | Inside the Destroyer: Room | Y | Y | Piano dance hall: This long room is a piano dance hall. The room extends both left and right of this image, the ceiling is just inside the top of this image and the floor half way up to the center from the bottom. In the middle of the image Cueball is spinning Megan around on the dancefloor, with her flowing dress billowing around her. To the very right Hairy is playing a piano, but he is cut off in the middle so his face, and the piano is in the next image to the right, but part of his piano stool can partly be seen. One full note and a small part of one of the other notes can be seen out of the three separate drawings of different notes that flows up from the piano in the right image | |||
| (1069, 1102) | 69 | 28 | Destroyer Cave section | Black | Black, can be seen, inside the Destroyer | |||||
| (1069, 1103) | 69 | 29 | Destroyer Cave section | Inside the Destroyer: Corridor and shaft | Slinky stair: In this mainly black image there is white at the very top right corner where part of the slinky stair can be seen, in the image above a slinky is walking down the steps | |||||
| (1069, 1104) | 69 | 30 | Destroyer Cave section | Top hull of the Destroyer with shaft | Y | Y | Slinky stair: Above the hull of the Destroyer. At the center of this image the hull of the Destroyer can be seen gently increasing its size towards right. Left of the middle a shaft, which is actually a staircase, is going down into the Destroyer. A few steps above last step visible step in the image there is a slinky stepping down. It makes a sound that is written along the stairs above it | |||
| (1070, 1069) | 70 | -5 | Ground level right of pyramid | Black | Black, never seen, below lowest visible terrain, bottom images, with white line at the bottom | |||||
| (1070, 1070) | 70 | -4 | Ground level right of pyramid | Black | Black, never seen, below lowest visible terrain | |||||
| (1070, 1071) | 70 | -3 | Ground level right of pyramid | Black | Black, never seen, below lowest visible terrain | |||||
| (1070, 1072) | 70 | -2 | Ground level right of pyramid | Black | Black, never seen, below ground level right of pyramid | |||||
| (1070, 1073) | 70 | -1 | Ground level right of pyramid | Black | Black, can be seen, below ground level right | |||||
| (1070, 1074) | 70 | 0 | Ground level right of pyramid | Terrain | Grassy hills | |||||
| (1070, 1075) | 70 | 1 | Ground level right of pyramid | White | Empty air above ground level right of the pyramid | |||||
| (1070, 1076) | 70 | 2 | Ground level right of pyramid | White | Empty air above ground level right of the pyramid | |||||
| (1070, 1085) | 70 | 11 | Destroyer Cave section | White | 1 | Empty air beneath the Destroyer cave section, but there is a coin hanging in the air at the bottom of this image 10 images above the ground and three images below the Destroyer above. It is right beneath the dome like room at the bottom of the Destroyer with the glitch floor that allows (tricks) the player into falling down, with fair chance of finding the coin even though it is the best hidden coin compared to the distance to the nearest image with any black in it | ||||
| (1070, 1086) | 70 | 12 | Destroyer Cave section | White | Empty air beneath the Destroyer cave section | |||||
| (1070, 1087) | 70 | 13 | Destroyer Cave section | White | Empty air beneath the Destroyer cave section | |||||
| (1070, 1088) | 70 | 14 | Destroyer Cave section | Bottom hull of the Destroyer with room | Y | Y | 1 | Glitch floor room: below the hull of the Destroyer. The hull of the Destroyer is here the floor of the dome room with the glitch floor. In the middle on the floor there is a black triangular warning sign with white text - warning of a glitch floor. On top of the sign there is a coin. Left of this sign there is a typical "wet floor" sign pointing towards left. There is an exclamation mark on the sign. The floor in the room, towards the out hull after the wet floor sign is part of the glitch that makes it possible to go through this part of the floor in our out of the space ship. (Dropping down through this glitch in the floor will lead to a coin at the bottom of the image three images below, in completely empty air (with 10 more images down to the ground from there) | ||
| (1070, 1089) | 70 | 15 | Destroyer Cave section | White | Glitch floor room: Empty air inside the Destroyer | |||||
| (1070, 1090) | 70 | 16 | Destroyer Cave section | White | Glitch floor room: Empty air inside the Destroyer | |||||
| (1070, 1091) | 70 | 17 | Destroyer Cave section | Inside the Destroyer: Room | Glitch floor room: Ceiling of the room, going completely straight from left to right in the top part of the image | |||||
| (1070, 1092) | 70 | 18 | Destroyer Cave section | Black | Black, can be seen, inside the Destroyer | |||||
| (1070, 1093) | 70 | 19 | Destroyer Cave section | Inside the Destroyer: Room | Y | Y | Cave: The grassy ground of the cave (two images high here) begins halfway between the top and the middle and extends from left to right, although it is very uneven with both a mound to begin with and a shallow part in the middle, followed by yet a small mound. There are two small plants growing above the grass on the down slope to the shallow part and at the bottom of this. Three small insects are flying in the left part of the image, two above the top of the mound and one above the plant on the downslope. Their movement indicated with lines | |||
| (1070, 1094) | 70 | 20 | Destroyer Cave section | Inside the Destroyer: Room | Cave: Most of this image is empty air but at the very top right of this image a small part of the cave ceiling can be seen. It has jagged edges, but mainly takes of a triangle of this corner. The cave extends one more image above this | |||||
| (1070, 1095) | 70 | 21 | Destroyer Cave section | Inside the Destroyer: Room | Y | Y | Y | Y | 1 | Cave: This is above the second image from the right inside the cave, two images above the floor. The ceiling has turned into a wall that in the bottom right of this image enters the room going straight up. Halfway up to the center there is a square shelf in the cave wall, with a little ledge jutting out. Beneath the ledge there are two sticks to keep it stable. Black hat is sitting there head down, arms on his knees, snoring. To the left the cave ceiling takes two steps up, and then it slopes unevenly but slowly up. In the left part the ceiling is above the center, and here is a "yellow" lamp, as a coin is "hanging" from the ceiling. But without the coin it instead looks like a broken lamp, but here the coin is definitely a part of the scenery. The light from the lamp has attracted a swarm of 13 buzzing insects, point like in the drawing, but they buzzes. (One of the insects is hidden by the coin) |
| (1070, 1096) | 70 | 22 | Destroyer Cave section | Black | Black, can be seen, inside the Destroyer | |||||
| (1070, 1097) | 70 | 23 | Destroyer Cave section | Inside the Destroyer: Room | Chandelier room: This is the bottom left part of the room with a chandelier, (which is in the image above with two coins). The room also extends almost halfway into the next image to the right. The left wall is close to the left edge and the floor above the center in this image | |||||
| (1070, 1098) | 70 | 24 | Destroyer Cave section | Inside the Destroyer: Room | Y | 2 | Chandelier room: This is the top left part of this room and to the right there hangs a chandelier with six light bulbs three on each side of the chain holding it to the ceiling. Above the bulbs there are two coins one on each side of the chain. The room also extends almost halfway into the next image to the right. The left wall is close to the left edge and the ceiling is below the center in this image | |||
| (1070, 1099) | 70 | 25 | Destroyer Cave section | Black | Black, can be seen, inside the Destroyer | |||||
| (1070, 1100) | 70 | 26 | Destroyer Cave section | Black | Black, can be seen, inside the Destroyer | |||||
| (1070, 1101) | 70 | 27 | Destroyer Cave section | Inside the Destroyer: Room and corridor | Y | Y | Piano dance hall: This long room is a piano dance hall. The room extends two images left of this image, the ceiling is just inside the top of this image and the floor half way up to the center from the bottom. In the left image Cueball is dancing with Megan to the music played on a piano by Hairy. The piano is in the most left part of this image, just up against the room’s right wall, which is just halfway from the left edge to the middle. The piano is fully visible, but the player Hairy is cut off in the middle so only his face, hands and legs can be seen as well as some part of his piano stool. The rest is in the image to the left, as are one full note and a small part of one of the other notes out of the three separate drawings of different notes that flows up from the piano in this image, so two can be seen here. A corridor enters the picture from the right at the top of the image, and where it enters this room at ceiling height there is a small ledge hanging out over the piano. The ledge is supported by two sticks beneath it | |||
| (1070, 1102) | 70 | 28 | Destroyer Cave section | Black | Black, can be seen, inside the Destroyer | |||||
| (1070, 1103) | 70 | 29 | Destroyer Cave section | Inside the Destroyer: Corridor and shaft | Slinky stair: The slinky stair is coming down from the top left corner turning into a corridor above the center. The corridor goes right out the image. In the image above and left a slinky is walking down the steps | |||||
| (1070, 1104) | 70 | 30 | Destroyer Cave section | Top hull of the Destroyer with shaft | Above the hull of the Destroyer. At the center of this image the hull of the Destroyer can be seen gently increasing its size towards right. At the bottom left there is a small white triangle, part of a shaft, which is actually the top of a staircase going down into the Destroyer | |||||
| (1071, 1069) | 71 | -5 | Ground level right of pyramid | Black | Black, never seen, below lowest visible terrain, bottom images, with white line at the bottom | |||||
| (1071, 1070) | 71 | -4 | Ground level right of pyramid | Black | Black, never seen, below lowest visible terrain | |||||
| (1071, 1071) | 71 | -3 | Ground level right of pyramid | Black | Black, never seen, below lowest visible terrain | |||||
| (1071, 1072) | 71 | -2 | Ground level right of pyramid | Black | Black, never seen, below ground level right of pyramid | |||||
| (1071, 1073) | 71 | -1 | Ground level right of pyramid | Black | Black, can be seen, below ground level right | |||||
| (1071, 1074) | 71 | 0 | Ground level right of pyramid | Terrain | 1 | Grassy hills with a coin over a small hidden hole in the ground to the left of the small mound | ||||
| (1071, 1075) | 71 | 1 | Ground level right of pyramid | White | Empty air above ground level right of the pyramid | |||||
| (1071, 1076) | 71 | 2 | Ground level right of pyramid | White | Empty air above ground level right of the pyramid | |||||
| (1071, 1085) | 71 | 11 | Destroyer Cave section | White | Empty air beneath the Destroyer cave section | |||||
| (1071, 1086) | 71 | 12 | Destroyer Cave section | White | Empty air beneath the Destroyer cave section | |||||
| (1071, 1087) | 71 | 13 | Destroyer Cave section | White | Empty air beneath the Destroyer cave section | |||||
| (1071, 1088) | 71 | 14 | Destroyer Cave section | Bottom hull of the Destroyer with room | Glitch floor room: below the hull of the Destroyer. The hull of the Destroyer is here the floor of the dome room with the glitch floor rising up towards right | |||||
| (1071, 1089) | 71 | 15 | Destroyer Cave section | Inside the Destroyer: Room | Glitch floor room: At the bottom right is part of the circle, which is the floor of the Glitch floor room, where this bulges out beneath the Destroyers hull | |||||
| (1071, 1090) | 71 | 16 | Destroyer Cave section | White | Glitch floor room: Empty air inside the Destroyer | |||||
| (1071, 1091) | 71 | 17 | Destroyer Cave section | Inside the Destroyer: Room | Glitch floor room: Ceiling of the room, going completely straight from left to right in the top part of the image | |||||
| (1071, 1092) | 71 | 18 | Destroyer Cave section | Black | Black, can be seen, inside the Destroyer | |||||
| (1071, 1093) | 71 | 19 | Destroyer Cave section | Inside the Destroyer: Room and corridor | Y | Cave: The right entrance to the cave. The image begins inside the corridor that comes from the right at the top of the image going left into the cave. The ceiling of the corridor is in the image above. Just where the ceiling of the corridor begins to go up as it enters the cave, just past the middle of the image, the floor rises very little, and then when the ceiling reaches the top of its first large step (of three steps in the image above where the ceiling already goes more than halfway up in that image at the left edge), the ground becomes grassy to the left in the last third of the image. A man with spiky black hair is walking left in the corridor halfway from the right edge to the grass | ||||
| (1071, 1094) | 71 | 20 | Destroyer Cave section | Inside the Destroyer: Room and corridor | Cave: The right entrance to the cave. The image begins to the right inside the corridor that comes from the right. In this image the floor of the corridor is not visible, as it is in the image below. The corridor continues until the middle of the image and then the cave begins to the left. The ceiling goes up fast, and takes two medium steps and one large at the top, so the ceiling reaches halfway between the middle and the top before it exits the image to the left. In the image below the floor has changed into terrain with grass from where the first step up in the ceiling is finished | |||||
| (1071, 1095) | 71 | 21 | Destroyer Cave section | Black | Black, can be seen, inside the Destroyer | |||||
| (1071, 1096) | 71 | 22 | Destroyer Cave section | Black | Black, can be seen, inside the Destroyer | |||||
| (1071, 1097) | 71 | 23 | Destroyer Cave section | Inside the Destroyer: Room and corridor | Chandelier room: This is the bottom right part of the room with a chandelier, (which is in the image above and left). The room extends almost all the way through the next image to the left. The floor is above the center in this image and Where the right wall end, before the middle from the left, it turns into a corridor that exits the image to the right | |||||
| (1071, 1098) | 71 | 24 | Destroyer Cave section | Inside the Destroyer: Room | Chandelier room: This is the top right part of the room with a chandelier, (which is in the image to the left). The room extends almost all the way through the next image to the left. The room takes up most of the bottom left quadrant of this image | |||||
| (1071, 1099) | 71 | 25 | Destroyer Cave section | Black | Black, can be seen, inside the Destroyer | |||||
| (1071, 1100) | 71 | 26 | Destroyer Cave section | Black | Black, can be seen, inside the Destroyer | |||||
| (1071, 1101) | 71 | 27 | Destroyer Cave section | Inside the Destroyer: Corridor | A corridor goes through the image at the top | |||||
| (1071, 1102) | 71 | 28 | Destroyer Cave section | Black | Black, can be seen, inside the Destroyer | |||||
| (1071, 1103) | 71 | 29 | Destroyer Cave section | Inside the Destroyer: Corridor | A corridor goes through the image above the center | |||||
| (1071, 1104) | 71 | 30 | Destroyer Cave section | Top hull of the Destroyer | Above the hull of the Destroyer. At the center of this image the hull of the Destroyer can be seen gently increasing its size towards right, and is the middle is a small step up and then down again | |||||
| (1072, 1069) | 72 | -5 | Ground level right of pyramid | Black | Black, never seen, below lowest visible terrain, bottom images, with white line at the bottom | |||||
| (1072, 1070) | 72 | -4 | Ground level right of pyramid | Black | Black, never seen, below lowest visible terrain | |||||
| (1072, 1071) | 72 | -3 | Ground level right of pyramid | Black | Black, never seen, below lowest visible terrain | |||||
| (1072, 1072) | 72 | -2 | Ground level right of pyramid | Black | Black, never seen, below ground level right of pyramid | |||||
| (1072, 1073) | 72 | -1 | Ground level right of pyramid | Black | Black, can be seen, below ground level right | |||||
| (1072, 1074) | 72 | 0 | Ground level right of pyramid | Terrain | Grassy hills | |||||
| (1072, 1075) | 72 | 1 | Ground level right of pyramid | White | Empty air above ground level right of the pyramid | |||||
| (1072, 1076) | 72 | 2 | Ground level right of pyramid | White | Empty air above ground level right of the pyramid | |||||
| (1072, 1085) | 72 | 11 | Destroyer Cave section | White | Empty air beneath the Destroyer cave section | |||||
| (1072, 1086) | 72 | 12 | Destroyer Cave section | White | Empty air beneath the Destroyer cave section | |||||
| (1072, 1087) | 72 | 13 | Destroyer Cave section | White | Empty air beneath the Destroyer cave section | |||||
| (1072, 1088) | 72 | 14 | Destroyer Cave section | White - almost | Glitch floor room: Empty air beneath the Destroyer cave section, except for a very small part of the hull of the dome room below with the glitch floor which just enters this white image at the very top left corner | |||||
| (1072, 1089) | 72 | 15 | Destroyer Cave section | Bottom hull of the Destroyer with room | Glitch floor room: below the hull of the Destroyer. At the bottom right of this image the hull of the Destroyer can be seen, gently increasing its size towards right. But from the middle it begins to go down left in a circle, and turns into the floor of the Glitch floor room, where this bulges out beneath the Destroyers hull | |||||
| (1072, 1090) | 72 | 16 | Destroyer Cave section | Inside the Destroyer: Room | Glitch floor room: The floor of this room is part of semi-circle shaped bowl, and it is almost a vertical wall going down almost at the right in this image, but it clearly extends further to the left at the bottom, so the circle shape can easily be seen | |||||
| (1072, 1091) | 72 | 17 | Destroyer Cave section | Inside the Destroyer: Room and corridor | Glitch floor room: A corridor enters the image at the very right at the top, only to enter into the top of the Glitch floor room, whose ceiling is at the same level as the corridor, but the floor is part of semi-circle shaped bowl, and at the entrance the floor is almost a vertical wall going down almost at the right in this image. | |||||
| (1072, 1092) | 72 | 18 | Destroyer Cave section | Inside the Destroyer: Room | Small one coin room: At the very right of this almost black image is the left wall of a small empty rectangular room that is mainly located in the image to the right (with a coin). The floor is below and the ceiling above the center | |||||
| (1072, 1093) | 72 | 19 | Destroyer Cave section | Inside the Destroyer: Corridor | A corridor goes through the image at the very top. The ceiling of the corridor is in the image above | |||||
| (1072, 1094) | 72 | 20 | Destroyer Cave section | Inside the Destroyer: Corridor and shaft | A corridor enters left at the very bottom going right across the image. Left of the middle a shaft goes up through the image forming an upside down T. Most of the corridor is in the image below | |||||
| (1072, 1095) | 72 | 21 | Destroyer Cave section | Inside the Destroyer: Shaft | A shaft enters left of the middle of the image from above and goes down through the image | |||||
| (1072, 1096) | 72 | 22 | Destroyer Cave section | Inside the Destroyer: Shaft | A shaft enters left of the middle of the image from above and goes down through the image | |||||
| (1072, 1097) | 72 | 23 | Destroyer Cave section | Inside the Destroyer: Shaft | A shaft enters left of the middle of the image from above and goes down through the image. Above the center a corridor exits to the left from the shaft | |||||
| (1072, 1098) | 72 | 24 | Destroyer Cave section | Inside the Destroyer: Shaft | A shaft enters left of the middle of the image from above and goes down through the image | |||||
| (1072, 1099) | 72 | 25 | Destroyer Cave section | Inside the Destroyer: Shaft | A shaft enters left of the middle of the image from above and goes down through the image | |||||
| (1072, 1100) | 72 | 26 | Destroyer Cave section | Inside the Destroyer: Shaft | A shaft enters left of the middle of the image from above and goes down through the image | |||||
| (1072, 1101) | 72 | 27 | Destroyer Cave section | Inside the Destroyer: Shaft | A shaft enters left of the middle of the image from above and goes down through the image. Above the center a corridor exits to the left from the shaft, and at the very bottom a corridor exits right from the shaft | |||||
| (1072, 1102) | 72 | 28 | Destroyer Cave section | Inside the Destroyer: Shaft | A shaft enters left of the middle of the image from above and goes down through the image | |||||
| (1072, 1103) | 72 | 29 | Destroyer Cave section | Inside the Destroyer: Shaft | A corridor enters left at the top going right until it turns into a shaft that goes down from here through the image. Below the center another corridor goes off to the right | |||||
| (1072, 1104) | 72 | 30 | Destroyer Cave section | Top hull of the Destroyer | Y | Y | 1 | Above the hull of the Destroyer. At the top of this image the hull of the Destroyer can be seen gently increasing its size towards right. To the very right there is a cowboy sitting with two reins holding on to the ship like he is riding it as a horse. He is cut off at the back of his head at the right edge, and so is the last letters of his yell. There is a coin a little in front of him | ||
| (1073, 1069) | 73 | -5 | Ground level right of pyramid | Black | Black, never seen, below lowest visible terrain, bottom images, with white line at the bottom | |||||
| (1073, 1070) | 73 | -4 | Ground level right of pyramid | Black | Black, never seen, below lowest visible terrain | |||||
| (1073, 1071) | 73 | -3 | Ground level right of pyramid | Black | Black, never seen, below lowest visible terrain | |||||
| (1073, 1072) | 73 | -2 | Ground level right of pyramid | Black | Black, never seen, below ground level right of pyramid | |||||
| (1073, 1073) | 73 | -1 | Ground level right of pyramid | Black | Black, can be seen, below ground level right | |||||
| (1073, 1074) | 73 | 0 | Ground level right of pyramid | Terrain | Y | Y | Ponytail is walking right. She is followed by a small black bird right behind her head | |||
| (1073, 1075) | 73 | 1 | Ground level right of pyramid | White | Empty air above ground level right of the pyramid | |||||
| (1073, 1076) | 73 | 2 | Ground level right of pyramid | White | Empty air above ground level right of the pyramid | |||||
| (1073, 1085) | 73 | 11 | Destroyer Cave section | White | Empty air beneath the Destroyer cave section | |||||
| (1073, 1086) | 73 | 12 | Destroyer Cave section | White | Empty air beneath the Destroyer cave section | |||||
| (1073, 1087) | 73 | 13 | Destroyer Cave section | White | Empty air beneath the Destroyer cave section | |||||
| (1073, 1088) | 73 | 14 | Destroyer Cave section | White | Empty air beneath the Destroyer cave section | |||||
| (1073, 1089) | 73 | 15 | Destroyer Cave section | Bottom hull of the Destroyer | Below the hull of the Destroyer. At the very bottom of this image the hull of the Destroyer can be seen, gently increasing its size towards right | |||||
| (1073, 1090) | 73 | 16 | Destroyer Cave section | Inside the Destroyer: Room | 1 | Rectangular two coin room: The bottom left of this room is located at the top of this image starting halfway between the right edge and the middle. The room extends up and right. In the right part of the image over the floor is a coin | ||||
| (1073, 1091) | 73 | 17 | Destroyer Cave section | Inside the Destroyer: Room, corridor and shaft | Rectangular two coin room: The top left of this room is located at the bottom of this image starting halfway between the right edge and the middle. The room extends down and right. To the far right a shaft exits the room from the ceiling going up. The shaft extends to the image to the right. Halfway up to the upper edge the shaft is joined by a corridor coming from the left going all through the image above the room | |||||
| (1073, 1092) | 73 | 18 | Destroyer Cave section | Inside the Destroyer: Room, corridor and shaft | 1 | Small one coin room: A small empty rectangular room that extends further to the left than this image. The floor is below and the ceiling above the center, the right wall is past the middle and at the bottom right of the room a corridor exits to the right and at the right edge a shaft goes down from the corridor. In the middle of the room there is a coin | ||||
| (1073, 1093) | 73 | 19 | Destroyer Cave section | Inside the Destroyer: Corridor | A corridor goes through the image at very top, so the top part is in the image above | |||||
| (1073, 1094) | 73 | 20 | Destroyer Cave section | Black - almost | Black inside the Destroyer almost, but for a thin line of white along at the bottom of this image where the top of a corridor goes through the image | |||||
| (1073, 1095) | 73 | 21 | Destroyer Cave section | Black | Black, can be seen, inside the Destroyer | |||||
| (1073, 1096) | 73 | 22 | Destroyer Cave section | Black | Black, can be seen, inside the Destroyer | |||||
| (1073, 1097) | 73 | 23 | Destroyer Cave section | Black | Black, can be seen, inside the Destroyer | |||||
| (1073, 1098) | 73 | 24 | Destroyer Cave section | Black | Black, can be seen, inside the Destroyer | |||||
| (1073, 1099) | 73 | 25 | Destroyer Cave section | Black | Black, can be seen, inside the Destroyer | |||||
| (1073, 1100) | 73 | 26 | Destroyer Cave section | Black | Black, can be seen, inside the Destroyer | |||||
| (1073, 1101) | 73 | 27 | Destroyer Cave section | Inside the Destroyer: Corridor | 1 | A corridor goes through the image at the bottom. To the right there is a coin | ||||
| (1073, 1102) | 73 | 28 | Destroyer Cave section | Black | Black, can be seen, inside the Destroyer | |||||
| (1073, 1103) | 73 | 29 | Destroyer Cave section | Inside the Destroyer: Corridor | A corridor goes through the image below the center | |||||
| (1073, 1104) | 73 | 30 | Destroyer Cave section | Top hull of the Destroyer | Y | Y | Above the hull of the Destroyer. At the top of this image the hull of the Destroyer can be seen gently increasing its size towards right. To the very left there is the back side of a cowboy (who in the image to the left can be seen to be sitting with two reins holding on to the ship like he is riding it as a horse). Only the back of his head can be seen at the left edge, and the same for the last letters of his yell | |||
| (1074, 1069) | 74 | -5 | Ground level right of pyramid | Black | Black, never seen, below lowest visible terrain, bottom images, with white line at the bottom | |||||
| (1074, 1070) | 74 | -4 | Ground level right of pyramid | Black | Black, never seen, below lowest visible terrain | |||||
| (1074, 1071) | 74 | -3 | Ground level right of pyramid | Black | Black, never seen, below lowest visible terrain | |||||
| (1074, 1072) | 74 | -2 | Ground level right of pyramid | Black | Black, never seen, below ground level right of pyramid | |||||
| (1074, 1073) | 74 | -1 | Ground level right of pyramid | Black | Black, can be seen, below ground level right | |||||
| (1074, 1074) | 74 | 0 | Ground level right of pyramid | Terrain | Y | Grassy hills ending in a cliff going down. Above the cliff is a black hat (like Black Hat's) resting on a stick in the ground | ||||
| (1074, 1075) | 74 | 1 | Ground level right of pyramid | White | Empty air above ground level right of the pyramid | |||||
| (1074, 1076) | 74 | 2 | Ground level right of pyramid | White | Empty air above ground level right of the pyramid | |||||
| (1074, 1085) | 74 | 11 | Destroyer Cave section | White | Empty air beneath the Destroyer cave section | |||||
| (1074, 1086) | 74 | 12 | Destroyer Cave section | White | Empty air beneath the Destroyer cave section | |||||
| (1074, 1087) | 74 | 13 | Destroyer Cave section | White | Empty air beneath the Destroyer cave section | |||||
| (1074, 1088) | 74 | 14 | Destroyer Cave section | White | Empty air beneath the Destroyer cave section | |||||
| (1074, 1089) | 74 | 15 | Destroyer Cave section | Bottom hull of the Destroyer | Below the hull of the Destroyer. At the very bottom of this image the hull of the Destroyer can be seen, gently increasing its size towards right | |||||
| (1074, 1090) | 74 | 16 | Destroyer Cave section | Inside the Destroyer: Room | 1 | Rectangular two coin room: The bottom right of this room is located at the top of this image starting halfway between the right edge and the middle. The room extends up and left. In the middle of the image over the floor is a coin | ||||
| (1074, 1091) | 74 | 17 | Destroyer Cave section | Inside the Destroyer: Room and shaft | Rectangular two coin room: The top right of this room is located at the bottom of this image starting halfway between the right edge and the middle. The room extends down and left. To the far left a shaft exits the room from the ceiling going up. The shaft extends into the image to the left | |||||
| (1074, 1092) | 74 | 18 | Destroyer Cave section | Inside the Destroyer: Corridor and shaft | A corridor enters right below the center going left across the image. To the very left a shaft comes up from below to join the corridor forming an L lying face down. The shaft extends into the picture to the left | |||||
| (1074, 1093) | 74 | 19 | Destroyer Cave section | Inside the Destroyer: Corridor and shaft | A corridor enters the image at very top left, but already halfway to the middle the floor begins to rise 45 degree, and before the middle this shaft/corridor exits the image at the top. The top part of the corridor is in the image above | |||||
| (1074, 1094) | 74 | 20 | Destroyer Cave section | Inside the Destroyer: Corridor and shaft | Y | The top part of a corridor enters left at the bottom but then it turns rising 45 degree before the middle. Past the middle this shaft/corridor stops rising and becomes a corridor going right again. At the far right there is a pit in the bottom of the floor of the corridor, there is a bridge over the top of the pit. At the bottom of the pit (whose floor is almost at the bottom of the image) stands Cueball looking up | ||||
| (1074, 1095) | 74 | 21 | Destroyer Cave section | Black | Black, can be seen, inside the Destroyer | |||||
| (1074, 1096) | 74 | 22 | Destroyer Cave section | Black | Black, never seen, inside the Destroyer | |||||
| (1074, 1097) | 74 | 23 | Destroyer Cave section | Black | Black, never seen, inside the Destroyer | |||||
| (1074, 1098) | 74 | 24 | Destroyer Cave section | Black | Black, never seen, inside the Destroyer | |||||
| (1074, 1099) | 74 | 25 | Destroyer Cave section | Black | Black, never seen, inside the Destroyer | |||||
| (1074, 1100) | 74 | 26 | Destroyer Cave section | Black | Black, can be seen, inside the Destroyer | |||||
| (1074, 1101) | 74 | 27 | Destroyer Cave section | Inside the Destroyer: Corridor | A corridor goes through the image at the bottom | |||||
| (1074, 1102) | 74 | 28 | Destroyer Cave section | Black | Black, can be seen, inside the Destroyer | |||||
| (1074, 1103) | 74 | 29 | Destroyer Cave section | Inside the Destroyer: Room and corridor | Y | Upside down room. To the very left a corridor enters this room below the middle. The floor is at the same height but it turns out that in this room, the floor is the ceiling, and the ceiling, that are above the center, is the floor. There are five people on the ceiling in this long room that extends in to the next image to the right. Three of them are in this image. They are not hanging down from the ceiling, rather they are standing there. In the middle of the image Cueball walks towards left away from Megan and Ponytail that are almost at the right edge of the image | ||||
| (1074, 1104) | 74 | 30 | Destroyer Cave section | Top hull of the Destroyer | Above the hull of the Destroyer. At the top of this image the hull of the Destroyer can be seen gently increasing its size towards right. | |||||
| (1075, 1069) | 75 | -5 | Ground level right of pyramid | Black | Black, never seen, below lowest visible terrain, bottom images, with white line at the bottom | |||||
| (1075, 1070) | 75 | -4 | Ground level right of pyramid | Black | Black, never seen, below lowest visible terrain | |||||
| (1075, 1071) | 75 | -3 | Ground level right of pyramid | Black | Black, never seen, below lowest visible terrain | |||||
| (1075, 1072) | 75 | -2 | Ground level right of pyramid | Black | Black, never seen, below ground level right of pyramid | |||||
| (1075, 1073) | 75 | -1 | Ground level right of pyramid | Black | Black, can be seen, below ground level right | |||||
| (1075, 1074) | 75 | 0 | Ground level right of pyramid | Terrain | Y | Cueball singing | ||||
| (1075, 1075) | 75 | 1 | Ground level right of pyramid | White | Empty air above ground level right of the pyramid | |||||
| (1075, 1076) | 75 | 2 | Ground level right of pyramid | White | Empty air above ground level right of the pyramid | |||||
| (1075, 1085) | 75 | 11 | Destroyer Cave section | White | Empty air beneath the Destroyer cave section | |||||
| (1075, 1086) | 75 | 12 | Destroyer Cave section | White | Empty air beneath the Destroyer cave section | |||||
| (1075, 1087) | 75 | 13 | Destroyer Cave section | White | Empty air beneath the Destroyer cave section | |||||
| (1075, 1088) | 75 | 14 | Destroyer Cave section | Bottom hull of the Destroyer | Below the hull of the Destroyer. Bottom hull of the Destroyer with a canon jutting out pointing left. At the very top of this image the hull of the Destroyer can be seen, gently increasing its size towards right | |||||
| (1075, 1089) | 75 | 15 | Destroyer Cave section | Black - almost | Black inside the Destroyer except for a very small piece of the outer hull at the very bottom left corner | |||||
| (1075, 1090) | 75 | 16 | Destroyer Cave section | Black | Black, can be seen, inside the Destroyer | |||||
| (1075, 1091) | 75 | 17 | Destroyer Cave section | Black | Black, can be seen, inside the Destroyer | |||||
| (1075, 1092) | 75 | 18 | Destroyer Cave section | Inside the Destroyer: Corridor | A corridor goes through the image below the center; it is very uneven and goes a little up and down | |||||
| (1075, 1093) | 75 | 19 | Destroyer Cave section | Black | Black, can be seen, inside the Destroyer | |||||
| (1075, 1094) | 75 | 20 | Destroyer Cave section | Inside the Destroyer: Room, corridor and shaft | Y | Y | 1 | Alarm room: A corridor enters left below the middle, but immediately this enters a small room with a domed ceiling going up to the center of the image. The domes edges right and left jut out beneath the ceiling of the corridor, that continues on the right side. At the top of the dome there is a small black square protruding. It is some kind of alarm which is going off saying "beep". The corridor to the right ends just before the right edge and turns into a shaft going up to a corridor just inside the top of the image. The corridor exits the image to the right, but it also goes left but it is a dead-end that stops at the middle just above the right end of the dome below. In this small "room" there are three boxes, one on top of the other two in a small pyramid. Just in front of them to the right there is a coin on the corridor floor, just left of the shaft | ||
| (1075, 1095) | 75 | 21 | Destroyer Cave section | Black | Black, can be seen, inside the Destroyer | |||||
| (1075, 1096) | 75 | 22 | Destroyer Cave section | Black | Black, can be seen, inside the Destroyer | |||||
| (1075, 1097) | 75 | 23 | Destroyer Cave section | Black | Black, never seen, inside the Destroyer | |||||
| (1075, 1098) | 75 | 24 | Destroyer Cave section | Black | Black, never seen, inside the Destroyer | |||||
| (1075, 1099) | 75 | 25 | Destroyer Cave section | Black | Black, never seen, inside the Destroyer | |||||
| (1075, 1100) | 75 | 26 | Destroyer Cave section | Black | Black, can be seen, inside the Destroyer | |||||
| (1075, 1101) | 75 | 27 | Destroyer Cave section | Inside the Destroyer: Corridor | A corridor goes through the image at the bottom | |||||
| (1075, 1102) | 75 | 28 | Destroyer Cave section | Black | Black, can be seen, inside the Destroyer | |||||
| (1075, 1103) | 75 | 29 | Destroyer Cave section | Inside the Destroyer: Room | Y | Y | 1 | Upside down room. To the left of this image is the right part of a long room that extends through most of the image to the left. The floor is just below the center but it turns out that in this room, the floor is the ceiling, and the ceiling, that are above the center, is the floor. There are five people on the ceiling in this long room but only two of them are in this image. They are not hanging down from the ceiling, rather they are standing there. Just at the left edge is Megan holding something and Cueball holding a wine glass. Both her hair and the wine stays as if they were the ones standing on the floor. In the top right corner of the room there is a coin | ||
| (1075, 1104) | 75 | 30 | Destroyer Cave section | Top hull of the Destroyer | Above the hull of the Destroyer. At the very top of this image the hull of the Destroyer can be seen gently increasing its size towards right. | |||||
| (1076, 1069) | 76 | -5 | Ground level right of pyramid | Black | Black, never seen, below lowest visible terrain, bottom images, with white line at the bottom | |||||
| (1076, 1070) | 76 | -4 | Ground level right of pyramid | Black | Black, never seen, below lowest visible terrain | |||||
| (1076, 1071) | 76 | -3 | Ground level right of pyramid | Black | Black, never seen, below lowest visible terrain | |||||
| (1076, 1072) | 76 | -2 | Ground level right of pyramid | Black | Black, never seen, below ground level right of pyramid | |||||
| (1076, 1073) | 76 | -1 | Ground level right of pyramid | Black | Black, can be seen, below ground level right | |||||
| (1076, 1074) | 76 | 0 | Ground level right of pyramid | Terrain | Grassy ground with a step down going right | |||||
| (1076, 1075) | 76 | 1 | Ground level right of pyramid | White | Empty air above ground level right of the pyramid | |||||
| (1076, 1076) | 76 | 2 | Ground level right of pyramid | White | Empty air above ground level right of the pyramid | |||||
| (1076, 1085) | 76 | 11 | Destroyer Bridge | White | Empty air beneath the Destroyer bridge | |||||
| (1076, 1086) | 76 | 12 | Destroyer Bridge | White | Empty air beneath the Destroyer bridge | |||||
| (1076, 1087) | 76 | 13 | Destroyer Bridge | White | Empty air beneath the Destroyer bridge | |||||
| (1076, 1088) | 76 | 14 | Destroyer Bridge | Bottom hull of the Destroyer | Below the hull of the Destroyer. At the top of this image the hull of the Destroyer can be seen, gently increasing its size towards right even taking a step toward the right increasing the size a bit faster, but in the image to the right of this step is reversed | |||||
| (1076, 1089) | 76 | 15 | Destroyer Bridge | Black | Black, can be seen, inside the Destroyer | |||||
| (1076, 1090) | 76 | 16 | Destroyer Bridge | Black | Black, never seen, inside the Destroyer | |||||
| (1076, 1091) | 76 | 17 | Destroyer Bridge | Black | Black, can be seen, inside the Destroyer | |||||
| (1076, 1092) | 76 | 18 | Destroyer Bridge | Inside the Destroyer: Corridor | A corridor goes through the image below the center; it is very uneven and goes a little up and down | |||||
| (1076, 1093) | 76 | 19 | Destroyer Bridge | Black | Black, can be seen, inside the Destroyer | |||||
| (1076, 1094) | 76 | 20 | Destroyer Bridge | Inside the Destroyer: Room and corridor | Giant ant rooms: A corridor enters left at the top, and after the middle it enters a small room with a domed ceiling going up into the image above and it also extends to the right. The domes edges left (and right in the next image) jut out beneath the ceiling of the corridor, (that also continues after the room in the right image). This is the first of three rooms belonging to the giant ant queen. | |||||
| (1076, 1095) | 76 | 21 | Destroyer Bridge | Inside the Destroyer: Room | Giant ant rooms: At the bottom right, from right past the middle of this almost black image is the top of a small domed room. Only the top of the rounded ceiling is visible going only half way to the center where it is highest | |||||
| (1076, 1096) | 76 | 22 | Destroyer Bridge | Black | Black, can be seen, inside the Destroyer | |||||
| (1076, 1097) | 76 | 23 | Destroyer Bridge | Black | Black, never seen, inside the Destroyer | |||||
| (1076, 1098) | 76 | 24 | Destroyer Bridge | Black | Black, never seen, inside the Destroyer | |||||
| (1076, 1099) | 76 | 25 | Destroyer Bridge | Black | Black, never seen, inside the Destroyer | |||||
| (1076, 1100) | 76 | 26 | Destroyer Bridge | Black | Black, can be seen, inside the Destroyer | |||||
| (1076, 1101) | 76 | 27 | Destroyer Bridge | Inside the Destroyer: Room, corridor and shaft | Prince of Persia maze: A corridor enters left at the bottom going right across the image. To the very right a shaft goes up through the image forming an L lying down. Part of the shaft is in the next image, and the corridor ends in this shaft. The top of the maze is blocked by a thin ledge that becomes the ceiling of a corridor going right in the next image. Above the ledge is the beginning of the large room that is the maze resembling level 1 of the computer game Prince of Persia. At the top the wall of the shaft takes a step to the left and at the very top over this step is a small ledge of the same length as the step | |||||
| (1076, 1102) | 76 | 28 | Destroyer Bridge | Inside the Destroyer: Room | Prince of Persia maze: This is above the entrance to the maze (a large room) that resembles level 1 of the computer game Prince of Persia. The image is mainly black, but to the right from the center and down the left most part of the maze can be seen. It is just inside at the top, but then takes a step out just below the middle. The wall goes straight down here, but there are two thin ledges jutting out from the wall a distance similar to the step above. A third ledge is in the image below and the floor under that is also a step up from the ledge below over the entrance shaft | |||||
| (1076, 1103) | 76 | 29 | Destroyer Bridge | Black | Black, can be seen, inside the Destroyer | |||||
| (1076, 1104) | 76 | 30 | Destroyer Bridge | Black - almost | Black inside the Destroyer, except for a very small white triangle at the very top left corner where the top hull of the Destroyer can be seen gently increasing its size towards right. (Just above this image on the hull there is a coin) | |||||
| (1076, 1105) | 76 | 31 | Destroyer Bridge | Top hull of the Destroyer | 1 | Above the hull of the Destroyer. At the very bottom left of this image, the hull of the Destroyer enters from below and then it gently increases its size towards right. In the right part of the image there is a coin above the hull | ||||
| (1076, 1106) | 76 | 32 | Destroyer Bridge | White | Empty air above the Destroyer | |||||
| (1076, 1107) | 76 | 33 | Destroyer Bridge | White | Empty air above the Destroyer | |||||
| (1076, 1108) | 76 | 34 | Destroyer Bridge | White | Empty air above the Destroyer | |||||
| (1076, 1109) | 76 | 35 | Destroyer Bridge | White | Empty air above the Destroyer | |||||
| (1076, 1110) | 76 | 36 | Destroyer Bridge | White | Empty air above the Destroyer | |||||
| (1076, 1111) | 76 | 37 | Destroyer Bridge | White | Empty air above the Destroyer | |||||
| (1076, 1112) | 76 | 38 | Destroyer Bridge | White | Empty air above the Destroyer | |||||
| (1077, 1069) | 77 | -5 | Ground level right of pyramid | Black | Black, never seen, below lowest visible terrain, bottom images, with white line at the bottom | |||||
| (1077, 1070) | 77 | -4 | Ground level right of pyramid | Black | Black, never seen, below lowest visible terrain | |||||
| (1077, 1071) | 77 | -3 | Ground level right of pyramid | Black | Black, never seen, below lowest visible terrain | |||||
| (1077, 1072) | 77 | -2 | Ground level right of pyramid | Black | Black, never seen, below ground level right of pyramid | |||||
| (1077, 1073) | 77 | -1 | Ground level right of pyramid | Black | Black, can be seen, below ground level right | |||||
| (1077, 1074) | 77 | 0 | Ground level right of pyramid | Terrain | Grassy ground | |||||
| (1077, 1075) | 77 | 1 | Ground level right of pyramid | White | Empty air above ground level right of the pyramid | |||||
| (1077, 1076) | 77 | 2 | Ground level right of pyramid | White | Empty air above ground level right of the pyramid | |||||
| (1077, 1085) | 77 | 11 | Destroyer Bridge | White | Empty air beneath the Destroyer bridge | |||||
| (1077, 1086) | 77 | 12 | Destroyer Bridge | White | Empty air beneath the Destroyer bridge | |||||
| (1077, 1087) | 77 | 13 | Destroyer Bridge | White | Empty air beneath the Destroyer bridge | |||||
| (1077, 1088) | 77 | 14 | Destroyer Bridge | Bottom hull of the Destroyer | Below the hull of the Destroyer. At the top of this image the hull of the Destroyer can be seen, gently increasing its size towards right although it takes a step toward the right decreasing the size again. This was a step back from a step out in the image before to the left | |||||
| (1077, 1089) | 77 | 15 | Destroyer Bridge | Black | Black, can be seen, inside the Destroyer | |||||
| (1077, 1090) | 77 | 16 | Destroyer Bridge | Black | Black, never seen, inside the Destroyer | |||||
| (1077, 1091) | 77 | 17 | Destroyer Bridge | Black | Black, can be seen, inside the Destroyer | |||||
| (1077, 1092) | 77 | 18 | Destroyer Bridge | Inside the Destroyer: Corridor | A corridor goes through the image below the center; it is very uneven and goes a little up and down | |||||
| (1077, 1093) | 77 | 19 | Destroyer Bridge | Black | Black, can be seen, inside the Destroyer | |||||
| (1077, 1094) | 77 | 20 | Destroyer Bridge | Inside the Destroyer: Room and corridor | Y | Giant ant rooms: To the left is the bottom right part of a small room with floor at the top of the image and a domed ceiling going up into the image above and extending to the left. A corridor exits right, where the room ends halfway to the middle and after the middle it enters another much larger domed room. The edges of the domes where they come down to the corridor juts out beneath the ceiling of the corridor, (which also continues after the room in the left image). The right room is the middle one of three, the one where the giant ant queen resides in the next image. Cueball is standing in the right part of the image, on the first step of a three step pedestal, which begins halfway from the start of the room to the right edge. The second step can just be seen and Cueball stands right in front of this. He is talking to the queen ant in the next image, as can be seen by a line going from him up to his text, but all text is in the images above and above right | ||||
| (1077, 1095) | 77 | 21 | Destroyer Bridge | Inside the Destroyer: Room | Y | Giant ant rooms: In the bottom left corner is the right top of a small domed room making a quarter circle around the corner. From the middle of the image towards right the domed ceiling of the giant ant queen in the next image to the left comes up to the center at the right edge. In the image below Cueball stands just inside this room and talks to the ant. The first few letters of each of his two sentences can be seen at the images right edge, where they are cut off. The ant’s reply, which is in between is not visible in this image | ||||
| (1077, 1096) | 77 | 22 | Destroyer Bridge | Black | Black, can be seen, inside the Destroyer | |||||
| (1077, 1097) | 77 | 23 | Destroyer Bridge | Black | Black, never seen, inside the Destroyer | |||||
| (1077, 1098) | 77 | 24 | Destroyer Bridge | Black | Black, never seen, inside the Destroyer | |||||
| (1077, 1099) | 77 | 25 | Destroyer Bridge | Black | Black, never seen, inside the Destroyer | |||||
| (1077, 1100) | 77 | 26 | Destroyer Bridge | Black | Black, can be seen, inside the Destroyer | |||||
| (1077, 1101) | 77 | 27 | Destroyer Bridge | Inside the Destroyer: Room, corridor and shaft | Prince of Persia maze: This is the entrance to the maze (a large room) that resembles level 1 of the computer game Prince of Persia. The entrance to the maze comes in the bottom left corner where a shaft beginning just above the bottom of the image goes up to the middle before a thin ledge comes out from the left and covers the top of the entry shaft and almost reaches the next wall to the right, or rather a construction hanging in the air (or from a wall). The main part of the entry shaft is in the left image, and there is seen that the bottom of the shaft is also the end of a corridor coming from the left. The corridor under the ledge continues right under the construction and then there is a step down where another corridor leads to the right edge. Above the gap in the first ledge there is another thin ledge. This ledge is a continuation to the left of the top of the construction which then continues to the right as a corridor under another ledge at the very top of the image. This ledge stops before the construction ends with a wall coming up to the height of this third ledge, so there are just white above the wall and ledge. To the left there is a broader "shaft" up above the first ledge to the left of the two top ledges, and the room extends into the left image here. On the right side of the wall on the construct in the right part of the image there is a broad shaft going down, just barely contained inside the right edge where there is the edge of another wall. At the bottom the shaft tightens to only half the width ass the construction becomes wider here. At the bottom the right wall ends and the shaft enters the corridor mentioned before, which goes into the image to the left as it does also at the top above the right wall. The maze also continues in the image above | |||||
| (1077, 1102) | 77 | 28 | Destroyer Bridge | Inside the Destroyer: Room, corridor and shaft | Y | 1 | Prince of Persia maze: This is above the entrance shaft to the maze (a large room) that resembles level 1 of the computer game Prince of Persia. The left part of this image is a broad high room (shaft like, but too broad to be a normal shaft). At the bottom of this room Cueball hangs suspended in midair. In the image below it can be seen that he has just jumped of a thin ledge to the right. Above him to the right there is a square construction, with a small step to the right. Above it there is a corridor where a Cueball is standing looking left with a coin in front of him. This is the highest level any corridors reach in the maze. There are two steps down towards right, both the floor and the corridor ceiling, the last going down to a thin ledge forming a corridor going right | |||
| (1077, 1103) | 77 | 29 | Destroyer Bridge | Black | Black, can be seen, inside the Destroyer | |||||
| (1077, 1104) | 77 | 30 | Destroyer Bridge | Black | Black, can be seen, inside the Destroyer | |||||
| (1077, 1105) | 77 | 31 | Destroyer Bridge | Top hull of the Destroyer, under bridge | Above the hull of the Destroyer. At the bottom of this image the hull of the Destroyer can be seen gently increasing its size towards right. The right part of this part of the hull is below the bridge | |||||
| (1077, 1106) | 77 | 32 | Destroyer Bridge | White | Empty air above the Destroyer, half is under the overhang of the bridge | |||||
| (1077, 1107) | 77 | 33 | Destroyer Bridge | Top hull of the Destroyer with room, under bridge | Y | 2 | Tarkin’s room: Above the hull of the Destroyer. To the left there is empty air, but halfway to the middle the Destroyers hull comes into the image, coming straight out from the right edge. Below this there is also empty air as this is under the bridge overhang. The bridge is thus the part of the hull that can be seen. Where it stops going from right to left, and begins going straight up there is a coin. There is a small section going a little further out left, than at the bottom, and then back in again. At the top of the image there is a room that extends even a little further to the left. Two Cueball like guys walk left towards the end of the bridge, the left Cueball looks back over his shoulder at the right, while speaking. But the text is only in the image above. (From the text we learn that the last Cueball is Tarkin). They are walking towards what might be some control panel to the left and about this panel there is a coin | |||
| (1077, 1108) | 77 | 34 | Destroyer Bridge | Top hull of the Destroyer with room | Y | Tarkin’s room: Above the hull of the Destroyer. To the left there is empty air, but halfway to the middle the Destroyers hull comes into the image, coming straight up from the bottom edge continuing out the top. This is the bridge section. At the bottom of the image there is a room. In the room can be seen the text spoken by Cueball and Tarkin in the image below (where there is a coin). The front part of the bridge toward air, is making two steps in and out above this room | ||||
| (1077, 1109) | 77 | 35 | Destroyer Bridge | Top hull of the Destroyer with room | Y | Y | Darth Vader on the bridge: Above the hull of the Destroyer. To the left there is empty air, but halfway to the middle the Destroyers hull comes into the image, coming straight up from the bottom edge continuing out the top. There is a big room extending right of this image. Farthest left at a big window stands Cueball looking out while having his hands on the control board standing as a small black trapeze-like structure in front of the window. Behind him to the right is Darth Vader with his hand lifted talking to Hairy. The front part of the bridge toward air, is extending towards right at the bottom to make room for this The Bridge room, and it goes in again above. There are two small steps in above and below this room extension. Above and below these the hull is straight up and down | |||
| (1077, 1110) | 77 | 36 | Destroyer Bridge | Top hull of the Destroyer with room | Y | Y | Y | Globe of Death: Above the hull of the Destroyer. To the left there is empty air, but halfway to the middle the Destroyers hull comes into the image from below. Just inside the image the hull then continues right in a platform on top of the bridge, that ends at the far right where a wall comes up, but this wall stops before reaching a the visible part of the Globe of Death at the top of the bridge, a section of circle which encloses the top right corner is thus inside this huge room. Below on the platform is Cueball looking at Megan fixing a parabolic disc for satellite TV. The disk sits on a tall slim box with two wires going in and out of it from top to bottom. She talks to him | ||
| (1077, 1111) | 77 | 37 | Destroyer Bridge | Top hull of the Destroyer with room | Y | Globe of Death: Above the hull of the Destroyer. To the left there is empty air outside the hull, but most of this image is inside the Globe of Death at the top of the bridge with. The rooms left wall describes a section of a circle that goes from the top right of the middle down to the middle of the image at the bottom. At the very top is Megan’s head pointing down, the rest of her is cut off at the top edge. (In the image above it can be seen that she is racing left and down the slope on a bike) | ||||
| (1077, 1112) | 77 | 38 | Destroyer Bridge | Top hull of the Destroyer with room | Y | Y | Globe of Death: Above the hull of the Destroyer. Most of the image is empty air outside the hull, but the bottom right corner of the image is inside the Globe of Death at the top of the bridge. The room’s top wall describes a small section of a circle that goes around this corner. At the bottom left of this ceiling is Megan, without a head as it is cut off at the bottom edge. She is racing left and down the slope on a bike with four speeding lines behind her | |||
| (1078, 1069) | 78 | -5 | Ground level right of pyramid | Black | Black, never seen, below lowest visible terrain, bottom images, with white line at the bottom | |||||
| (1078, 1070) | 78 | -4 | Ground level right of pyramid | Black | Black, never seen, below lowest visible terrain | |||||
| (1078, 1071) | 78 | -3 | Ground level right of pyramid | Black | Black, never seen, below lowest visible terrain | |||||
| (1078, 1072) | 78 | -2 | Ground level right of pyramid | Black | Black, never seen, below ground level right of pyramid | |||||
| (1078, 1073) | 78 | -1 | Ground level right of pyramid | Black | Black, can be seen, below ground level right | |||||
| (1078, 1074) | 78 | 0 | Ground level right of pyramid | Terrain | Y | Grassy ground with a small pile of stones | ||||
| (1078, 1075) | 78 | 1 | Ground level right of pyramid | White | Empty air above ground level right of the pyramid | |||||
| (1078, 1076) | 78 | 2 | Ground level right of pyramid | White | Empty air above ground level right of the pyramid | |||||
| (1078, 1085) | 78 | 11 | Destroyer Bridge | White | Empty air beneath the Destroyer bridge | |||||
| (1078, 1086) | 78 | 12 | Destroyer Bridge | White | Empty air beneath the Destroyer bridge | |||||
| (1078, 1087) | 78 | 13 | Destroyer Bridge | White | Empty air beneath the Destroyer bridge | |||||
| (1078, 1088) | 78 | 14 | Destroyer Bridge | Bottom hull of the Destroyer | Below the hull of the Destroyer. At the top of this image the hull of the Destroyer can be seen, gently increasing its size towards right | |||||
| (1078, 1089) | 78 | 15 | Destroyer Bridge | Black | Black, can be seen, inside the Destroyer | |||||
| (1078, 1090) | 78 | 16 | Destroyer Bridge | Black | Black, never seen, inside the Destroyer | |||||
| (1078, 1091) | 78 | 17 | Destroyer Bridge | Black | Black, can be seen, inside the Destroyer | |||||
| (1078, 1092) | 78 | 18 | Destroyer Bridge | Inside the Destroyer: Corridor | A corridor goes through the image below the center; it is very uneven and goes a little up and down | |||||
| (1078, 1093) | 78 | 19 | Destroyer Bridge | Black | Black, can be seen, inside the Destroyer | |||||
| (1078, 1094) | 78 | 20 | Destroyer Bridge | Inside the Destroyer: Room | Y | Giant ant rooms: At the very top of this image is a raised pedestal and on top of this sits a giant ant queen. Most of her body is cut off at the top edge, but all three sections of her are visible, including the tip of her head and her six legs. Just in front of her head is a small black dot, this is the tip of one of her antennas. In the top left corner is also a small black dot, this is the line going from Cueball just inside the left image up to the text he speaks in the images above and above left. The ant is also talking to him. It faces him to the left. The pedestal is already two steps up from the floor of this large room with a domed ceiling, but these things can only be seen in the images above, left and right | ||||
| (1078, 1095) | 78 | 21 | Destroyer Bridge | Inside the Destroyer: Room | Y | Y | Giant ant rooms: This is the main part of the central (of three) rooms with the giant ant queen who resides in the middle of this picture, taking up more than half the length of the picture. The domed ceiling above her is flat in the central part, where it has reached the center of the image. But at the sides it can be seen to bend down again. Most of the queen’s body is inside this picture, all three sections, but the bottom part of her is cut off at the bottom edge. Also her two long antennas pointing left are almost entirely inside this image. At the very left part of the text that Cueball (in the image below to the left) can be seen, but the rest is in the image to the left. The queen answers him | |||
| (1078, 1096) | 78 | 22 | Destroyer Bridge | Black | Black, can be seen, inside the Destroyer | |||||
| (1078, 1097) | 78 | 23 | Destroyer Bridge | Black | Black, never seen, inside the Destroyer | |||||
| (1078, 1098) | 78 | 24 | Destroyer Bridge | Black | Black, never seen, inside the Destroyer | |||||
| (1078, 1099) | 78 | 25 | Destroyer Bridge | Black | Black, never seen, inside the Destroyer | |||||
| (1078, 1100) | 78 | 26 | Destroyer Bridge | Black | Black, can be seen, inside the Destroyer | |||||
| (1078, 1101) | 78 | 27 | Destroyer Bridge | Inside the Destroyer: Room, corridor and shaft | Prince of Persia maze: This is part of the maze (a large room) that resembles level 1 of the computer game Prince of Persia. At the center a corridor comes from the left and goes to a small room in the right part of the image. The ceiling is at the same height but the floor that takes a step down to double the height. From the middle of this small room a thin shaft goes up to a long corridor like room, which extends into the image above, and right. To the left of the shaft halfway to the left edge the room enters a corridor to the left. Only the floor is visible. | |||||
| (1078, 1102) | 78 | 28 | Destroyer Bridge | Inside the Destroyer: Room, corridor and shaft | Prince of Persia maze: This is part of the maze (a large room) that resembles level 1 of the computer game Prince of Persia. To the left at the bottom two corridors enters, the bottom one separated from the top by a thin ledge. This is an extension from the image to the left, and the bottom corridor also extends in the image below. Half way to the middle there is a small hole in the ledge, but after this the ledge continues to a black structure coming out of the right edge. There is a step up and then the corridor goes out right. The corridor below the ledge goes through the entire image | |||||
| (1078, 1103) | 78 | 29 | Destroyer Bridge | Black | Black, can be seen, inside the Destroyer | |||||
| (1078, 1104) | 78 | 30 | Destroyer Bridge | Black | Black, can be seen, inside the Destroyer | |||||
| (1078, 1105) | 78 | 31 | Destroyer Bridge | Top hull of the Destroyer, under bridge | Above the hull of the Destroyer. At the bottom of this image the hull of the Destroyer can be seen gently increasing its size towards right until before the middle when it slopes very sharply up and right out of the top edge of the image. This part of the hull is below the overhang of the bridge | |||||
| (1078, 1106) | 78 | 32 | Destroyer Bridge | Top hull of the Destroyer with corridor, under bridge | Y | Y | 1 | Above the hull of the Destroyer. To the left there is empty air, but just past the middle the Destroyers hull comes into the image from below sloping very steeply up and out at the top edge. At the top of this sloping wall there is a corridor going into the Destroyer. Where the corridor exits the hull there is a thin ledge over the sloping hull. A small fence guards the drop down, and behind this fence Ponytail throwing out a paper plane with lines indicates the planes curving path. A coin is floating right over the plane. The whole image is below the overhang of the bridge | ||
| (1078, 1107) | 78 | 33 | Destroyer Bridge | Top hull of the Destroyer with room, under bridge | Tarkin’s room: Above the hull of the Destroyer. The empty air in this image is actually that under the bridge overhang at the bottom of the image. This ends to the right where the steeply increasing slop reaches the bridge overhang above Ponytail in the image below. The white at the top of the image is the room inside the Destroyer where a Cueball is talking to Tarkin | |||||
| (1078, 1108) | 78 | 34 | Destroyer Bridge | Inside the Destroyer: Room and corridor | Tarkin's room: A corridor enters from the right at the very bottom, part of it being in the image below. At the very left it enters a room, with ceiling just below the center. Inside the room we find Tarkin | |||||
| (1078, 1109) | 78 | 35 | Destroyer Bridge | Inside the Destroyer: Room and corridor | Y | Darth Vader on the bridge: At the bottom right a corridor enters the image and goes into a room to the left that begins before half way past the middle and extends into the image to the left. The ceiling goes halfway past the center. (Inside the room in the next image is Darth Vader at the Destroyers bridge). In the top right corner is the left part of a very low room that extends to the right. It is the box room, with three boxes, only the last to the left visible in this image. | ||||
| (1078, 1110) | 78 | 36 | Destroyer Bridge | Top hull of the Destroyer with room | Y | Y | Y | Globe of Death: Above the hull of the Destroyer. To the bottom left there is a small section of empty air which is outside the hull, but most of this image is inside the Globe of Death at the top of the bridge with black in the bottom third where the globe rest on the ship. The room’s floor describes a section of a circle. From the left on the down slope comes Ponytail racing on an ostrich towards right with a lance and coming the other way towards her is Megan racing left down the right down slope on a bike with another lance. Both of them has four speed lines after them | ||
| (1078, 1111) | 78 | 37 | Destroyer Bridge | White | 1 | Globe of Death: Empty air inside the Destroyers Globe of Death room. There is a coin towards the bottom left, but that is in the middle of the Globe | ||||
| (1078, 1112) | 78 | 38 | Destroyer Bridge | Top hull of the Destroyer with room | Globe of Death: Above the hull of the Destroyer. The bottom part of this image is inside the Globe of Death at the top of the bridge. The rooms ceiling describes a small section of a circle that goes from left halfway down from the middle to right just above the bottom. At the very top of this circle, there is a flat piece, where the wall is thinner, as it has a perfect curve on the inside. This flat piece of hull is both the highest point on the hull but also the highest solid (or black in any other way) part of the image, even a little higher up than the top of the floating rock island | |||||
| (1079, 1069) | 79 | -5 | Ground level right of pyramid | Black | Black, never seen, below lowest visible terrain, bottom images, with white line at the bottom | |||||
| (1079, 1070) | 79 | -4 | Ground level right of pyramid | Black | Black, never seen, below lowest visible terrain | |||||
| (1079, 1071) | 79 | -3 | Ground level right of pyramid | Black | Black, never seen, below lowest visible terrain | |||||
| (1079, 1072) | 79 | -2 | Ground level right of pyramid | Black | Black, never seen, below ground level right of pyramid | |||||
| (1079, 1073) | 79 | -1 | Ground level right of pyramid | Black | Black, can be seen, below ground level right | |||||
| (1079, 1074) | 79 | 0 | Ground level right of pyramid | Terrain | Grassy ground | |||||
| (1079, 1075) | 79 | 1 | Ground level right of pyramid | White | Empty air above ground level right of the pyramid | |||||
| (1079, 1076) | 79 | 2 | Ground level right of pyramid | White | Empty air above ground level right of the pyramid | |||||
| (1079, 1085) | 79 | 11 | Destroyer Bridge | White | Empty air beneath the Destroyer bridge | |||||
| (1079, 1086) | 79 | 12 | Destroyer Bridge | White | Empty air beneath the Destroyer bridge | |||||
| (1079, 1087) | 79 | 13 | Destroyer Bridge | White | Empty air beneath the Destroyer bridge | |||||
| (1079, 1088) | 79 | 14 | Destroyer Bridge | Bottom hull of the Destroyer | Below the hull of the Destroyer. At the top of this image the hull of the Destroyer can be seen, gently increasing its size towards right | |||||
| (1079, 1089) | 79 | 15 | Destroyer Bridge | Black | Black, can be seen, inside the Destroyer | |||||
| (1079, 1090) | 79 | 16 | Destroyer Bridge | Black | Black, never seen, inside the Destroyer | |||||
| (1079, 1091) | 79 | 17 | Destroyer Bridge | Black | Black, can be seen, inside the Destroyer | |||||
| (1079, 1092) | 79 | 18 | Destroyer Bridge | Inside the Destroyer: Corridor | A corridor goes through the image below the center; it is very uneven and goes a little up and down | |||||
| (1079, 1093) | 79 | 19 | Destroyer Bridge | Black | Black, can be seen, inside the Destroyer | |||||
| (1079, 1094) | 79 | 20 | Destroyer Bridge | Inside the Destroyer: Room and corridor | 1 | Giant ant rooms: To the right is most of a small room with floor at the top of the image and a domed ceiling going up, just into the image above. On the floor in the middle of the room there is a coin. A corridor exits left where the room ends in the middle of the image and halfway to the left it enters another much larger domed room. The edges of the domes where they come down to the corridor juts out beneath the ceiling of the corridor, (which also continues after the room in the left image). The right room is the last of three, the one where the giant ant queen resides in the next image to the left. The beginning of a three step pedestal, that begins halfway just inside the left room, the second step can just be seen at the left edge. The queen ant in the next image is on top of the last step | ||||
| (1079, 1095) | 79 | 21 | Destroyer Bridge | Inside the Destroyer: Room | Giant ant rooms: In the bottom right part of this image is the top of a small domed room making a half circle between the middle and the right edge (there is a coin in the room in the image below). In the left part of the image towards left the domed ceiling, of the giant ant queen in the next image to the right, comes up almost to the center at the left edge | |||||
| (1079, 1096) | 79 | 22 | Destroyer Bridge | Black | Black, can be seen, inside the Destroyer | |||||
| (1079, 1097) | 79 | 23 | Destroyer Bridge | Black | Black, never seen, inside the Destroyer | |||||
| (1079, 1098) | 79 | 24 | Destroyer Bridge | Black | Black, never seen, inside the Destroyer | |||||
| (1079, 1099) | 79 | 25 | Destroyer Bridge | Black | Black, never seen, inside the Destroyer | |||||
| (1079, 1100) | 79 | 26 | Destroyer Bridge | Black | Black, can be seen, inside the Destroyer | |||||
| (1079, 1101) | 79 | 27 | Destroyer Bridge | Inside the Destroyer: Room, corridor and shaft | Prince of Persia maze: This is part of the maze (a large room) that resembles level 1 of the computer game Prince of Persia. At the top left a room extends into the left and above images. Just inside there is several thin ledges above each other. One hangs suspended just under the top edge, and then one continues the floor of the room over a wall that goes down. Below this ledge there is yet a thin floor, but this goes all the way across to a black structure that hangs in the air (or the wall). The top part of this structure is small rectangle which is connected as the corner of a much larger rectangle, but this with the long side down. Behind the small and above the large rectangle is another small room going into the images above and right. The structure ends just before the right edge, but the floor continues over the edge in a small ledge (which stops just inside the next image. Below is a shaft that goes into a corridor. The corridor begins here below and goes left, but it extends into the image on the right (where the shaft has become wider to the right). To the left the corridor ends in the middle of the image, and on the floor here there are four sharp spikes protruding out. Above them is a shaft up below the ledge that went between the two black structures left and right. Above the spikes there are two steps up, the top step has a thin ledge hanging out over the first step. At the top of this is a corridor going left under the thin ledge above. This stops at the wall of the first structure to the left halfway left of the middle | |||||
| (1079, 1102) | 79 | 28 | Destroyer Bridge | Inside the Destroyer: Room, corridor and shaft | Y | 1 | Prince of Persia maze: This is part of the maze (a large room) that resembles level 1 of the computer game Prince of Persia. At the bottom a corridor enters and goes through the entire image, the corridor also extends in the image below. Below the center to the left another corridor enters and continues over a thin ledge. The ledge stops before reaching a wall in the middle, where a ledge comes the other way out. Below these ledges is another thin floor that creates a small corridor going back left. The thin floor separates this corridor from the one at the bottom. The small corridor stops at a black wall under the ledge above halfway to the left edge from the middle. Here is a coin. The top corridor takes a step over the top ledge and continues as a corridor to exit at the right. Just at this right edge of the image there is a small black part of a circle. This is the front of Cueballs head that is cut off by the edge | |||
| (1079, 1103) | 79 | 29 | Destroyer Bridge | Black | Black, can be seen, inside the Destroyer | |||||
| (1079, 1104) | 79 | 30 | Destroyer Bridge | Black | Black, can be seen, inside the Destroyer | |||||
| (1079, 1105) | 79 | 31 | Destroyer Bridge | Black | Black, can be seen, inside the Destroyer | |||||
| (1079, 1106) | 79 | 32 | Destroyer Bridge | Inside the Destroyer: Corridor | A corridor goes through the image at the top | |||||
| (1079, 1107) | 79 | 33 | Destroyer Bridge | Inside the Destroyer: Corridor | A corridor enters from the left at the very top goes through the image, but stopping halfway right past the middle. The ceiling of the corridor is in the image above, and here it can be seen that where it ends it turns into a shaft going up from the end of the corridor | |||||
| (1079, 1108) | 79 | 34 | Destroyer Bridge | Inside the Destroyer: Corridor and shaft | A corridor enters left at the very bottom (part of it being in the image below) going right ending in a shaft past the middle that goes all the way through the image from top to bottom. Above the center another corridor goes out from the shaft to the right | |||||
| (1079, 1109) | 79 | 35 | Destroyer Bridge | Inside the Destroyer: Room, corridor and shaft | Y | Y | The box room: A shaft enters right of the middle of the image from above and goes down through the image. At the bottom a corridor goes out from the shaft to the left leaving the image to the left. At the top a small corridor leads into a very small room, ceiling inside this image just below the top. Here Cueball is sitting on the floor just inside the entrance. There are three square boxes on the floor one behind the other, the last one is in the image to the left where the room extends. Ponytail is sitting on the first box looking down on Cueball who looks up at her | |||
| (1079, 1110) | 79 | 36 | Destroyer Bridge | Inside the Destroyer: Room and shaft | Globe of Death: The top left part of this image is inside the Globe of Death at the top of the bridge. To the right there is a shaft going straight down (from the exit from the Globe in the image above) | |||||
| (1079, 1111) | 79 | 37 | Destroyer Bridge | Top hull of the Destroyer with room and corridor | Globe of Death: The left part of this image is inside the Globe of Death at the top of the bridge. Its right wall is a section of a circle that begins at the top left just inside the image and exits just left of the middle at the bottom. Just inside at the very bottom is a corridor that exits the Globe and where it ends right of the middle the top of a shaft can be seen going down. To the right of the globe above the shaft is the top of the hull going straight right. Just above where the corridor ends to the right there is a very small ledge over a small step, and below the step the hull inclines steeply down right | |||||
| (1079, 1112) | 79 | 38 | Destroyer Bridge | Top hull of the Destroyer with room | Globe of Death: At the very left bottom of this image is a small part of the Globe of Death at the top of the bridge. Its right wall is a section of a circle that just goes around this corner | |||||
| (1080, 1069) | 80 | -5 | Ground level right of pyramid | Black | Black, never seen, below lowest visible terrain, bottom images, with white line at the bottom | |||||
| (1080, 1070) | 80 | -4 | Ground level right of pyramid | Black | Black, never seen, below lowest visible terrain | |||||
| (1080, 1071) | 80 | -3 | Ground level right of pyramid | Black | Black, never seen, below lowest visible terrain | |||||
| (1080, 1072) | 80 | -2 | Ground level right of pyramid | Black | Black, never seen, below ground level right of pyramid | |||||
| (1080, 1073) | 80 | -1 | Ground level right of pyramid | Black | Black, can be seen, below ground level right | |||||
| (1080, 1074) | 80 | 0 | Ground level right of pyramid | Terrain | Grassy ground | |||||
| (1080, 1075) | 80 | 1 | Ground level right of pyramid | White | Empty air above ground level right of the pyramid | |||||
| (1080, 1076) | 80 | 2 | Ground level right of pyramid | White | Empty air above ground level right of the pyramid | |||||
| (1080, 1085) | 80 | 11 | Destroyer Bridge | White | Empty air beneath the Destroyer bridge | |||||
| (1080, 1086) | 80 | 12 | Destroyer Bridge | White | Empty air beneath the Destroyer bridge | |||||
| (1080, 1087) | 80 | 13 | Destroyer Bridge | White | Empty air beneath the Destroyer bridge | |||||
| (1080, 1088) | 80 | 14 | Destroyer Bridge | Bottom hull of the Destroyer | Below the hull of the Destroyer. In the middle of this image the hull of the Destroyer can be seen, gently below the hull of the Destroyer. Increasing its size towards right. | |||||
| (1080, 1089) | 80 | 15 | Destroyer Bridge | Black | Black, can be seen, inside the Destroyer | |||||
| (1080, 1090) | 80 | 16 | Destroyer Bridge | Black | Black, never seen, inside the Destroyer | |||||
| (1080, 1091) | 80 | 17 | Destroyer Bridge | Black | Black, can be seen, inside the Destroyer | |||||
| (1080, 1092) | 80 | 18 | Destroyer Bridge | Inside the Destroyer: Corridor | A corridor goes through the image below the center; it is very uneven and goes a little up and down | |||||
| (1080, 1093) | 80 | 19 | Destroyer Bridge | Black | Black, can be seen, inside the Destroyer | |||||
| (1080, 1094) | 80 | 20 | Destroyer Bridge | Black | Black, can be seen, inside the Destroyer | |||||
| (1080, 1095) | 80 | 21 | Destroyer Bridge | Black | Black, can be seen, inside the Destroyer | |||||
| (1080, 1096) | 80 | 22 | Destroyer Bridge | Black | Black, can be seen, inside the Destroyer | |||||
| (1080, 1097) | 80 | 23 | Destroyer Bridge | Black | Black, never seen, inside the Destroyer | |||||
| (1080, 1098) | 80 | 24 | Destroyer Bridge | Black | Black, never seen, inside the Destroyer | |||||
| (1080, 1099) | 80 | 25 | Destroyer Bridge | Black | Black, never seen, inside the Destroyer | |||||
| (1080, 1100) | 80 | 26 | Destroyer Bridge | Black | Black, can be seen, inside the Destroyer | |||||
| (1080, 1101) | 80 | 27 | Destroyer Bridge | Inside the Destroyer: Room, corridor and shaft | Prince of Persia maze: This is part of the maze (a large room) that resembles level 1 of the computer game Prince of Persia. To the left from below the center and to the top is a shaft. At the bottom it is broader, but from the center it had normal width. It extends into the image to the left (and at the bottom it is a corridor going left). In the upper part it enters a corridor coming from left. There is a thin ledge hanging out over half of the shaft. To the right the corridor moved over a black structure, and under a thin ledge at the very bottom. There is also a corridor on top of this ledge, just inside the image. The entire top of the image extends into the image above. The corridor to the left is so high it could be considered a small room. The right halfway from the middle there is a thin shaft into a tiny square room, extending to normal shaft width at the bottom, where four sharp spikes protrudes. Above the corridor at the very top exits to the right where it continues in the next image to the right | |||||
| (1080, 1102) | 80 | 28 | Destroyer Bridge | Inside the Destroyer: Room, corridor and shaft | Y | Y | 1 | Prince of Persia maze: This is part of the maze (a large room) that resembles level 1 of the computer game Prince of Persia. Two corridors goes through the entire image from left to right, one in the center and one at the very bottom, the bottom one extending into the image below. The top corridor is at the highest level of any corridor in the maze. Just at the left edge of the top corridor is Cueball looking left with a sword pointing down. He is so close to the edge that the very front of his face is cut-off at the edge. To the very right in the top corridor there is a shaft down. A thin ledge juts out over the shafts opening. There is a similar ledge just below this. Both are just contained inside the image, the shaft, however, extends into the right image. Below these ledges there is another ledge, but coming out from the right (wall in the next image). The ledge goes right almost to the middle of the picture, but just after it enters the image from the edge, there is a hole in the ledge, down to the corridor at the bottom. In the left part of this corridor above the bottom one, there is a coin | ||
| (1080, 1103) | 80 | 29 | Destroyer Bridge | Black | Black, can be seen, inside the Destroyer | |||||
| (1080, 1104) | 80 | 30 | Destroyer Bridge | Black | Black, can be seen, inside the Destroyer | |||||
| (1080, 1105) | 80 | 31 | Destroyer Bridge | Inside the Destroyer: Room | Y | Y | Y | 1 | Oxygen pump room: A medium seized room with floor just above the bottom and ceiling just below the middle ends just past the middle to the left and extends into the right image. Hairbun is pointing left while talking to Ponytail to her right. Her face is cut off at the right edge, so Ponytail is also in the right image. She is standing in front of a system of gas containers with several pipes going out from them (one from each of the 8 containers). All the pipes are connected to a larger box at the left end. This box is connected with a thick socket to the wall close to the floor and also a wire comes out from the wall and splits in two before connecting higher up with the box. There is a coin at the farthest end of the room behind the largest box. Hairbun tells that in the event of a fire this system will pump in pure oxygen. The text is cut off at the right edge so less than half of the text is in this image | |
| (1080, 1106) | 80 | 32 | Destroyer Bridge | Inside the Destroyer: Corridor | A corridor goes through the image at the top | |||||
| (1080, 1107) | 80 | 33 | Destroyer Bridge | Black | Black, can be seen, inside the Destroyer | |||||
| (1080, 1108) | 80 | 34 | Destroyer Bridge | Inside the Destroyer: Room and corridor | Y | Y | Y | 6 | Darth Vader's gold bullion reserves: A corridor enters from the left above the center and before halfway to the middle enters a low ceilinged room, ceiling just inside at the top, where Cueball, talking to Megan behind him to the right, is pointing towards five black boxes with large white dollar signs and there are also three smaller bags with similar but smaller dollar signs. There are six coins here located left of Cueball; one just before the first bag, one on the step of the first box, one above and between the two top boxes, one behind the two bags on the top left box, and one on the first step down and one on the second step down as they are formed by the last two boxes. The images extends to the right and part of the text is cut off at the right edge | |
| (1080, 1109) | 80 | 35 | Destroyer Bridge | Black | Black, can be seen, inside the Destroyer | |||||
| (1080, 1110) | 80 | 36 | Destroyer Bridge | Top hull of the Destroyer | Above the hull of the Destroyer. To the left the hull is above the edge of the image, but then it comes down into the image just before the middle in a steep incline. When this stops just before the right edge of the image the hull takes a straight step down and then the hull continues straight right | |||||
| (1080, 1111) | 80 | 37 | Destroyer Bridge | Top hull of the Destroyer | Above the hull of the Destroyer. At the bottom left of this image the hull of the Destroyer can be seen sloping steeply down towards right, exiting at the bottom of the image before the middle | |||||
| (1080, 1112) | 80 | 38 | Destroyer Bridge | White | Empty air above the Destroyer | |||||
| (1081, 1069) | 81 | -5 | Ground level right of pyramid | Black | Black, never seen, below lowest visible terrain, bottom images, with white line at the bottom | |||||
| (1081, 1070) | 81 | -4 | Ground level right of pyramid | Black | Black, never seen, below lowest visible terrain | |||||
| (1081, 1071) | 81 | -3 | Ground level right of pyramid | Black | Black, never seen, below lowest visible terrain | |||||
| (1081, 1072) | 81 | -2 | Ground level right of pyramid | Black | Black, never seen, below ground level right of pyramid | |||||
| (1081, 1073) | 81 | -1 | Ground level right of pyramid | Black | Black, can be seen, below ground level right | |||||
| (1081, 1074) | 81 | 0 | Ground level right of pyramid | Terrain | Y | Two birds flying above the middle of the image. (Above these birds in the image above there is a coin) | ||||
| (1081, 1075) | 81 | 1 | Ground level right of pyramid | White | 1 | Empty air, but a coin is floating in the middle of this image above the two birds that are flying below | ||||
| (1081, 1076) | 81 | 2 | Ground level right of pyramid | White | Empty air above ground level right of the pyramid | |||||
| (1081, 1085) | 81 | 11 | Destroyer Bridge | White | Empty air beneath the Destroyer bridge | |||||
| (1081, 1086) | 81 | 12 | Destroyer Bridge | White | Empty air beneath the Destroyer bridge | |||||
| (1081, 1087) | 81 | 13 | Destroyer Bridge | White | Empty air beneath the Destroyer bridge | |||||
| (1081, 1088) | 81 | 14 | Destroyer Bridge | Bottom hull of the Destroyer | Below the hull of the Destroyer. In the middle of this image the hull of the Destroyer can be seen, gently below the hull of the Destroyer. Increasing its size towards right. | |||||
| (1081, 1089) | 81 | 15 | Destroyer Bridge | Black | Black, can be seen, inside the Destroyer | |||||
| (1081, 1090) | 81 | 16 | Destroyer Bridge | Black | Black, never seen, inside the Destroyer | |||||
| (1081, 1091) | 81 | 17 | Destroyer Bridge | Black | Black, can be seen, inside the Destroyer | |||||
| (1081, 1092) | 81 | 18 | Destroyer Bridge | Inside the Destroyer: Corridor | A corridor goes through the image below the center; it is very uneven and goes a little up and down | |||||
| (1081, 1093) | 81 | 19 | Destroyer Bridge | Black | Black, can be seen, inside the Destroyer | |||||
| (1081, 1094) | 81 | 20 | Destroyer Bridge | Black | Black, never seen, inside the Destroyer | |||||
| (1081, 1095) | 81 | 21 | Destroyer Bridge | Black | Black, never seen, inside the Destroyer | |||||
| (1081, 1096) | 81 | 22 | Destroyer Bridge | Black | Black, never seen, inside the Destroyer | |||||
| (1081, 1097) | 81 | 23 | Destroyer Bridge | Black | Black, never seen, inside the Destroyer | |||||
| (1081, 1098) | 81 | 24 | Destroyer Bridge | Black | Black, never seen, inside the Destroyer | |||||
| (1081, 1099) | 81 | 25 | Destroyer Bridge | Black | Black, never seen, inside the Destroyer | |||||
| (1081, 1100) | 81 | 26 | Destroyer Bridge | Black | Black, can be seen, inside the Destroyer | |||||
| (1081, 1101) | 81 | 27 | Destroyer Bridge | Inside the Destroyer: Room and corridor | Prince of Persia maze: This is part of the maze (a large room) that resembles level 1 of the computer game Prince of Persia. A corridor enters from the left at the very top, most of it being in the image above. Before the middle it turns into a shaft going one step down, to another corridor which continues at the top through the image. Past the middle another shaft comes down into the corridor from above. After this shaft begins the exit corridor that leads straight to the right end of the maze | |||||
| (1081, 1102) | 81 | 28 | Destroyer Bridge | Inside the Destroyer: Room, corridor and shaft | Y | Prince of Persia maze: This is above the exit corridor of this maze (a large room) that resembles level 1 of the computer game Prince of Persia. A corridor enters from the left at the center. It goes over the top of a black structure with a small square on top of the end of a rectangular structure twice the length. After that the structure becomes even deeper. On this step down before it becomes deeper stands Cueball looking right. The corridor goes above his head, over to a thin ledge that juts out from another rectangular structure jutting out from the wall to the right. The corridor ends there, halfway past the middle to the right. From Cueball there is a corridor under the ledge, and at the wall there is a shaft down to another corridor going right over a shaft down to the exit corridor in the image below. The corridor goes past the haft, where there is another small ledge hanging over the shaft, but then this corridor also ends close to the right side. This is the piece of the maze that are furthest right, while not being part of the exit corridor below. The vey left a shaft is going down from the corridor. Most of it is in the image to the left. Just above the bottom, there is a thin ledge coming out left exiting the image left. Below this there is a corridor that ends right under Cueball (where it goes down to the exit corridor in the image below | ||||
| (1081, 1103) | 81 | 29 | Destroyer Bridge | Black | Black, can be seen, inside the Destroyer | |||||
| (1081, 1104) | 81 | 30 | Destroyer Bridge | Black | Black, can be seen, inside the Destroyer | |||||
| (1081, 1105) | 81 | 31 | Destroyer Bridge | Inside the Destroyer: Room, corridor and shaft | Y | Y | Oxygen pump room: A medium seized room with floor just above the bottom and ceiling just below the middle, extends into the left image, and ends at the middle to the right where a corridor leads out of the right edge of the image. Just at this very right edge a shaft can be seen (only barely) going from the corridor at the bottom and up to the top. It does continue up, but due to a small protrusion on the shaft wall right at the top, it seems like the shaft stops there. Ponytail is talking to Hairbun, but only her face is in this image the rest is cut off at the left edge. Most of Hairbun's text is in this image, but part of it is in the next image to the left. All Ponytail's text is in this image. (In the next room there is a coin an a system than in the event of a fire will pump in pure oxygen) | |||
| (1081, 1106) | 81 | 32 | Destroyer Bridge | Inside the Destroyer: Corridor | A corridor goes through the image at the top | |||||
| (1081, 1107) | 81 | 33 | Destroyer Bridge | Black | Black, can be seen, inside the Destroyer | |||||
| (1081, 1108) | 81 | 34 | Destroyer Bridge | Inside the Destroyer: Room and corridor | Y | Darth Vader's gold bullion reserves: A corridor enters from the right above the center and past the center towards left it enters a low ceilinged room, ceiling just inside at the top, where Cueball, talking to Megan, but that is in the next image to the left where the room extends. But some of their text can be seen in this image. (In the image to the left there are 6 coins on top of gold bags and boxes) | ||||
| (1081, 1109) | 81 | 35 | Destroyer Bridge | Black | Black, can be seen, inside the Destroyer | |||||
| (1081, 1110) | 81 | 36 | Destroyer Bridge | Top hull of the Destroyer | Y | Above the hull of the Destroyer. At the center of this image the hull of the Destroyer can be seen going straight right, and then halfway past the middle to the right taking a large step down below to just above the edge of this image and then it continues straight right. On the hull at the top of the step lies a big crocodile looking right | ||||
| (1081, 1111) | 81 | 37 | Destroyer Bridge | White | Empty air above the Destroyer | |||||
| (1081, 1112) | 81 | 38 | Destroyer Bridge | White | Empty air above the Destroyer | |||||
| (1082, 1069) | 82 | -5 | Ground level right of pyramid | Black | Black, never seen, below lowest visible terrain, bottom images, with white line at the bottom | |||||
| (1082, 1070) | 82 | -4 | Ground level right of pyramid | Black | Black, never seen, below lowest visible terrain | |||||
| (1082, 1071) | 82 | -3 | Ground level right of pyramid | Black | Black, never seen, below lowest visible terrain | |||||
| (1082, 1072) | 82 | -2 | Ground level right of pyramid | Black | Black, never seen, below ground level right of pyramid | |||||
| (1082, 1073) | 82 | -1 | Ground level right of pyramid | Black | Black, can be seen, below ground level right | |||||
| (1082, 1074) | 82 | 0 | Ground level right of pyramid | Terrain | Grassy ground | |||||
| (1082, 1075) | 82 | 1 | Ground level right of pyramid | White | Empty air above ground level right of the pyramid | |||||
| (1082, 1076) | 82 | 2 | Ground level right of pyramid | White | Empty air above ground level right of the pyramid | |||||
| (1082, 1085) | 82 | 11 | Destroyer Bridge | White | Empty air beneath the Destroyer bridge | |||||
| (1082, 1086) | 82 | 12 | Destroyer Bridge | White | Empty air beneath the Destroyer bridge | |||||
| (1082, 1087) | 82 | 13 | Destroyer Bridge | White | Empty air beneath the Destroyer bridge | |||||
| (1082, 1088) | 82 | 14 | Destroyer Bridge | Bottom hull of the Destroyer | Y | Y | Below the hull of the Destroyer. In the middle of this image the hull of the Destroyer can be seen, gently below the hull of the Destroyer. Increasing its size towards right. To the left Megan hangs on to the hull. She is fidgeting trying to hold on with both arms and makes a sound | |||
| (1082, 1089) | 82 | 15 | Destroyer Bridge | Black | Black, can be seen, inside the Destroyer | |||||
| (1082, 1090) | 82 | 16 | Destroyer Bridge | Black | Black, never seen, inside the Destroyer | |||||
| (1082, 1091) | 82 | 17 | Destroyer Bridge | Black | Black, can be seen, inside the Destroyer | |||||
| (1082, 1092) | 82 | 18 | Destroyer Bridge | Inside the Destroyer: Corridor | A corridor goes through the image below the center; it is very uneven and goes a little up and down | |||||
| (1082, 1093) | 82 | 19 | Destroyer Bridge | Black | Black, can be seen, inside the Destroyer | |||||
| (1082, 1094) | 82 | 20 | Destroyer Bridge | Black | Black, never seen, inside the Destroyer | |||||
| (1082, 1095) | 82 | 21 | Destroyer Bridge | Black | Black, never seen, inside the Destroyer | |||||
| (1082, 1096) | 82 | 22 | Destroyer Bridge | Black | Black, never seen, inside the Destroyer | |||||
| (1082, 1097) | 82 | 23 | Destroyer Bridge | Black | Black, never seen, inside the Destroyer | |||||
| (1082, 1098) | 82 | 24 | Destroyer Bridge | Black | Black, never seen, inside the Destroyer | |||||
| (1082, 1099) | 82 | 25 | Destroyer Bridge | Black | Black, never seen, inside the Destroyer | |||||
| (1082, 1100) | 82 | 26 | Destroyer Bridge | Black | Black, can be seen, inside the Destroyer | |||||
| (1082, 1101) | 82 | 27 | Destroyer Bridge | Inside the Destroyer: Room | Y | Y | Prince of Persia maze: This is right exit of the maze (a large room to the left) that resembles level 1 of the computer game Prince of Persia. A corridor enters from the left at the top. At the entrance guarding the exit is Cueball with a sword half raised for fight. The exit of the maze is a small room that begins past the middle and extend in to the right image and above. It is a small rectangular room, with a last little ledge coming out over the entrance corridor to the left; the last remnant of the maze. (A shaft goes up in the ceiling in the image above) | |||
| (1082, 1102) | 82 | 28 | Destroyer Bridge | Inside the Destroyer: Room and shaft | Prince of Persia maze: This is the top of the right exit of the maze (which is a large room to the left) that resembles level 1 of the computer game Prince of Persia. The image is mainly black, but at the bottom right is the exit of the maze in a small room that begins past the middle and extend in to the right image and below. It is a small rectangular room and in the very right is part of the shaft that goes through the image, most of the shaft being in the next image to the right | |||||
| (1082, 1103) | 82 | 29 | Destroyer Bridge | Black - almost | Black inside the Destroyer except for the shaft that enters in the very right part of the image from above and goes down through the image, most of the shaft being in the next image to the right | |||||
| (1082, 1104) | 82 | 30 | Destroyer Bridge | Black - almost | Black inside the Destroyer except for the shaft that enters in the very right part of the image from above and goes down through the image, most of the shaft being in the next image to the right | |||||
| (1082, 1105) | 82 | 31 | Destroyer Bridge | Inside the Destroyer: Room, corridor and shaft | Two coins on top room: Both the left and right edges of this image has shaft running from the top and down. The one on the right all the way through, the one on the left stops just above the bottom of the image, where it turns into a corridor going left into the left image. Both corridors extends into the next images left and right, the one to the right has most of the shaft in the next image right, the one to the left only just enters the left image, at the top left corner it is even possible to see the left wall as it juts a little out there. The two shafts are connected at the very top of this image. A corridor goes in from each side, and in the middle there is a small rectangular room, only the floor is visible here, the rest extends up in the image above. (Above there are two coins, one above the other) | |||||
| (1082, 1106) | 82 | 32 | Destroyer Bridge | Inside the Destroyer: Room, corridor and shaft | 2 | Two coins on top room: Both the left and right edges of this image has shaft running from the bottom and up. The one on the right all the way through, the one on the left stops just below the top of the image, where it turns into a corridor going left into the left image. Both corridors extends into the next images left and right, the one to the right has most of the shaft in the next image right, the one to the left only just enters the left image in some sections as it is possible to see part of the left wall, both at the bottom left corner and in a longer section above the middle. The two shafts are connected at the bottom of this image. A corridor goes in from each side, and in the middle there is a small rectangular room, the floor is not visible as it is in the image below. In the middle of the room there are two coins, one just above the bottom edge and the other one on top of this near the ceiling | ||||
| (1082, 1107) | 82 | 33 | Destroyer Bridge | Black - almost | Black inside the Destroyer except for the shaft that enters in the very right part of the image from above and goes down through the image, most of the shaft being in the next image to the right | |||||
| (1082, 1108) | 82 | 34 | Destroyer Bridge | Inside the Destroyer: Corridor and shaft | A corridor enters left above the center going right across the image. At the very right edge a shaft goes down through the image forming a lying T. Most of the shaft is in the image to the left | |||||
| (1082, 1109) | 82 | 35 | Destroyer Bridge | Inside the Destroyer: Room | Emperor’s room: This almost black image only has a small white section to the right, where the left part of the Emperor room can be seen coming up from below and ending at the ceiling just above the center. The emperor and his bird are in the image to the right | |||||
| (1082, 1110) | 82 | 36 | Destroyer Bridge | Top hull of the Destroyer | Above the hull of the Destroyer. At the very bottom of this image the hull of the Destroyer can be seen going straight right | |||||
| (1082, 1111) | 82 | 37 | Destroyer Bridge | White | Empty air above the Destroyer | |||||
| (1082, 1112) | 82 | 38 | Destroyer Bridge | White | Empty air above the Destroyer | |||||
| (1083, 1069) | 83 | -5 | Ground level right of pyramid | Black | Black, never seen, below lowest visible terrain, bottom images, with white line at the bottom | |||||
| (1083, 1070) | 83 | -4 | Ground level right of pyramid | Black | Black, never seen, below lowest visible terrain | |||||
| (1083, 1071) | 83 | -3 | Ground level right of pyramid | Black | Black, never seen, below lowest visible terrain | |||||
| (1083, 1072) | 83 | -2 | Ground level right of pyramid | Black | Black, never seen, below ground level right of pyramid | |||||
| (1083, 1073) | 83 | -1 | Ground level right of pyramid | Black | Black, can be seen, below ground level right | |||||
| (1083, 1074) | 83 | 0 | Ground level right of pyramid | Terrain | Grassy ground | |||||
| (1083, 1075) | 83 | 1 | Ground level right of pyramid | White | Empty air above ground level right of the pyramid | |||||
| (1083, 1076) | 83 | 2 | Ground level right of pyramid | White | Empty air above ground level right of the pyramid | |||||
| (1083, 1085) | 83 | 11 | Destroyer Bridge | White | Empty air beneath the Destroyer bridge | |||||
| (1083, 1086) | 83 | 12 | Destroyer Bridge | White | Empty air beneath the Destroyer bridge | |||||
| (1083, 1087) | 83 | 13 | Destroyer Bridge | White | Empty air beneath the Destroyer bridge | |||||
| (1083, 1088) | 83 | 14 | Destroyer Bridge | Bottom hull of the Destroyer | Below the hull of the Destroyer. In the middle of this image the hull of the Destroyer can be seen, gently below the hull of the Destroyer. Below the hull of the Destroyer. Increasing its size towards right. | |||||
| (1083, 1089) | 83 | 15 | Destroyer Bridge | Black | Black, can be seen, inside the Destroyer | |||||
| (1083, 1090) | 83 | 16 | Destroyer Bridge | Black | Black, can be seen, inside the Destroyer | |||||
| (1083, 1091) | 83 | 17 | Destroyer Bridge | Black | Black, can be seen, inside the Destroyer | |||||
| (1083, 1092) | 83 | 18 | Destroyer Bridge | Inside the Destroyer: Corridor | A corridor goes through the image below the center; it is very uneven and goes a little up and down | |||||
| (1083, 1093) | 83 | 19 | Destroyer Bridge | Black | Black, can be seen, inside the Destroyer | |||||
| (1083, 1094) | 83 | 20 | Destroyer Bridge | Black | Black, can be seen, inside the Destroyer | |||||
| (1083, 1095) | 83 | 21 | Destroyer Bridge | Black | Black, can be seen, inside the Destroyer | |||||
| (1083, 1096) | 83 | 22 | Destroyer Bridge | Black | Black, can be seen, inside the Destroyer | |||||
| (1083, 1097) | 83 | 23 | Destroyer Bridge | Black | Black, can be seen, inside the Destroyer | |||||
| (1083, 1098) | 83 | 24 | Destroyer Bridge | Black | Black, can be seen, inside the Destroyer | |||||
| (1083, 1099) | 83 | 25 | Destroyer Bridge | Black | Black, can be seen, inside the Destroyer | |||||
| (1083, 1100) | 83 | 26 | Destroyer Bridge | Black | Black, can be seen, inside the Destroyer | |||||
| (1083, 1101) | 83 | 27 | Destroyer Bridge | Inside the Destroyer: Room | Prince of Persia maze:: Only the top left corner of this image is not black. The white part is the bottom right of the small ante room right of the maze at the right exit | |||||
| (1083, 1102) | 83 | 28 | Destroyer Bridge | Inside the Destroyer: Room and shaft | Prince of Persia maze: At the bottom left is the right part of the small ante room right of the maze at the right exit, which can be seen at the very left where a shaft goes up through the image, part of it being in the image to the left | |||||
| (1083, 1103) | 83 | 29 | Destroyer Bridge | Inside the Destroyer: Corridor and shaft | A corridor enters right at the bottom going left to a shaft that goes down through the image from top to bottom at the very left; part of the shaft is in the image to the left | |||||
| (1083, 1104) | 83 | 30 | Destroyer Bridge | Inside the Destroyer: Shaft | A shaft that goes down through the image from top to bottom at the very left; part of the shaft is in the image to the left | |||||
| (1083, 1105) | 83 | 31 | Destroyer Bridge | Inside the Destroyer: Shaft | A shaft that goes down through the image from top to bottom at the very left; part of the shaft is in the image to the left | |||||
| (1083, 1106) | 83 | 32 | Destroyer Bridge | Inside the Destroyer: Shaft | A shaft that goes down through the image from top to bottom at the very left; part of the shaft is in the image to the left | |||||
| (1083, 1107) | 83 | 33 | Destroyer Bridge | Inside the Destroyer: Shaft | A shaft that goes down through the image from top to bottom at the very left; part of the shaft is in the image to the left | |||||
| (1083, 1108) | 83 | 34 | Destroyer Bridge | Inside the Destroyer: Shaft | A shaft that goes down through the image from top to bottom at the very left; part of the shaft is in the image to the left | |||||
| (1083, 1109) | 83 | 35 | Destroyer Bridge | Inside the Destroyer: Room and shaft | Y | Y | Y | Y | Emperor’s room: A guy with a small black hat (or weird hair) is walking right while talking to the Emperor who walks in front of him, he is in a black cloak. They are looking at a box on legs with two wires coming in from the floor behind the leg closest to the Emperor and two other wires going out the other side of the box. At least one bird is inside it as can be seen from the sounds it makes. Behind the box on a pedestal is a chair facing the box. The chair is up against the right wall. The right wall is just inside, the ceiling is just above the center and the floor is at the very bottom of the image. The left wall extends just into the picture to the left, and at the very bottom left a shaft exits the room down | |
| (1083, 1110) | 83 | 36 | Destroyer Bridge | Top hull of the Destroyer | Above the hull of the Destroyer. At the very bottom of this image the hull of the Destroyer can be seen going straight right | |||||
| (1083, 1111) | 83 | 37 | Destroyer Bridge | White | Empty air above the Destroyer | |||||
| (1083, 1112) | 83 | 38 | Destroyer Bridge | White | Empty air above the Destroyer | |||||
| (1084, 1069) | 84 | -5 | Ground level right of pyramid | Black | Black, never seen, below lowest visible terrain, bottom images, with white line at the bottom | |||||
| (1084, 1070) | 84 | -4 | Ground level right of pyramid | Black | Black, never seen, below lowest visible terrain | |||||
| (1084, 1071) | 84 | -3 | Ground level right of pyramid | Black | Black, never seen, below lowest visible terrain | |||||
| (1084, 1072) | 84 | -2 | Ground level right of pyramid | Black | Black, never seen, below ground level right of pyramid | |||||
| (1084, 1073) | 84 | -1 | Ground level right of pyramid | Black | Black, can be seen, below ground level right | |||||
| (1084, 1074) | 84 | 0 | Ground level right of pyramid | Terrain | Grassy ground | |||||
| (1084, 1075) | 84 | 1 | Ground level right of pyramid | White | Empty air above ground level right of the pyramid | |||||
| (1084, 1076) | 84 | 2 | Ground level right of pyramid | White | Empty air above ground level right of the pyramid | |||||
| (1084, 1085) | 84 | 11 | Destroyer Rear | White | Empty air beneath the Destroyer bridge | |||||
| (1084, 1086) | 84 | 12 | Destroyer Rear | White | Empty air beneath the Destroyer bridge | |||||
| (1084, 1087) | 84 | 13 | Destroyer Rear | White | Empty air beneath the Destroyer bridge | |||||
| (1084, 1088) | 84 | 14 | Destroyer Rear | Bottom hull of the Destroyer | Below the hull of the Destroyer. Towards the bottom of this image the hull of the Destroyer can be seen, gently increasing its size below the hull of the Destroyer. Towards right. | |||||
| (1084, 1089) | 84 | 15 | Destroyer Rear | Black | Black, can be seen, inside the Destroyer | |||||
| (1084, 1090) | 84 | 16 | Destroyer Rear | Inside the Destroyer: Room and shaft | Y | Light bulb room: A large room beginning just inside to the left and it is almost contained within the top and bottom edges of this image, but to the top right the ceiling is just cut off and the room extends as much into the next image to the right. On the floor (in the middle of the big room) to the very right lies a giant light bulb. The bulb is cut off at the right edge before the glass finishes at the screw base. The filament is visible in the left part of the bulb. At the very top left, a little inside the room a shaft exits upwards | ||||
| (1084, 1091) | 84 | 17 | Destroyer Rear | Inside the Destroyer: Room, corridor and shaft | Light bulb room: A large room with a giant light bulb is below this image, but to the right the top of the rooms ceiling just graces the bottom of this image. To the left is a shaft that exits into the room below in the image below. The shaft goes up through this image | |||||
| (1084, 1092) | 84 | 18 | Destroyer Rear | Inside the Destroyer: Corridor and shaft | A corridor enters left at the bottom going right to a shaft that goes down through the image from top to bottom | |||||
| (1084, 1093) | 84 | 19 | Destroyer Rear | Inside the Destroyer: Shaft | A shaft enters in the left part of the image from above and goes down through the image | |||||
| (1084, 1094) | 84 | 20 | Destroyer Rear | Inside the Destroyer: Shaft | A shaft enters in the left part of the image from above and goes down through the image | |||||
| (1084, 1095) | 84 | 21 | Destroyer Rear | Inside the Destroyer: Shaft | Y | Y | A shaft enters in the left part of the image from above and goes down through the image. In the center of the shaft Cueball and a Megan is holding on to each other to prevent them from falling further down by holding on to each other and pressing their feet to each side of the pit. He talks about what to do | |||
| (1084, 1096) | 84 | 22 | Destroyer Rear | Inside the Destroyer: Shaft | A shaft enters in the left part of the image from above and goes down through the image | |||||
| (1084, 1097) | 84 | 23 | Destroyer Rear | Inside the Destroyer: Shaft | A shaft enters in the left part of the image from above and goes down through the image | |||||
| (1084, 1098) | 84 | 24 | Destroyer Rear | Inside the Destroyer: Shaft | A shaft enters in the left part of the image from above and goes down through the image | |||||
| (1084, 1099) | 84 | 25 | Destroyer Rear | Inside the Destroyer: Shaft | 1 | A shaft enters in the left part of the image from above and goes down through the image. In the center of the shaft there is a coin | ||||
| (1084, 1100) | 84 | 26 | Destroyer Rear | Inside the Destroyer: Shaft | A shaft enters in the left part of the image from above and goes down through the image | |||||
| (1084, 1101) | 84 | 27 | Destroyer Rear | Inside the Destroyer: Shaft | A shaft enters in the left part of the image from above and goes down through the image | |||||
| (1084, 1102) | 84 | 28 | Destroyer Rear | Inside the Destroyer: Shaft | A shaft enters in the left part of the image from above and goes down through the image | |||||
| (1084, 1103) | 84 | 29 | Destroyer Rear | Inside the Destroyer: Corridor and shaft | A corridor enters from the left at the bottom the image going right to a shaft that goes down before the middle of the image | |||||
| (1084, 1104) | 84 | 30 | Destroyer Rear | Black | Black, can be seen, inside the Destroyer | |||||
| (1084, 1105) | 84 | 31 | Destroyer Rear | Black | Black, can be seen, inside the Destroyer | |||||
| (1084, 1106) | 84 | 32 | Destroyer Rear | Black | Black, can be seen, inside the Destroyer | |||||
| (1084, 1107) | 84 | 33 | Destroyer Rear | Black | Black, can be seen, inside the Destroyer | |||||
| (1084, 1108) | 84 | 34 | Destroyer Rear | Black | Black, can be seen, inside the Destroyer | |||||
| (1084, 1109) | 84 | 35 | Destroyer Rear | Top hull of the Destroyer | Above the hull of the Destroyer. To the left the hull is above the edge of the image, but then it comes down into the image in a steep incline. When this stops above the center of the image the hull continues straight right. | |||||
| (1084, 1110) | 84 | 36 | Destroyer Rear | Top hull of the Destroyer | Above the hull of the Destroyer. At the very bottom left of this image the hull of the Destroyer can be seen going straight right, and then is begins to slope steeply down right and disappears below the image | |||||
| (1084, 1111) | 84 | 37 | Destroyer Rear | White | Empty air above the Destroyer | |||||
| (1084, 1112) | 84 | 38 | Destroyer Rear | White | Empty air above the Destroyer | |||||
| (1085, 1069) | 85 | -5 | Ground level right of pyramid | Black | Black, never seen, below lowest visible terrain, bottom images, with white line at the bottom | |||||
| (1085, 1070) | 85 | -4 | Ground level right of pyramid | Black | Black, never seen, below lowest visible terrain | |||||
| (1085, 1071) | 85 | -3 | Ground level right of pyramid | Black | Black, never seen, below lowest visible terrain | |||||
| (1085, 1072) | 85 | -2 | Ground level right of pyramid | Black | Black, never seen, below ground level right of pyramid | |||||
| (1085, 1073) | 85 | -1 | Ground level right of pyramid | Black | Black, can be seen, below ground level right | |||||
| (1085, 1074) | 85 | 0 | Ground level right of pyramid | Terrain | Grassy ground | |||||
| (1085, 1075) | 85 | 1 | Ground level right of pyramid | White | Empty air above ground level right of the pyramid | |||||
| (1085, 1076) | 85 | 2 | Ground level right of pyramid | White | Empty air above ground level right of the pyramid | |||||
| (1085, 1085) | 85 | 11 | Destroyer Rear | White | Empty air beneath the Destroyer bridge | |||||
| (1085, 1086) | 85 | 12 | Destroyer Rear | White | Empty air beneath the Destroyer bridge | |||||
| (1085, 1087) | 85 | 13 | Destroyer Rear | White | Empty air beneath the Destroyer bridge | |||||
| (1085, 1088) | 85 | 14 | Destroyer Rear | Bottom hull of the Destroyer | Below the hull of the Destroyer. Towards the bottom of this image the hull of the Destroyer can be seen, gently increasing its size below the hull of the Destroyer. Towards right. | |||||
| (1085, 1089) | 85 | 15 | Destroyer Rear | Black | Black, can be seen, inside the Destroyer | |||||
| (1085, 1090) | 85 | 16 | Destroyer Rear | Inside the Destroyer: Room and corridor | Y | Light bulb room: A large room beginning just inside to the right and it is almost contained within the top and bottom edges of this image, but the ceiling is just cut off and the room extends as much into the next image to the left. On the floor (in the middle of the big room) to the very left lies a giant light bulb. The bulb is cut off at the left edge before the glass above the screw base really turns into a bulb. The filament is visible in the glass part. At the bottom right of the room a corridor exits to the right | ||||
| (1085, 1091) | 85 | 17 | Destroyer Rear | Inside the Destroyer: Room | Light bulb room: A large room with a giant light bulb is below this image, the top of the rooms ceiling just enters the bottom of this image | |||||
| (1085, 1092) | 85 | 18 | Destroyer Rear | Black | Black, can be seen, inside the Destroyer | |||||
| (1085, 1093) | 85 | 19 | Destroyer Rear | Black | Black, can be seen, inside the Destroyer | |||||
| (1085, 1094) | 85 | 20 | Destroyer Rear | Black | Black, can be seen, inside the Destroyer | |||||
| (1085, 1095) | 85 | 21 | Destroyer Rear | Black | Black, can be seen, inside the Destroyer | |||||
| (1085, 1096) | 85 | 22 | Destroyer Rear | Black | Black, can be seen, inside the Destroyer | |||||
| (1085, 1097) | 85 | 23 | Destroyer Rear | Black | Black, can be seen, inside the Destroyer | |||||
| (1085, 1098) | 85 | 24 | Destroyer Rear | Black | Black, can be seen, inside the Destroyer | |||||
| (1085, 1099) | 85 | 25 | Destroyer Rear | Black | Black, can be seen, inside the Destroyer | |||||
| (1085, 1100) | 85 | 26 | Destroyer Rear | Black | Black, can be seen, inside the Destroyer | |||||
| (1085, 1101) | 85 | 27 | Destroyer Rear | Black | Black, can be seen, inside the Destroyer | |||||
| (1085, 1102) | 85 | 28 | Destroyer Rear | Black | Black, can be seen, inside the Destroyer | |||||
| (1085, 1103) | 85 | 29 | Destroyer Rear | Black | Black, can be seen, inside the Destroyer | |||||
| (1085, 1104) | 85 | 30 | Destroyer Rear | Black | Black, can be seen, inside the Destroyer | |||||
| (1085, 1105) | 85 | 31 | Destroyer Rear | Black | Black, never seen, inside the Destroyer | |||||
| (1085, 1106) | 85 | 32 | Destroyer Rear | Black | Black, never seen, inside the Destroyer | |||||
| (1085, 1107) | 85 | 33 | Destroyer Rear | Black | Black, never seen, inside the Destroyer | |||||
| (1085, 1108) | 85 | 34 | Destroyer Rear | Black | Black, can be seen, inside the Destroyer | |||||
| (1085, 1109) | 85 | 35 | Destroyer Rear | Top hull of the Destroyer | Above the hull of the Destroyer. Above the center of the image the hull goes straight left to right | |||||
| (1085, 1110) | 85 | 36 | Destroyer Rear | White | Empty air above the Destroyer | |||||
| (1085, 1111) | 85 | 37 | Destroyer Rear | White | Empty air above the Destroyer | |||||
| (1085, 1112) | 85 | 38 | Destroyer Rear | White | Empty air above the Destroyer | |||||
| (1086, 1069) | 86 | -5 | Ground level right of pyramid | Black | Black, never seen, below lowest visible terrain, bottom images, with white line at the bottom | |||||
| (1086, 1070) | 86 | -4 | Ground level right of pyramid | Black | Black, never seen, below lowest visible terrain | |||||
| (1086, 1071) | 86 | -3 | Ground level right of pyramid | Black | Black, never seen, below lowest visible terrain | |||||
| (1086, 1072) | 86 | -2 | Ground level right of pyramid | Black | Black, never seen, below ground level right of pyramid | |||||
| (1086, 1073) | 86 | -1 | Ground level right of pyramid | Black | Black, can be seen, below ground level right | |||||
| (1086, 1074) | 86 | 0 | Ground level right of pyramid | Terrain | Y | Grassy ground with an empty pedestal | ||||
| (1086, 1075) | 86 | 1 | Ground level right of pyramid | White | Empty air above ground level right of the pyramid | |||||
| (1086, 1076) | 86 | 2 | Ground level right of pyramid | White | Empty air above ground level right of the pyramid | |||||
| (1086, 1085) | 86 | 11 | Destroyer Rear | White | Empty air beneath the Destroyer bridge | |||||
| (1086, 1086) | 86 | 12 | Destroyer Rear | White | Empty air beneath the Destroyer bridge | |||||
| (1086, 1087) | 86 | 13 | Destroyer Rear | White | Empty air beneath the Destroyer bridge | |||||
| (1086, 1088) | 86 | 14 | Destroyer Rear | Bottom hull of the Destroyer with shaft | Y | 1 | Below the hull of the Destroyer. Towards the bottom of this image the hull of the Destroyer can be seen, gently increasing its size below the hull of the Destroyer. Towards right. There is a shaft leading into the Destroyer. A coin is falling down the shaft bouncing on the walls | |||
| (1086, 1089) | 86 | 15 | Destroyer Rear | Inside the Destroyer: Shaft | A shaft goes down the middle of this image inside the destroyer | |||||
| (1086, 1090) | 86 | 16 | Destroyer Rear | Inside the Destroyer: Corridor and shaft | A corridor enters left at the bottom going right entering a shaft that goes up through the image right past the middle of the image | |||||
| (1086, 1091) | 86 | 17 | Destroyer Rear | Inside the Destroyer: Room and shaft | Y | Y | Proposition room: A large but empty room except for Hairbun who is telling something to a guy with flat black hair. Some of the text is cut off at the right edge where the room continues. The room also extends above this image. The left wall of the room is just left of the middle and the floor is just below the center. At the center of the image in the left part of the room there is a shaft exiting the room going down | |||
| (1086, 1092) | 86 | 18 | Destroyer Rear | Inside the Destroyer: Room | Proposition room: The top of a large room. The room extends to the left image and to the one below. (In the image below are Hairbun and a guy). The left wall of the room is just left of the middle and the ceiling is just below the center | |||||
| (1086, 1093) | 86 | 19 | Destroyer Rear | Black | Black, can be seen, inside the Destroyer | |||||
| (1086, 1094) | 86 | 20 | Destroyer Rear | Black | Black, never seen, inside the Destroyer | |||||
| (1086, 1095) | 86 | 21 | Destroyer Rear | Black | Black, never seen, inside the Destroyer | |||||
| (1086, 1096) | 86 | 22 | Destroyer Rear | Black | Black, never seen, inside the Destroyer | |||||
| (1086, 1097) | 86 | 23 | Destroyer Rear | Black | Black, never seen, inside the Destroyer | |||||
| (1086, 1098) | 86 | 24 | Destroyer Rear | Black | Black, never seen, inside the Destroyer | |||||
| (1086, 1099) | 86 | 25 | Destroyer Rear | Black | Black, never seen, inside the Destroyer | |||||
| (1086, 1100) | 86 | 26 | Destroyer Rear | Black | Black, never seen, inside the Destroyer | |||||
| (1086, 1101) | 86 | 27 | Destroyer Rear | Black | Black, never seen, inside the Destroyer | |||||
| (1086, 1102) | 86 | 28 | Destroyer Rear | Black | Black, never seen, inside the Destroyer | |||||
| (1086, 1103) | 86 | 29 | Destroyer Rear | Black | Black, never seen, inside the Destroyer | |||||
| (1086, 1104) | 86 | 30 | Destroyer Rear | Black | Black, never seen, inside the Destroyer | |||||
| (1086, 1105) | 86 | 31 | Destroyer Rear | Black | Black, never seen, inside the Destroyer | |||||
| (1086, 1106) | 86 | 32 | Destroyer Rear | Black | Black, can be seen, inside the Destroyer | |||||
| (1086, 1107) | 86 | 33 | Destroyer Rear | Black | Black, can be seen, inside the Destroyer | |||||
| (1086, 1108) | 86 | 34 | Destroyer Rear | Black | Black, can be seen, inside the Destroyer | |||||
| (1086, 1109) | 86 | 35 | Destroyer Rear | Top hull of the Destroyer | Above the hull of the Destroyer. Above the center of the image the hull goes straight left to right | |||||
| (1086, 1110) | 86 | 36 | Destroyer Rear | White | Empty air above the Destroyer | |||||
| (1086, 1111) | 86 | 37 | Destroyer Rear | White | Empty air above the Destroyer | |||||
| (1086, 1112) | 86 | 38 | Destroyer Rear | White | Empty air above the Destroyer | |||||
| (1087, 1069) | 87 | -5 | Ground level right of pyramid | Black | Black, never seen, below lowest visible terrain, bottom images, with white line at the bottom | |||||
| (1087, 1070) | 87 | -4 | Ground level right of pyramid | Black | Black, never seen, below lowest visible terrain | |||||
| (1087, 1071) | 87 | -3 | Ground level right of pyramid | Black | Black, never seen, below lowest visible terrain | |||||
| (1087, 1072) | 87 | -2 | Ground level right of pyramid | Black | Black, never seen, below ground level right of pyramid | |||||
| (1087, 1073) | 87 | -1 | Ground level right of pyramid | Black | Black, can be seen, below ground level right | |||||
| (1087, 1074) | 87 | 0 | Ground level right of pyramid | Terrain | Grassy ground | |||||
| (1087, 1075) | 87 | 1 | Ground level right of pyramid | White | Empty air above ground level right of the pyramid | |||||
| (1087, 1076) | 87 | 2 | Ground level right of pyramid | White | Empty air above ground level right of the pyramid | |||||
| (1087, 1085) | 87 | 11 | Destroyer Rear | White | Empty air beneath the Destroyer bridge | |||||
| (1087, 1086) | 87 | 12 | Destroyer Rear | White | Empty air beneath the Destroyer bridge | |||||
| (1087, 1087) | 87 | 13 | Destroyer Rear | White | Empty air beneath the Destroyer bridge | |||||
| (1087, 1088) | 87 | 14 | Destroyer Rear | Bottom hull of the Destroyer | Below the hull of the Destroyer. Towards the bottom of this image the hull of the Destroyer can be seen, gently increasing its size below the hull of the Destroyer. Towards right. | |||||
| (1087, 1089) | 87 | 15 | Destroyer Rear | Black | Black, can be seen, inside the Destroyer | |||||
| (1087, 1090) | 87 | 16 | Destroyer Rear | Black | Black, can be seen, inside the Destroyer | |||||
| (1087, 1091) | 87 | 17 | Destroyer Rear | Inside the Destroyer: Room | Y | Proposition room: A large but empty room except. The room extends to the left image and to the one above. (In the left image is Hairbun talking). Some text from the left image is entering this image, so it is cut off at the left edge where the room continues. The right wall of the room is just right of the middle and the floor is just below the center | ||||
| (1087, 1092) | 87 | 18 | Destroyer Rear | Inside the Destroyer: Room | Proposition room: The top of a large room. The room extends to the right image and to the one below. (In the image below and left are Hairbun and a guy). The right wall of the room is just right of the middle and the ceiling is just below the center | |||||
| (1087, 1093) | 87 | 19 | Destroyer Rear | Black | Black, can be seen, inside the Destroyer | |||||
| (1087, 1094) | 87 | 20 | Destroyer Rear | Black | Black, never seen, inside the Destroyer | |||||
| (1087, 1095) | 87 | 21 | Destroyer Rear | Black | Black, never seen, inside the Destroyer | |||||
| (1087, 1096) | 87 | 22 | Destroyer Rear | Black | Black, never seen, inside the Destroyer | |||||
| (1087, 1097) | 87 | 23 | Destroyer Rear | Black | Black, can be seen, inside the Destroyer | |||||
| (1087, 1098) | 87 | 24 | Destroyer Rear | Black | Black, can be seen, inside the Destroyer | |||||
| (1087, 1099) | 87 | 25 | Destroyer Rear | Black | Black, can be seen, inside the Destroyer | |||||
| (1087, 1100) | 87 | 26 | Destroyer Rear | Black | Black, can be seen, inside the Destroyer | |||||
| (1087, 1101) | 87 | 27 | Destroyer Rear | Black | Black, never seen, inside the Destroyer | |||||
| (1087, 1102) | 87 | 28 | Destroyer Rear | Black | Black, never seen, inside the Destroyer | |||||
| (1087, 1103) | 87 | 29 | Destroyer Rear | Black | Black, never seen, inside the Destroyer | |||||
| (1087, 1104) | 87 | 30 | Destroyer Rear | Black | Black, can be seen, inside the Destroyer | |||||
| (1087, 1105) | 87 | 31 | Destroyer Rear | Black | Black, can be seen, inside the Destroyer | |||||
| (1087, 1106) | 87 | 32 | Destroyer Rear | Black | Black, can be seen, inside the Destroyer | |||||
| (1087, 1107) | 87 | 33 | Destroyer Rear | Rear end of the Destroyer | Behind the rear end of the Destroyers hull. Most of this image is black inside the Destroyer, but halfway past the middle to the right the hull enters from above and inclines steeply down towards right exiting the image at the right edge just below the center of the image | |||||
| (1087, 1108) | 87 | 34 | Destroyer Rear | Rear end of the Destroyer | 1 | Behind the rear end of the Destroyers hull. The hull enters from above left of the middle and inclines steeply down towards right exiting the image half way past the middle. Halfway down this incline there is a coin | ||||
| (1087, 1109) | 87 | 35 | Destroyer Rear | Rear end - top hull of the Destroyer | Rear end to just above the hull of the Destroyer. Most of this image is empty air behind the rear end of the hull of the Destroyer but at the top left the top hull can be seen to end and then slope steeply down towards right exiting the bottom edge of the image before reaching the center | |||||
| (1087, 1110) | 87 | 36 | Destroyer Rear | White | Empty air above the Destroyer | |||||
| (1087, 1111) | 87 | 37 | Destroyer Rear | White | Empty air above the Destroyer | |||||
| (1087, 1112) | 87 | 38 | Destroyer Rear | White | Empty air above the Destroyer | |||||
| (1088, 1069) | 88 | -5 | Ground level right of pyramid | Black | Black, never seen, below lowest visible terrain, bottom images, with white line at the bottom | |||||
| (1088, 1070) | 88 | -4 | Ground level right of pyramid | Black | Black, never seen, below lowest visible terrain | |||||
| (1088, 1071) | 88 | -3 | Ground level right of pyramid | Black | Black, never seen, below lowest visible terrain | |||||
| (1088, 1072) | 88 | -2 | Ground level right of pyramid | Black | Black, never seen, below ground level right of pyramid | |||||
| (1088, 1073) | 88 | -1 | Ground level right of pyramid | Black | Black, can be seen, below ground level right | |||||
| (1088, 1074) | 88 | 0 | Ground level right of pyramid | Terrain | Y | A Medusa like girl facing left. She seems to have at least 10 long lines going out of her head. Some of them may have something at the end that could be a snakes head, but that is not clear. She walks left with both her hands out, like a zombie | ||||
| (1088, 1075) | 88 | 1 | Ground level right of pyramid | White | Empty air above ground level right of the pyramid | |||||
| (1088, 1076) | 88 | 2 | Ground level right of pyramid | White | Empty air above ground level right of the pyramid | |||||
| (1088, 1085) | 88 | 11 | Destroyer Rear | White | Empty air beneath the Destroyer rear | |||||
| (1088, 1086) | 88 | 12 | Destroyer Rear | White | Empty air beneath the Destroyer rear | |||||
| (1088, 1087) | 88 | 13 | Destroyer Rear | White | Empty air beneath the Destroyer rear | |||||
| (1088, 1088) | 88 | 14 | Destroyer Rear | Bottom hull of the Destroyer | Below the hull of the Destroyer. Towards the bottom of this image the hull of the Destroyer can be seen, gently increasing its size below the hull of the Destroyer. Towards right. | |||||
| (1088, 1089) | 88 | 15 | Destroyer Rear | Black | Black, can be seen, inside the Destroyer | |||||
| (1088, 1090) | 88 | 16 | Destroyer Rear | Black | Black, can be seen, inside the Destroyer | |||||
| (1088, 1091) | 88 | 17 | Destroyer Rear | Black | Black, can be seen, inside the Destroyer | |||||
| (1088, 1092) | 88 | 18 | Destroyer Rear | Black | Black, can be seen, inside the Destroyer | |||||
| (1088, 1093) | 88 | 19 | Destroyer Rear | Black | Black, can be seen, inside the Destroyer | |||||
| (1088, 1094) | 88 | 20 | Destroyer Rear | Black | Black, can be seen, inside the Destroyer | |||||
| (1088, 1095) | 88 | 21 | Destroyer Rear | Black | Black, can be seen, inside the Destroyer | |||||
| (1088, 1096) | 88 | 22 | Destroyer Rear | Black | Black, can be seen, inside the Destroyer | |||||
| (1088, 1097) | 88 | 23 | Destroyer Rear | Black | Black, can be seen, inside the Destroyer | |||||
| (1088, 1098) | 88 | 24 | Destroyer Rear | Inside the Destroyer: Room and corridor | Rear end room: The bottom part of a small empty room with a short corridor that leads right out to the rear end of the Destroyer. The room’s walls are within the image, but the ceiling part is almost as much above this image | |||||
| (1088, 1099) | 88 | 25 | Destroyer Rear | Inside the Destroyer: Room | Rear end room: The top part of a small empty room close to the rear end of the Destroyer. The room’s walls are within the image, but the bottom part is even bigger below this image | |||||
| (1088, 1100) | 88 | 26 | Destroyer Rear | Black | Black, can be seen, inside the Destroyer | |||||
| (1088, 1101) | 88 | 27 | Destroyer Rear | Black | Black, can be seen, inside the Destroyer | |||||
| (1088, 1102) | 88 | 28 | Destroyer Rear | Black | Black, can be seen, inside the Destroyer | |||||
| (1088, 1103) | 88 | 29 | Destroyer Rear | Black | Black, can be seen, inside the Destroyer | |||||
| (1088, 1104) | 88 | 30 | Destroyer Rear | Black | Black, can be seen, inside the Destroyer | |||||
| (1088, 1105) | 88 | 31 | Destroyer Rear | Rear end of the Destroyer | Behind the rear end of the Destroyers hull. Most of this image is black inside the Destroyer, but just past the middle to the right the hull enters from above and inclines steeply down towards right exiting the image at the right edge just below above the bottom of the image | |||||
| (1088, 1106) | 88 | 32 | Destroyer Rear | Rear end of the Destroyer | Behind the rear end of the Destroyers hull. The hull enters from above left of the middle and inclines steeply down towards right exiting the image just past the middle | |||||
| (1088, 1107) | 88 | 33 | Destroyer Rear | Rear end of the Destroyer | Behind the rear end of the Destroyers hull. Most of this image is white air behind the Destroyer, but halfway down past the center to the left the hull enters from the left and inclines steeply down towards right exiting the image at the bottom edge just before the middle of the image | |||||
| (1088, 1108) | 88 | 34 | Destroyer Rear | White | Empty air behind the rear end of the Destroyer | |||||
| (1089, 1069) | 89 | -5 | Ground level right of pyramid | Black | Black, never seen, below lowest visible terrain, bottom images, with white line at the bottom | |||||
| (1089, 1070) | 89 | -4 | Ground level right of pyramid | Black | Black, never seen, below lowest visible terrain | |||||
| (1089, 1071) | 89 | -3 | Ground level right of pyramid | Black | Black, never seen, below lowest visible terrain | |||||
| (1089, 1072) | 89 | -2 | Ground level right of pyramid | Black | Black, never seen, below ground level right of pyramid | |||||
| (1089, 1073) | 89 | -1 | Ground level right of pyramid | Black | Black, can be seen, below ground level right | |||||
| (1089, 1074) | 89 | 0 | Ground level right of pyramid | Terrain | Grassy ground | |||||
| (1089, 1075) | 89 | 1 | Ground level right of pyramid | White | Empty air above ground level right of the pyramid | |||||
| (1089, 1076) | 89 | 2 | Ground level right of pyramid | White | Empty air above ground level right of the pyramid | |||||
| (1089, 1085) | 89 | 11 | Destroyer Rear | White | Empty air beneath the Destroyer rear | |||||
| (1089, 1086) | 89 | 12 | Destroyer Rear | White | Empty air beneath the Destroyer rear | |||||
| (1089, 1087) | 89 | 13 | Destroyer Rear | White | Empty air beneath the Destroyer rear | |||||
| (1089, 1088) | 89 | 14 | Destroyer Rear | Bottom hull of the Destroyer | Below the hull of the Destroyer. Towards the very bottom of this image the hull of the Destroyer can be seen, gently increasing its size below the hull of the Destroyer. Towards right. Almost filling the bottom right part of this image all with black | |||||
| (1089, 1089) | 89 | 15 | Destroyer Rear | Rear end of the Destroyer | To the very right the rear end of the Destroyer ends. The rest is black. At the top there is a short horizontal line, then this begins to slope steeply down right exiting at the right edge before reaching the bottom edge | |||||
| (1089, 1090) | 89 | 16 | Destroyer Rear | Rear end of the Destroyer | Behind the rear end of the Destroyers hull. Most of this image is black inside the Destroyer, but to the far right the hull goes straight down from top to bottom. At the very top is the last part of that gentler slope from the image above where Cueball sat with his sandwich | |||||
| (1089, 1091) | 89 | 17 | Destroyer Rear | Rear end of the Destroyer | Y | Y | Y | 1 | Behind the rear end of the Destroyers hull. The left part of this image is black inside the Destroyer, but at the top left of the middle the end a steep incline left, and begins to go almost straight down, but a little out right. Below the center of the image this flattens out to only a small slope down right which disappears at the bottom edge close to the right edge. On this gentler slope is Cueball sitting and he has just dropped his sandwich which bounces and soon it will plunge out over the edge of the ship, so he yells after it. Just right of his sandwich is a coin | |
| (1089, 1092) | 89 | 18 | Destroyer Rear | Rear end of the Destroyer | Behind the rear end of the Destroyers hull. Most of this image is black inside the Destroyer, but at the top to the far right the hull goes straight down, and then before the center it begins to incline steeply left | |||||
| (1089, 1093) | 89 | 19 | Destroyer Rear | Rear end of the Destroyer | Behind the rear end of the Destroyers hull. Most of this image is black inside the Destroyer, but to the far right the hull goes straight down from top to bottom | |||||
| (1089, 1094) | 89 | 20 | Destroyer Rear | Rear end of the Destroyer | Behind the rear end of the Destroyers hull. Most of this image is black inside the Destroyer, but to the far right the hull goes straight down from top to bottom | |||||
| (1089, 1095) | 89 | 21 | Destroyer Rear | Rear end of the Destroyer | Behind the rear end of the Destroyers hull. Most of this image is black inside the Destroyer, but to the far right the hull goes straight down from top to bottom | |||||
| (1089, 1096) | 89 | 22 | Destroyer Rear | Rear end of the Destroyer | Behind the rear end of the Destroyers hull. Most of this image is black inside the Destroyer, but to the far right the hull goes straight down from top to bottom | |||||
| (1089, 1097) | 89 | 23 | Destroyer Rear | Rear end of the Destroyer | Behind the rear end of the Destroyers hull. Most of this image is black inside the Destroyer, but to the far right the hull goes straight down from top to bottom | |||||
| (1089, 1098) | 89 | 24 | Destroyer Rear | Rear end of the Destroyer with corridor | Behind the rear end of the Destroyers hull. The hull enters from above just at the middle and inclines steeply down towards left, then there is a corridor going inside the Destroyer to the left, and below this the hulls incline reverses steeply down towards right almost to the bottom of the image, but before it leaves the image it begins to go straight down and then exits the image at the bottom close to the right edge | |||||
| (1089, 1099) | 89 | 25 | Destroyer Rear | Rear end of the Destroyer | Behind the rear end of the Destroyers hull. The hull enters from above just at the middle and inclines steeply down towards left (opposite the incline above) exiting the image at the bottom, left of the middle | |||||
| (1089, 1100) | 89 | 26 | Destroyer Rear | Rear end of the Destroyer | Behind the rear end of the Destroyers hull. The hull enters from above just inside from the right edge and inclines steeply down towards left (opposite the incline above) exiting the image at the bottom, right of the middle | |||||
| (1089, 1101) | 89 | 27 | Destroyer Rear | Black - almost | Black inside the Destroyer, except at the bottom right corner which is part of the rear end of the Destroyers hull. The hull slopes steeply down towards left (opposite of the image above) | |||||
| (1089, 1102) | 89 | 28 | Destroyer Rear | Black - almost | Black inside the Destroyer, except at the top right corner which is part of the rear end of the Destroyers hull. The hull enters from above and inclines steeply down towards right (opposite of the image below) | |||||
| (1089, 1103) | 89 | 29 | Destroyer Rear | Rear end of the Destroyer | Behind the rear end of the Destroyers hull. The hull enters from above just left of the middle and inclines steeply down towards right exiting the image close to the right edge | |||||
| (1089, 1104) | 89 | 30 | Destroyer Rear | Rear end of the Destroyer | Behind the rear end of the Destroyers hull. The hull enters from above just inside from the left and inclines steeply down towards right exiting the image just before the middle | |||||
| (1089, 1105) | 89 | 31 | Destroyer Rear | White - almost | Empty air behind the rear end of the Destroyer, except at the very bottom left corner where a small part of the rear hull can be seen sloping steeply down right | |||||
| (1089, 1106) | 89 | 32 | Destroyer Rear | White | Empty air behind the rear end of the Destroyer | |||||
| (1089, 1107) | 89 | 33 | Destroyer Rear | White | Empty air behind the rear end of the Destroyer | |||||
| (1089, 1108) | 89 | 34 | Destroyer Rear | White | Empty air behind the rear end of the Destroyer | |||||
| (1090, 1069) | 90 | -5 | Ground level right of pyramid | Black | Black, never seen, below lowest visible terrain, bottom images, with white line at the bottom | |||||
| (1090, 1070) | 90 | -4 | Ground level right of pyramid | Black | Black, never seen, below lowest visible terrain | |||||
| (1090, 1071) | 90 | -3 | Ground level right of pyramid | Black | Black, never seen, below lowest visible terrain | |||||
| (1090, 1072) | 90 | -2 | Ground level right of pyramid | Black | Black, never seen, below ground level right of pyramid | |||||
| (1090, 1073) | 90 | -1 | Ground level right of pyramid | Black | Black, can be seen, below ground level right | |||||
| (1090, 1074) | 90 | 0 | Ground level right of pyramid | Terrain | Y | Grassy ground with a small hole in the ground without grass (above this in the next image the missing piece of land floats in the air). This is right beneath the end of the Star Destroyer | ||||
| (1090, 1075) | 90 | 1 | Ground level right of pyramid | Terrain | Y | A small lump of earth floats in the air at the bottom of this image. Below in the image beneath is a hole in the ground where this came from. Above this floating earth is the end of the Star Destroyer | ||||
| (1090, 1076) | 90 | 2 | Ground level right of pyramid | White | Empty air above ground level right of the pyramid | |||||
| (1090, 1085) | 90 | 11 | Destroyer Rear | White | Empty air beneath the Destroyer rear | |||||
| (1090, 1086) | 90 | 12 | Destroyer Rear | White | Empty air beneath the Destroyer rear | |||||
| (1090, 1087) | 90 | 13 | Destroyer Rear | White | Empty air beneath the Destroyer rear | |||||
| (1090, 1088) | 90 | 14 | Destroyer Rear | Rear end - bottom hull of the Destroyer | Y | Y | Below the hull of the Destroyer. The rear end of the Destroyer just fits in above the bottom of this image. In the middle of the image there is a plateau going back left in the rear of the space ship. . On this shelf a Megan-like girl is leaning up against the ship’s hull to the left while another Megan stands close to the edge looking slightly down and right. She is the one talking | |||
| (1090, 1089) | 90 | 15 | Destroyer Rear | Rear end of the Destroyer | Empty air behind the rear end of the Destroyer | |||||
| (1090, 1090) | 90 | 16 | Destroyer Rear | White | Empty air behind the rear end of the Destroyer | |||||
| (1090, 1091) | 90 | 17 | Destroyer Rear | White | Empty air behind the rear end of the Destroyer | |||||
| (1090, 1092) | 90 | 18 | Destroyer Rear | White | Empty air behind the rear end of the Destroyer | |||||
| (1090, 1093) | 90 | 19 | Destroyer Rear | White | Empty air behind the rear end of the Destroyer | |||||
| (1090, 1094) | 90 | 20 | Destroyer Rear | White | Empty air behind the rear end of the Destroyer | |||||
| (1090, 1095) | 90 | 21 | Destroyer Rear | White | Empty air behind the rear end of the Destroyer | |||||
| (1090, 1096) | 90 | 22 | Destroyer Rear | White | Empty air behind the rear end of the Destroyer | |||||
| (1090, 1097) | 90 | 23 | Destroyer Rear | White | Empty air behind the rear end of the Destroyer | |||||
| (1090, 1098) | 90 | 24 | Destroyer Rear | White | Empty air behind the rear end of the Destroyer | |||||
| (1090, 1099) | 90 | 25 | Destroyer Rear | White | Empty air behind the rear end of the Destroyer | |||||
| (1090, 1100) | 90 | 26 | Destroyer Rear | White | Empty air behind the rear end of the Destroyer | |||||
| (1090, 1101) | 90 | 27 | Destroyer Rear | Rear end of the Destroyer | Behind the rear end of the Destroyers hull. Most of this image is white empty air, but the hull enters from above just a little inside from the left and then inclines steeply down towards left (opposite the incline above) exiting the image at left edge just below the center | |||||
| (1090, 1102) | 90 | 28 | Destroyer Rear | Rear end of the Destroyer with corridor | 1 | Behind the rear end of the Destroyers hull. The hull enters from the left above the center and inclines steeply down right. Then the incline stops and there is a corridor going inside the Destroyer to the left, but only just as long as it is high, making a small square room at this very end of the hull. There is a coin in this hole. Both above and below this corridor hole there are small ledges jutting further out. Below the bottom ledge the hull goes straight down, but just before the bottom edge the hulls incline reverses steeply down towards left | ||||
| (1090, 1103) | 90 | 29 | Destroyer Rear | White | Empty air behind the rear end of the Destroyer | |||||
| (1090, 1104) | 90 | 30 | Destroyer Rear | White | Empty air behind the rear end of the Destroyer | |||||
| (1090, 1105) | 90 | 31 | Destroyer Rear | White | Empty air behind the rear end of the Destroyer | |||||
| (1090, 1106) | 90 | 32 | Destroyer Rear | White | Empty air behind the rear end of the Destroyer | |||||
| (1090, 1107) | 90 | 33 | Destroyer Rear | White | Empty air behind the rear end of the Destroyer | |||||
| (1090, 1108) | 90 | 34 | Destroyer Rear | White | Empty air behind the rear end of the Destroyer | |||||
| (1091, 1069) | 91 | -5 | Ground level right of pyramid | Black | Black, never seen, below lowest visible terrain, bottom images, with white line at the bottom | |||||
| (1091, 1070) | 91 | -4 | Ground level right of pyramid | Black | Black, never seen, below lowest visible terrain | |||||
| (1091, 1071) | 91 | -3 | Ground level right of pyramid | Black | Black, never seen, below lowest visible terrain | |||||
| (1091, 1072) | 91 | -2 | Ground level right of pyramid | Black | Black, never seen, below ground level right of pyramid | |||||
| (1091, 1073) | 91 | -1 | Ground level right of pyramid | Black | Black, can be seen, below ground level right | |||||
| (1091, 1074) | 91 | 0 | Ground level right of pyramid | Terrain | Grassy ground | |||||
| (1091, 1075) | 91 | 1 | Ground level right of pyramid | White | Empty air above ground level right of the pyramid | |||||
| (1091, 1076) | 91 | 2 | Ground level right of pyramid | White | Empty air above ground level right of the pyramid | |||||
| (1091, 1085) | 91 | 11 | Destroyer Rear | White | Empty air beneath the Destroyer rear | |||||
| (1091, 1086) | 91 | 12 | Destroyer Rear | White | Empty air beneath the Destroyer rear | |||||
| (1091, 1087) | 91 | 13 | Destroyer Rear | White | Empty air beneath the Destroyer rear | |||||
| (1091, 1088) | 91 | 14 | Destroyer Rear | White | Empty air beneath the Destroyer rear | |||||
| (1091, 1089) | 91 | 15 | Destroyer Rear | White | Empty air below the Destroyer | |||||
| (1091, 1090) | 91 | 16 | Destroyer Rear | White | Empty air behind the rear end of the Destroyer | |||||
| (1091, 1091) | 91 | 17 | Destroyer Rear | White | Empty air behind the rear end of the Destroyer | |||||
| (1091, 1092) | 91 | 18 | Destroyer Rear | White | Empty air behind the rear end of the Destroyer | |||||
| (1091, 1093) | 91 | 19 | Destroyer Rear | White | Empty air behind the rear end of the Destroyer | |||||
| (1091, 1094) | 91 | 20 | Destroyer Rear | White | Empty air behind the rear end of the Destroyer | |||||
| (1091, 1095) | 91 | 21 | Destroyer Rear | White | Empty air behind the rear end of the Destroyer | |||||
| (1091, 1096) | 91 | 22 | Destroyer Rear | White | Empty air behind the rear end of the Destroyer | |||||
| (1091, 1097) | 91 | 23 | Destroyer Rear | White | Empty air behind the rear end of the Destroyer | |||||
| (1091, 1098) | 91 | 24 | Destroyer Rear | White | Empty air behind the rear end of the Destroyer | |||||
| (1091, 1099) | 91 | 25 | Destroyer Rear | White | Empty air behind the rear end of the Destroyer | |||||
| (1091, 1100) | 91 | 26 | Destroyer Rear | White | Empty air behind the rear end of the Destroyer | |||||
| (1091, 1101) | 91 | 27 | Destroyer Rear | White | Empty air behind the rear end of the Destroyer | |||||
| (1091, 1102) | 91 | 28 | Destroyer Rear | White | Empty air behind the rear end of the Destroyer | |||||
| (1091, 1103) | 91 | 29 | Destroyer Rear | White | Empty air behind the rear end of the Destroyer | |||||
| (1091, 1104) | 91 | 30 | Destroyer Rear | White | Empty air behind the rear end of the Destroyer | |||||
| (1091, 1105) | 91 | 31 | Destroyer Rear | White | Empty air behind the rear end of the Destroyer | |||||
| (1091, 1106) | 91 | 32 | Destroyer Rear | White | Empty air behind the rear end of the Destroyer | |||||
| (1091, 1107) | 91 | 33 | Destroyer Rear | White | Empty air behind the rear end of the Destroyer | |||||
| (1091, 1108) | 91 | 34 | Destroyer Rear | White | Empty air behind the rear end of the Destroyer | |||||
| (1092, 1069) | 92 | -5 | Ground level right of pyramid | Black | Black, never seen, below lowest visible terrain, bottom images, with white line at the bottom | |||||
| (1092, 1070) | 92 | -4 | Ground level right of pyramid | Black | Black, never seen, below lowest visible terrain | |||||
| (1092, 1071) | 92 | -3 | Ground level right of pyramid | Black | Black, never seen, below lowest visible terrain | |||||
| (1092, 1072) | 92 | -2 | Ground level right of pyramid | Black | Black, never seen, below ground level right of pyramid | |||||
| (1092, 1073) | 92 | -1 | Ground level right of pyramid | Black | Black, can be seen, below ground level right | |||||
| (1092, 1074) | 92 | 0 | Ground level right of pyramid | Terrain | Grassy ground | |||||
| (1092, 1075) | 92 | 1 | Ground level right of pyramid | White | Empty air above ground level right of the pyramid | |||||
| (1092, 1076) | 92 | 2 | Ground level right of pyramid | White | Empty air above ground level right of the pyramid | |||||
| (1093, 1069) | 93 | -5 | Ground level right of pyramid | Black | Black, never seen, below lowest visible terrain, bottom images, with white line at the bottom | |||||
| (1093, 1070) | 93 | -4 | Ground level right of pyramid | Black | Black, never seen, below lowest visible terrain | |||||
| (1093, 1071) | 93 | -3 | Ground level right of pyramid | Black | Black, never seen, below lowest visible terrain | |||||
| (1093, 1072) | 93 | -2 | Ground level right of pyramid | Black | Black, never seen, below ground level right of pyramid | |||||
| (1093, 1073) | 93 | -1 | Ground level right of pyramid | Black | Black, can be seen, below ground level right | |||||
| (1093, 1074) | 93 | 0 | Ground level right of pyramid | Terrain | Y | White Hat almost hidden in the tall grass, only his head is visible | ||||
| (1093, 1075) | 93 | 1 | Ground level right of pyramid | White | Empty air above ground level right of the pyramid | |||||
| (1093, 1076) | 93 | 2 | Ground level right of pyramid | White | Empty air above ground level right of the pyramid | |||||
| (1094, 1069) | 94 | -5 | Ground level right of pyramid | Black | Black, never seen, below lowest visible terrain, bottom images, with white line at the bottom | |||||
| (1094, 1070) | 94 | -4 | Ground level right of pyramid | Black | Black, never seen, below lowest visible terrain | |||||
| (1094, 1071) | 94 | -3 | Ground level right of pyramid | Black | Black, never seen, below lowest visible terrain | |||||
| (1094, 1072) | 94 | -2 | Ground level right of pyramid | Black | Black, never seen, below ground level right of pyramid | |||||
| (1094, 1073) | 94 | -1 | Ground level right of pyramid | Black | Black, can be seen, below ground level right | |||||
| (1094, 1074) | 94 | 0 | Ground level right of pyramid | Terrain | Grassy ground so high that it is almost at the top of the image | |||||
| (1094, 1075) | 94 | 1 | Ground level right of pyramid | White | 1 | Empty air, but a coin is floating just above the ground which is just beneath this image in the image below | ||||
| (1094, 1076) | 94 | 2 | Ground level right of pyramid | White | Empty air above ground level right of the pyramid | |||||
| (1095, 1069) | 95 | -5 | Ground level right of pyramid | Black | Black, never seen, below lowest visible terrain, bottom images, with white line at the bottom | |||||
| (1095, 1070) | 95 | -4 | Ground level right of pyramid | Black | Black, never seen, below lowest visible terrain | |||||
| (1095, 1071) | 95 | -3 | Ground level right of pyramid | Black | Black, never seen, below lowest visible terrain | |||||
| (1095, 1072) | 95 | -2 | Ground level right of pyramid | Black | Black, never seen, below ground level right of pyramid | |||||
| (1095, 1073) | 95 | -1 | Ground level right of pyramid | Black | Black, can be seen, below ground level right | |||||
| (1095, 1074) | 95 | 0 | Ground level right of pyramid | Terrain | Grassy ground so high that it is almost at the top of the image and towards the right is completely black | |||||
| (1095, 1075) | 95 | 1 | Ground level right of pyramid | Terrain | Y | Grassy ground at the very bottom of this image with a small lollipop like flower in the grass | ||||
| (1095, 1076) | 95 | 2 | Ground level right of pyramid | White | Empty air above ground level right of the pyramid | |||||
| (1096, 1069) | 96 | -5 | Ground level right of pyramid | Black | Black, never seen, below lowest visible terrain, bottom images, with white line at the bottom | |||||
| (1096, 1070) | 96 | -4 | Ground level right of pyramid | Black | Black, never seen, below lowest visible terrain | |||||
| (1096, 1071) | 96 | -3 | Ground level right of pyramid | Black | Black, never seen, below lowest visible terrain | |||||
| (1096, 1072) | 96 | -2 | Ground level right of pyramid | Black | Black, never seen, below ground level right of pyramid | |||||
| (1096, 1073) | 96 | -1 | Ground level right of pyramid | Black | Black, can be seen, below ground level right | |||||
| (1096, 1074) | 96 | 0 | Ground level right of pyramid | Terrain | Grassy ground so high that it is almost at the top of the image and towards the left is completely black | |||||
| (1096, 1075) | 96 | 1 | Ground level right of pyramid | White | Empty air above ground level right of the pyramid | |||||
| (1096, 1076) | 96 | 2 | Ground level right of pyramid | White | Empty air above ground level right of the pyramid | |||||
| (1097, 1069) | 97 | -5 | Ground level right of pyramid | Black | Black, never seen, below lowest visible terrain, bottom images, with white line at the bottom | |||||
| (1097, 1070) | 97 | -4 | Ground level right of pyramid | Black | Black, never seen, below lowest visible terrain | |||||
| (1097, 1071) | 97 | -3 | Ground level right of pyramid | Black | Black, never seen, below lowest visible terrain | |||||
| (1097, 1072) | 97 | -2 | Ground level right of pyramid | Black | Black, never seen, below ground level right of pyramid | |||||
| (1097, 1073) | 97 | -1 | Ground level right of pyramid | Black | Black, can be seen, below ground level right | |||||
| (1097, 1074) | 97 | 0 | Ground level right of pyramid | Terrain | Grassy ground so high that it is almost at the top of the image | |||||
| (1097, 1075) | 97 | 1 | Ground level right of pyramid | White | Empty air above ground level right of the pyramid | |||||
| (1097, 1076) | 97 | 2 | Ground level right of pyramid | White | Empty air above ground level right of the pyramid | |||||
| (1098, 1069) | 98 | -5 | Ground level right of pyramid | Black | Black, never seen, below lowest visible terrain, bottom images, with white line at the bottom | |||||
| (1098, 1070) | 98 | -4 | Ground level right of pyramid | Black | Black, never seen, below lowest visible terrain | |||||
| (1098, 1071) | 98 | -3 | Ground level right of pyramid | Black | Black, never seen, below lowest visible terrain | |||||
| (1098, 1072) | 98 | -2 | Ground level right of pyramid | Black | Black, never seen, below ground level right of pyramid | |||||
| (1098, 1073) | 98 | -1 | Ground level right of pyramid | Black | Black, can be seen, below ground level right | |||||
| (1098, 1074) | 98 | 0 | Ground level right of pyramid | Terrain | Y | A floating Cueball that looks kind of distorted. | ||||
| (1098, 1075) | 98 | 1 | Ground level right of pyramid | White | Empty air above ground level right of the pyramid | |||||
| (1098, 1076) | 98 | 2 | Ground level right of pyramid | White | Empty air above ground level right of the pyramid | |||||
| (1099, 1069) | 99 | -5 | Ground level right of pyramid | Black | Black, never seen, below lowest visible terrain, bottom images, with white line at the bottom | |||||
| (1099, 1070) | 99 | -4 | Ground level right of pyramid | Black | Black, never seen, below lowest visible terrain | |||||
| (1099, 1071) | 99 | -3 | Ground level right of pyramid | Black | Black, never seen, below lowest visible terrain | |||||
| (1099, 1072) | 99 | -2 | Ground level right of pyramid | Black | Black, never seen, below ground level right of pyramid | |||||
| (1099, 1073) | 99 | -1 | Ground level right of pyramid | Black | Black, can be seen, below ground level right | |||||
| (1099, 1074) | 99 | 0 | Ground level right of pyramid | Terrain | Grassy ground so high that it is almost at the top of the image | |||||
| (1099, 1075) | 99 | 1 | Ground level right of pyramid | White | Empty air above ground level right of the pyramid | |||||
| (1099, 1076) | 99 | 2 | Ground level right of pyramid | White | Empty air above ground level right of the pyramid | |||||
| (1100, 1069) | 100 | -5 | Ground level right of pyramid | Black | Black, never seen, below lowest visible terrain, bottom images, with white line at the bottom | |||||
| (1100, 1070) | 100 | -4 | Ground level right of pyramid | Black | Black, never seen, below lowest visible terrain | |||||
| (1100, 1071) | 100 | -3 | Ground level right of pyramid | Black | Black, never seen, below lowest visible terrain | |||||
| (1100, 1072) | 100 | -2 | Ground level right of pyramid | Black | Black, never seen, below ground level right of pyramid | |||||
| (1100, 1073) | 100 | -1 | Ground level right of pyramid | Black | Black, can be seen, below ground level right | |||||
| (1100, 1074) | 100 | 0 | Ground level right of pyramid | Terrain | Grassy ground so high that it is almost at the top of the image | |||||
| (1100, 1075) | 100 | 1 | Ground level right of pyramid | White | Empty air above ground level right of the pyramid | |||||
| (1100, 1076) | 100 | 2 | Ground level right of pyramid | White | Empty air above ground level right of the pyramid | |||||
| (1101, 1069) | 101 | -5 | Ground level right of pyramid | Black | Black, never seen, below lowest visible terrain, bottom images, with white line at the bottom | |||||
| (1101, 1070) | 101 | -4 | Ground level right of pyramid | Black | Black, never seen, below lowest visible terrain | |||||
| (1101, 1071) | 101 | -3 | Ground level right of pyramid | Black | Black, never seen, below lowest visible terrain | |||||
| (1101, 1072) | 101 | -2 | Ground level right of pyramid | Black | Black, never seen, below ground level right of pyramid | |||||
| (1101, 1073) | 101 | -1 | Ground level right of pyramid | Black | Black, can be seen, below ground level right | |||||
| (1101, 1074) | 101 | 0 | Ground level right of pyramid | Terrain | Grassy ground so high that it is almost at the top of the image | |||||
| (1101, 1075) | 101 | 1 | Ground level right of pyramid | White | Empty air above ground level right of the pyramid | |||||
| (1101, 1076) | 101 | 2 | Ground level right of pyramid | White | Empty air above ground level right of the pyramid | |||||
| (1102, 1069) | 102 | -5 | Ground level right of pyramid | Black | Black, never seen, below lowest visible terrain, bottom images, with white line at the bottom | |||||
| (1102, 1070) | 102 | -4 | Ground level right of pyramid | Black | Black, never seen, below lowest visible terrain | |||||
| (1102, 1071) | 102 | -3 | Ground level right of pyramid | Black | Black, never seen, below lowest visible terrain | |||||
| (1102, 1072) | 102 | -2 | Ground level right of pyramid | Black | Black, never seen, below ground level right of pyramid | |||||
| (1102, 1073) | 102 | -1 | Ground level right of pyramid | Black | Black, can be seen, below ground level right | |||||
| (1102, 1074) | 102 | 0 | Ground level right of pyramid | Terrain | Grassy ground so high that it is almost at the top of the image | |||||
| (1102, 1075) | 102 | 1 | Ground level right of pyramid | White | Empty air above ground level right of the pyramid | |||||
| (1102, 1076) | 102 | 2 | Ground level right of pyramid | White | Empty air above ground level right of the pyramid | |||||
| (1103, 1069) | 103 | -5 | Ground level right of pyramid | Black | Black, never seen, below lowest visible terrain, bottom images, with white line at the bottom | |||||
| (1103, 1070) | 103 | -4 | Ground level right of pyramid | Black | Black, never seen, below lowest visible terrain | |||||
| (1103, 1071) | 103 | -3 | Ground level right of pyramid | Black | Black, never seen, below lowest visible terrain | |||||
| (1103, 1072) | 103 | -2 | Ground level right of pyramid | Black | Black, never seen, below ground level right of pyramid | |||||
| (1103, 1073) | 103 | -1 | Ground level right of pyramid | Black | Black, can be seen, below ground level right | |||||
| (1103, 1074) | 103 | 0 | Ground level right of pyramid | Terrain | Grassy ground so high that it is almost at the top of the image | |||||
| (1103, 1075) | 103 | 1 | Ground level right of pyramid | White | Empty air above ground level right of the pyramid | |||||
| (1103, 1076) | 103 | 2 | Ground level right of pyramid | White | Empty air above ground level right of the pyramid | |||||
| (1104, 1069) | 104 | -5 | Ground level right of pyramid | Black | Black, never seen, below lowest visible terrain, bottom images, with white line at the bottom | |||||
| (1104, 1070) | 104 | -4 | Ground level right of pyramid | Black | Black, never seen, below lowest visible terrain | |||||
| (1104, 1071) | 104 | -3 | Ground level right of pyramid | Black | Black, never seen, below lowest visible terrain | |||||
| (1104, 1072) | 104 | -2 | Ground level right of pyramid | Black | Black, never seen, below ground level right of pyramid | |||||
| (1104, 1073) | 104 | -1 | Ground level right of pyramid | Black | Black, can be seen, below ground level right | |||||
| (1104, 1074) | 104 | 0 | Ground level right of pyramid | Terrain | Grassy ground sloping downwards to the right | |||||
| (1104, 1075) | 104 | 1 | Ground level right of pyramid | White | Empty air above ground level right of the pyramid | |||||
| (1104, 1076) | 104 | 2 | Ground level right of pyramid | White | Empty air above ground level right of the pyramid | |||||
| (1105, 1069) | 105 | -5 | Ground level right of pyramid | Black | Black, never seen, below lowest visible terrain, bottom images, with white line at the bottom | |||||
| (1105, 1070) | 105 | -4 | Ground level right of pyramid | Black | Black, never seen, below lowest visible terrain | |||||
| (1105, 1071) | 105 | -3 | Ground level right of pyramid | Black | Black, never seen, below lowest visible terrain | |||||
| (1105, 1072) | 105 | -2 | Ground level right of pyramid | Black | Black, never seen, below ground level right of pyramid | |||||
| (1105, 1073) | 105 | -1 | Ground level right of pyramid | Black | Black, can be seen, below ground level right | |||||
| (1105, 1074) | 105 | 0 | Ground level right of pyramid | Terrain | Grassy ground | |||||
| (1105, 1075) | 105 | 1 | Ground level right of pyramid | White | Empty air above ground level right of the pyramid | |||||
| (1105, 1076) | 105 | 2 | Ground level right of pyramid | White | Empty air above ground level right of the pyramid | |||||
| (1106, 1069) | 106 | -5 | Ground level right of pyramid | Black | Black, never seen, below lowest visible terrain, bottom images, with white line at the bottom | |||||
| (1106, 1070) | 106 | -4 | Ground level right of pyramid | Black | Black, never seen, below lowest visible terrain | |||||
| (1106, 1071) | 106 | -3 | Ground level right of pyramid | Black | Black, never seen, below lowest visible terrain | |||||
| (1106, 1072) | 106 | -2 | Ground level right of pyramid | Black | Black, never seen, below ground level right of pyramid | |||||
| (1106, 1073) | 106 | -1 | Ground level right of pyramid | Black | Black, can be seen, below ground level right | |||||
| (1106, 1074) | 106 | 0 | Ground level right of pyramid | Terrain | Grassy ground | |||||
| (1106, 1075) | 106 | 1 | Ground level right of pyramid | White | Empty air above ground level right of the pyramid | |||||
| (1106, 1076) | 106 | 2 | Ground level right of pyramid | White | Empty air above ground level right of the pyramid | |||||
| (1107, 1069) | 107 | -5 | Ground level right of pyramid | Black | Black, never seen, below lowest visible terrain, bottom right corner image, with white line both at the bottom and to the right | |||||
| (1107, 1070) | 107 | -4 | Ground level right of pyramid | Black | Black, never seen, below lowest visible terrain, right edge image, with white line to the right | |||||
| (1107, 1071) | 107 | -3 | Ground level right of pyramid | Black | Black, never seen, below lowest visible terrain, right edge image, with white line to the right | |||||
| (1107, 1072) | 107 | -2 | Ground level right of pyramid | Black | Black, never seen, below ground level right of pyramid, right edge image, with white line to the right | |||||
| (1107, 1073) | 107 | -1 | Ground level right of pyramid | Black | Black, can be seen, below ground level right, right edge image, with white line to the right | |||||
| (1107, 1074) | 107 | 0 | Ground level right of pyramid | Nest | Y | Foundation of the birds nest, with the lowest part of the pole. Right edge image with white line to the right in the lower black section | ||||
| (1107, 1075) | 107 | 1 | Ground level right of pyramid | Nest | Y | Y | Birds nest with 3 eggs and the rest of the pole. Right edge image. | |||
| (1107, 1076) | 107 | 2 | Ground level right of pyramid | White | 10 | Empty air above the birds nest but with 10 coins stacked on top of each other in four rows |
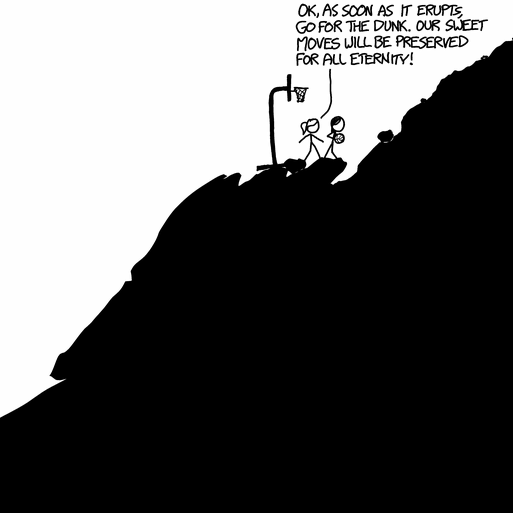
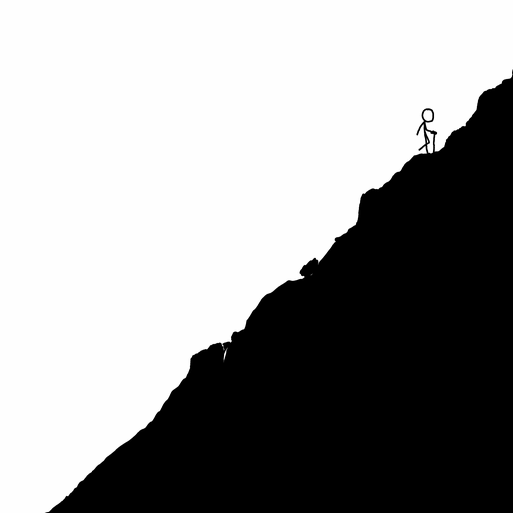
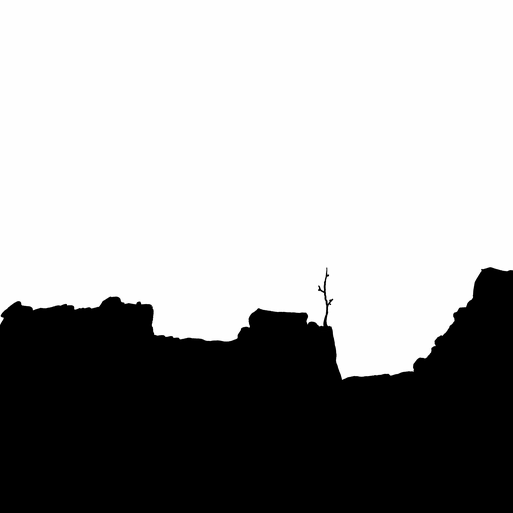
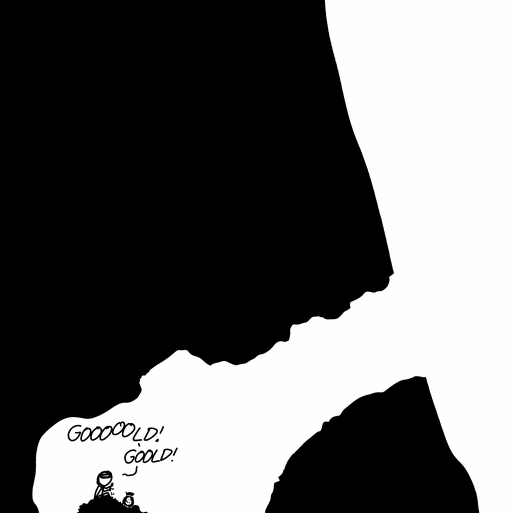
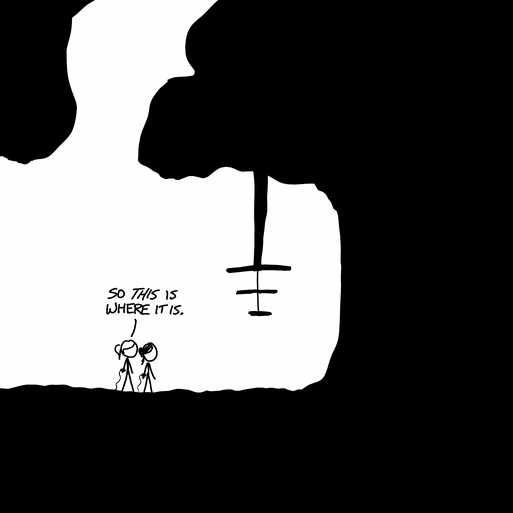
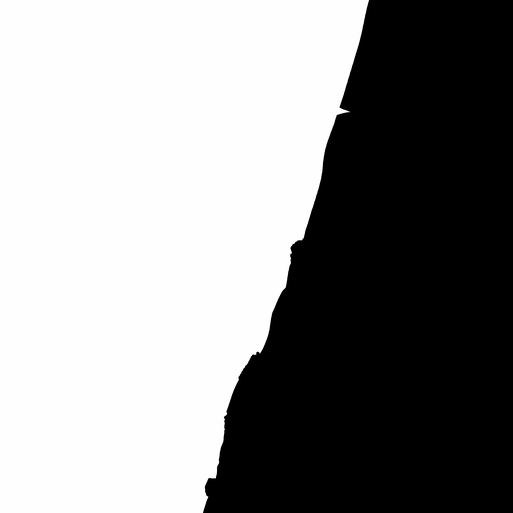
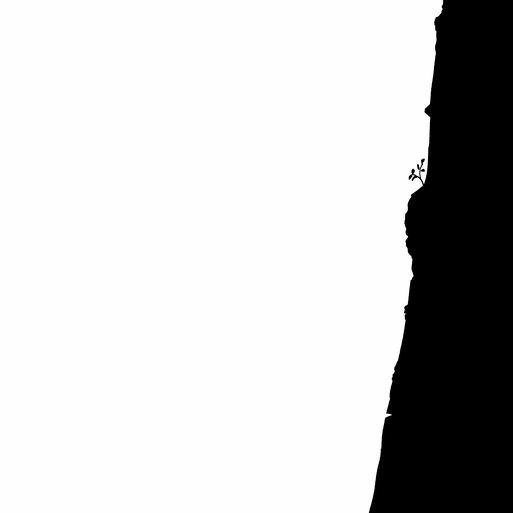
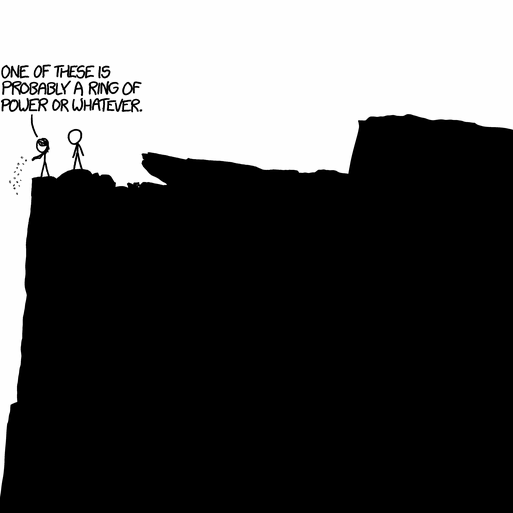
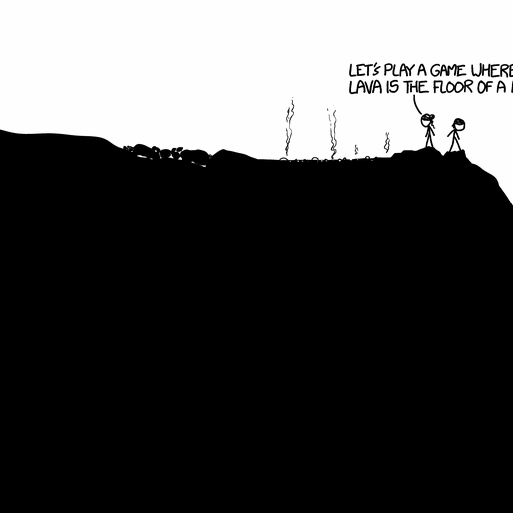
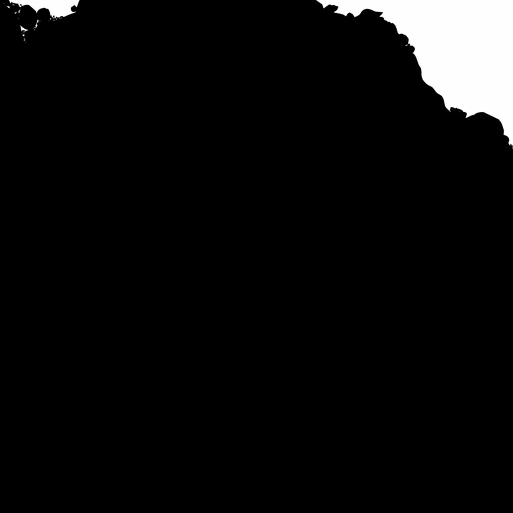
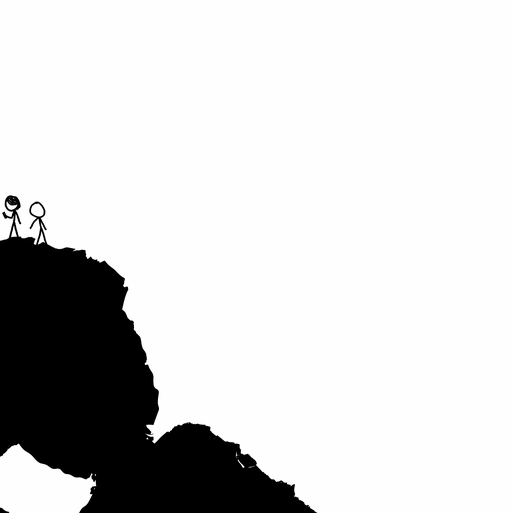
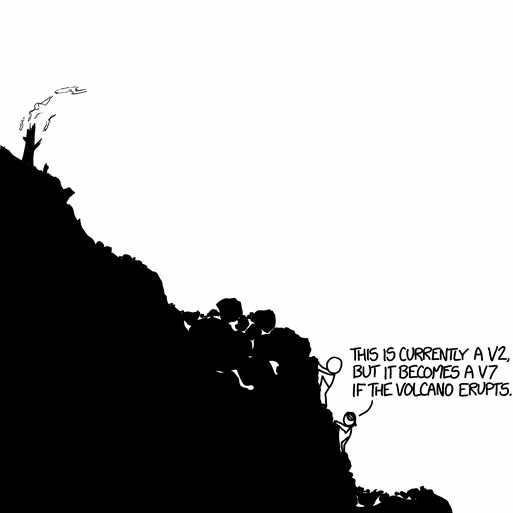
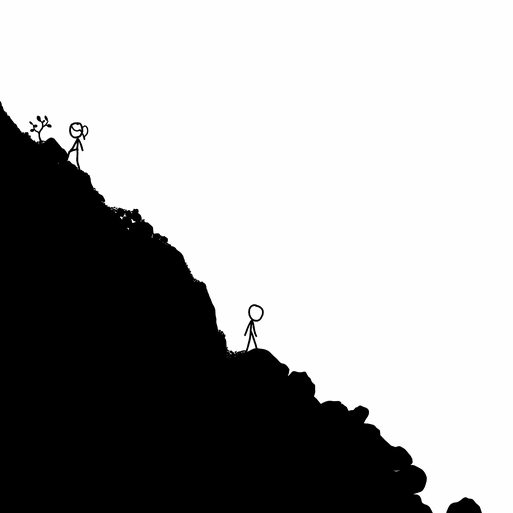
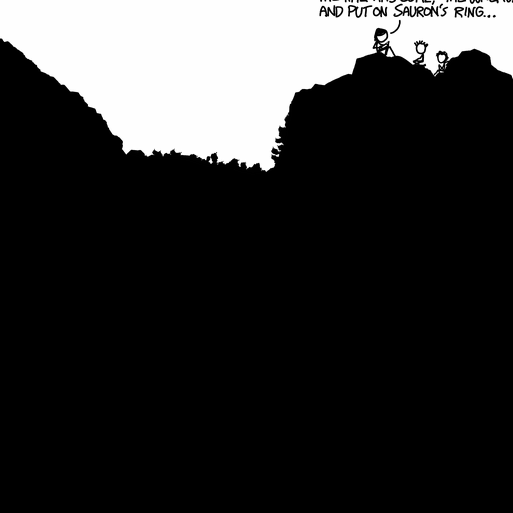
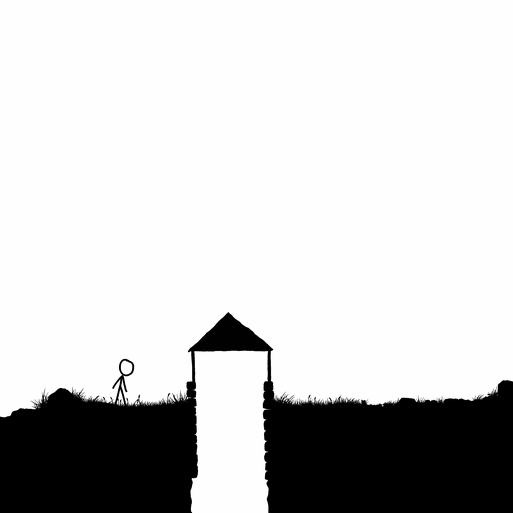
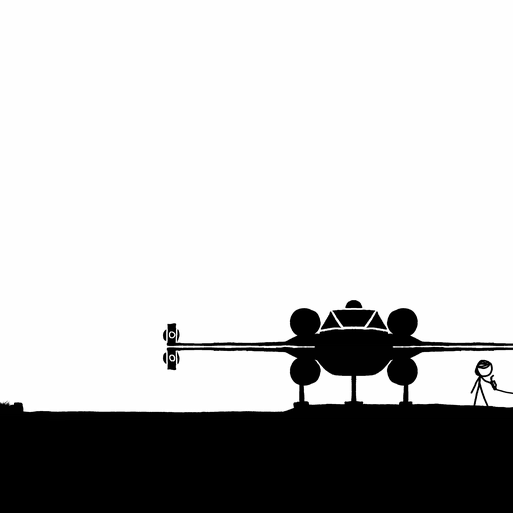
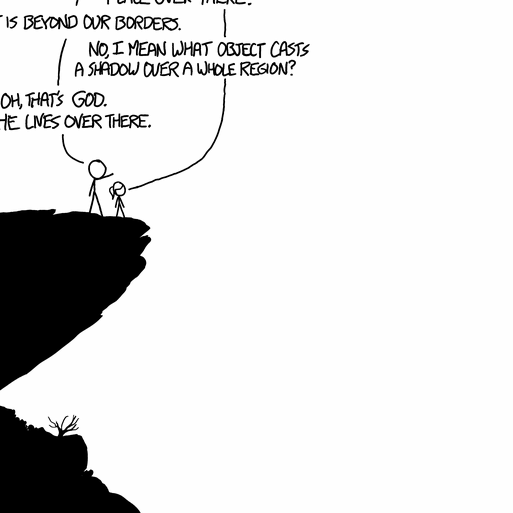
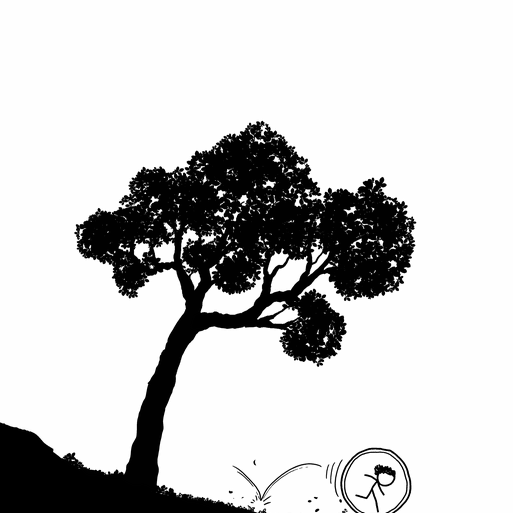
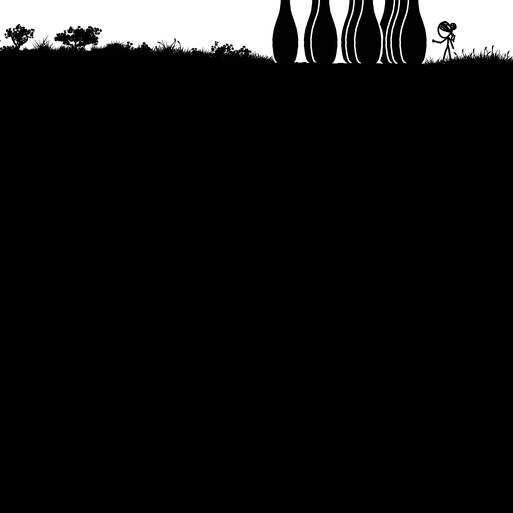
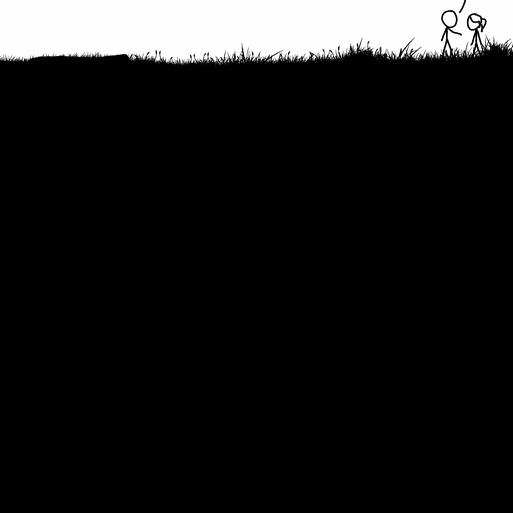
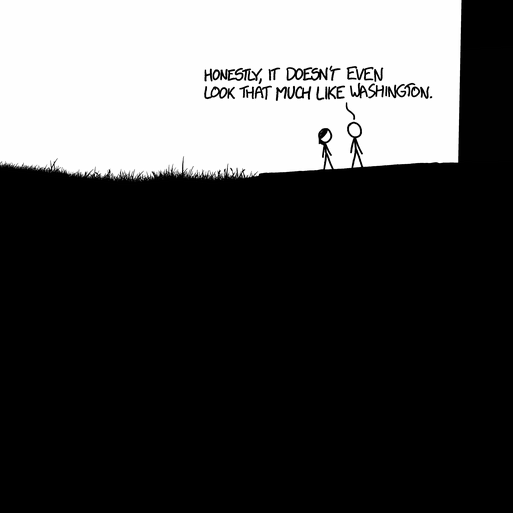
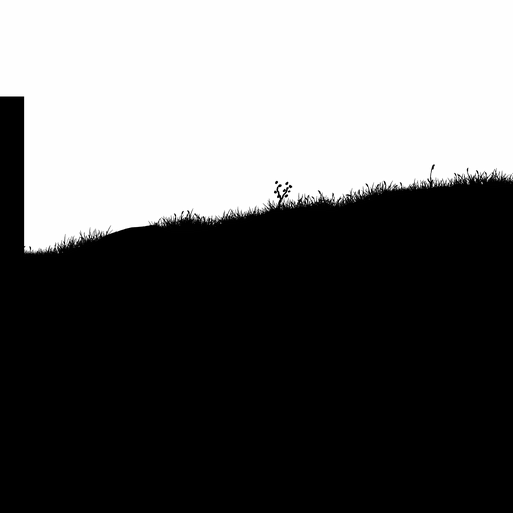
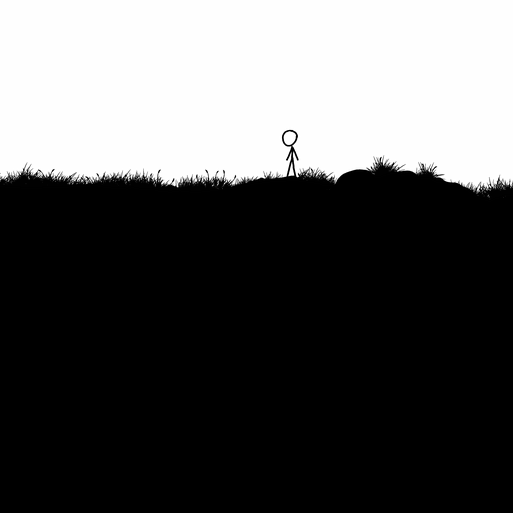
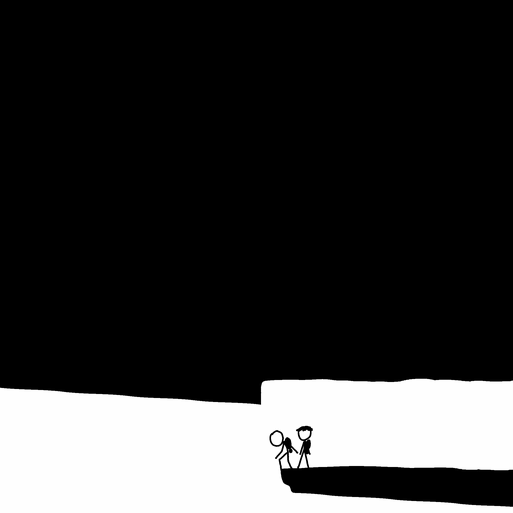
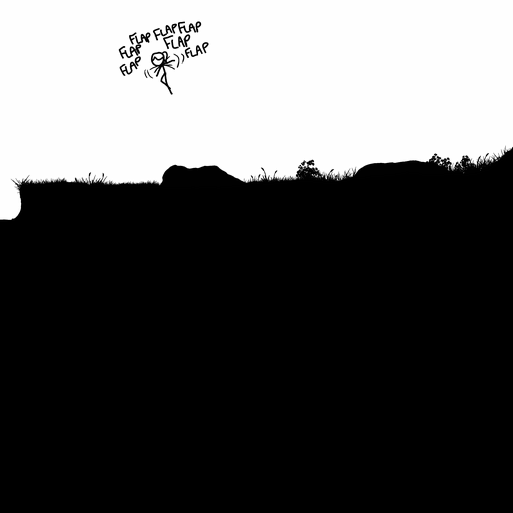
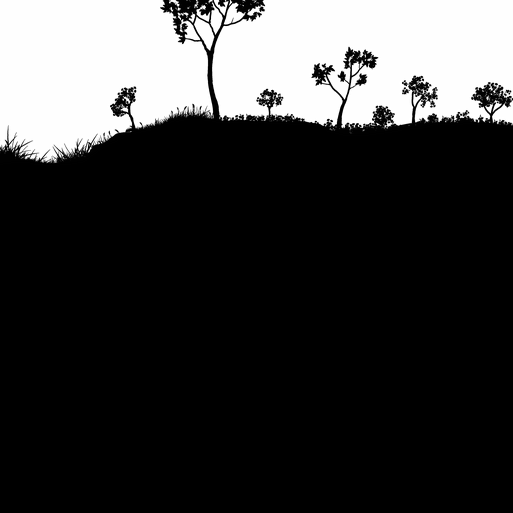
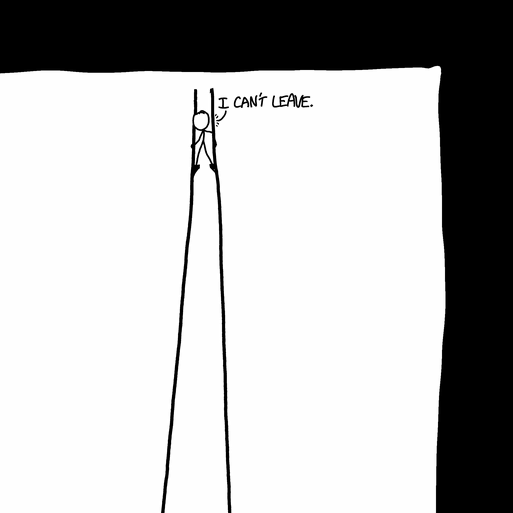
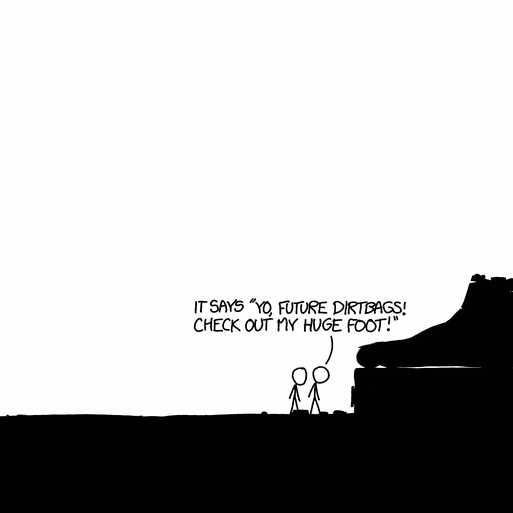
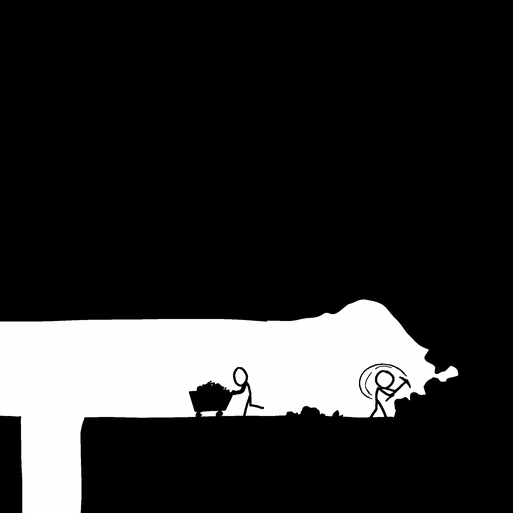
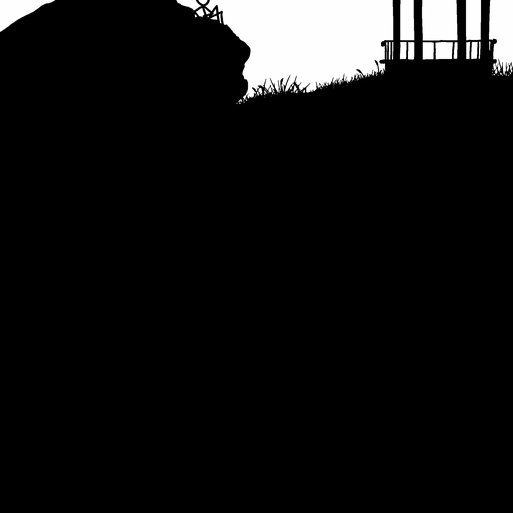
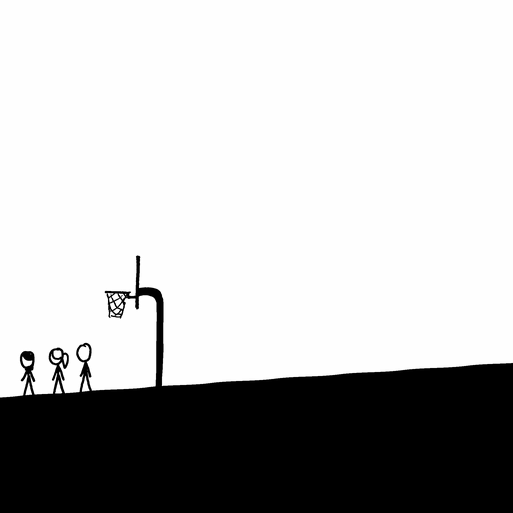
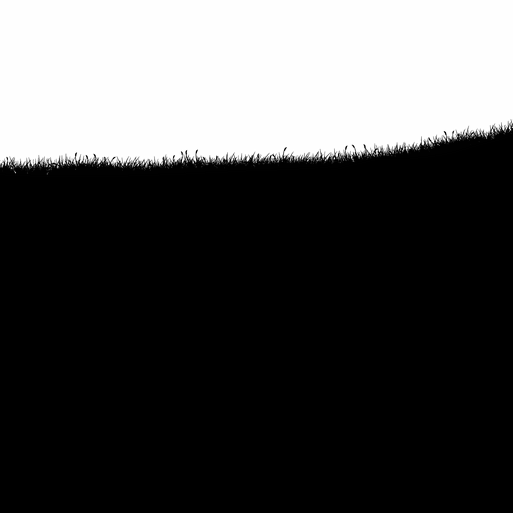
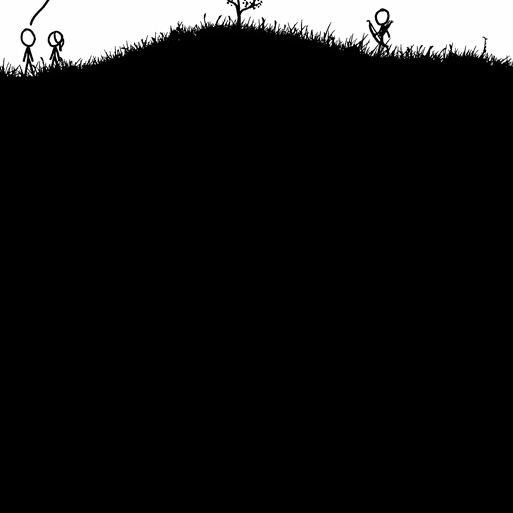
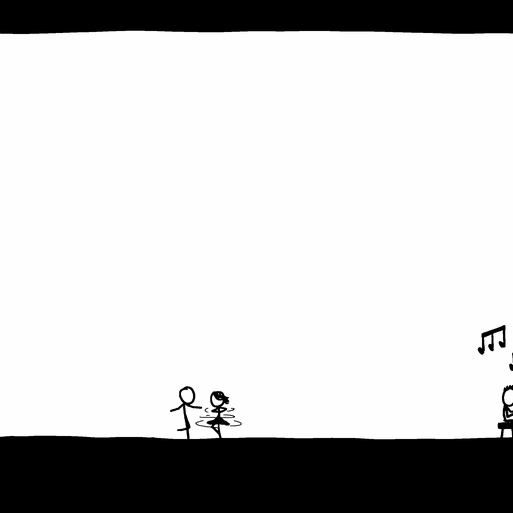
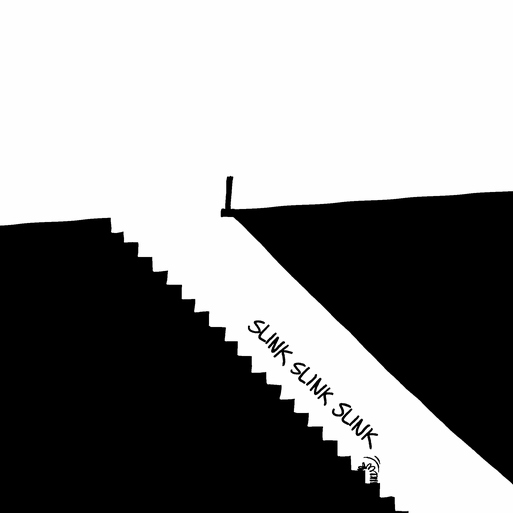
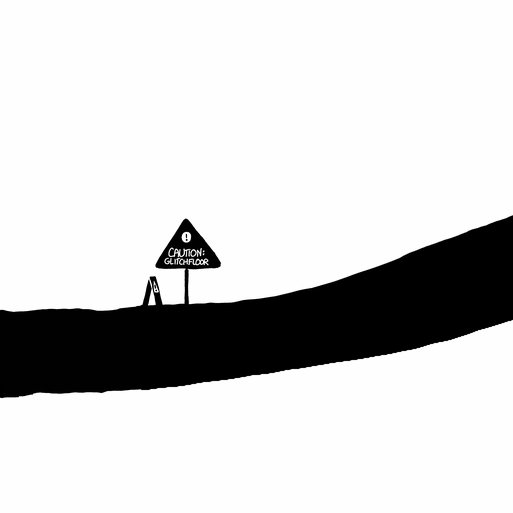
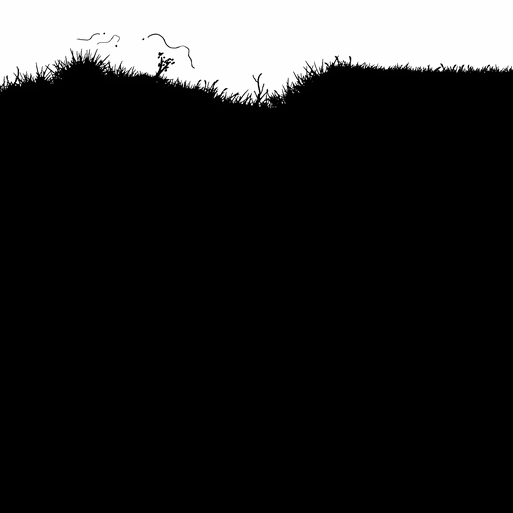
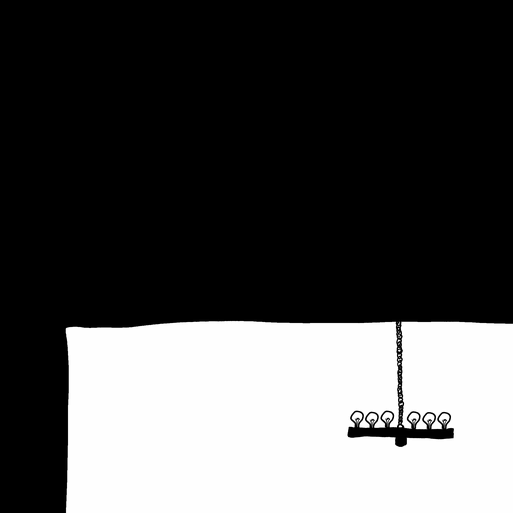
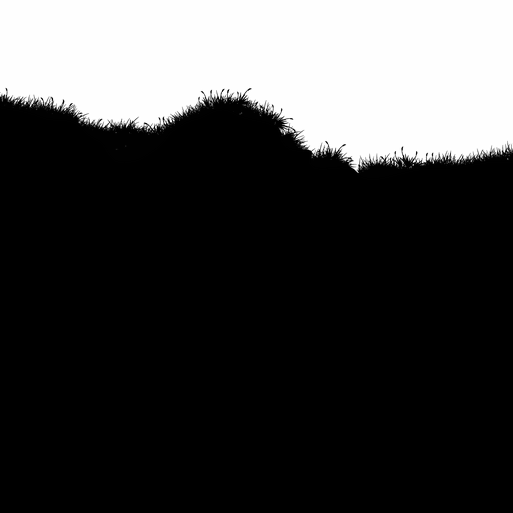
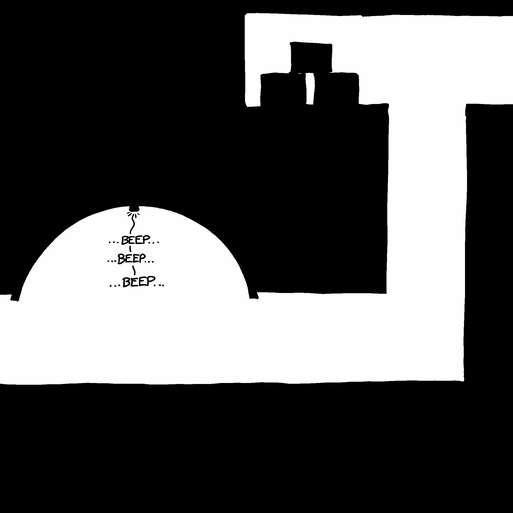
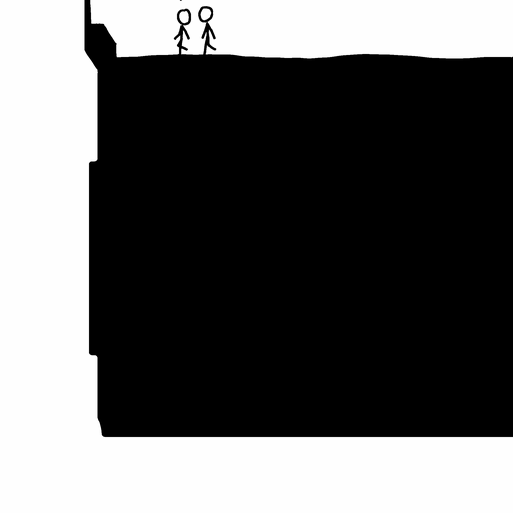
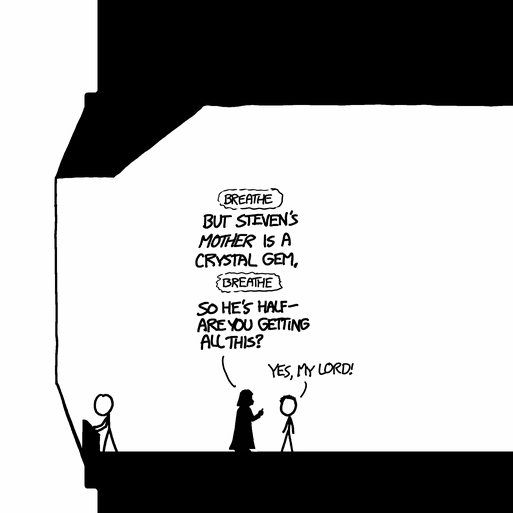
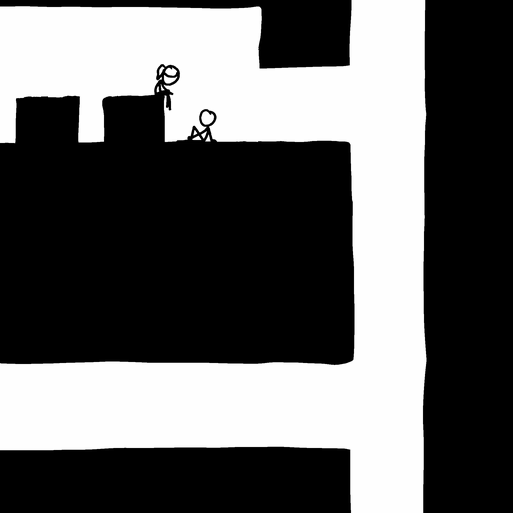
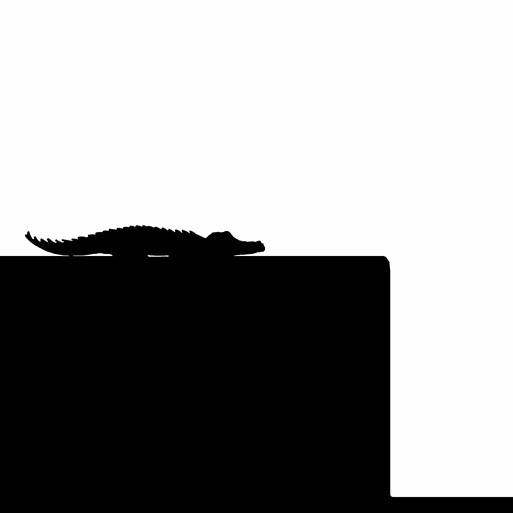
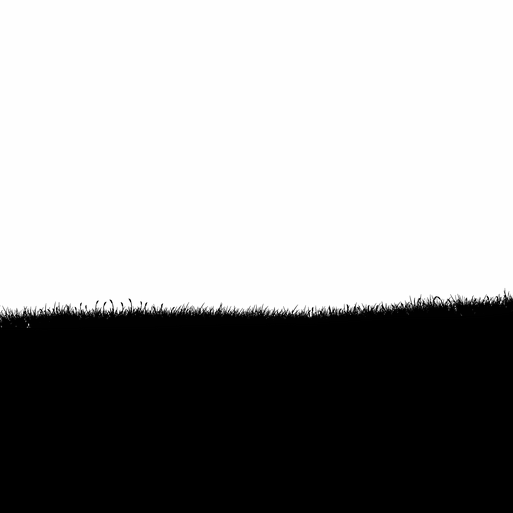
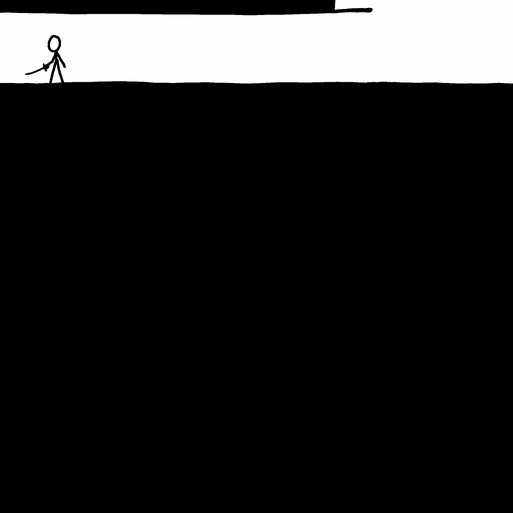
Data extracted from table
Persons
- There are 148 images where there are some persons, or at least a part of a person inside the image.
- Several images have more than one person (this is often the case as they talk to each other).
- But there are also several images where a person has been cut at the edges of the images, and thus is visible in more than one image.
- These persons will thus be counted more than once in the table above, as there are persons (although only part) in both images
- It is difficult to say if there are more or less of either of these two situations, but since many situations with people have more than one, it is likely not a smaller number, but a higher number of people than 148.
- This is (of course) not counting the hoverboard Cueball.
- The word Cueball is used 158 times in the table in relation to 120 individual images.
- However, this has not always relation to a Cueball in the image (or even more than one in the up to 30 images with Cueball used more than once).
- He do often appear more than once in the same image though.
- Cueball appears less than 90 times (if not counting the kids that looks like him, which should not be counted, as Cueball is an adult.)
- However, this has not always relation to a Cueball in the image (or even more than one in the up to 30 images with Cueball used more than once).
- The word Megan is used 67 times in the table in relation to 62 individual images.
- However, this has not always relation to a Megan in the image (or even more than one in the up to 5 images with Megan used more than once)
- But she does appear twice in at least one image: (1090, 1088)
- Megan appears at least 40 times (if not counting the kids that looks like her, which should not be counted, as Megan is an adult.)
- However, this has not always relation to a Megan in the image (or even more than one in the up to 5 images with Megan used more than once)
- The word Ponytail is used 40 times in the table in relation to 37 individual images.
- However, this has not always relation to a Ponytail in the image (or even more than one in the up to 3 images with Ponytail used more than once)
- She never appears twice in the same image
- Ponytail appears 26 times (if not counting the kids that looks like her, which should not be counted, as Ponytail is an adult.)
- However, this has not always relation to a Ponytail in the image (or even more than one in the up to 3 images with Ponytail used more than once)
- The phrase Hairy is used 10 times in the table in relation to 8 individual images.
- However, this has not always relation to a Hairy in the image (or even more than one in the up to 2 images with Hairy used more than once)
- He never appears twice in the same image
- Hairy appears 7 times (if not counting the kids that looks like him, which should not be counted, as Hairy is an adult.)
- However, this has not always relation to a Hairy in the image (or even more than one in the up to 2 images with Hairy used more than once)
- The name Hairbun is used 14 times in the table in relation to 10 individual images.
- However, this has not always relation to a Hairbun in the image (or even more than one in the up to 4 images with Hairbun used more than once)
- She never appears twice in the same image
- Hairbun appears 5 times (if not counting the kids that looks like her, which should not be counted, as Hairbun is an adult.)
- However, this has not always relation to a Hairbun in the image (or even more than one in the up to 4 images with Hairbun used more than once)
- Apart from these main characters used several times, then also White Hat and Beret Guy is used twice each and Black Hat only once.
Text
- There are 110 images where there is at least some text
- It is often only part of the text belonging to a given situation that are in the relevant image, as the text is often written above or to the side of the persons who says the sentence, and that will often be in the next image/images.
- Text is not only registered if it is spoken, also if it is written on an item or if it is a sound.
- As long as it is signs that can be written using a keyboard it is counted as text.
- But notes from someone singing etc. are not counted as text.
- Several images have more than one person speaking, but usually these text parts belong to the same situation.
- On the other hand, there are several images where the text has been cut at the edges of the images, and thus is visible in more than one image.
- Thus the total amount of situations with text is likely lower than 110.
Animals
- There are 26 images where there are animals (or their unborn of-spring).
- In total there are 41 animals and 3 eggs.
- Even with 40 animals for 26 images, there are still only 22 situations with animals, as two of the animals are so big that they take up 2 and 3 images, and one animal is cut in the middle even though it is small.
- There are also images where people mention animals without these animals present in the image.
- In (1026, 1073) Cueball is singing about spiders.
- In (972, 1077) a mom discovers a bug (she points to some grass, without any visible bug).
- In (946, 1074) Elon Musk calls his workers for swine: Back to your desks, swine!
- Here is a list of all animals shown in the comic going from left to right through the whole image:
- 1 duck sitting on top of the left side of the volcano crater
- 1 horse swimming in the lava lake towards Cueball
- 2 eagles are flying in empty air (talking) above the right slope down from the Volcano
- 1 chicken like bird (thinking) is sitting on top of the three parachutes of the space capsule on the way to the volcano
- 2 birds that are tied together with a string, and on that string there hangs a coin, flying over the x-wing to the left
- 1 insect, small flying, followed by Beret Guy to the left of the Washington Monument
- 1 duck sitting on top of the truck of a flag pole just left of the Washington Monument
- 1 fish, small, that jumps out of the ball pit inside the Destroyer (in 2 images as it is cut in the middle)
- 2 birds are circling above the end a fishing line under the Rebel Blockade Runner
- 1 octopus giant inside the Destroyer (in 3 images)
- 3 birds in the air near the left wall in the Cave in the Destroyer
- 1 puma like cat on a large rock inside the Cave in the Destroyer
- 1 deer with antlers on the grassy ground in the right part of the Cave in the Destroyer
- 3 insects, small, are flying in the right part of the Cave in the Destroyer
- 13 insects, buzzing, point like in the drawing, are swarming around a lamp on the cave ceiling in the right part of the Cave in the Destroyer
- 1 black bird following Ponytail to the right
- 1 ant queen, giant, (talking to Cueball) inside the Destroyer (in 2 images)
- 1 ostrich is racing with Ponytail on its back holding a lance, Megan racing against them on a bike with her lance, in the bottom part of the Globe of Death in the Destroyer
- 2 birds flying above the ground to the right (with a coin above them)
- 1 crocodile, big, lies on top of the hull of rear end of the Destroyer
- 1 bird (at least) inside a cage making a chirping sound, but it is not visible, in the Emperor’s room inside the Destroyer
- 3 birds egg in the nest at the right end of the image
Objects
- There are 211 images where there is some kind of object that is more interesting than rocks and grass, or empty rooms/shafts and corridors.
- An object can still be something rather mundane like a tree or a box, but it could also be a light saber, a small robot or quadcopter or a small building.
- Some objects will spread over more than one image, but objects in this context is not large structures like the Destroyer or the Pyramid etc.
Coins
- There are 169 coins in the game.
- There are 126 images where there clearly would be at least a part of coin visible.
- Two coins that are located right on the edge of two images, and even one coin centered right on the corner between four images. These images are listed as having 0.5 or 0.25 coins.
- So 3 coins are visible in a total of 8 images.
- This means that the remaining 166 coins are located in 118 images.
- 102 images has just one coin.
- 9 images have 2 coins (18 coins), only one image has 3, two have 4 (8 coins) and two have 6 (12 coins).
- Then there are 10 in the image above the nest at the right end of the world
- And 11 in the starting image.
- At the starting point there are 12 coins visible, but one of these at the top left is on top of the next image above, together with 5 other
- So the 17 coins in the Play Area is divided with 11 in the starting image and 6 in the one above.
- The other image with 6 is Darth Vader's gold bullion reserves.
- Two of those four images with a half coin, actually have 1.5 coins each.
- So there are 16 images with 2 or more coins, they have 62 coins in total.
- Then there are 2 images with 1.5 coins and two with 0.5 and four with 0.25 coins giving 5 coins in those 8 images
- And finally the 102 single coins in 102 images.
- Images = 102+8+16 = 126.
- Coins = 62 +5 +102 = 169.
- Apart ftom the 18 images with more than one coin there are many other places where there are more than one coin located in the same location, but where the location and the coins are spread over more than one image
- For instance the play area has its 17 coins split, but there are also many rooms with coins in each side, where the coins are in different images although in the same room.
- How many different locations there are with coins are not disclosed by the sort-able data in this table.
Featureless images
- There are 3440 images, but lots of these are quite boring, as they are completely featureless (or almost).
- 1669 images are totally black or almost black
- 1610 images are completely black and hence inaccessible.
- 20 more are black images where you can go through, which makes them not uniform black (although they look like that), 18 of these are in the lava lake and two are in the cotton trap.
- There are also 39 images with content listed as "Black - almost". Images which only has very little white in them. When to apply this description is a judgment call, so some very black images has not received this, because there could be some interesting part or location related to the image.
- Of these images 1090 images can never be seen during the game, as the 8 images around each of these 1090 images are also black (or the image is at the border of the image below ground). These have been labeled: Black, never seen
- This doesn't mean that the remaining 520 completely black images can be seen, but they have been labeled: Black, can be seen. At least one of the 8 images surrounding one of these black images can be accessed in the game. But the hoverboard need to get almost to the middle/center of an image before the images left/right or above/below becomes visible, and not all the images that are listed like this has been checked for that, only that the at least one of the 8 images around them are accessible.
- 406 of the black images are inside the Destroyer (including the two from the cotton trap and 25 that are only almost black).
- This means that 381 are totally black and 379 of them are inaccessible.
- Of these 379 only 74 can never be seen, vs. 305 that can be (307 with those from the trap)
- There are a few other black images that are not below ground level, two inside the pyramid and one inside the Rebel Blockade Runner, all three can be seen.
- 826 images are totally white or almost white
- 808 of these are completely white and consist mainly of empty air outside
- But a few of them (12) is empty air inside the Destroyer, 6 in the glitch floor room, 5 in the cave and 1 in the globe of death.
- There are also 18 images with content listed as "White - almost".
- There are also two images with contents listed as White with Birds in the sky and Wires - almost white. But as these either is interesting or are part of something else they are not counted here
- On top of this there are the rest of the 7920 images, which are not active, but would have been white. That would have added 4480 extra white images.
- 808 of these are completely white and consist mainly of empty air outside
- This gives a sum total of 2495 images which have almost no features in them
- 2418 of these have absolutely no features, 2438 no visible features.
- This leaves 945 images that have some clearly visible features-
- But there are several almost black that are not listed as such because they have most of a corridor of shaft in them, or there are empty rooms and bare/grassy ground.
- About 380 images belonging to the Destroyer has no rooms or any other interesting features, but only shafts, corridors or only a featureless part of the hull.
- This brings the possible number of interesting images down to 565.
- Sorting on the five tags reveals that there are “only” 378 images that have at least one of the five sort-able items: People, text, animals, objects and coins.
- There is actually only one image that gets them all, that is the one with Black Hat: (1070, 1095)|.
- Black Hat is the person, the lamp is a coin, which before taken covers the object which is the broken lamp holder. The animals are 13 buzzing insects, and the buzzing and snoring are written with text.
- In 70 of those 378 images the only interesting features the coins, thus the image itself is not interesting.
- Sorting on the five tags reveals that there are “only” 378 images that have at least one of the five sort-able items: People, text, animals, objects and coins.
- This leaves “only” 308 images with some interesting items.
This article is issued from Explainxkcd. The text is licensed under Creative Commons - Attribution - Sharealike. Additional terms may apply for the media files.